Workspace One - iOS Configuration Guide
The following contains procedures for deploying Workspace One for iOS.
Go to the Workspace ONE console.
Click the Resources > Apps > Native > Purchased tab.
Click the Sync assets button.
Note
A token is provided to you to pass the iOS app from Apple Business Manager to Workspace ONE using sToken.
Click the Blocksi for iPad app. If the app is shown as Unknown, click Unknown and type the Name and Bundle ID to com.blocksi.dnsproxy.
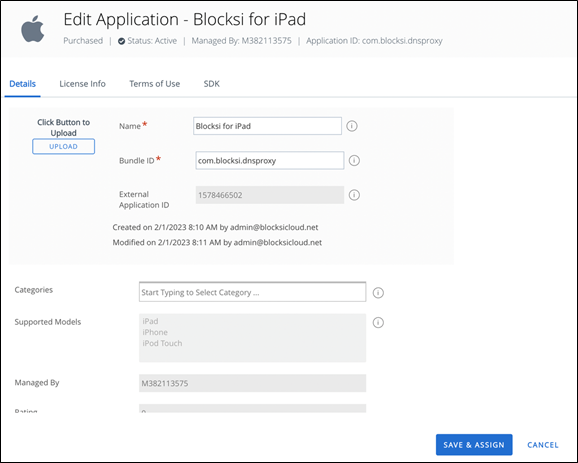
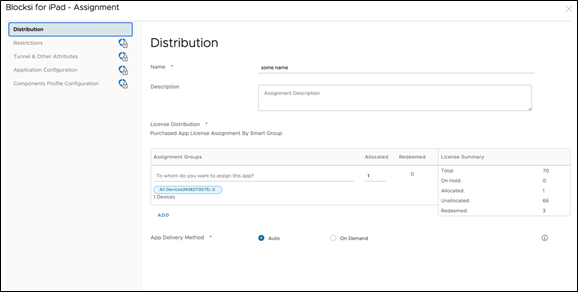
Click SAVE > ASSIGN. The Distribution fields should look like the following:
Go to the Application Configuration section.
Turn the Send configuration toggle on.
Click the Upload XML button and upload an XML file with the following configuration:
<dict>
   <key>adminPassword</key>
   <string>123PasswordExample</string>
   <key>organizationId</key>
   <string>admin@blocksi.net</string>
   <key>policyServer</key>
   <string>34.41.17.164:2800</string>
   <key>filteringDNS</key>
   <string>104.155.190.120:81</string>
   <key>showDisclaimer</key>
   <string>false</string>
   <key>ttl</key>
   <string>60</string>
   <key>userAuthEnabled</key>
   <string>false</string>
</dict>
Note
You need to change BlocksiSuperAdmin@domain.com to match your main super-admin account for Blocksi. You may also change 123Blocksi to any password of your choice or keep 123Blocksi as the standard password to access app details.
Note
If you will be filtering by serial number, you must include the following in the configuration.
Note
If you cannot see the keys that were configured in the XML file, the XML file format is incorrect, or Workspace ONE cannot parse this configuration file. You are not informed that something went wrong. In this case, check the XML file or send it to us for review.
Regarding the Configuration values, more details are available in the Configurable Values for the iOS Filtering App document.
Click Create > Publish.
Go to Resources > Profiles & Baselines > Profiles > Add > Add Profile > Apple iOS.
Select Context: user or device profile. The Workspace ONE console does not have UI for DNS Proxy settings implemented, but it is reachable through Custom Settings.
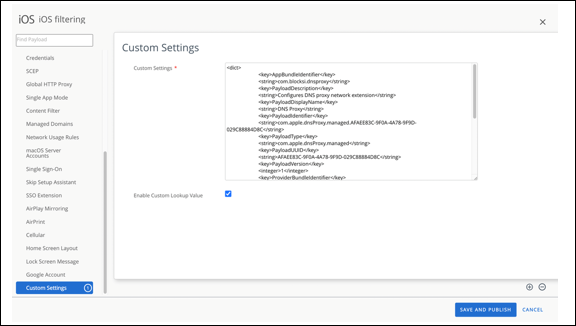
Go to Custom Settings (at the very bottom of the list), select the Enable Custom Lookup Value checkbox, and paste text from the iOS-custom-policy-configuration.plist file. The result should look like this:
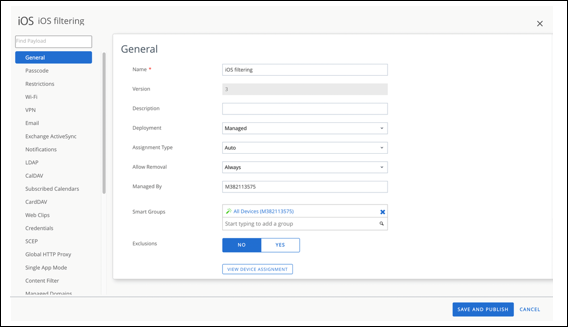
Go to General payload. These settings do not affect the functionality of the application; Smart groups should include target devices (or users). The customer will fill these fields according to their own requirements. Overall, it should look something like this:
Click SAVE & PUBLISH.
Click PUBLISH.
Note
This needs to be performed on the target device.
Open the Settings app.
Navigate to General > VPN & Device Management.
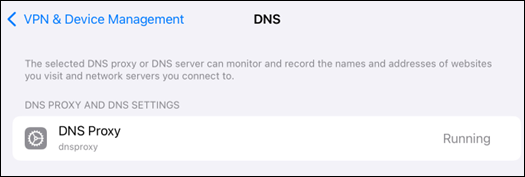
Click the DNS row under Restrictions and Proxies. The DNS Proxy profile should be Running, as shown below.
To create the filtering policy, please see Configuring the iOS Filtering Policy on the BMEE Admin Dashboard.