Use top-level domain filters to set up which domains students are allowed to visit and which ones are blocked.
To create a top-level domain filter
Click Content Filtering from the Main Menu and then click Filters from its sub-menu.
Click TOP-LEVEL DOMAIN FILTER at the top of the screen. The Top-Level Domain Filter screen appears.

Type the name of the filter in the Enter filter name text field.
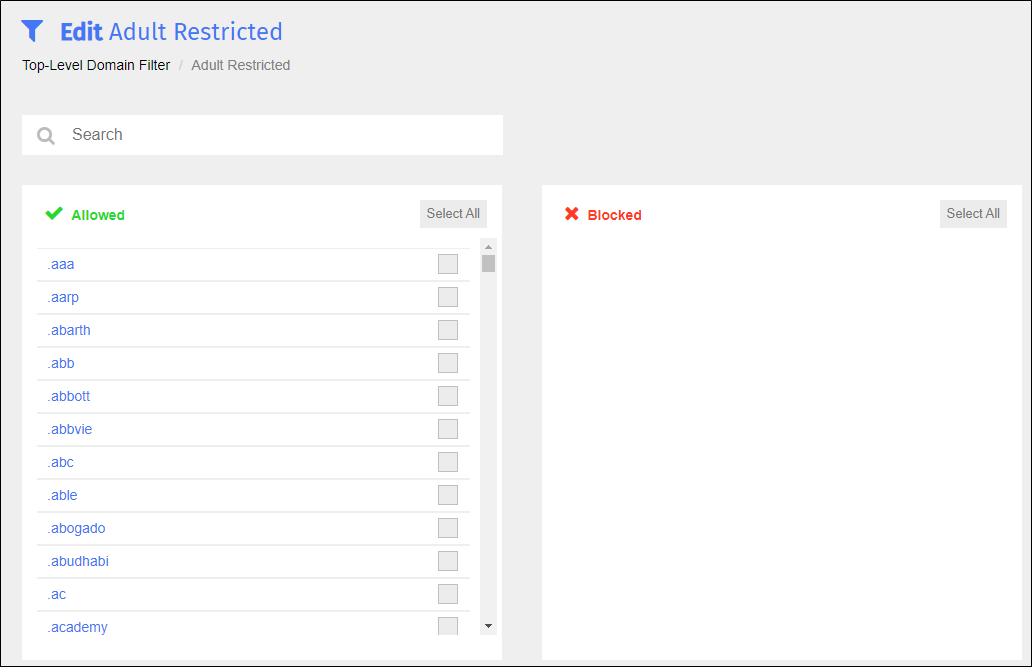
Click Create Filter + to add the filter. The following screen appears. You are presented with a list of domains. Choose to allow or block one or more of the domains.

Select the checkboxes to the right of one or more domains to block in the Allowed section.
Click Block when you have finished. Blocksi moves the domains you selected into the Blocked section to the right. Click the Select All button to select all domains.
To rename a top-level domain filter
Click Content Filtering from the Main Menu and then click Filters from its sub-menu.
Click TOP-LEVEL DOMAIN FILTER at the top of the screen. The Top-Level Domain Filter screen appears.

Locate the filter to rename, and click the filter name. A box opens to allow you to rename the filter. Note that Blocksi added Save and Cancel buttons to the right of the name, as shown below.

Rename the filter, and click the Save button.
Modify a top-level domain filter as needed.
To modify a top-level domain filter
Click Content Filtering from the Main Menu and then click Filters from its sub-menu.
Click TOP-LEVEL DOMAIN FILTER at the top of the screen. The Top-Level Domain Filter screen appears.

Locate the name of the filter to modify, and click the
 icon to the right of the filter name. The Edit screen appears.
Make the necessary changes to the filter, and click Save Changes.
Use an existing top-level domain filter to create a new one.
To duplicate a top-level domain filter
Click Content Filtering from the Main Menu and then click Filters from its sub-menu.
Click TOP-LEVEL DOMAIN FILTER at the top of the screen. The Top-Level Domain Filter screen appears.

Locate the domain filter to duplicate, and click the
 icon. The Duplicate Filter window opens.
Type the name of the new filter in the text box.
Click OK to add the filter and close the window. The duplicated filter appears at the bottom of the list. It contains the same blocked and allowed domains as the original filter.
Make any desired changes to the new filter and save it.
Delete a top-level domain filter when you no longer need it.
To delete a top-level domain filter
Click Content Filtering from the Main Menu and then click Filters from its sub-menu.
Click TOP-LEVEL DOMAIN FILTER at the top of the screen. The Top-Level Domain Filter screen appears.

Locate the name of the filter to delete, and click the
 icon. A confirmation prompt appears.
Click OK to delete the filter.