Should your school lose a device, use Blocksi to find it.
Use Blocksi’s tracking system to track lost devices.
There are several conditions that must be met before you can track devices:
The device must be enrolled to your domain.
An OU specifically for lost devices must exist and must include the Blocksi Navigator App deployed in kiosks on the Google Admin Console. See Creating an OU for Device Tracking for details on creating a separate OU and Installing Blocksi Navigator for details on installing the app.
The device must be moved to the lost devices OU for tracking (DO NOT suspend or deactivate the device).
The device must be rebooted, either physically or forced from the Google Admin Console.
To track a lost device
Click Device Management from the Main Menu and then click Lost Devices from its sub-menu. The following screen appears.
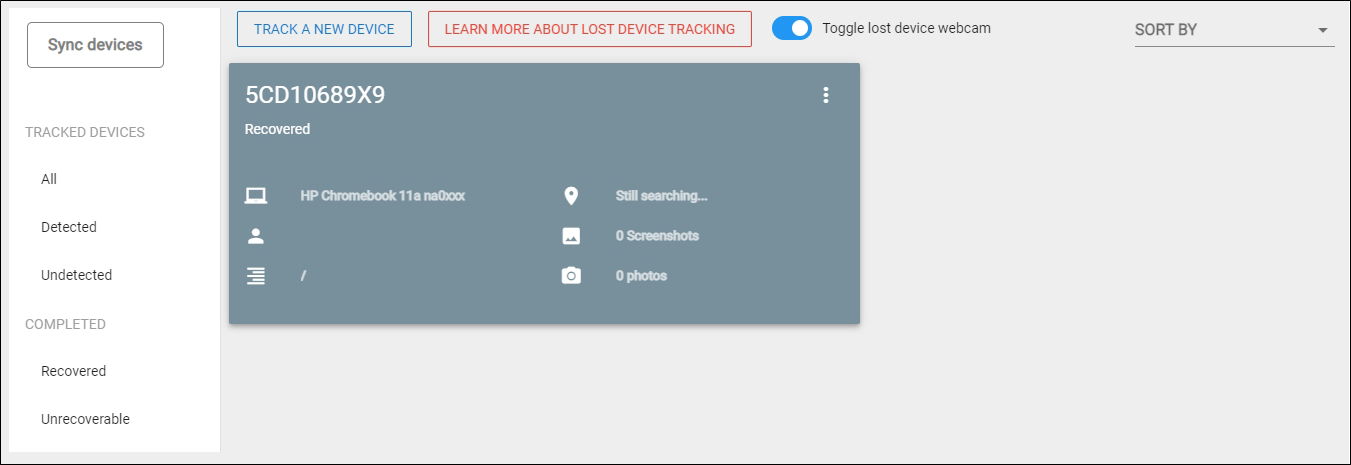
Click Toggle Lost Device Webcam to indicate whether to activate the webcam of the lost device.
Click TRACK A NEW DEVICE to track a new device. The following window opens.
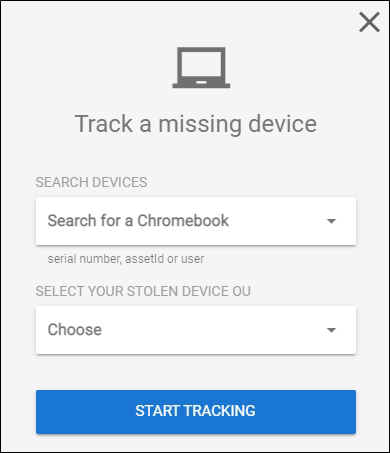
Select the missing device from the SEARCH DEVICES drop-down list.
Select the organizational unit (OU) you are using to track lost devices from the SELECT YOUR STOLEN DEVICE OU drop-down list.
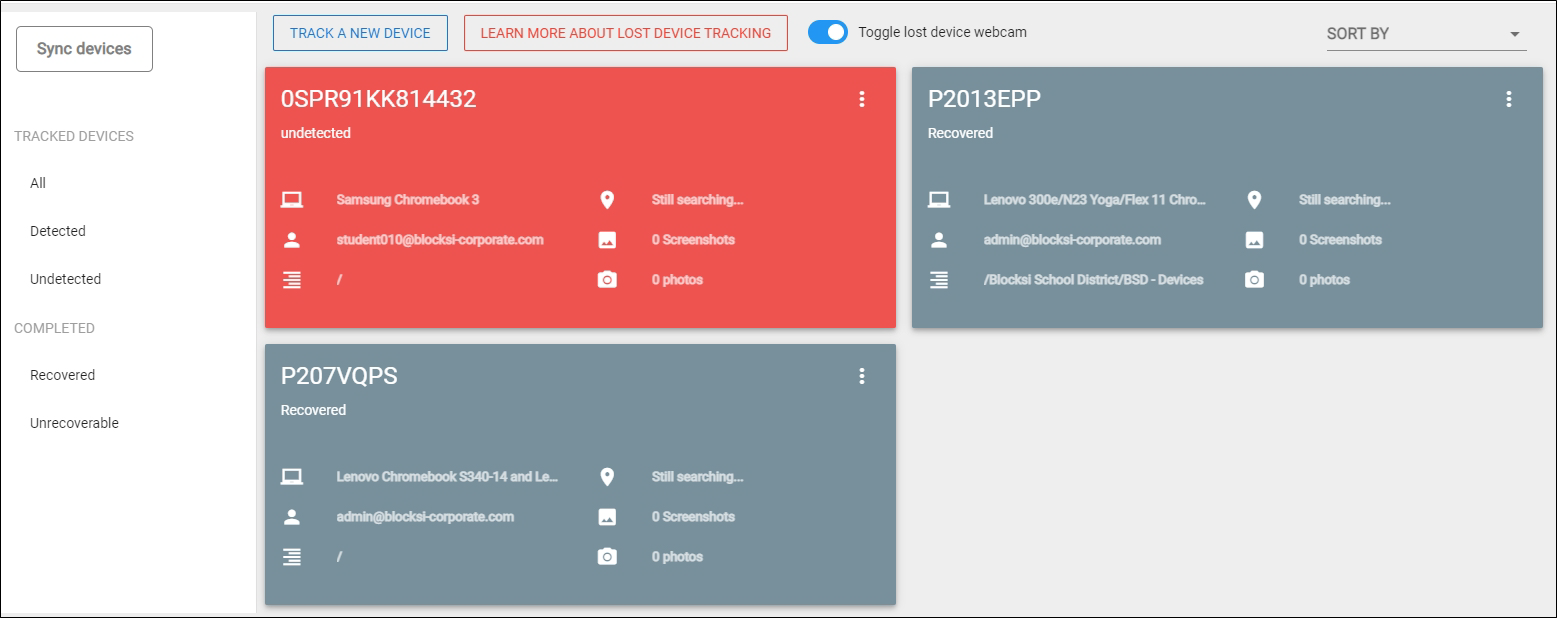
Click START TRACKING to start tracking. The results appear, as shown below. Once moved into the lost devices OU and identified as lost or stolen, Blocksi pinpoints the last known online location of the device on a Google map, takes screenshots every 3-5 seconds of activity on that device, and allows you to engage the webcam to take actual live photos to identify the surroundings of the current location of that device. Also, the device tile color depends on its status: red when undetected, green when detected, and gray when recovered.
Track the location of all devices used by your organizational unit.
To turn on device tracking
Click Device Management from the Main Menu and then click Inventory from its sub-menu. The Devices screen appears.
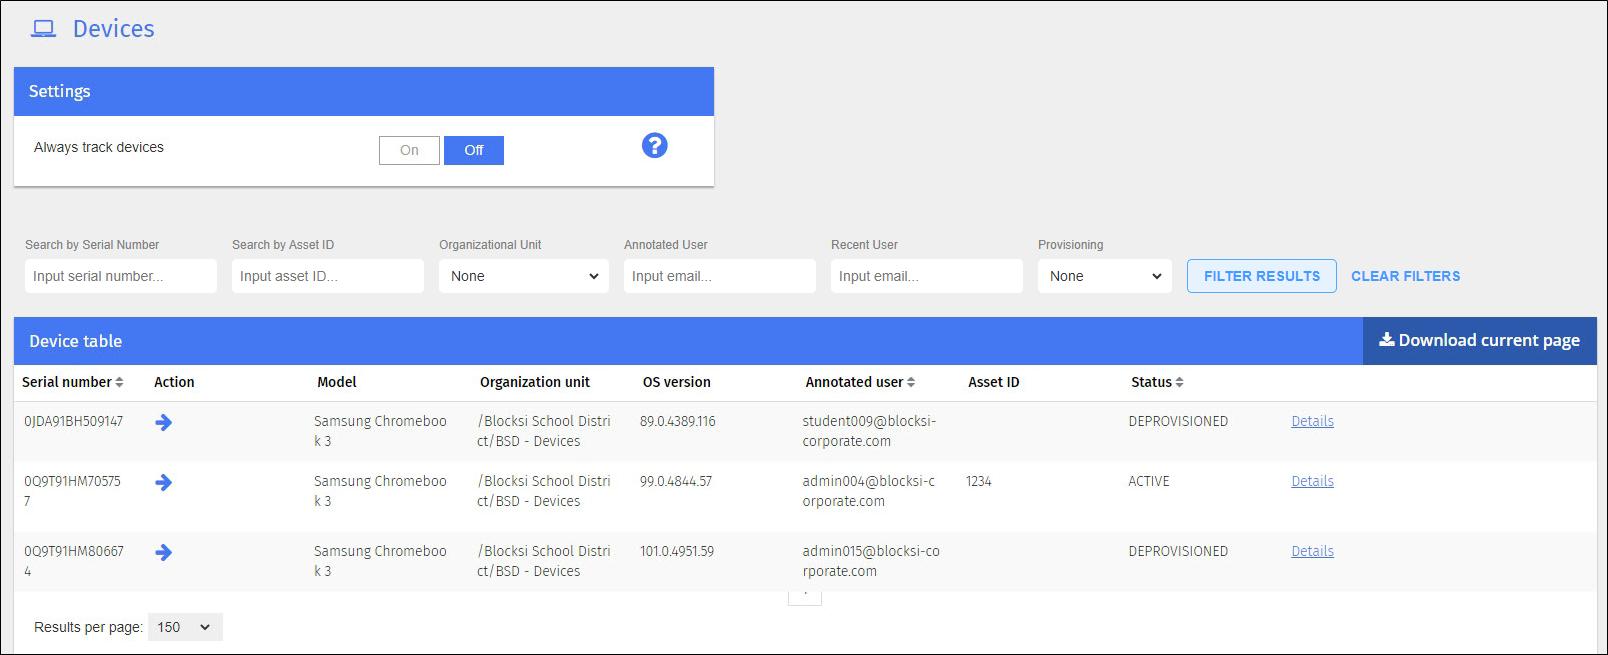
Click the ON button in the Settings section at the top of the screen. The location of all devices is reported every ten minutes and appears in the Device Table.
Click the Details link to the right of a device and the device details window opens. This window contains information about the selected device, including the device ID, the last enrollment time, the last sync time, the MAC address, and the location of the device.
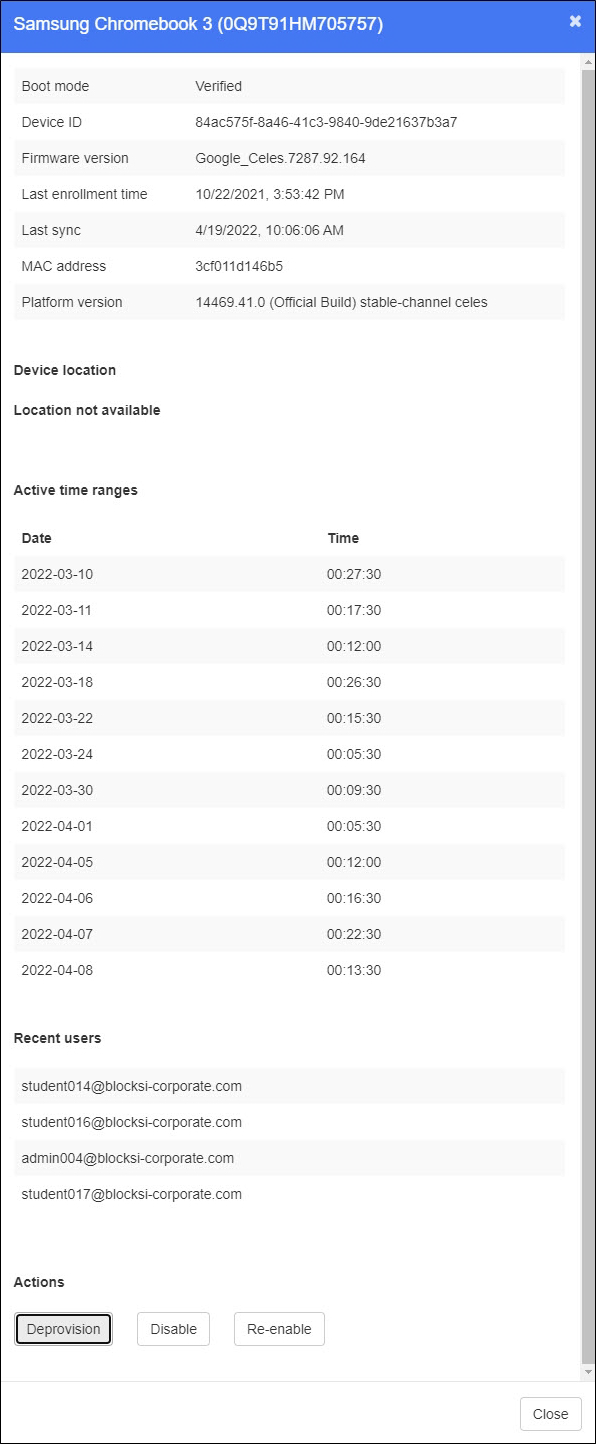
Click Show on map to the right of the student whose device to locate. The map indicates the location of the device.
Because the Blocksi application uses Google Maps, you have access to similar map functionality, such as zooming in and out, changing to street view, showing terrain in map view, and switching to satellite view using labels.
When you locate a lost device, view the location of the device, screenshots of the websites the user has visited, and photos of the user of the device.
To view collected data for a lost device
Click Device Management from the Main Menu and then click Lost Devices from its sub-menu. The following screen appears.
Tip
Click the Sort By drop-down list in the top right-hand corner of the screen to sort the devices by device serial number, the date the device was added, or the last time the device was seen.
Click the name of the device for which to view the data. The following options appear at the top of the screen: DETAILS, MAP, SCREENSHOTS, and PHOTOS. These options are described below.
Click DETAILS and the following window opens.
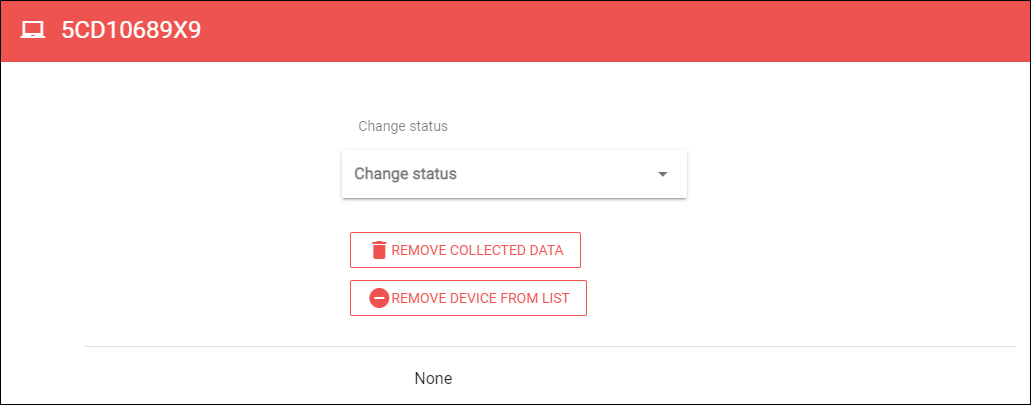
Use this window to change the status of a device and remove a device.
Click MAP and the following window opens.
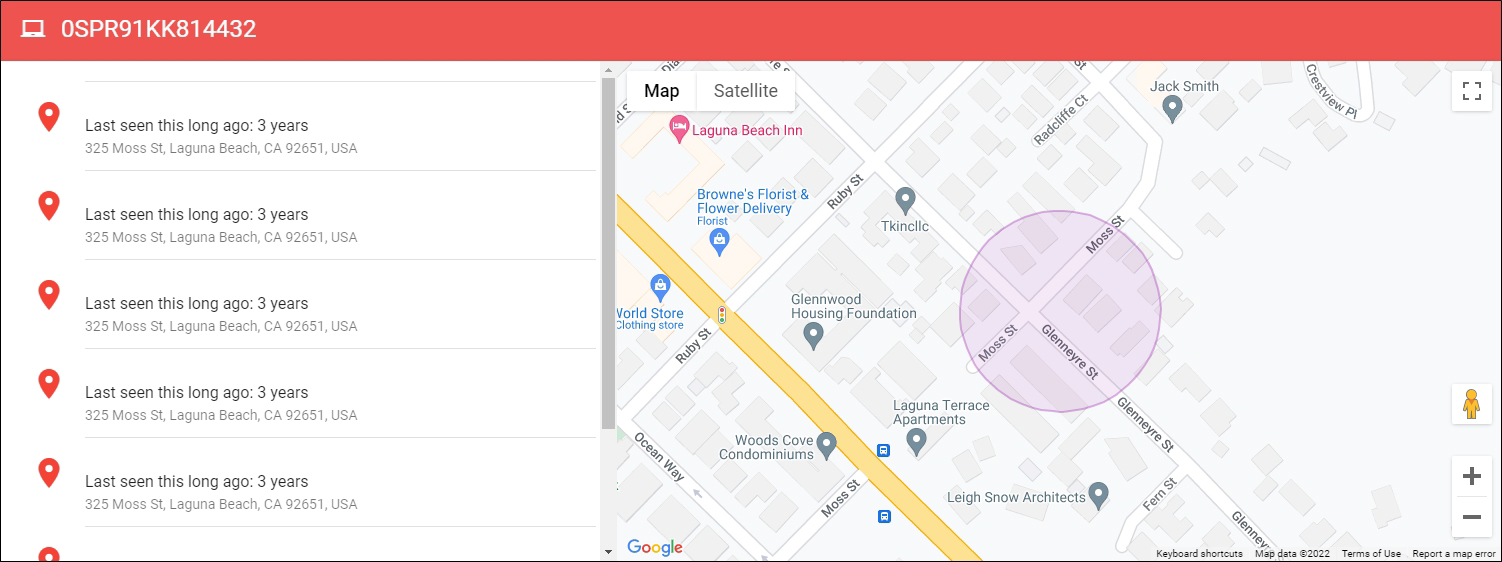
Use this screen to see the locations at which the device was last seen to the left, and a map of the currently selected location to the right. Use all the Google Maps functionality to further view the area.
Click SCREENSHOTS and the following window opens.

Here you can see the screens that the user has viewed.
Note
Screenshots are taken at five-minute intervals. Pages are also scanned for the input of email addresses, phone numbers, and social media accounts. These results appear on the Admin Dashboard.
Click PHOTOS and the following window opens.

These are photos of who was using the device.
After you have located the lost device, change the status of the device.
To change the status of a device
Click Device Management from the Main Menu and then click Lost Devices from its sub-menu. The following screen appears.

Tip
Click the Sort By drop-down list in the top right-hand corner of the screen to sort the devices by device serial number, the date the device was added, or the last time the device was seen.
Do one of the following:
Click the three vertical dots in the top right-hand corner of the device block and select whether to change the status to Recovered or Unrecoverable. The device window opens.
Click the name of a device. The device window opens.

Select the desired status from the drop-down list. Options include Recovered and Unrecoverable. The change device status window opens.
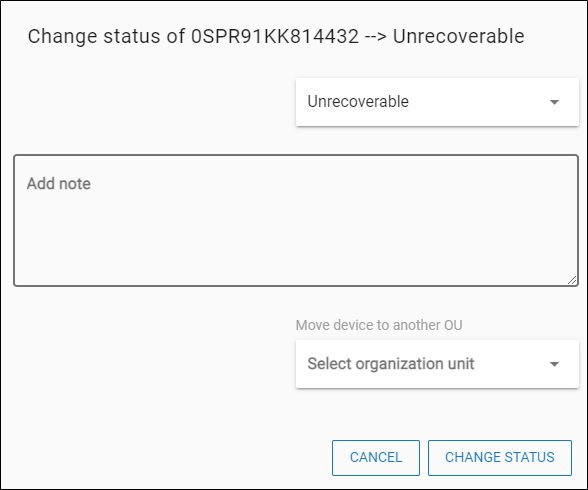
Type a note, if necessary. Move the device to another organizational unit.
When you have finished, click CHANGE STATUS to change the status of the device. Note the status change is reflected on the Tracked Devices screen.
Remove collected data for a device when it is no longer needed.
To remove collected data for a lost device
Click Device Management from the Main Menu and then click Lost Devices from its sub-menu. The following screen appears.

Tip
Click the Sort By drop-down list in the top right-hand corner of the screen to sort the devices by device serial number, the date the device was added, or the last time the device was seen.
Click the name of the device from which to remove the data. The following window opens.

Click the Remove Collected Data button to remove the collected data. A confirmation prompt appears.
Click OK to remove the data.
Note
Click the three horizontal dots in the upper right-hand corner of the device tile and select Remove Collected Data.
Note
This removes only the screenshots and photos for this device.
Remove a lost or recovered device at any time.
To remove a device
Click Device Management from the Main Menu and then click Lost Devices from its sub-menu. The following screen appears.

Tip
Click the Sort By drop-down list in the top right-hand corner of the screen to sort the devices by device serial number, the date the device was added, or the last time the device was seen.
Click the name of the device to remove. The following window opens.

Click the Remove Device From List button. A confirmation prompt appears.
Click OK to remove the device.
Note
Click the three horizontal dots in the upper right-hand corner of the device tile and select Remove Device From List.