Android App Deployment
The following describes how to deploy the Android App for use with Blocksi.
To sign up for TinyMDM
Sign in to the TinyMDM console with your Google Workspace account at the following URL: https://www.tinymdm.net/console/?locale=en#signup:default. The sign in window opens.
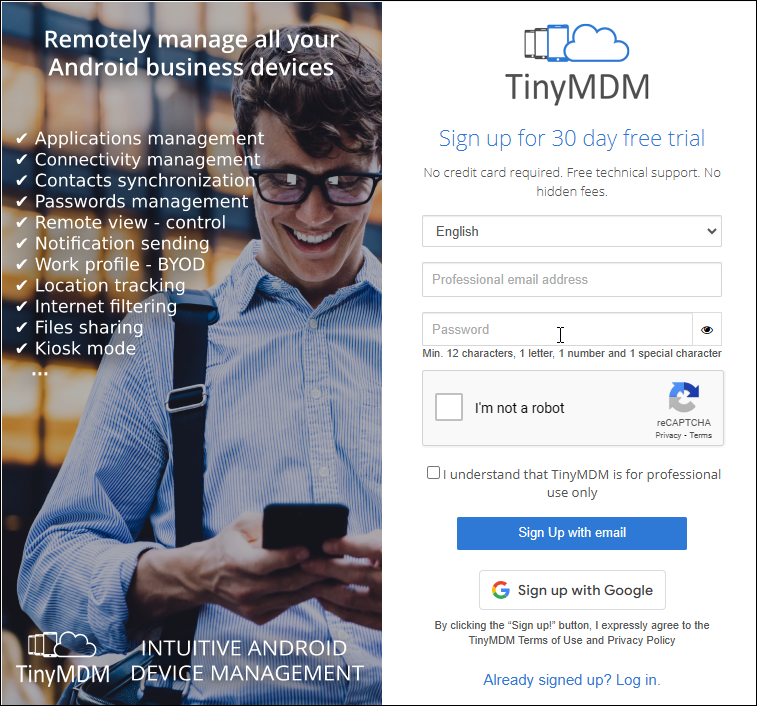
Click Sign up with Google.
Select your school's Admin Google Workspace account and sign in. The TinyMDM dashboard opens.
Go to Enterprise approved apps and click Register with Google Workspace. You are prompted for your account domain and an authorization token. See the next section for obtaining the token.
To get your token
Sign in to the Google Admin console using your Google Admin credentials.
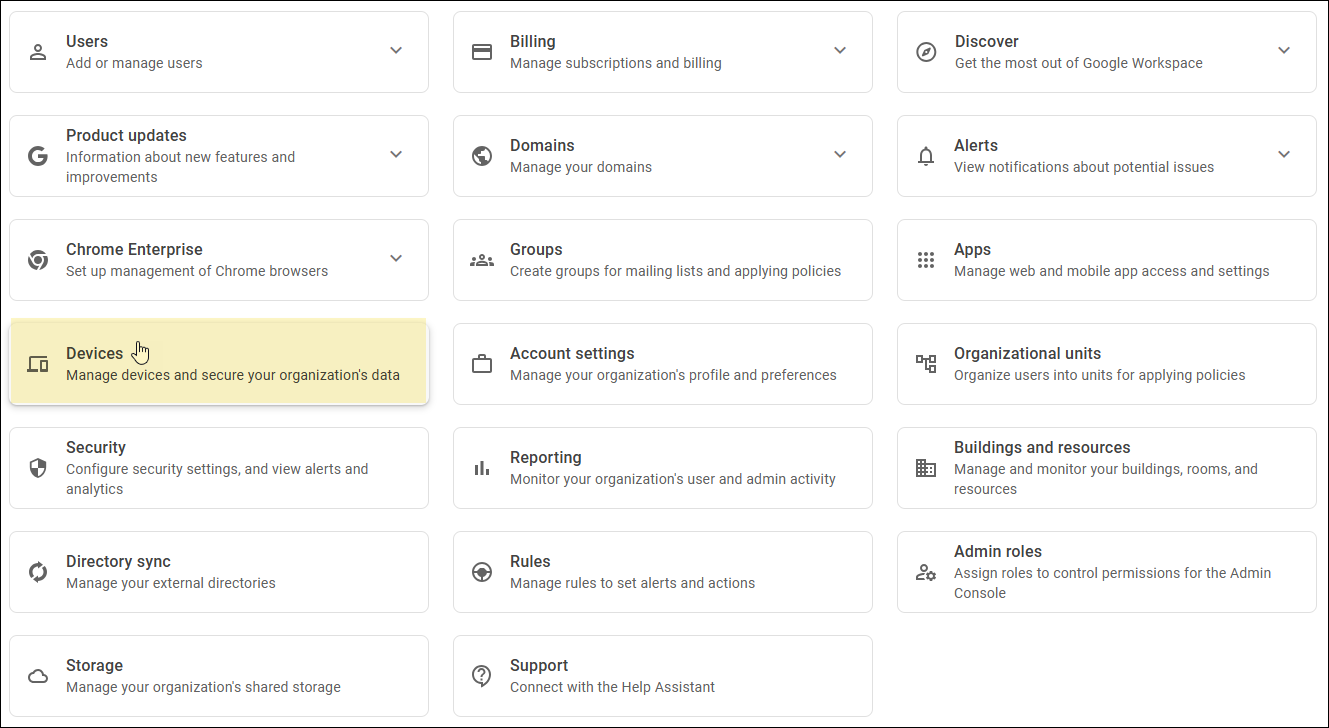
Click Devices.
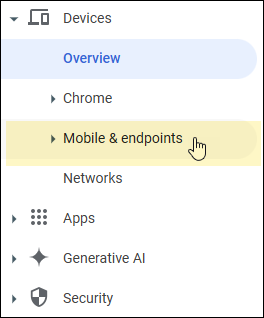
Click Mobile & endpoints from the Main Menu to the left.
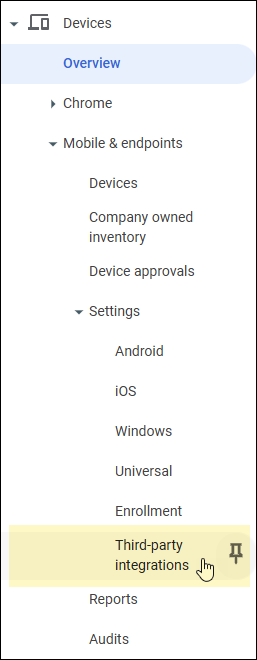
Click Third-party integrations.
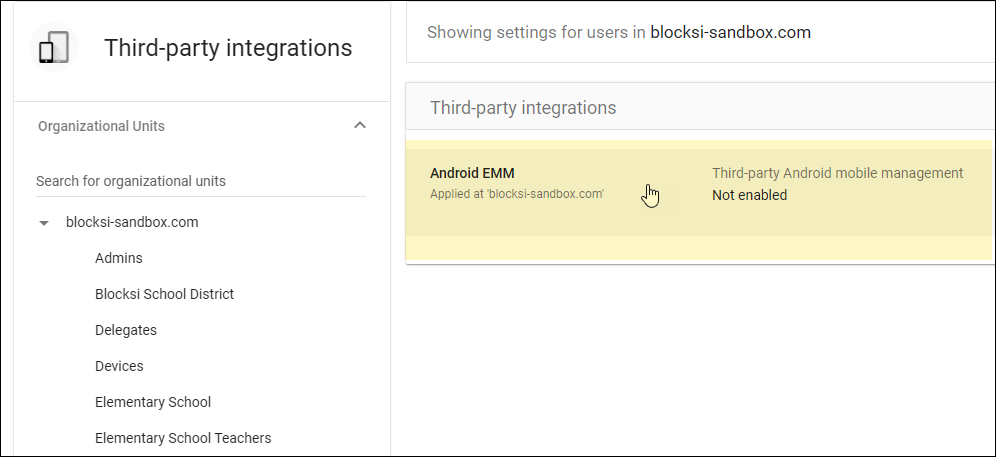
Click the Android EMM section under Third-party integrations.
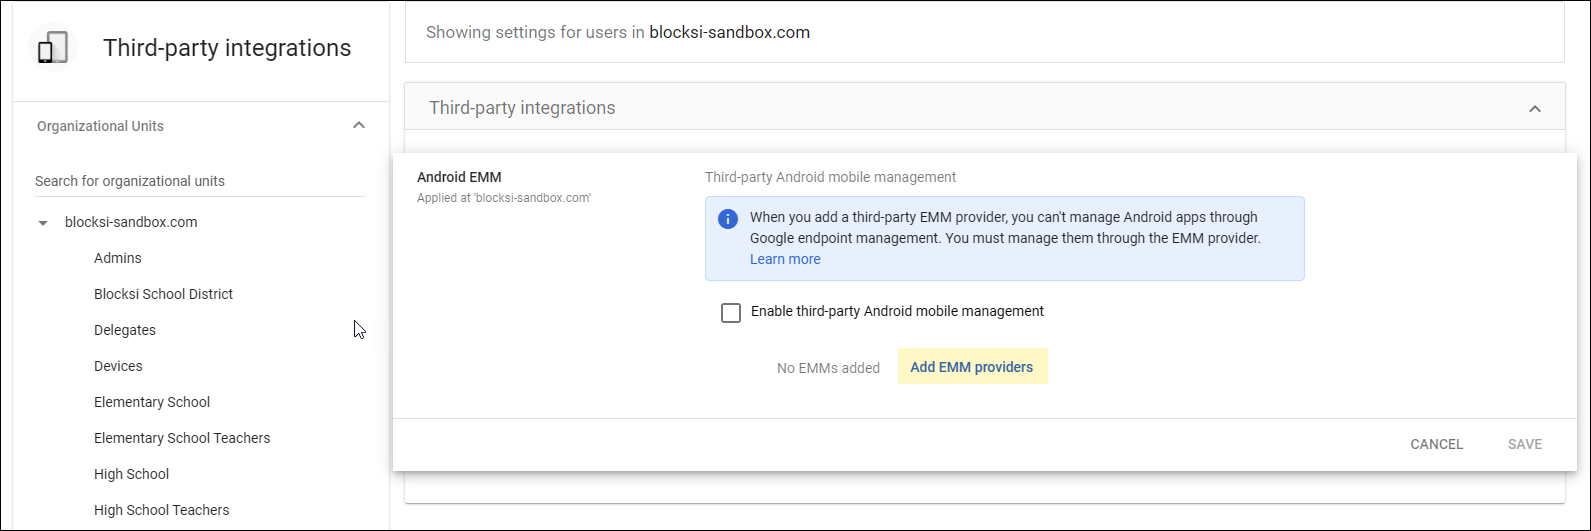
Click Add EMM providers. The Manage EMM providers screen appears.
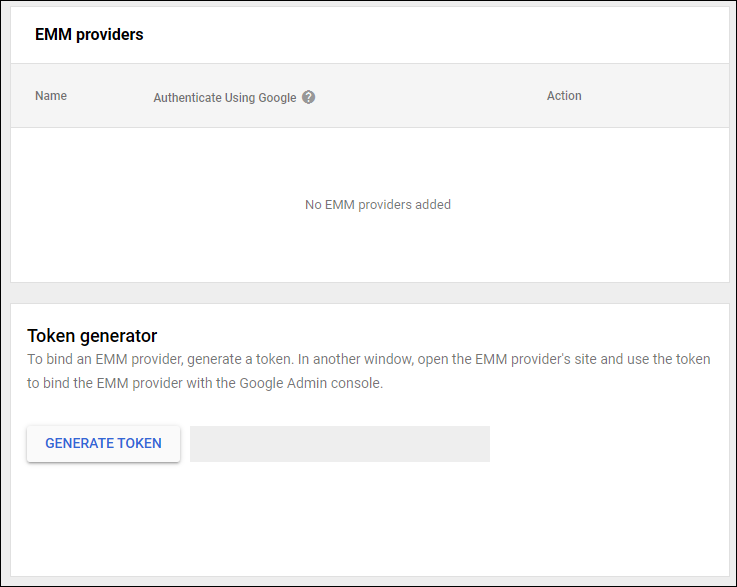
If a token is present in the Token generator section, copy the token; otherwise, click Generate Token to create a new token and copy it. Go to the EMM provider's website (TinyMDM) and share the token. Your EMM provider will provide the remaining setup instructions. After the provider receives your token, the provider is listed in the table.
Close the Manage EMM providers screen to return to the Third-party integrations screen.
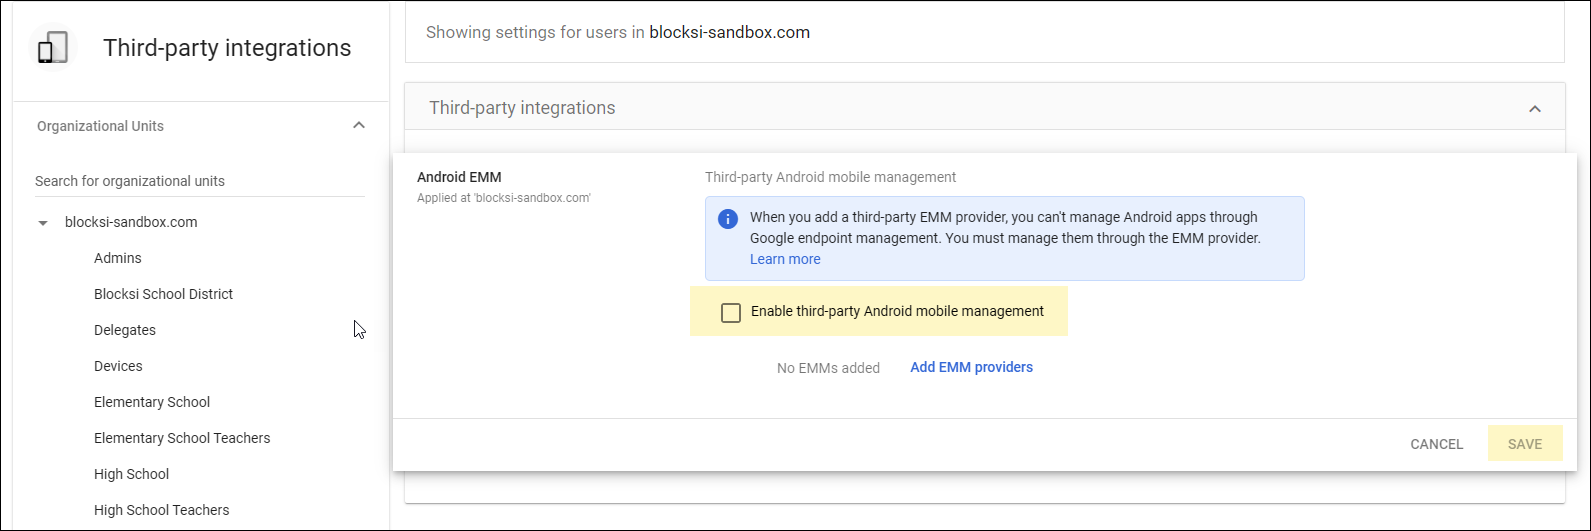
Select the Enable third-party Android mobile management checkbox and click Save. This enables the Third-party MDM. In this case, this is TinyMDM. The school Admin account registration is now complete.
After signing up and registering the company, start with the configuration of the TinyMDM console.
To configure TinyMDM
Go to the TinyMDM console.
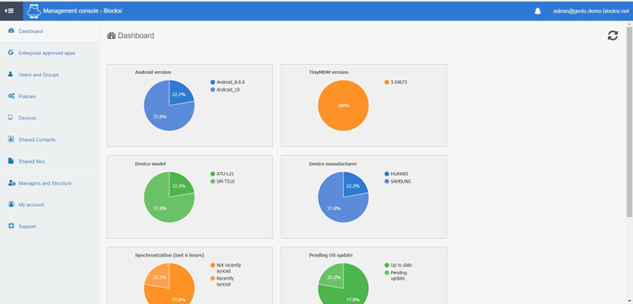
Navigate to Enterprise approved apps from the left menu pane to configure apps for the device. Under Apps management add or remove apps that the organization will use.

Select the apps that will be approved company-wide: public, private, or web from the Enterprise approved app tab.
Note
All the selected apps will be approved company-wide, but you’ll be able to adapt the list depending on the policies you’re setting up.
For public apps, click the Browse apps button and authorize as many apps as you need.
For private apps, click the Private apps button and upload private apps, if needed (APK format).
Add the Blocksi Link app as a private app and click the Private apps button. Click OK at the confirmation prompt. The following screen appears.
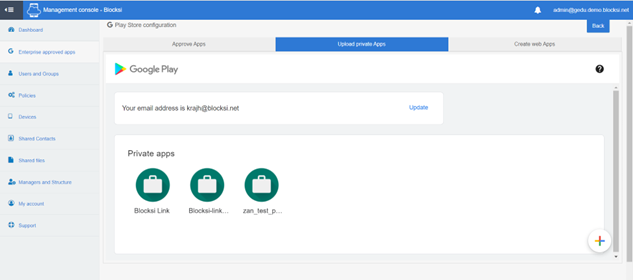
Click the + icon in the lower right-hand corner. The following screen appears.
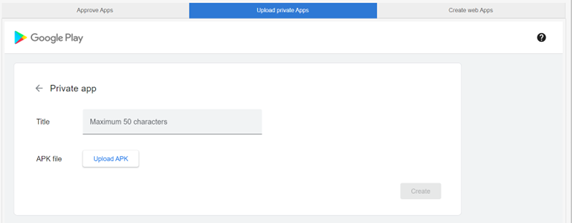
Type a name for the app to add to the organization. For example: Blocksi-link-app and upload the APK file of the app.
Click the Upload APK button and select the APK file to upload.
Click the Create button in the lower-right-hand corner. The private app should now be visible in the Enterprise Approved Apps list.
To update a private app, go to Enterprise approved apps > Private app and click the private app you need to update. Then, click Edit and upload the .apk file that includes the new version and wait a few minutes before pushing the update on managed devices through the security policy.
If you need assistance, please go to https://www.tinymdm.net/help-resources/quick-start/.
To create or import users
Before giving your students a managed device, you first have to register them via the Users and Groups tab.
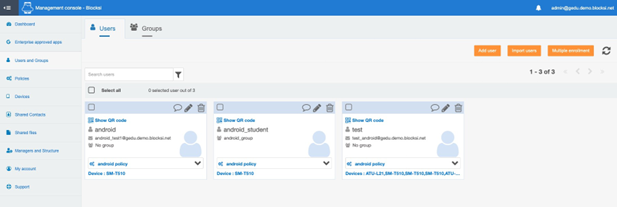
Create users in the following ways:
Use the Add user option and scan a QR to import one user at a time.
Use the Import users option to import a CSV file to add multiple users at once.
Note
The Multiple enrollment option is not needed.
To add individual users
Click the Add user button. The following window opens.
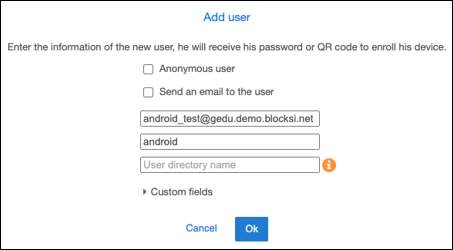
Clear the Anonymous user and Send an email to the user checkboxes.
Type the email address of the student in the first field.
Type the full name of the user in the second field.
Click OK. The new user/student is added.
To import users from a CSV file, the file needs to be prepared. This file has the following structure: user_name;user_email;group_name;directory_name;is_anonymous;send_email;custom_field;
Note
The following is very important for your app: You must leave the group_name and custom_field fields empty, and add a 0 to the is_anonymous and send_email fields need to contain a value of 0. For example, John Doe;john.doe@demo.com;;john.doe;0;0.
To add multiple users
Click the Import Users button. The following window opens.

If the upload is successful, the users are created and appear in the Users tab.
The policy represents the security rules to apply to the mobile devices, such as password requirements, approved apps, kiosk mode, connectivity management (Wi-Fi, Bluetooth, NFC) etc.
To create a policy
Go to the Policies tab in the left menu pane.
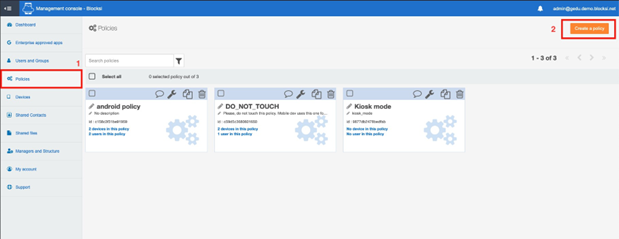
Click Create a policy. The following screen appears.
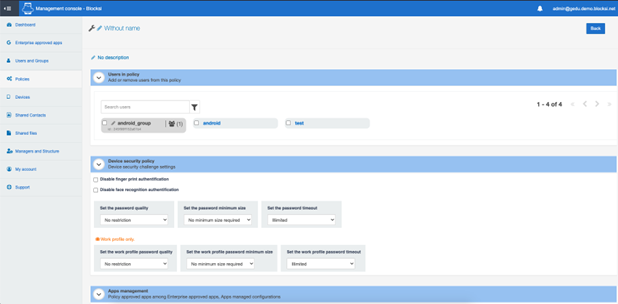
Click the Without name text, and type a name the policy. In this case, let's name it Policy_test. Add a short description to the policy, but it is not necessary.
To add users to the policy
Select the checkbox next to the user's name or the group if several users belong to the same group.

To configure device security options
Disable fingerprint authentication.
Disable face recognition authentication.
Set the password requirements such as type/quality (letter/numeric/special characters, pattern, PIN) and minimum size. It is recommended that the password quality is set to Only password or PIN or Only password or complex PIN.
To configure the apps management tab
Set the application permissions to Automatically granted.
Set the default update mode for apps to Always when wifi.
Approve the apps that will be installed on your devices.
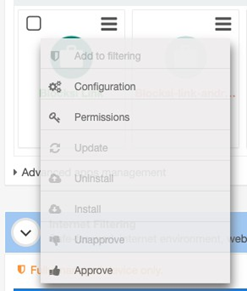
Click the icon of the app, or click the Settings button and click the Approve field. Policy approved apps are fully colored and their name appears in green, while unapproved apps are grayed out and their name appears in red.
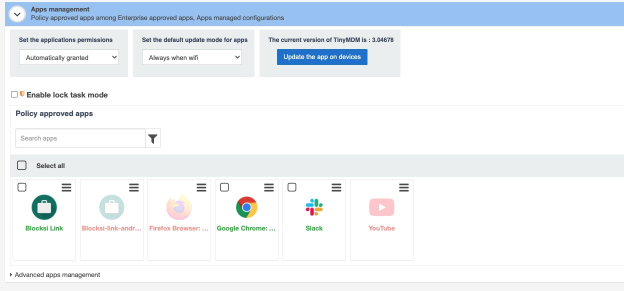
To install the approved apps on all devices, click the Select all checkbox, and then click the Settings button and click Install selected apps.

To uninstall an app, click the Settings button next to the app to uninstall and click Uninstall from the drop-down menu.
To lock your user's access to only a few available apps and disable some of the navigation buttons, enable Lock task mode, commonly known as Kiosk mode. To correctly configure this mode, do the following:
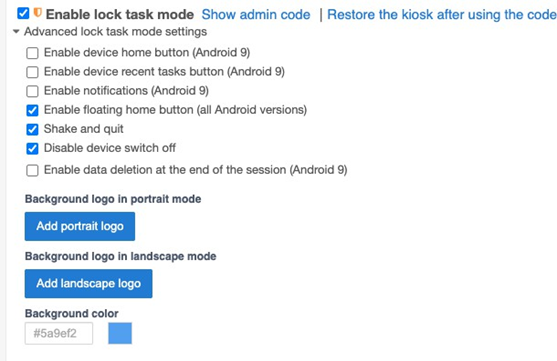
Select the Enable lock task mode checkbox and then click the Advanced lock task mode settings text to expand the list of checkboxes.
Select the Enable floating home button (all Android version) checkbox.
Select the Shake and quit checkbox.
Select the Disable Device switch off checkbox.
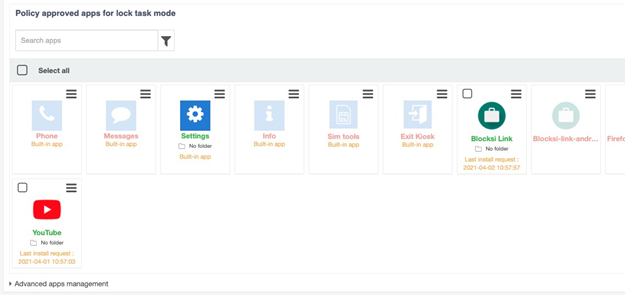
Approve the apps to enable in kiosk mode. Refer to Steps 3 through 6 in Configuring the Apps Management Tab.
Disable kiosk mode in the following ways:
Clear the Enable lock task mode checkbox on the TinyMDM console.
To exit the mode from the tablet, either shake the device and type in the admin code, or from the tablet, click the Exit kiosk app icon and type in the admin code when prompted. You can find the admin code next to the Enable lock task mode checkbox on the TinyMDM console.
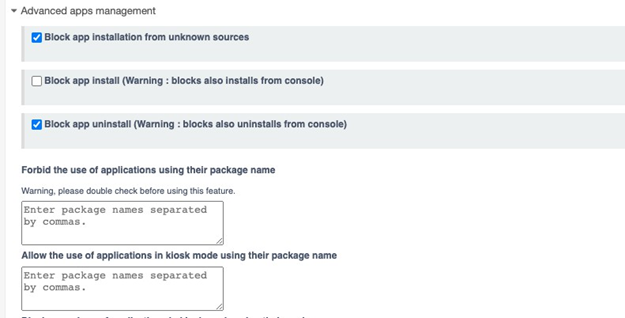
Click the Advanced app management text at the bottom of the Apps management tab to configure some additional settings.

It is important to select the Block app installation from unknown sources and Block app uninstall checkboxes to prevent the tablet user (e.g., student) from uninstalling apps from their device. Leave other options empty.
Skip the configuring the Internet Filtering, Wifi configuration, and Connectivity management tabs and go to the Device-wide controls tab.

From this section, do the following:
Select when Android OS will be updated
Prevent user from adding or removing personal accounts (like Google account) on the device
Allow installation of all Play Store applications of added google accounts
Prevent factory reset (in advanced settings also prevent factory reset from physical buttons on devices)
Disable Google factory reset protection
Disable camera
Block access to location settings
Disable debugging mode
Disable USB files access
Currently for us the most important boxes to check are Prevent factory reset and Disable debugging mode.
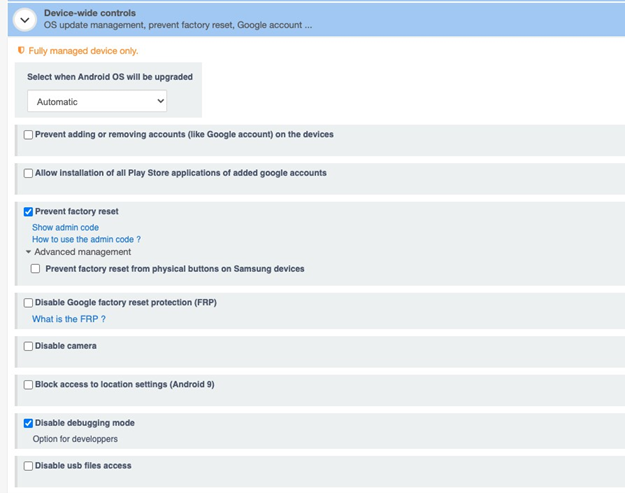
Again, skip the configuration of the following three sections: Screen control, Shared Contacts, and Shared files.

After the user is added and the policy created, continue with the user enrollment process.
To enroll a device
Factory reset your device by tapping six (6) times in a row anywhere on the first screen displayed at startup, (but six times in one spot), and waiting for a few seconds.
Note
Even if the first screen is often the one where the language selection is made, it may vary according to the manufacturer of the device. Whatever the first screen is, the important thing is to tap six times on the initial screen.
Next, the camera of the device opens: scan the QR code for your user. The QR code appears on the TinyMDM console under the Users and Groups menu. Every user has a unique code.
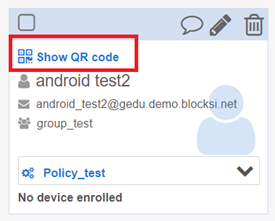
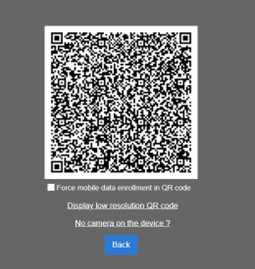
Connect to a Wi-Fi network and follow the steps of the configuration wizard.
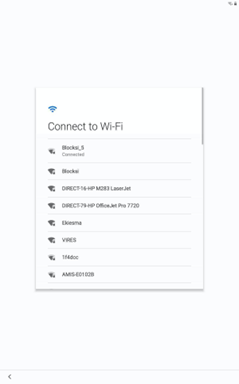
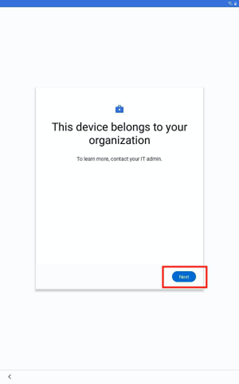
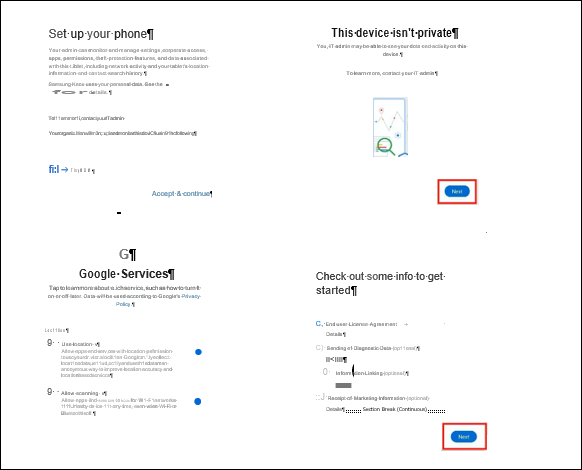
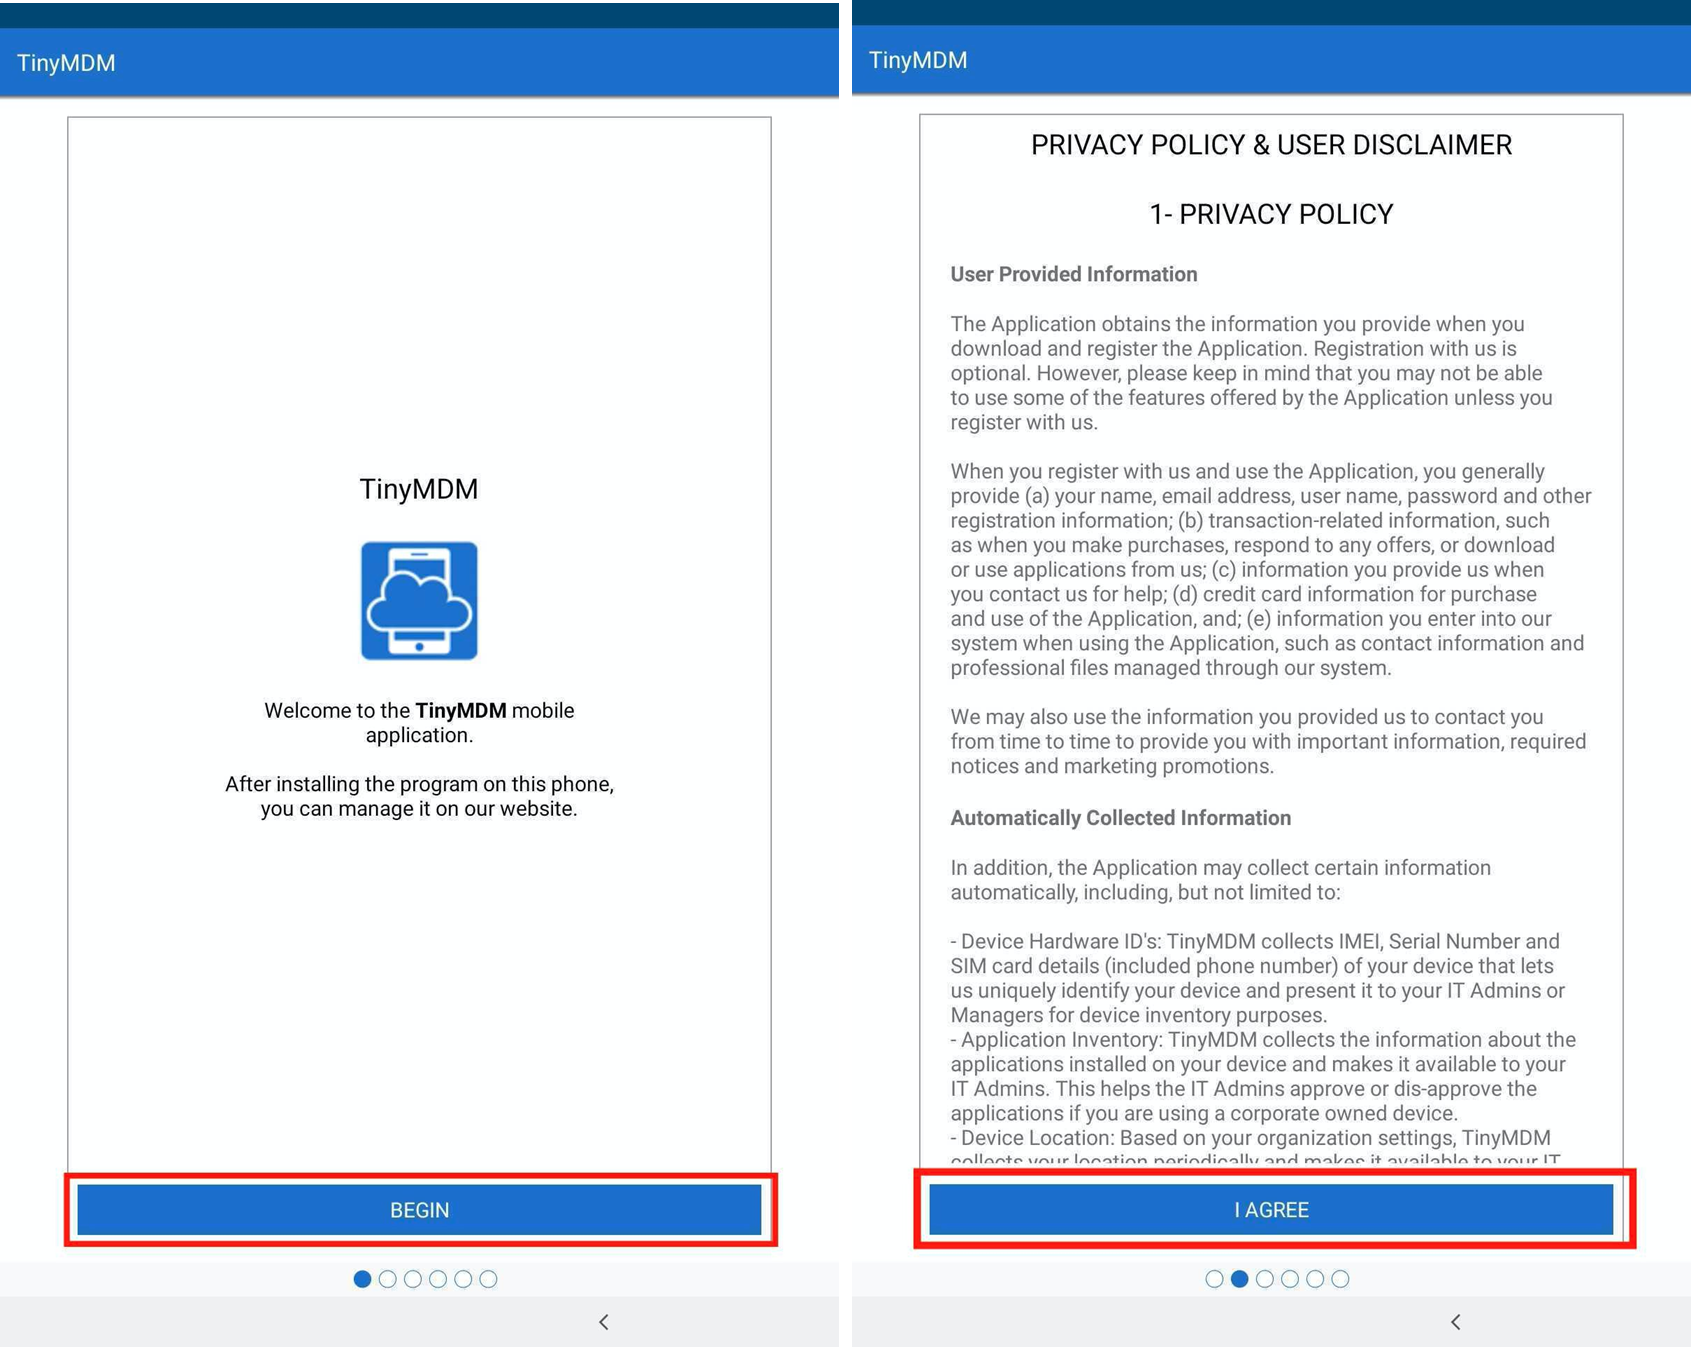
The device automatically downloads TinyMDM. Click Begin and accept the Terms of Use.
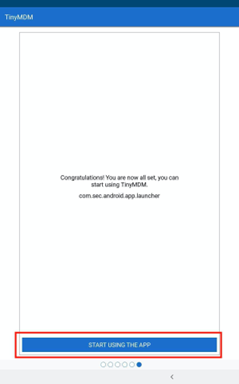
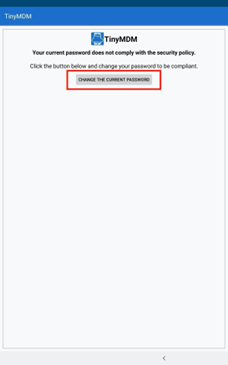
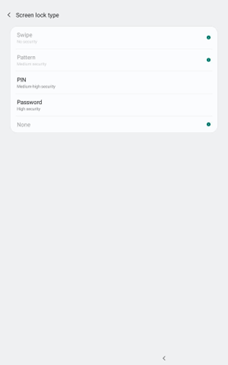
The configuration defined in the security policy is applied directly. Change the current password.
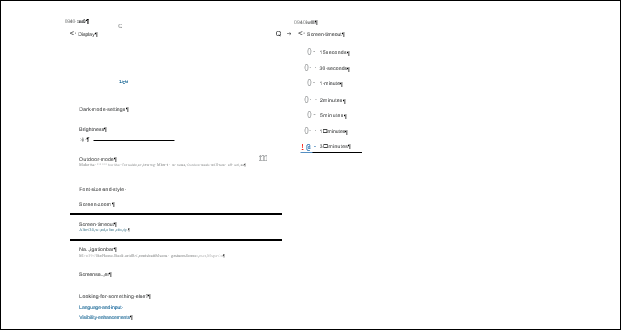
Change the length of screen timeout to the maximum value (30 minutes). On the device go to Settings > Display > Screen timeout.
To add the Blocksi link app
Add the Blocksi Link App as shown in Configuring TinyMDM.
Go to the TinyMDM Console.
Go to Policies and select the policy (in this example, Policy_test).
Go to the Apps management tab and click the Settings button in the Blocksi Link App section.
Click Configuration from the drop-down menu.
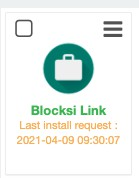
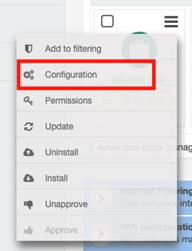
Type a name for the configuration for the app; for example, Configuration for email address.
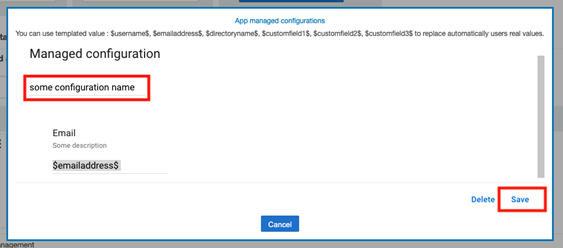
Click the Save button.
After all apps are installed, continue with configuring the Blocksi Link App.
To configure the app on the device
Open the app on first use.
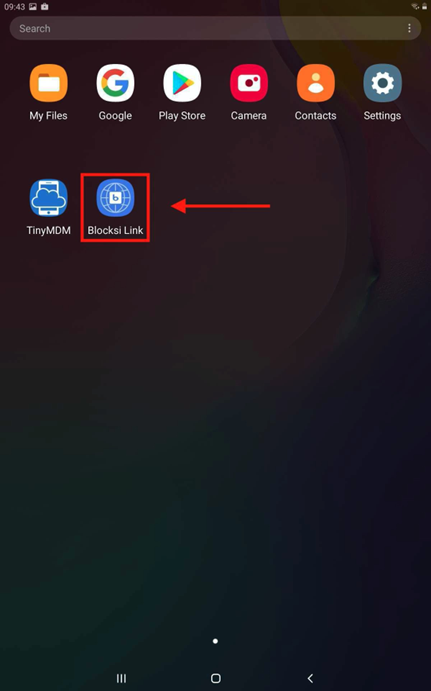
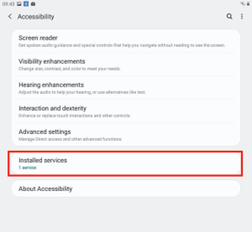
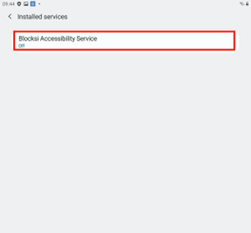
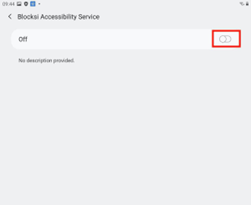
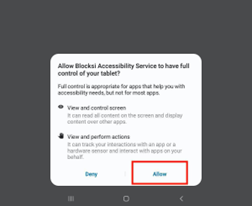
Upon app start, the Allow permission prompt screen appears. Here, agree to the accessibility permissions (as shown in the screenshots below).
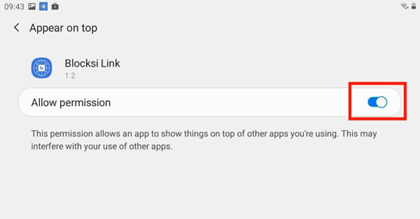
Next, agree to runtime permissions. The process is shown in the screenshots below.
