Manage individual or multiple user licenses. This screen reports License Status, User Email, User Status, Action options, User Name, Current Organizational Unit, and latest Blocksi Extension Version installed for that user.
To assign user licenses
Click User Licenses from the Main Menu and then click Google Workspace Users from its sub-menu. The Users screen appears.
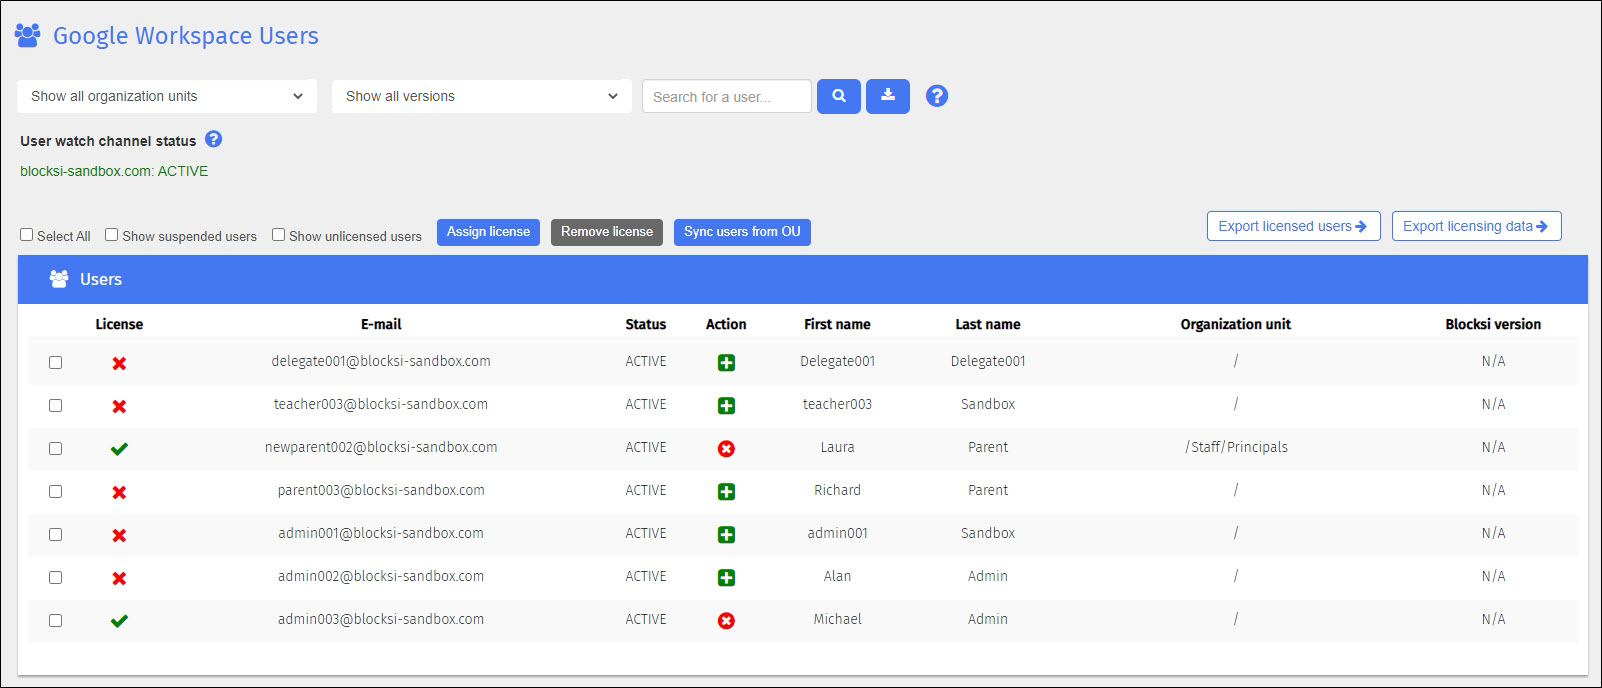
Select the checkboxes to the left of the user names for whom to assign a license.
Click the Assign License button. The license is assigned and the red X is replaced with a green checkmark in the License column.
Tip
Click the  icon in the Action column to assign a license to a single user. You do not have to select the user first.
Auto-licensing an organizational unit (OU) provides everyone in that OU with a license.
To auto-license an OU
Click User Licenses from the Main Menu and then click Google Workspace Users from its sub-menu. The Users screen appears.
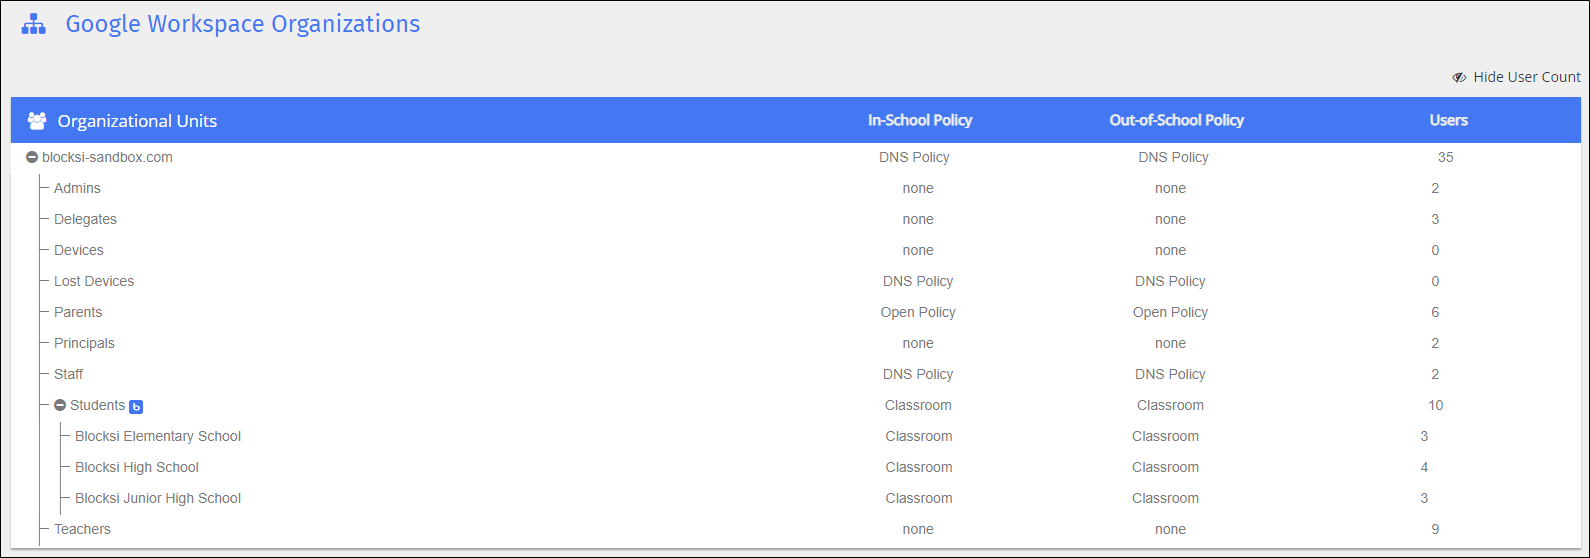
Locate the OU to set up. You may have to click the
 icon to the left of the OU name to expand the tree.
Click the
 icon to the right of the OU name for which to assign the licenses. The edit window opens, as shown below.
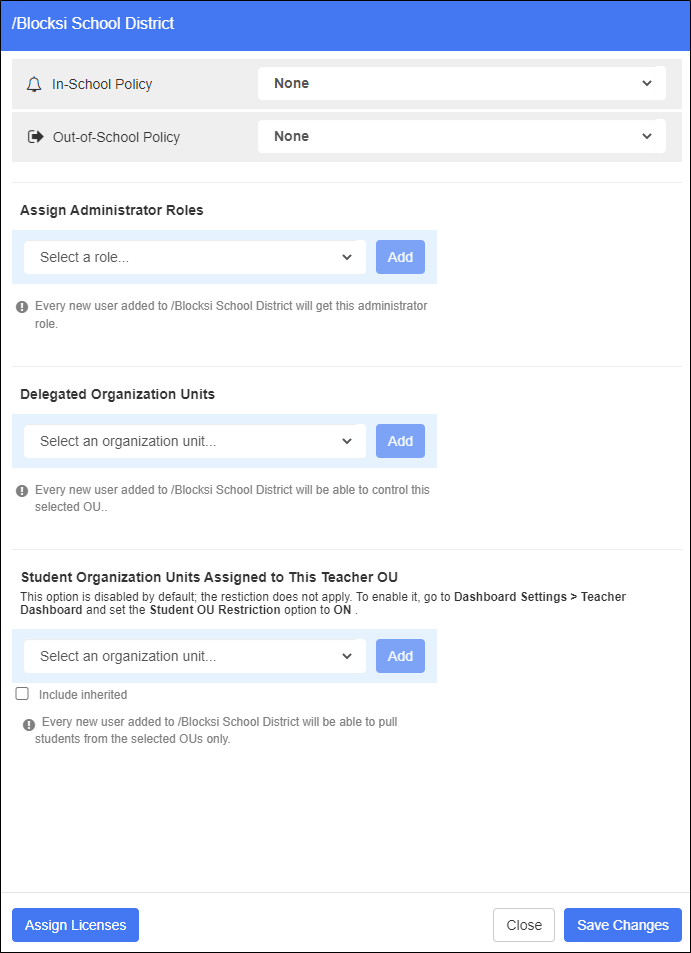
Click the Assign Licenses button in the lower left-hand corner of the window. The button turns red and the name changes to Clear Licenses.
Click the Save Changes button.
Click the Update Policies on All Clients button on the Action Bar. A success confirmation window opens.
Click Close to close the window.
Note
You cannot remove a license from a user who is in an organizational unit (OU) that is auto-licensed. You must first remove that user from the auto-licensed OU, and then remove the user's license.
View users who are unlicensed or have suspended licenses.
To view unlicensed users or users with a suspended license
Click User Licenses from the Main Menu and then click Google Workspace Users from its sub-menu. The Users screen appears.

Select the Show Suspended Users checkbox to see a list of all users with suspended licenses. Select the Show Unlicensed Users checkbox to see a list of all users who currently do not have a license.
To search for a user
Click User Licenses from the Main Menu and then click Google Workspace Users from its sub-menu. The Users screen appears.

Type the name of the user for whom to search in the Search for a user... text box.
Click the
 icon. The user you searched for appears in the listing. All the other users are removed from the listing.
There are instances when Blocksi may not be able to see users added to an OU via the Google Admin console. Sync those users from specific OUs so that Blocksi can see them. This is handy for those districts that do not want to auto-license users, but instead would rather select those users to license.
To sync users
Click User Licenses from the Main Menu and then click Google Workspace Users from its sub-menu. The Users screen appears.

Click the Sync Users From OU button. The Sync Users From OU window opens.
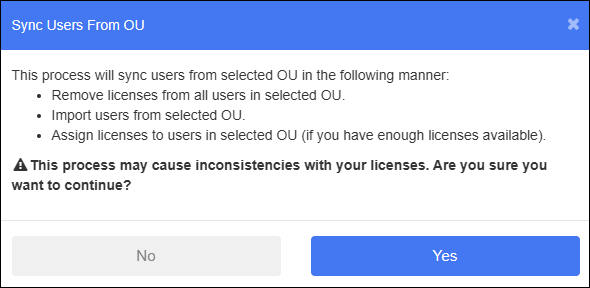
Click Yes to the prompt. The following window opens.
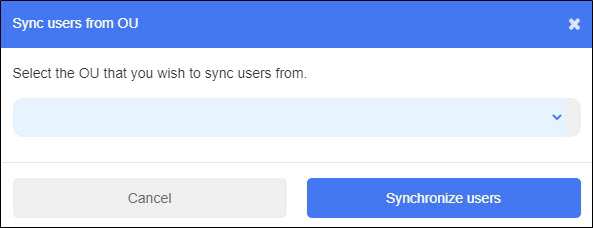
Click the down arrow and select the OU that contains the users to sync.
Note
You cannot sync the root OU.
Click the Synchronize Users button.
Note
Only OUs/users with auto-licensing enabled (
 ) are applied the license.
The following examples illustrate how synchronizing users works:
Sample OUs:
/Blocksi OU
/Blocksi OU/Students
/Blocksi OU/Students/Class
Sample Results
If you sync /Blocksi OU, users from all the sub-OUs are also synced.
If you sync /Blocksi OU/Students, users from the /Blocksi OU/Students/Class sub-OU is also synced.
If you sync /Blocksi OU/Students/Class, only users from that OU are synced.
If the synced OU has auto-licensing enabled (
 ), then users from that OU automatically get a license when sync is initiated.
If the synced OU does not have auto-licensing enabled, then the users do not get a license when sync is initiated.
Remove a user license from one of more users when they are no longer needed.
To remove user licenses
Click User Licenses from the Main Menu and then click Google Workspace Users from its sub-menu. The Users screen appears.

Select the checkboxes to the left of the usernames from whom to remove a license.
Click the Remove License button. The license for the user(s) is removed and the green checkmark is replaced with a red X in the License column.
Tip
Click the  icon in the Action column to remove a license from a single user. You do not have to select the user first.
Export licensing data, licensed users, and the user list.
Export licensing data to a CSV file to keep for your records.
To export licensing data
Click User Licenses from the Main Menu and then click Google Workspace Users from its sub-menu. The Users screen appears.

Click the Export Licensing Data -> button. The file appears in the lower left-hand corner of your screen in your spreadsheet program. Click it to open and save it.
Export the list of licensed uses to a CSV file to keep for your records.
To export licensed users
Click User Licenses from the Main Menu and then click Google Workspace Users from its sub-menu. The Users screen appears.

Click the Export Licensed Users -> button. The file appears in the lower left-hand corner of your screen in your spreadsheet program. Click it to open and save it.
Export the list of all uses to a CSV file to keep for your records.
To export a list of all users
Click User Licenses from the Main Menu and then click Google Workspace Users from its sub-menu. The Users screen appears.

Click
 . The file appears in the lower left-hand corner of your screen in your spreadsheet program. Click it to open and save it.