Organizational Units and Users
This section contains procedures for creating organizational units, adding users, and assigning policies to organizational units.
Create new organizational units (OUs) on the Google Admin console.
To add a new OU
Sign in to the Google Admin console using your Google Admin credentials.
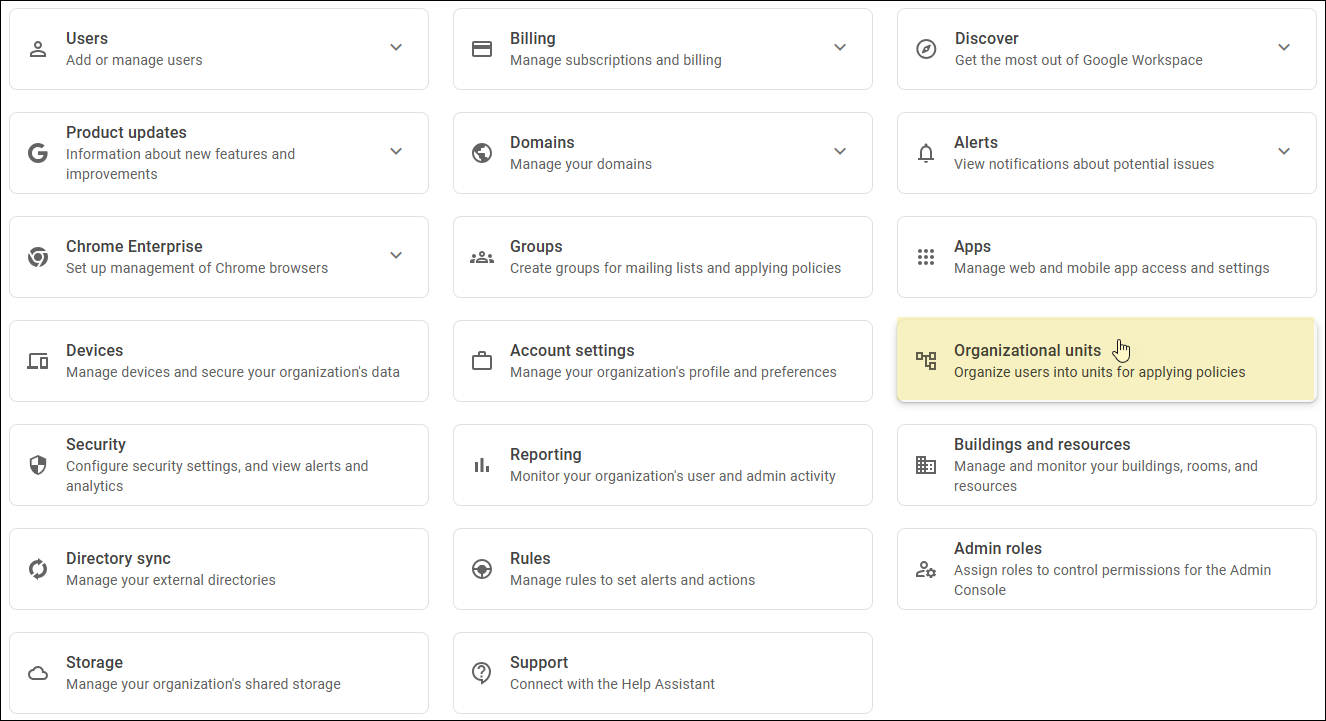
Click Organizational units. The Manage organizational units screen appears.
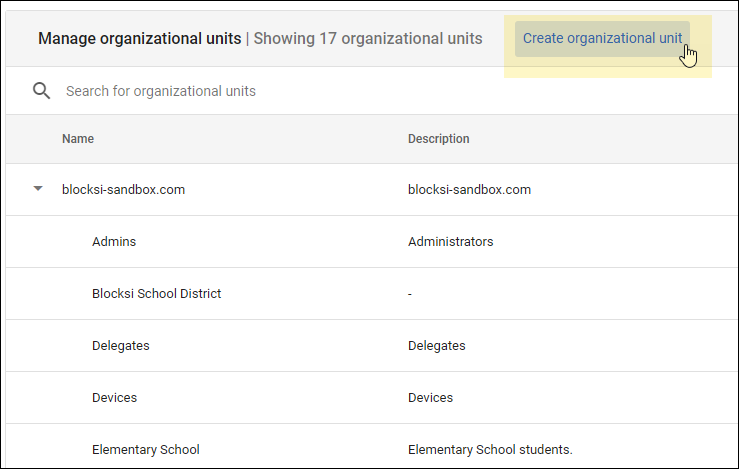
Click the Create organizational unit link. The Create new organizational unit window opens.
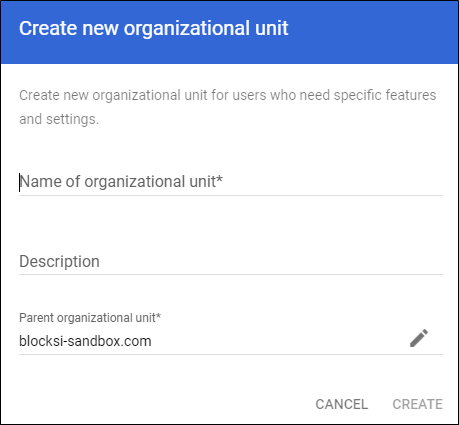
Type the name of the new OU in the Name of organizational unit* text field.
Type a description of the OU in the Description text field, if desired.
Accept the default parent OU in the Parent organizational unit* field or click the
 icon to open the Select parent organizational unit window, as shown below.
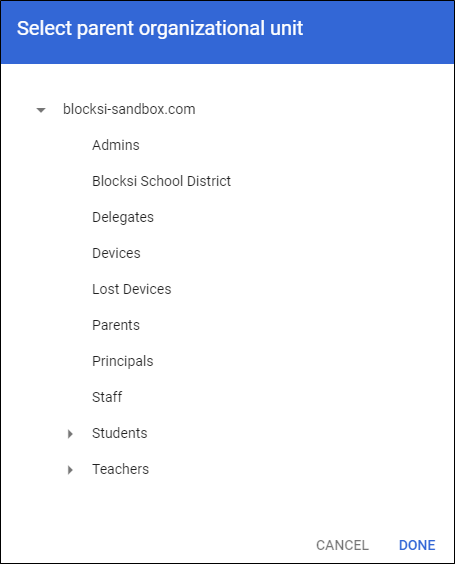
Click the arrows to locate the parent OU in which to create the new OU.
Select the desired parent OU and click Done. The selected OU appears in the Parent organizational unit* field.
Click CREATE to complete creating the OU.
Add new users on the Google Admin console and sync them in Blocksi.
Adding the User's Personal Information
Sign in to the Google Admin console using your Google Admin credentials.
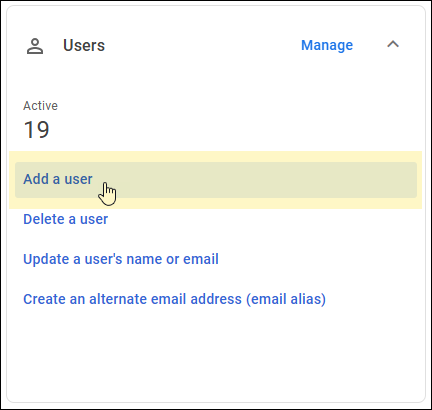
Click Add a User in the Users section. The Add new user window opens.
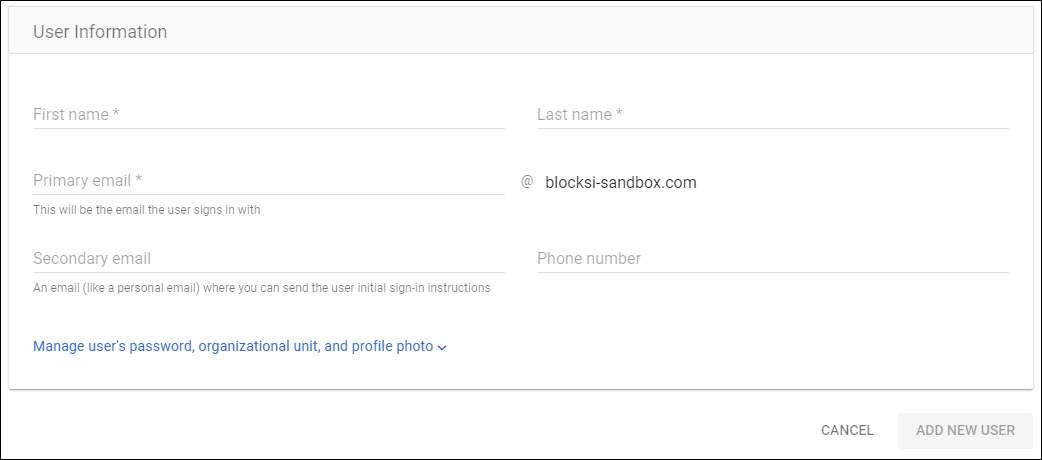
Type the user’s first name in the First name* text field.
Type the user’s last name in the Last name* text field.
Type the user’s primary email in the Primary email* text field.
Type the user's secondary email in the Secondary email text field, if necessary.
Selecting the OU and Assigning a Password
Click Manage user's password, organizational unit, and profile photo link to expand the User information window.
Accept the default organizational unit (OU) in the Organizational unit* field or click the
 icon to open the Select organizational unit window, as shown below.
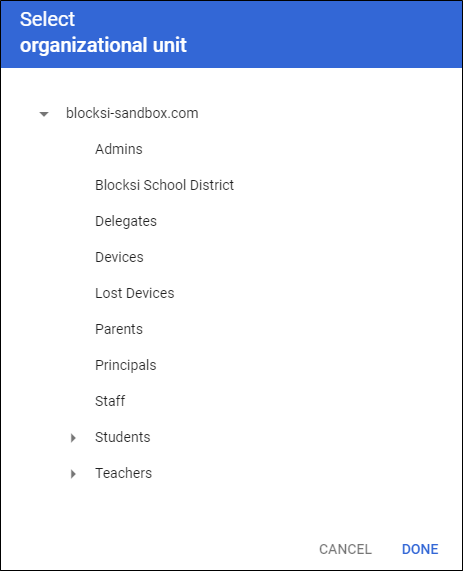
Click the arrows to locate the OU to which to assign this user, select the desired OU, and click Done.
Type the user’s phone number in the Phone number field.
Click UPLOAD PROFILE PHOTO to add a photo for this user. The Open dialog appears.
Navigate to the image file and click Open. The photo of the user appears to the left, along with the file name and a REMOVE link. Click the REMOVE link to remove the photo.
Click the Automatically generate a password option to generate a password for this user, or type the password in the Password text field.
Tip
Click the
 icon to view the password as you type it.
Note
Click Create password to enter the password now. Type the password in the field. Click the
 icon to view the password as you type it. Select the Ask user to change their password when they sign in checkbox to force the user to create a new password upon initial sign in.
Click the Ask for a password change at the next sign-in option to force the user to create a new password when they sign in for the first time.
Click ADD NEW USER. The user is added to the OU you selected and an additional screen appears, from which to copy or print the password, or email sign-in instructions to the user. Click PREVIEW and SEND to preview the email and send it to the user. You also have the opportunity to send a copy of the email to yourself.
Click ADD ANOTHER USER to add more users or click DONE if you are not adding more users. If you choose to add more users, you are brought back to the Add new user window. If you are finished adding users, and you click DONE, the following window opens.
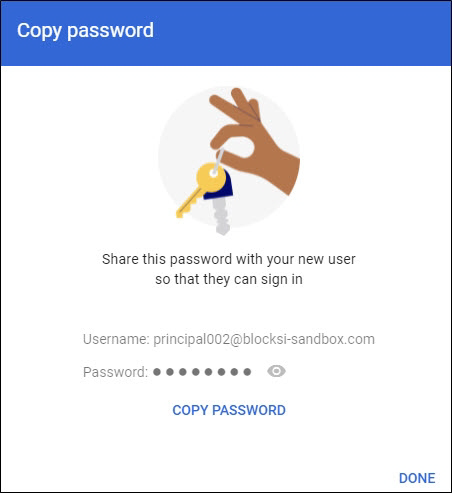
Click DONE to close the window.
Assign as many policies to an organizational unit (OU) as needed.
Note
If an OU is not configured, it inherits its policy from the first configured parent OU.
Note
Each OU running the Blocksi extension must be either configured itself or have at least one configured parent OU, or the extension will not initialize.
To assign policies to an OU
Sign in to the Blocksi Admin Dashboard using your Google Admin or Microsoft credentials.
Click Organizations and Entities from the Main Menu and then click Google Workspace Organizations , Azure AD Groups, or LDAP OU from its sub-menu. The Organizational Units screen appears.
Locate the OU to which to apply policies. You may have to click the
 icon to the left of the OU name to expand the tree.
Click the
 icon to the right of the OU name to open the edit window, as shown below.
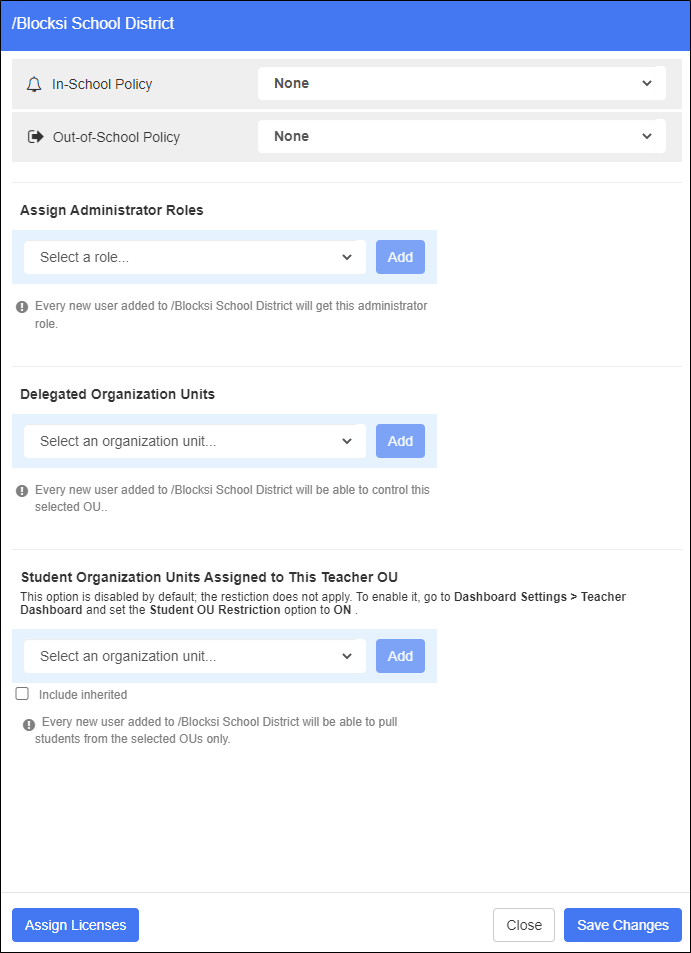
Select the policy to take effect while the student is in school from the In school policy drop-down list.
Select the policy to take effect while the student is out of school from the Out of school policy drop-down list.
Note
If you or another admin have already created policies, you cannot select Inherited; you must instead either select one of the policies or None.
Click Save Changes.