Jamf Pro - iOS Configuration Guide
The following contains procedures for deploying Jamf Pro for iOS.
Note
Blocksi supports iOS 13.1 and higher.
Prerequisites
Ensure the following prerequisites are in place before proceeding with deployment:
Send your Organization ID and organization name to Blocksi Support to authorize your district's use of the iOS filtering app. Refer to the Getting Your Organization ID and Name section for more information.
Ensure that Custom Apps and the Volume Purchase Program (VPP) are fully enabled and configured. Refer to the Configuring Volume Purchasing section for more information.
Purchase VPP licenses for the Blocksi for iOS app.
Create and configure an iOS filtering policy on the Blocksi Admin Dashboard. Depending on your needs, you may choose one of the following:
iOS Blanket Time-based Policy - For uniform filtering across devices.
Regular Policy - For user-based filtering.
If you will be using user-based filtering, an owner must be assigned to the device.
Sign in to your Apple School Manager account with your Administrator credentials.
Click your account name in the lower left-hand corner, and then click Preferences from the pop-up menu.
Go to Organization Information.
Locate your Organization ID and Organization Name.
Send this information to Blocksi. It is required to add your organization to the approved list of customers who can use Blocksi's filtering app.
Sign in to your Apple School Manager account using your administrator credentials.
Click your name in the bottom left of the sidebar.
Click Preferences at the bottom of the sidebar.
Click Enrollment Information.
Scroll down to the Customer Apps section and click Enable in the Custom Apps row.
Navigate to Settings > Global Management > Volume Purchasing.
Enter the Display Name and select your Country or Region.
In the App Store, locate and select Blocksi for iPad, then sign in to Apple School/Business Manager.
Set the License Type to Managed, enter
10in the Quantity field, select Blocksi LLC in the Assign To field, and click Get.Navigate to Personal Settings > Apps and Books, locate the server token for Blocksi LLC under Location, and click Download.
Return to Settings > Global Management > Volume Purchasing and click Upload Service Token.
Click Choose File in the Server Token window, select the downloaded token file, and click Upload.
Click Devices in the upper left corner.
Click Mobile Device Apps from the main menu, then click New.
Select App Store App or Apps Purchased in Volume under Choose an App Type and click Next.
Enter
blocksiin the Search box, select your Country or Region, and click Next.Click the Apps Purchased in Volume tab, then click Add to the right of Blocksi for iPad. The New Mobile Device App screen opens.
Confirm that Blocksi for iPad appears in the Display Name box, then select the Enabled and Free checkboxes.
Enter
com.blocksi.dnsproxyin the Bundle Identifier box.Select Install Automatically/Prompt Users to Install from the Distribution Method drop-down list.
Clear the Allow Users to Remove App (iOS 14 or Later) checkbox, then click the Scope tab.
Select All Mobile Devices from the Target Mobile Devices drop-down list, then select All Users from the Target Users drop-down list.
Click the Managed Distribution tab and select the Assign Content Purchased in Volume checkbox.
Click the App Configuration tab and enter the appropriate XML/PLIST configuration in the Preferences box. Refer to the Selecting the Appropriate XML/PLIST Configuration section for more information.
Click Save.
Type the following configuration in the Preferences box:
<dict>
   <key>organizationId</key>
   <string>admin@blocksi.net</string>
   <key>adminPassword</key>
   <string>123PasswordExample</string>
   <key>showDisclaimer</key>
   <string>false</string>
   <key>userAuthEnabled</key>
   <string>false</string>
</dict>
Note
Replace admin@blocksi.net with your Blocksi super-admin account email address. You may also change 123PasswordExample to a password of your choice, or keep it as the default password for accessing app details.
Type the following configuration in the Preferences box:
<dict>
   <key>organizationId</key>
   <string>admin@blocksi.net</string>
   <key>adminPassword</key>
   <string>123PasswordExample</string>
   <key>showDisclaimer</key>
   <string>false</string>
   <key>serialNumber</key>
   <string>$SERIALNUMBER</string>
   <key>userAuthEnabled</key>
   <string>false</string>
</dict>
Note
Replace admin@blocksi.net with your Blocksi super-admin account email address. You may also change 123PasswordExample to a password of your choice, or keep it as the default password for accessing app details.
Important
If you will be using this filtering type, ensure that an owner is assigned to the device.
Type the following configuration in the Preferences box:
<dict>
   <key>organizationId</key>
   <string>admin@blocksi.net</string>
   <key>adminPassword</key>
   <string>123PasswordExample</string>
   <key>showDisclaimer</key>
   <string>false</string>
   <key>userId</key>
   <string>$EMAIL</string>
   <key>userAuthEnabled</key>
   <string>true</string>
</dict>
Note
Replace admin@blocksi.net with your Blocksi super-admin account email address. You may also change 123PasswordExample to a password of your choice, or keep it as the default password for accessing app details.
Click Configuration Profiles from the main menu.
Click the + New button in the upper right corner to create a new profile.
Search for Content Filter in the list on the left and select it.
Configure the Content Filter as follows:
Setting
Value
Filter Name
Blocksi Content Filter (or any other name)
Filter Type
Plug-in
Identifier
com.blocksi.dnsproxyService Address
api.blocksi.netOrganization
leave blank
User Name
blocksiPassword
leave blank
Certificate
None
Per-app Networking
Disabled
Filter Order
Disabled
Socket Filter
Disabled
Browser Filter
Enabled
Custom Data
Enabled
Add Custom variables:
Variable
Value
organizationId
Replace with the Blocksi Super Admin email address
filteredPkgs
Enter
com.apple.mobilesafariorcom.google.chrome.ios, depending on the app you want to filter. You can filter multiple apps by separating values with a comma (e.g.,com.apple.mobilesafari,com.google.chrome.ios).Note
If you are using a serial number or user based filter, add the variables from the table below to this list as well.
Variable
Value
serialNumber
$SERIALNUMBERuserId
$EMAIL
Click Configuration Profiles from the main menu.
Click the Scope tab at the top of the page, then click Edit in the bottom right corner.
Use the Target drop-down menu to select All or Specific devices.
Click the Add button. You can select from the following:
Specific Devices - Individual machines.
Device Groups - Both static and smart groups.
Buildings or Departments - Organizational units.
Click Save.
A DNS Settings payload routes DNS queries through a Blocksi DNS server that enforces SafeSearch and YouTube restrictions. Two servers are available: a strict option and a moderate option.
Click Configuration Profiles from the main menu, then click the + New button in the upper-right corner.
On the Options tab, search for or select DNS Settings in the payload list on the left, then click + Add.
Set the DNS protocol to TLS.
In the Server Name field, enter the hostname for one of the two Blocksi DNS servers, then enter the matching address under Server Addresses:
Description
Server Name
Server Address
SafeSearch + YouTube (strict)
restrict-dns.blocksi.net34.60.103.207SafeSearch + YouTube (moderate)
restrict-moderate-dns.blocksi.net35.238.4.111To use Blocksi DNS only for search domains, enable DNS query domains, then add
google.comandyoutube.comin the Domain field. Click + Add to enter additional domains.Note
Only queries for the listed domains use the Blocksi DNS server. All other domains are resolved by the network's default DNS.
Set Disabling DNS settings by the user to Restrict.
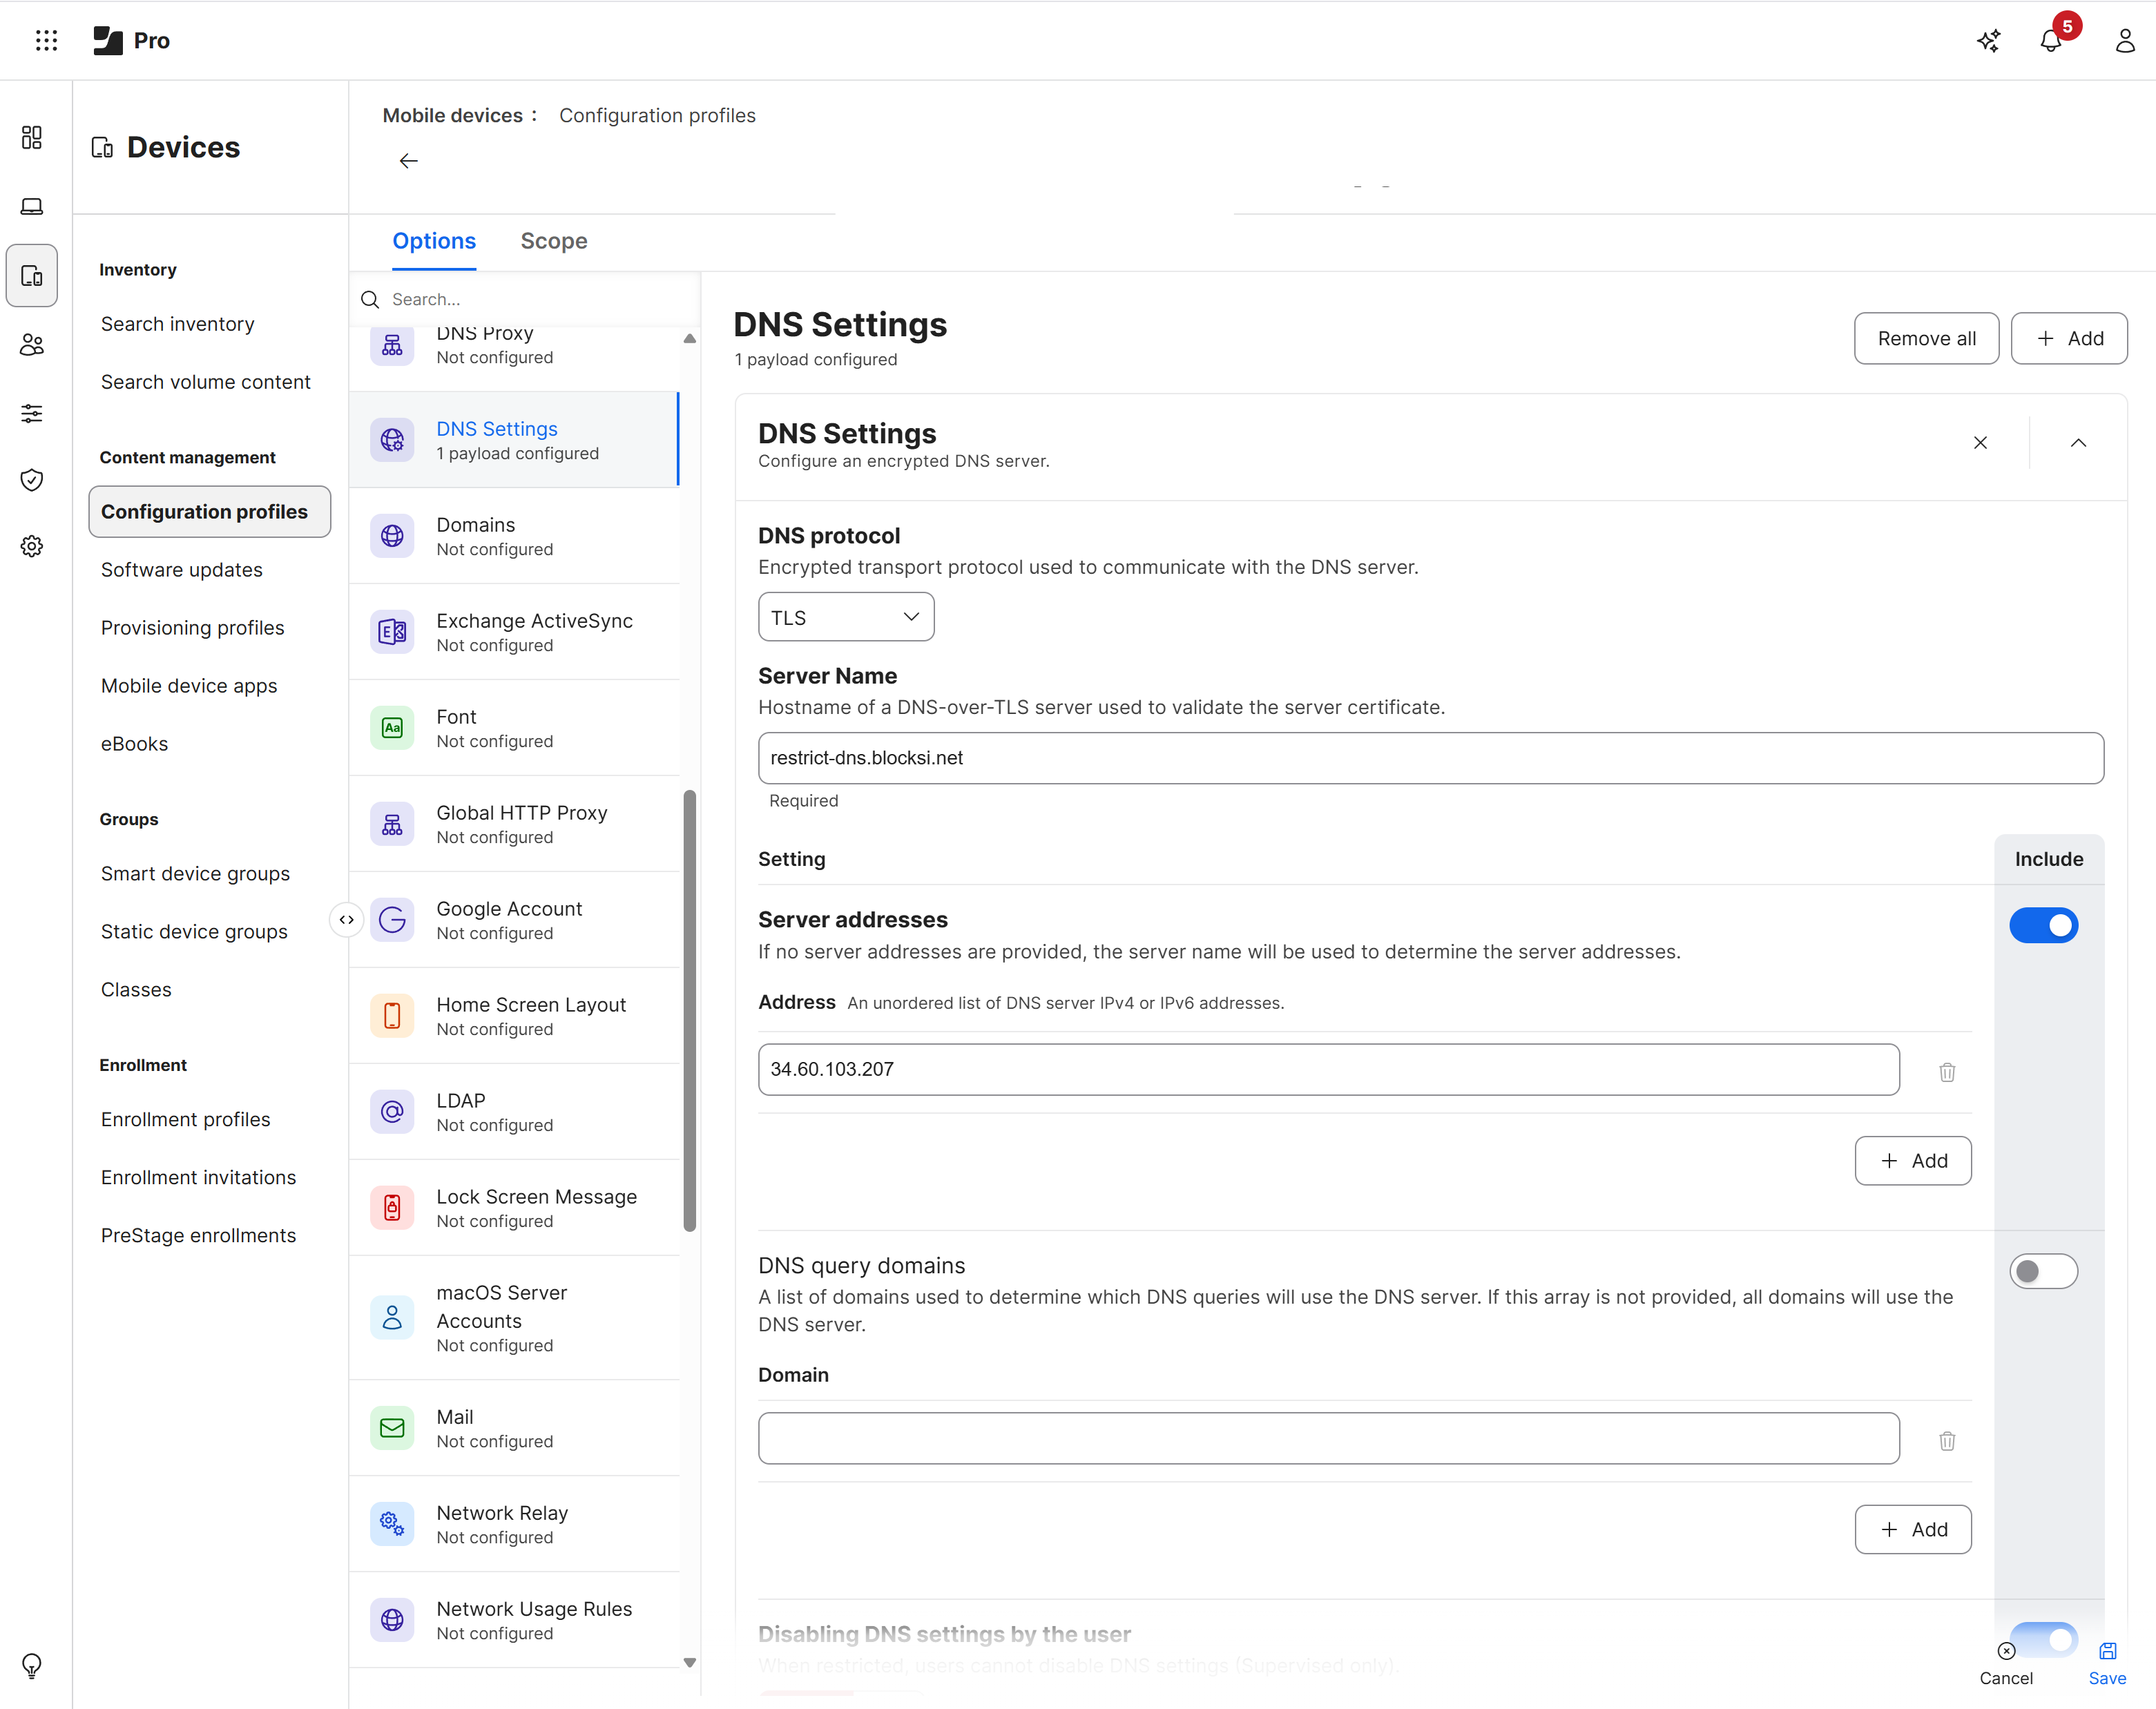
Click Save. The DNS Settings payload should resemble the image below.
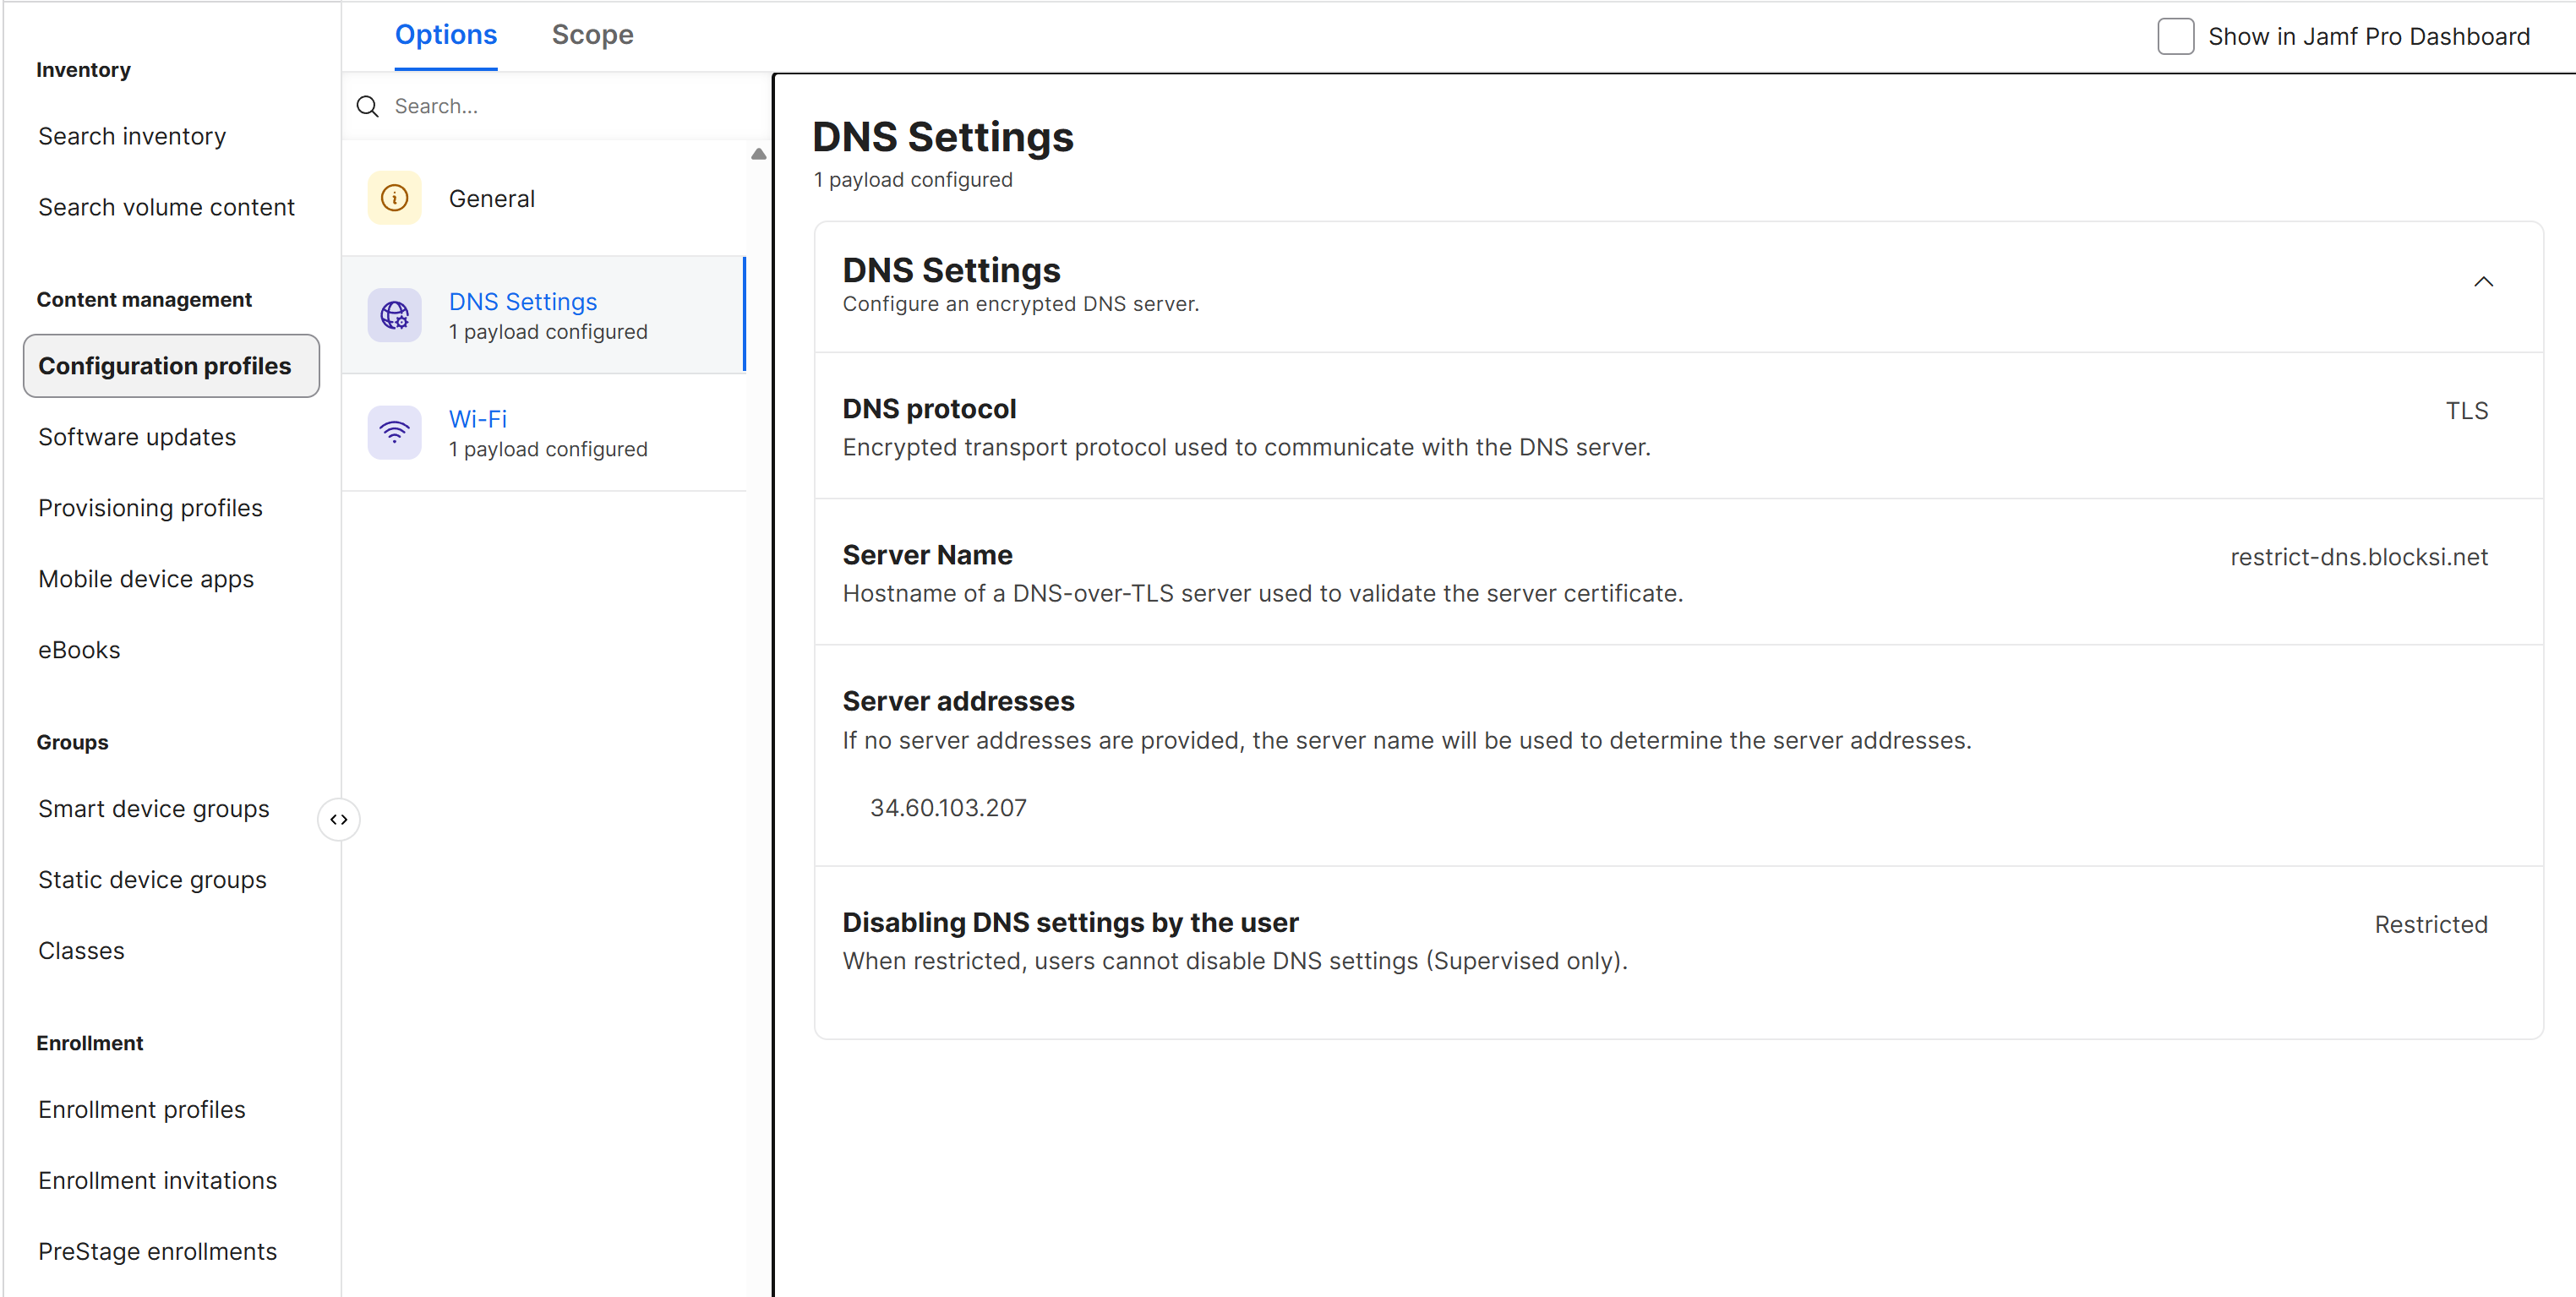
Important
Set the Scope for the DNS Settings configuration profile before deploying it.
To validate the deployment, confirm the following:
Open Settings on the iPad and navigate to General > VPN & Device Management.
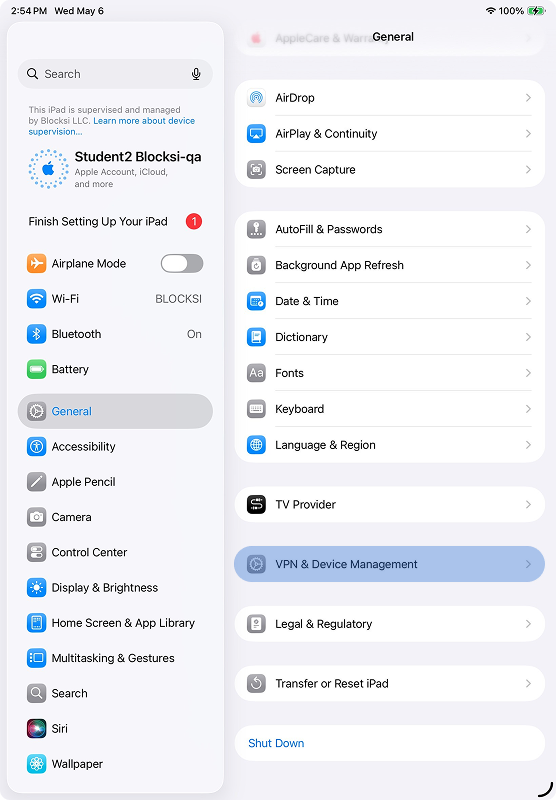
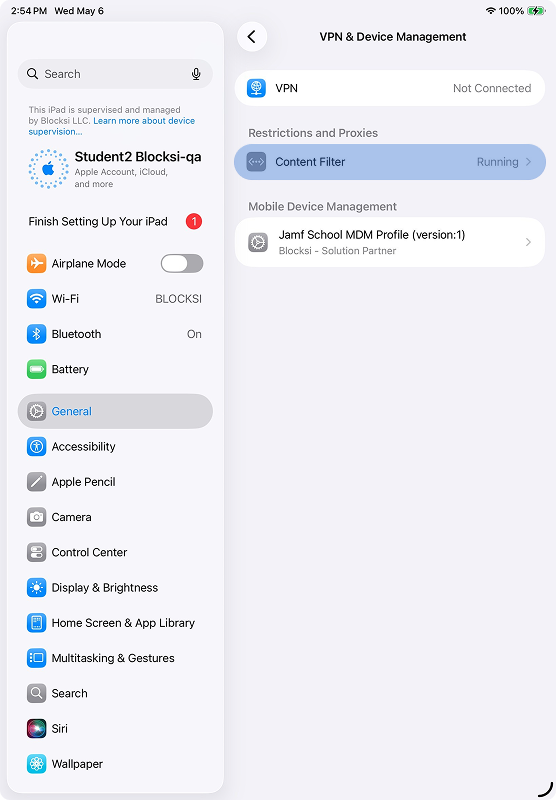
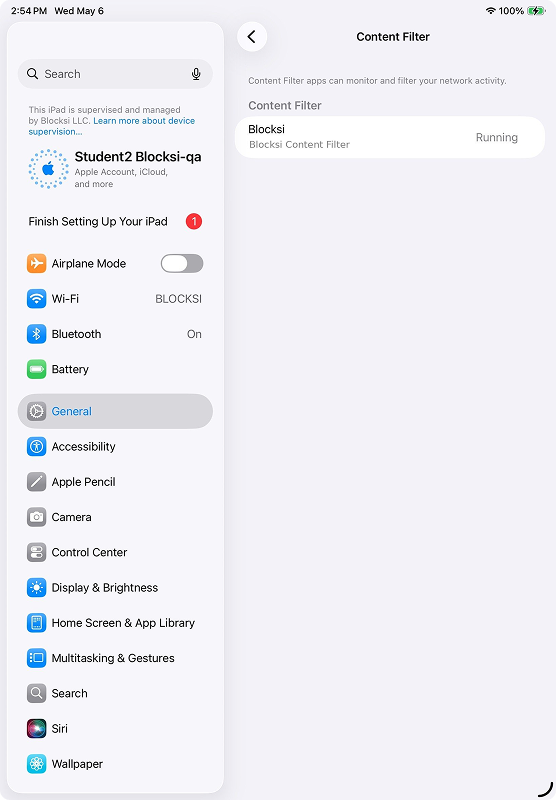
Click Content Filter under Restrictions and Proxies. The Content Filter Profile should display a status of "Running."
Open the Blocksi for iOS app. You should see an "Everything is OK" screen.
Tap Details.
Enter the admin password provided in the PLIST configuration to reveal the settings.
Confirm that the
organizationIdmatches Blocksi Super Admin email address.
Navigate to a site that is set to Allow on the filtering policy and confirm that the site opens.
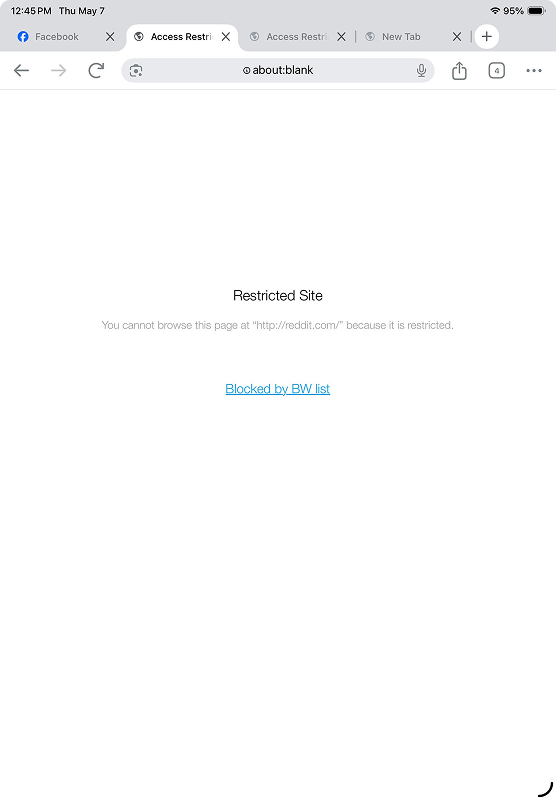
Navigate to a site that is set to Block on the filtering policy. You should be presented with an internal Restricted Site page.
Note
To create the filtering policy, refer to the Configuring the iOS Filtering Policy on the BMEE Admin Dashboard section.