Workspace One - macOS Configuration Guide
The following contains procedures for deploying Workspace One for macOS.
BlocksiForOSX.pkg
To configure the profile
Go to Workspace ONE dashboard, Resources > Profiles & Baselines > Profiles.
Create a new device profile or select an existing one to update.
To create a new profile, click Add > Add Profile.
To update an existing one, select Apple macOS and Device Profile
Configure the next settings:
System Extension
Custom Settings
Custom Attributes
Go to the System Extension section and configure it as it is shown in the example below.
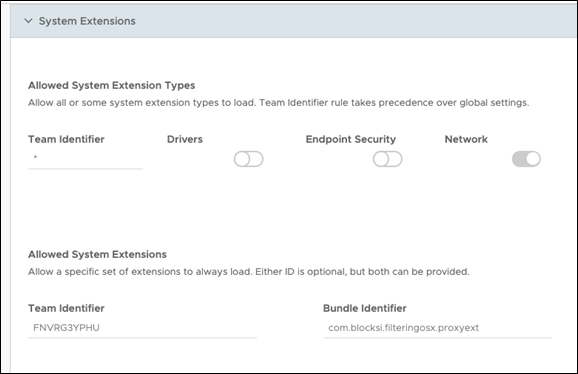
The values for the Team Identifier and Bundle Identifier are as follows:
Team Identifier: FNVRG3YPHU
Bundle Identifier: com.blocksi.filteringosx.proxyext
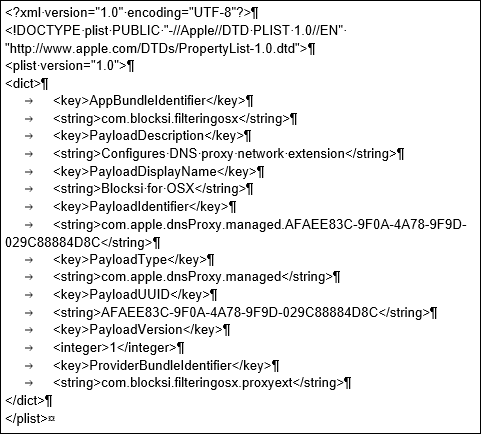
Go to the Custom Settings setting of the profile and type the following configuration:
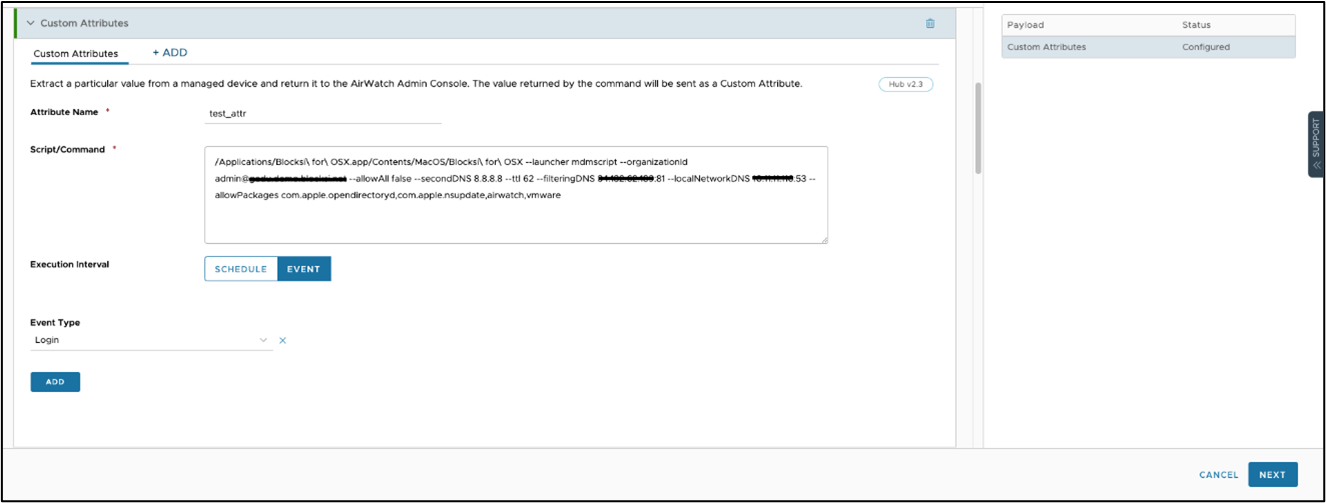
Go to the Custom Attributes setting. Add custom attributes to profile as following:
Attribute name: any
Script/Command: Copy the bellow example and replace the next values
admin@example.com with your super admin email value
XXX:XXX:XXX:XXX with the value of your AD server DNS
Script/Command text to input:

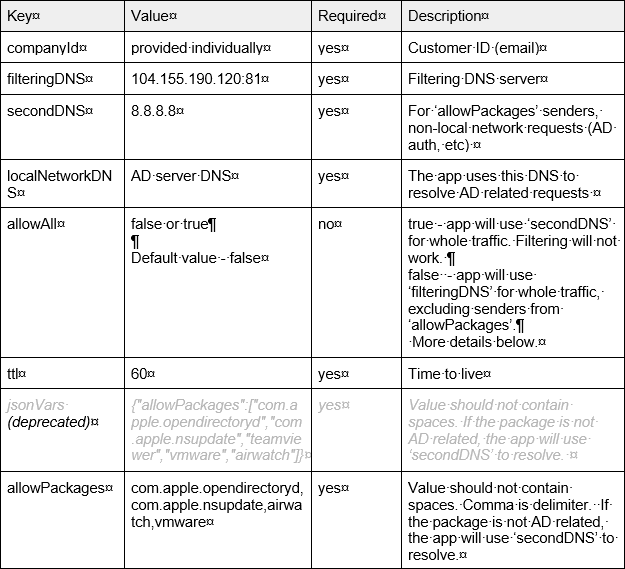
Descriptions of Key Values:
Additional Information:
JsonVars, allowPackages array - array of strings. The app checks string occurrences from this array to the package ID of sender (app). If the sender package ID contains at least one string from this array, the app will use secondDNS as DNS. For AD related senders, the app will use localNetworkDNS.
To clarify, if allowPackages contains the com.apple string, the app will use secondDNS for all packages with com.apple, including com.apple.Safari. In this case, filtering does not work for Safari browser due to the fact that the whole DNS traffic is redirected from the browser to the secondDNS.
If allowAll is true, then the app redirects all DNS requests to secondDNS.
To add the app
Go to Resources > Apps > Native.
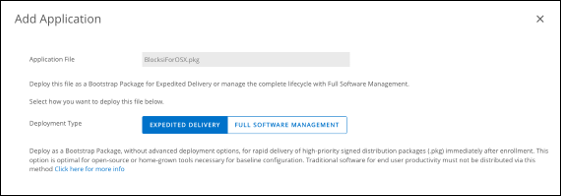
Click Add > Application File. The following window opens.

Upload PKG file installer (BlocksiForOSX.pkg). The Blocksi enrollment team will provide you with it.
Click Continue.
Select Expedited Delivery.
Configure assignments according to the requirements.
Deploy the application to your devices.