KANDJI - macOS Configuration Guide
The following contains procedures for configuring KANDJI for macOS.
The following are required for deployment.
BlocksiForOSX.pkg application. The app package file is downloaded together with these instructions.
Custom Postinstall script. The script is downloaded with these instructions. Filename is: post_install_script.sh.
Custom DNS Proxy .mobileconfig profile. The profile is downloaded together with these instructions. Filename is: Blocksi For OSX - DNS Proxy custom profile.mobileconfig.
You must sync LDAP users and OUs with Blocksi.
This is done with the Blocksi AD Synchronization app.
You must install and configure the app on your LDAP server.
Download the instructions and the app from the Downloads window on the Blocksi Admin dashboard. The download section is located under Profile > Downloads.
Filtering policy created on BM Admin Dashboard and assigned to LDAP OU. Once the LDAP OUs and Users are synced with Blocksi, you need to create some filtering policies and assign them to LDAP OUs.
On Kanji MDM: Have macOS devices already enrolled to your Kanji dashboard.
To add a custom app
Access the Library in the Kandji portal and press the + Add New button to add a new item.
Search for Custom Apps.
Click Custom Apps and then Add & Configure.
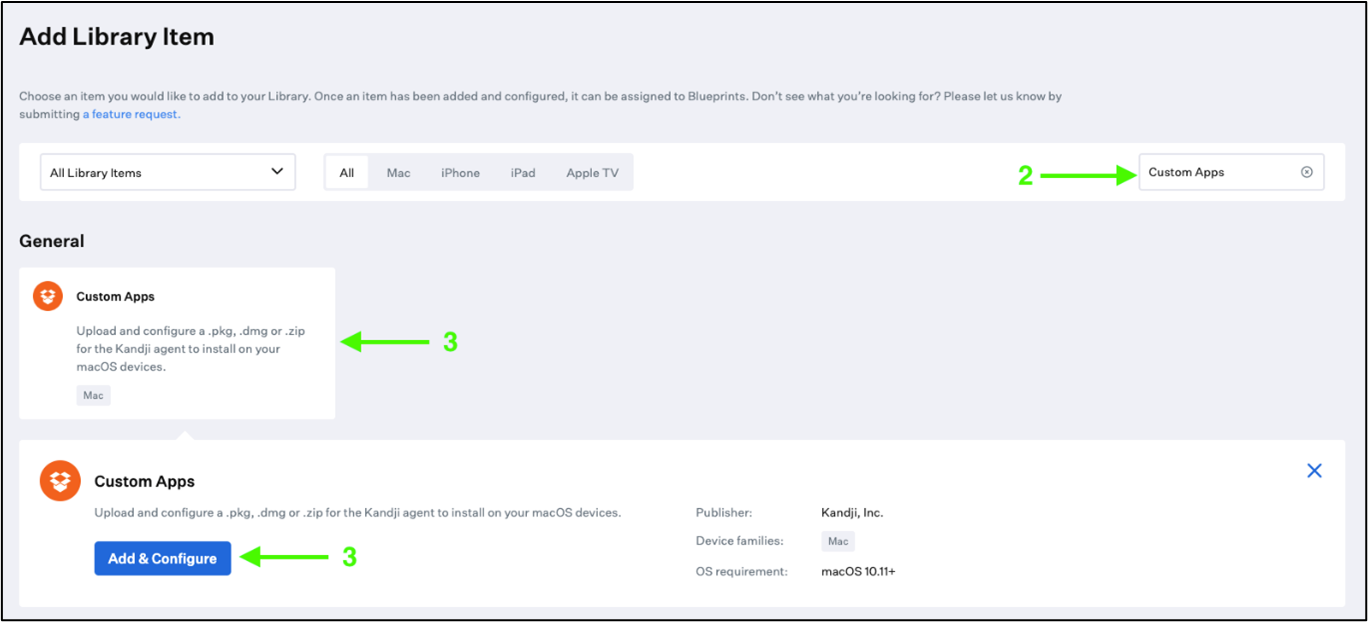
Enter a name for the app in the Add a title text field. For example: Blocksi For OSX.
Leave the Blueprint empty for now under Assignments.
Click the + Add button next to the Rules text. This opens an Assignment Rules interaction to allow you to create the rules.
Configure the Assignment Rules, as necessary. For example:
Select OS version in the Select input drop-down list.
Select is greater than from the 3rd drop-down list.
Type 12.5 in the Value field.
Click Confirm. The window should look like this:

Select Install once per device under Installation in the Settings section.
Click the toggle next to the Not available in Self Service text to enable Self Service under Self Service in the Settings section.
Before:

After:
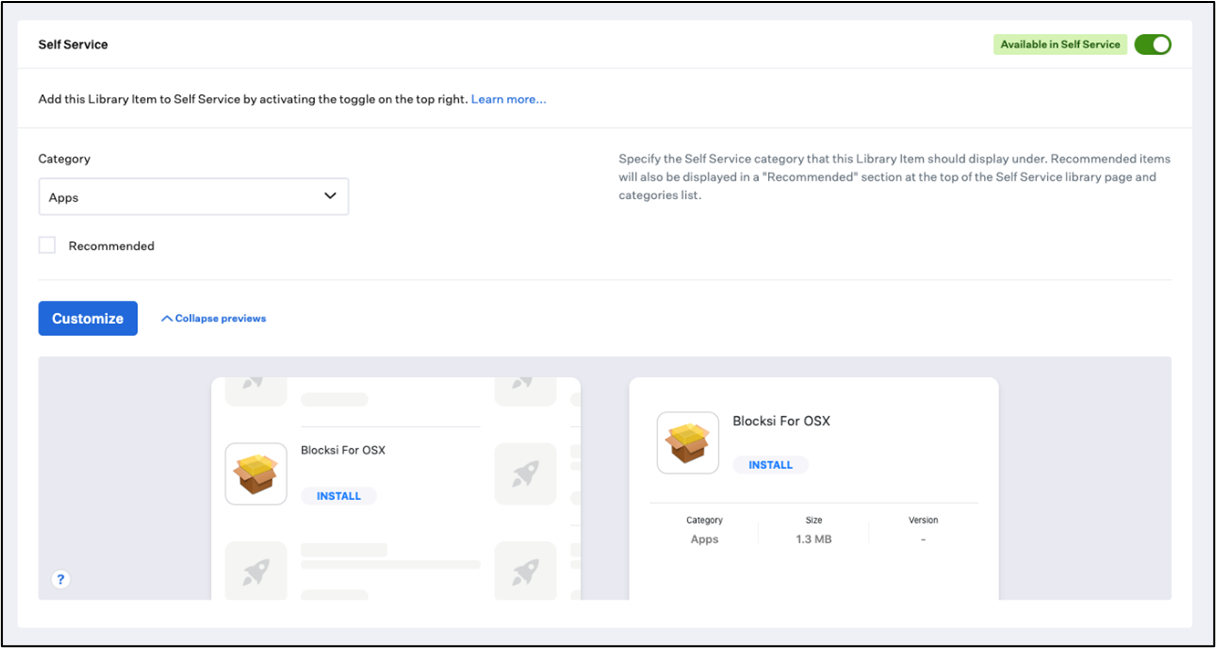
Select Apps for Category.
Customize the rest of the settings, if necessary.
Select the Installer Package option in the Install Details section and click the click to upload link and upload the BlocksiForOSX.pkg file.
Add a Postinstall Script:
Modify and type the contents of provided post_install_script.sh file, or
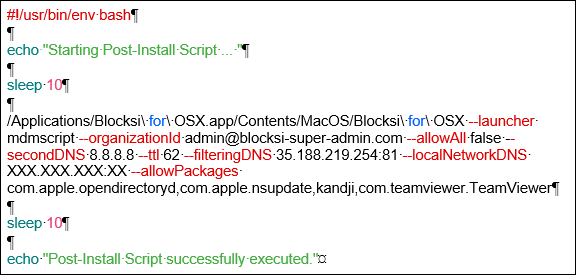
Modify and type the following text in the Postinstall script text area:
Note
Replace admin@blocksi-super-admin.com value with your school super-admin email.
Note
Replace XXX.XXX.XXX:XX with your local network AD server IP address. For example, 10.11.11.11:53.
When you have finished, the script should look like this:

Select the Restart after successful install checkbox.
Click Save.
To add the system extension
Access the Library in the Kandji portal and press the + Add New button to add a new item.
Search for System Extension.
Click System Extension and then Add & Configure. The following window opens.
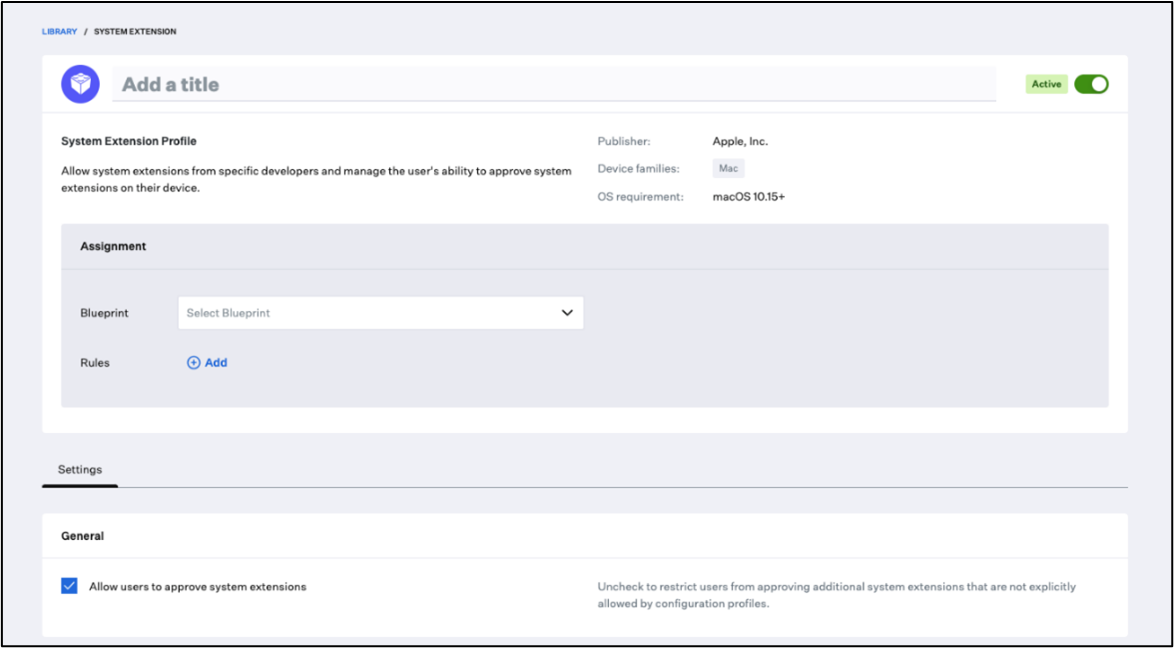
Type a name for the script In the Add a title field. For example, System Extensions for Blocksi.
Leave the Blueprint empty for now under Assignments.
Click the + Add button next to the Rules text. This opens an Assignment Rules interaction to allow you to create the rules.
Configure the Assignment Rules, as necessary. For example:
Select OS version in the Select input drop-down list.
Select is greater than from the 3rd drop-down list.
Type 12.5 in the Value field.
Click Confirm. The window should look like this:

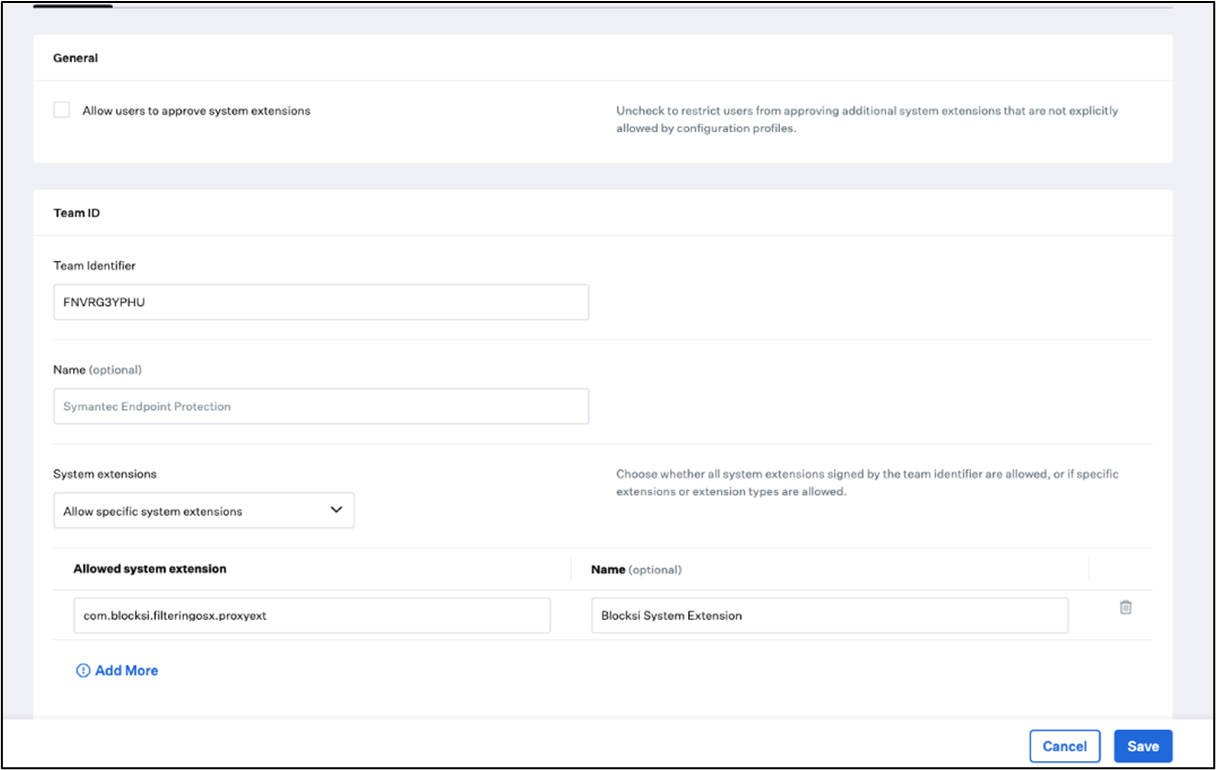
Configure the Settings section as follows:
General: Clear Allow users to approve system extensions.
Team ID: FNVRG3YPHU
Name: (Optional)
System Extensions:
Allow specific system extensions
Click Add More to add the next allowed system extension: com.blocksi.filteringosx.proxyext.
Name: Blocksi System Extension
When you have finished, you should see the following configuration:
Click Save.
To create a custom configuration profile
Due to the requirements of macOS Ventura (and above), the Blocksi For OSX app requires the addition of 1 profile called DNS Proxy that can be pushed through Kandji from the Configuration Profiles section. To have them deployed, follow the steps below.
Access the Library in the Kandji portal and press the + Add New button to add a new profile by searching and selecting Custom Profile.
Click Add & Configure. This opens a Custom Profile interaction to allow you to configure the profile.
Type a name for the custom profile in the Add a title field. For example, Blocksi for OSX - DNS Proxy custom profile.
Leave the Blueprint empty for now under Assignments.
Select Mac in the Install on section.
Configure the Assignment Rules, as necessary. For example:
Select OS version in the Select input drop-down list.
Select is greater than from the 3rd drop-down list.
Type 12.5 in the Value field.
Click Confirm. The window should look like this:

The Assignment section should look like this after it is configured:

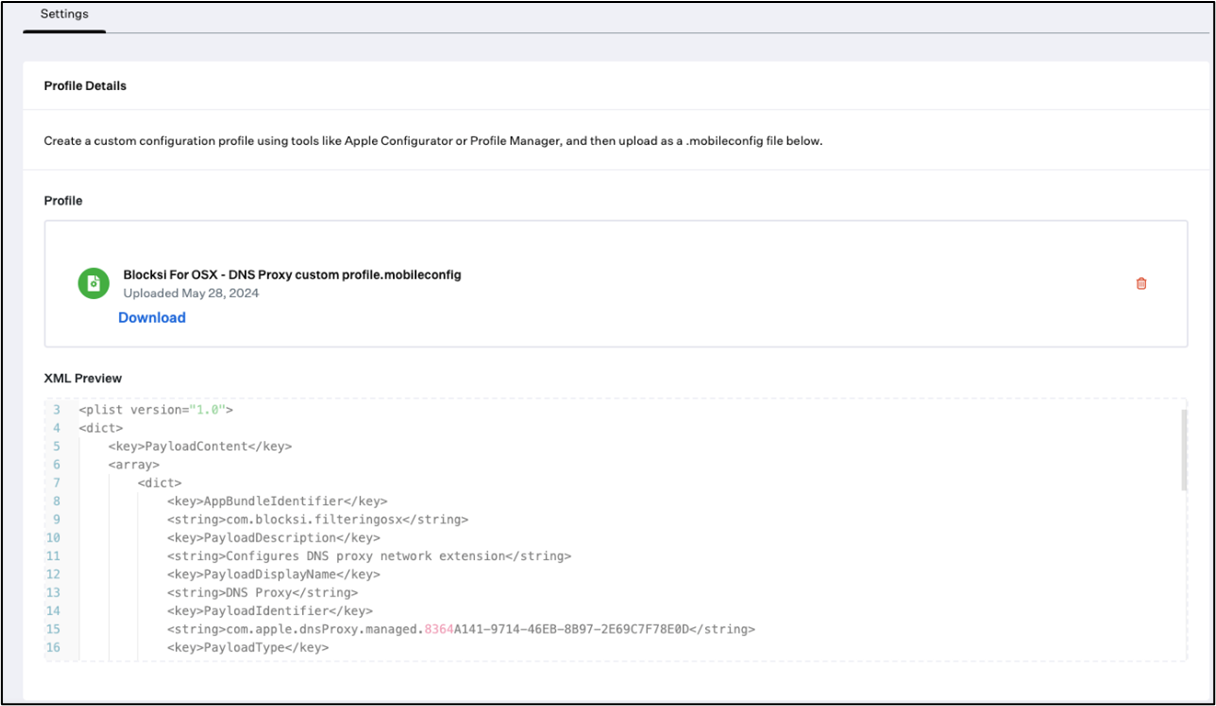
Scroll to the bottom of the page, and browse for the Blocksi For OSX - DNS Proxy custom profile.mobileconfig file in the Profile Details section and click Upload.
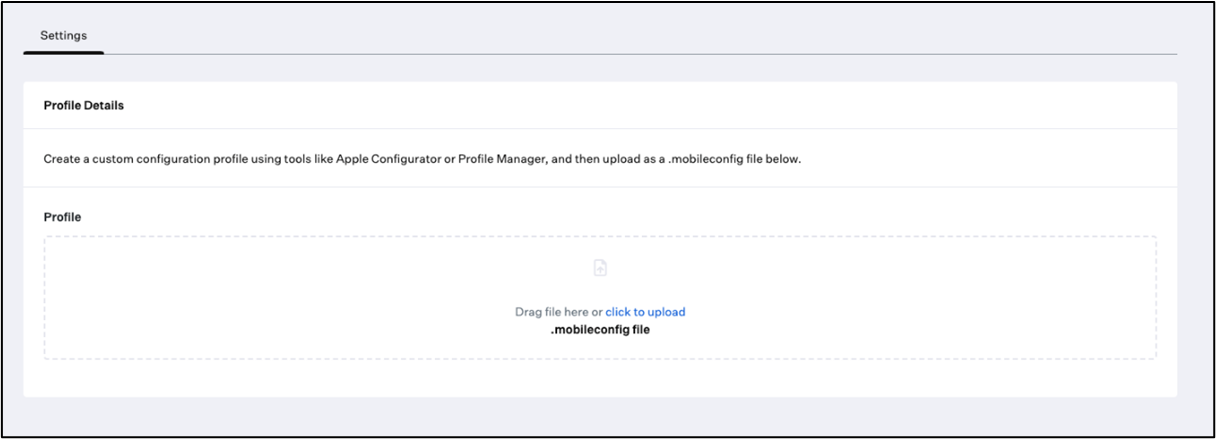
After the upload finishes, the XML Preview should look like this:
Click Save to save the profile settings.
To create a blueprint
Blueprints are used to configure app deployments and requirements.
Click Blueprints in the left menu on the Kandji dashboard. A list of created Blueprints appears.
Click + New Blueprint in the upper right-hand corner of the page to create a new Blueprint. This opens a Blueprint interaction to allow you to configure the settings.
Choose from one of the Blueprint templates on the left-hand side or create a New Blueprint by selecting start from scratch.
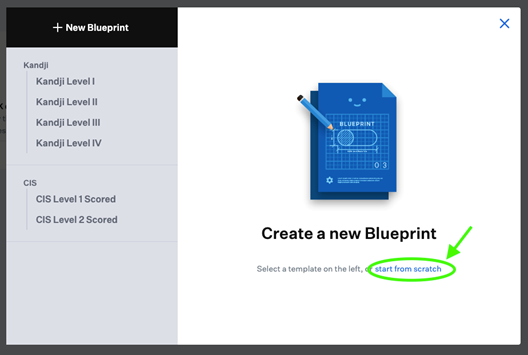
Give the blueprint a name. For example, Blueprint - Blocksi for OSX settings.
Click the Create Blueprint button.
Click Enable Library Items.
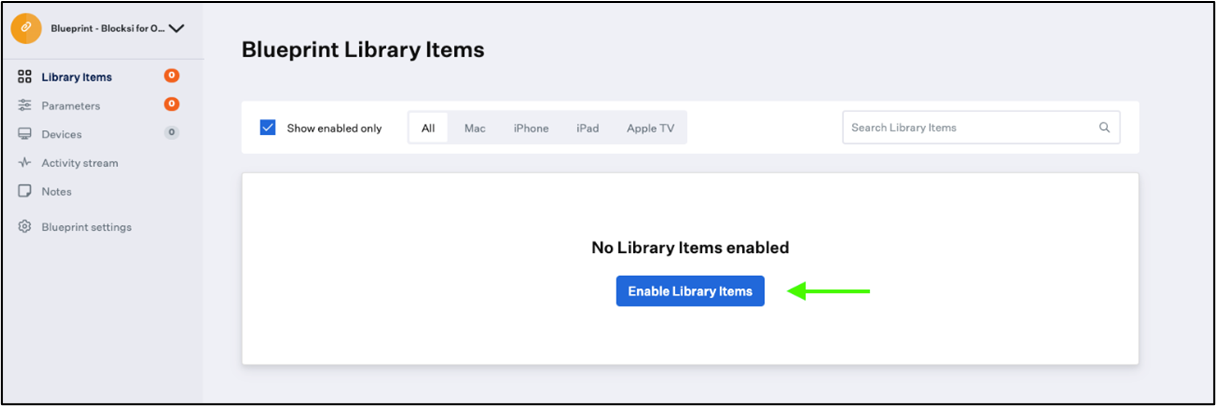
Add the previously created Library items:
Custom App
System Extension
Custom Profile
Click the toggle button to enable them.
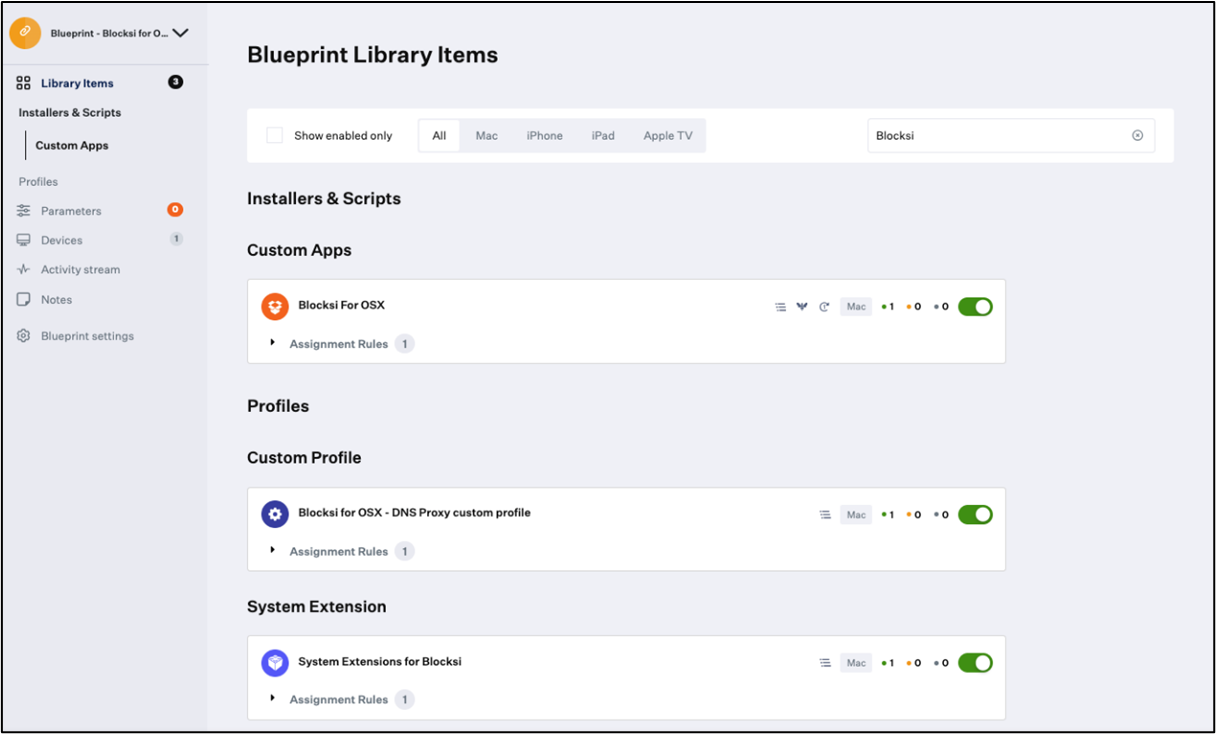
Click the Save Library Items button.
The deployment configuration is now complete. All that is needed now is to enroll a device, assign it to the created Blueprint, and verify if the configuration is correctly installed.
To enroll devices to Kandji
If you don’t have any devices enrolled on Kandji, here is an example of how to enroll them.
Navigate to Settings > Apple Integrations.
Configure Automated Device Enrollment.
Follow instructions to add the MDM configuration on business.apple.com or school.apple.com.
To enroll the device
Navigate to the Devices menu on Kandji.
Click Add A Device.
Follow the instructions to enroll the device.
Enroll the device with the correct enrollment code for the Blueprint created in the previous steps.
Do this for every device you need to enroll.
To test the configuration
Make sure you configure the AD bind to the Mac device on the enrolled device to login with AD users.
Login with a user to a device and wait for the MDM configuration blueprints to install.
Note
It can take anywhere up to 30 minutes for all items to install.
Wait for 30 minutes for the auto-restart of the device or trigger it manually.
Sign in with an AD user account that has the OSX filtering policy assigned on the LDAP OU after the restart.
To verify Blueprint and app installation
You should see a filter icon in the upper right-hand corner of the screen when you sign in to the device. This is the Blocksi for OSX app agent.
Open System Settings and go to Network > Filters.
Make sure that the Blocksi Filter is Enabled.
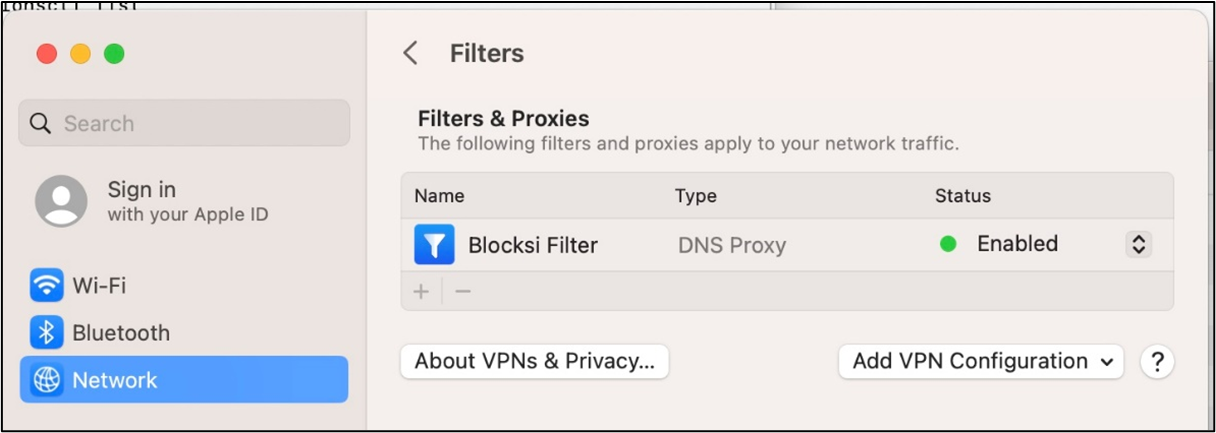
Verify Blueprint installation on Kandji:
On Kandji, navigate to Devices and click the target device.
For each item in the Status tab, check that their status is either Pass or Success.

Expand the Blocksi for OSX column and verify that the Postinstall script exited with success.
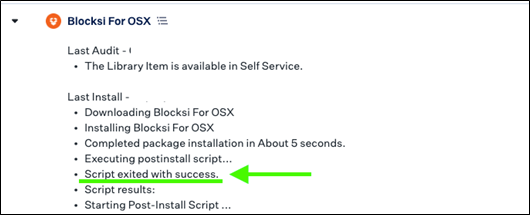
At the end of the log transcript, you should also see the log Post-Install Script successfully executed.
To verify filtering
Login to the Mac device with an LDAP user.
Open a browser to see if filtering is applied correctly.
Navigate to some sites that you either blocked with the Web filter or Exception List.
You should be displayed with one of the following screens on blocked sites:
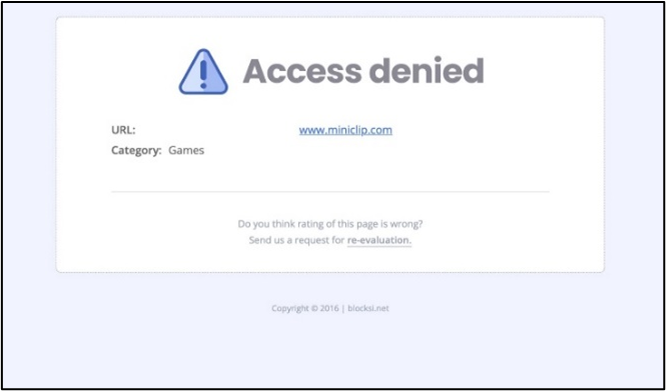
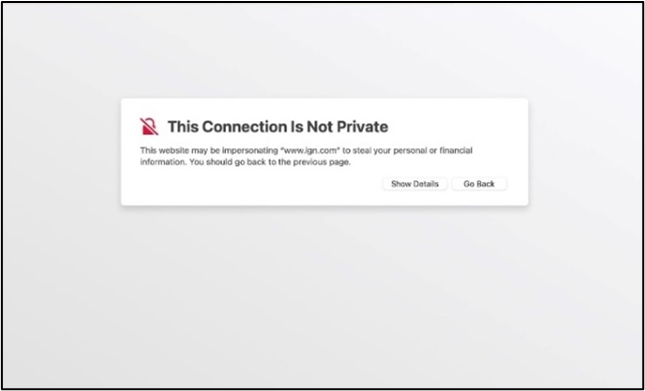
On the Blocksi Admin dashboard, navigate to Web Analytics > Insights and go to Logs. Verify that the user browsing done on the Mac Device is showing in the logs.