JAMF School - macOS Configuration Guide
The following contains procedures for configuring JAMF School for macOS.
You must have the following in place prior to deployment:
BlocksiForOSX.pkg application: The app package file is downloaded together with these instructions.
Custom script: The script is downloaded with these instructions. Filename is: pass_values_script.sh.
Custom DNS Proxy .mobileconfig profile. The profile is downloaded together with these instructions. Filename is: JAMF School MDM - DNS Proxy custom profile.mobileconfig.
LDAP users and OUs must be synced with Blocksi.
This is done with the Blocksi AD Synchronization app.
You must install and configure the app on your LDAP server.
Download the instructions and the app from the Downloads window on the Blocksi Admin dashboard. The download section is located under Profile > Downloads.
Filtering policy created on BM Admin Dashboard and assigned to LDAP OU. Once the LDAP OUs and Users are synced with Blocksi, you need to create some filtering policies and assign them to LDAP OUs.
On JAMF School MDM
Have macOS devices already enrolled to your JAMF School Dashboard.
Have Device Groups defined for student macOS devices.
To add Blocksi for the OSX application
On JAMF School MDM, navigate to Apps > Inventory in the left menu.
Click + Add App and select Add In-House macOS package from the drop-down list.
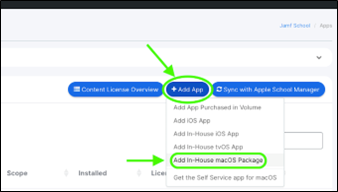
Upload the BlocksiForOSX.pkg application.
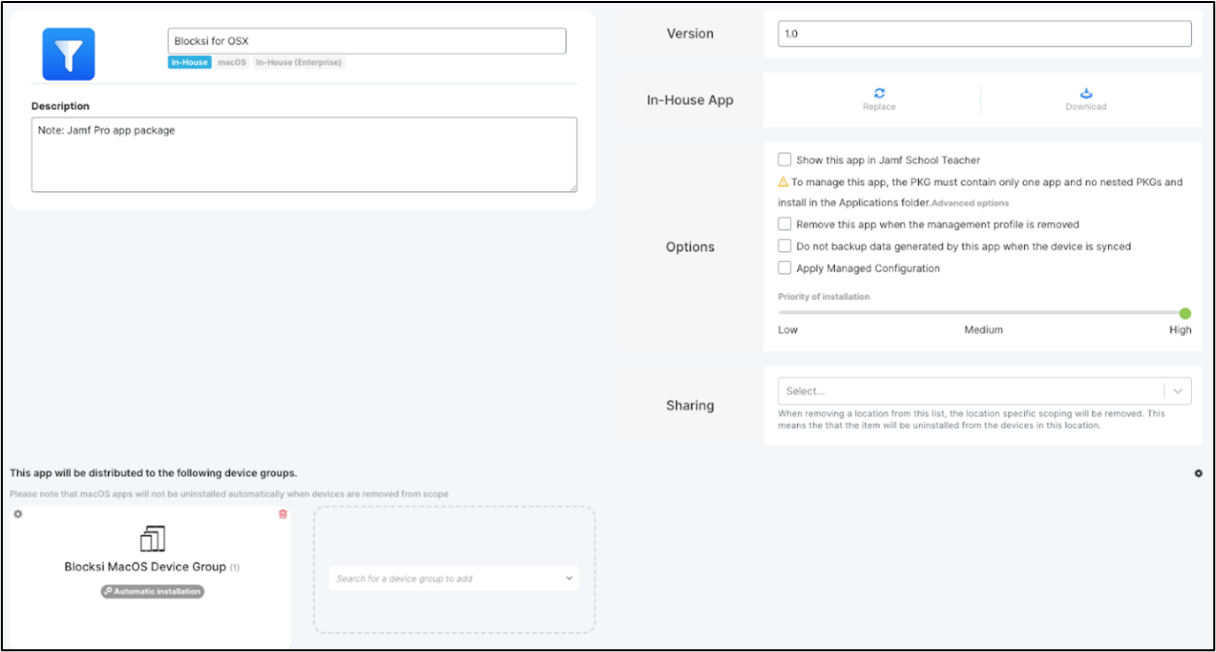
Modify the App name and Version.
Click Show advanced options in the Options section.
Set Priority of installation to High.
Click the + symbol under the This app will be distributed to the following device groups section to deploy the application to target devices.
Make sure Automatic Installation is set for the group.
Click Save. When you have finished, you should see the following screen:
To create a profile
On JAMF School MDM, navigate to Profiles > Overview in the left menu.
Click + Create Profile to create a new profile. The Create Profile window opens.
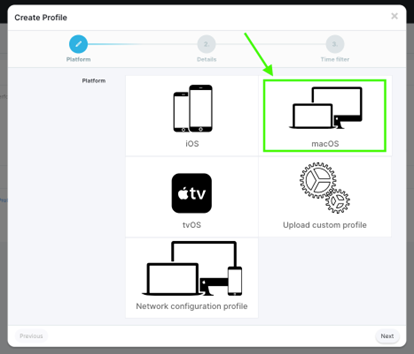
Select macOS under Platform.
Select Device Enrollment for Enrollment type and click Next. The following screen appears.
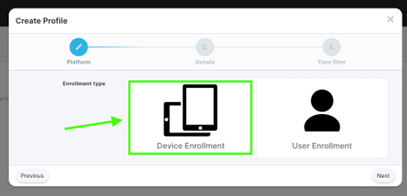
Choose a Profile name. For example: Blocksi macOS Device profile.
Add a description, if needed.
Leave the Use time filter checkbox cleared under Time filter.
Click Finish.
To configure the system extensions
Click System Extensions under macOS payload on the Profile Setting Configuration page.
Click Configure.
Clear the Allow users to approve system extensions checkbox.
Type FNVRG3YPHU in the Team Identifier field.
Select all the following: Driver Extension, Network Extension, and Endpoint Security Extension under Allowed System Extension Types in the Allowed System Extensions section.
Click + Add and type com.blocksi.filteringosx.proxyext.
Click Save. When you have finished, you should see the following screen:
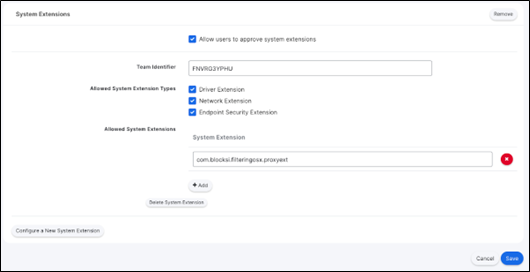
To configure the scope
Click Scope under General Settings on the Profile Setting Configuration page.
Click the + button to add the Device Groups that need this profile installed.

Make sure Automatic Installation is set for the group.
Click Save. When you have finished, you should see the following screen:

To configure a profile for DNS proxy
This profile is needed to install the Blocksi for OSX application in the background without user interaction.
Navigate to Profiles > Overview in the left menu on JAMF School MDM.
Click + Create Profile to create a new profile. The Create Profile window opens.
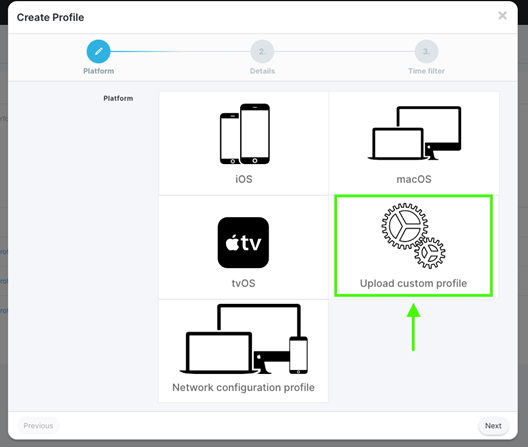
Select Upload custom profile under Platform.
Upload the JAMF School MDM - DNS Proxy custom profile.mobileconfig profile that was provided with these instructions.
Click Next.
Give the profile a name, for example: macOS Device Profile - DNS Proxy.
Add a description, if needed.
Leave the Use time filter checkbox cleared under Time filter.
Click Finish.
To configure the DNS proxy profile
Click + under the This profile will be distributed to the following device groups text to assign the profile to device groups.
Select the target groups from the drop-down list.
Make sure Automatic Installation is set for the group.
Click Save. When you have finished, you should see the following screen:
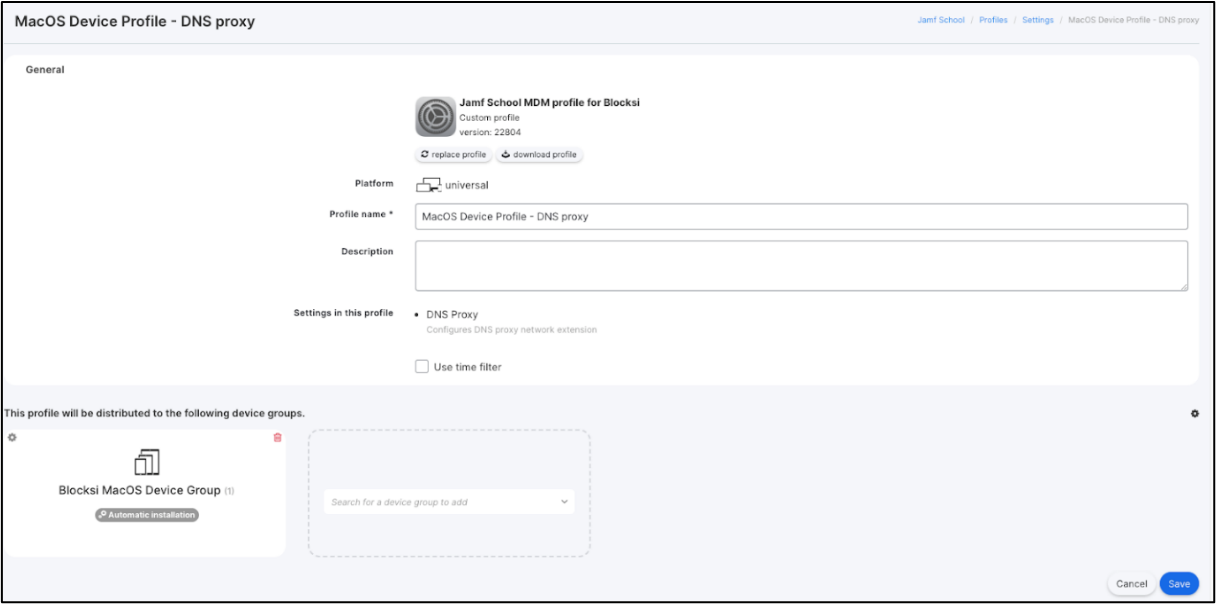
To create a script
Navigate to Scripts in the left menu on JAMF School MDM.
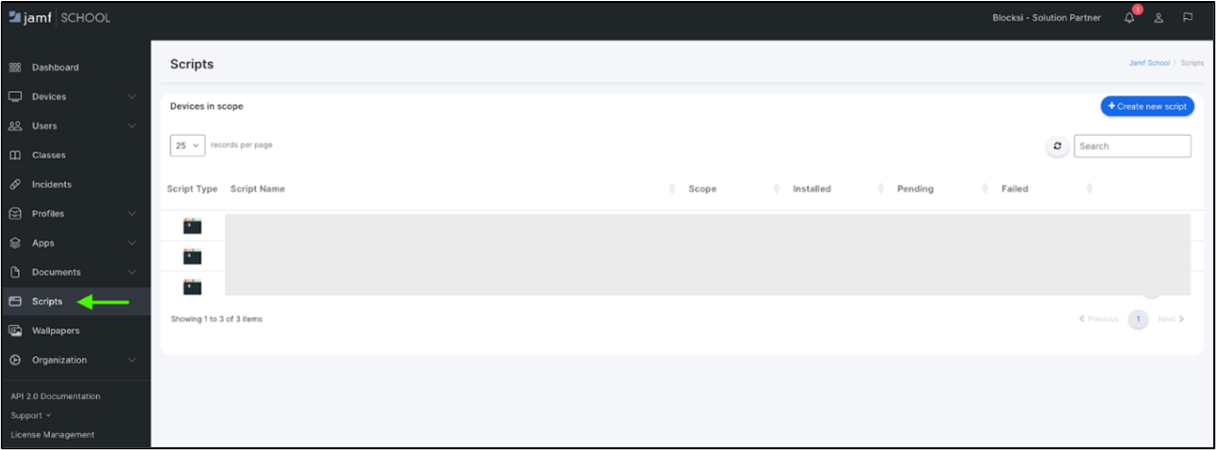
Click + Create new script in the upper right-hand corner of the page to create a new script. You should now see the following screen:
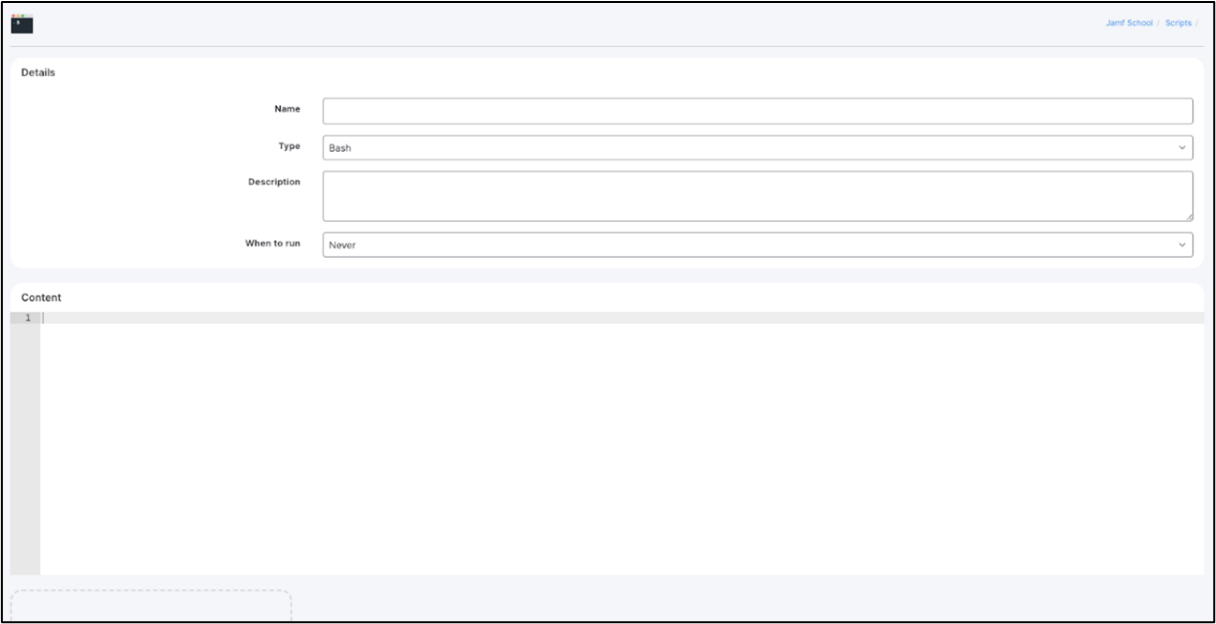
Type the following information:
Name: blocksi_pass_values_script
Type: Bash
Description: Script to pass values to Blocksi for OSX application
When to run: Just once
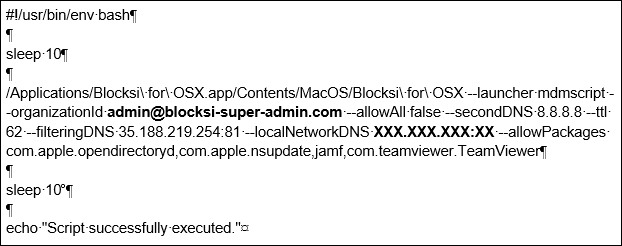
Copy the text below in the Content area.
Note
Replace admin@blocksi-super-admin.com with your school super-admin email.
Note
Replace XXX.XXX.XXX:XX with your local network DNS address. For example, 10.11.11.11:53.
Click the + button under the Content area to assign the script to a device group.
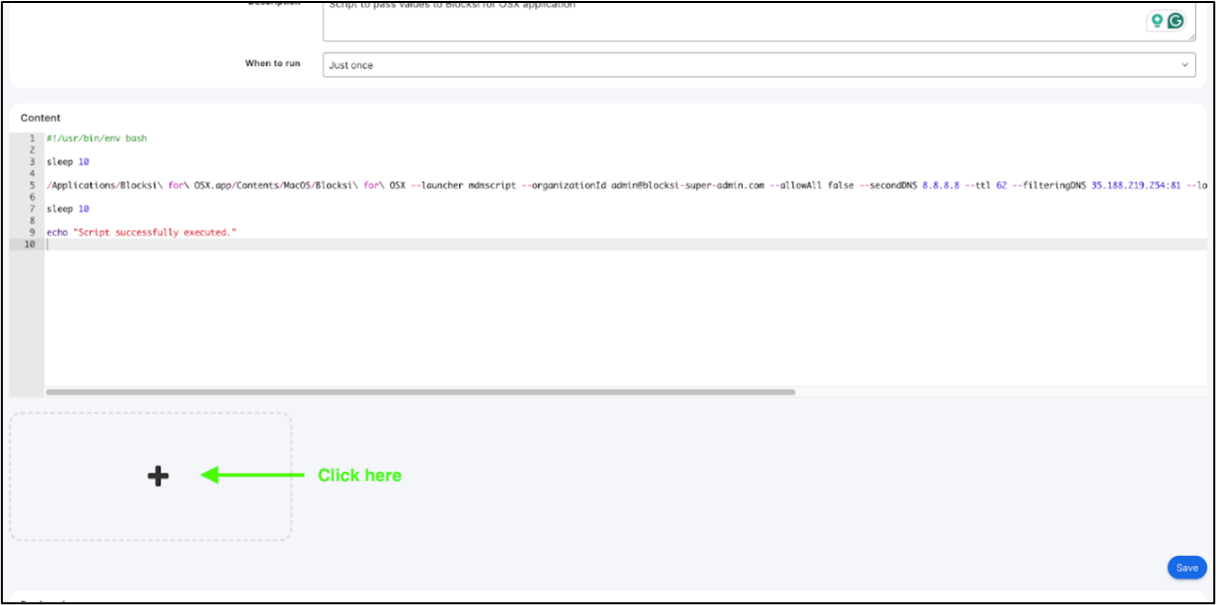
Select all applicable device groups from the list.
Make sure Automatic Installation is set for the group.
Click Save to save the script configuration.
To test the configuration
If you haven’t already, configure AD connection to your LDAP server on the test Mac device to login on the device with an LDAP user account.
Assign a filtering policy to a synced LDAP User OU on Blocksi Admin Dashboard (bm.blocksi.net).
Sign in to a managed device with an administrator account to check the app, script, and profile deployment. Upon login, a filter icon appears in the upper right-hand corner of the screen.
Open System Settings and go to Network > Filters.
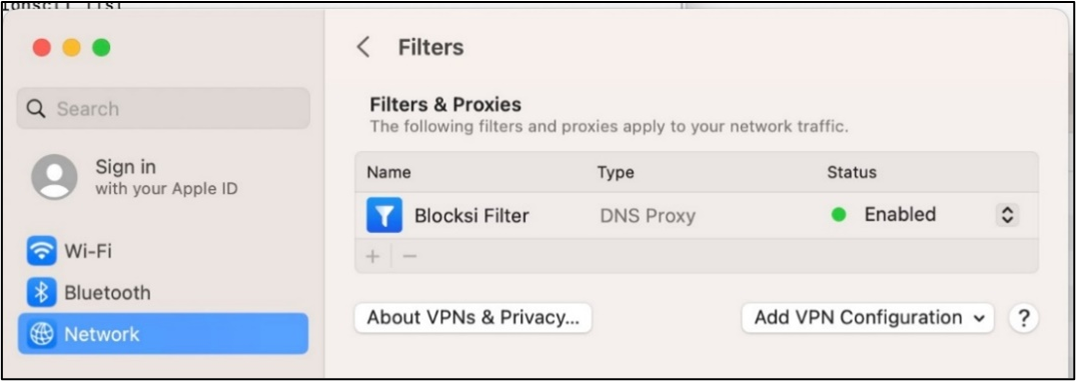
Make sure that the Blocksi Filter status is Enabled and a green dot 🟢 is visible.
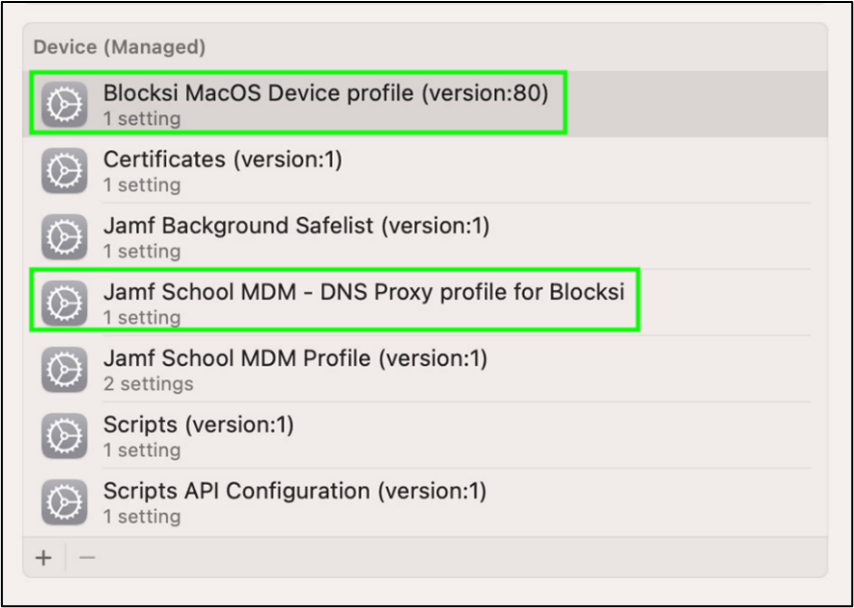
Navigate to Privacy & Security > Profiles in System Settings. Some of the profiles are installed by default upon the device enrollment to JAMF School MDM. Make sure that you see the following profiles installed for the Blocksi for OSX deployment:
Blocksi macOS Device Profile
JAMF School MDM - DNS Proxy profile for Blocksi
To verify filtering
Login to the Mac device with an LDAP user.
Open a browser to see if filtering is applied correctly.
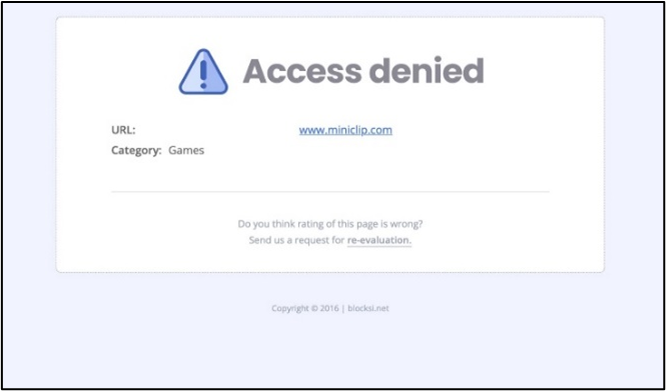
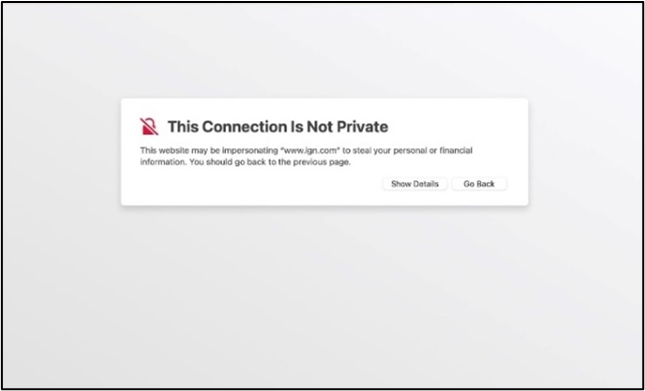
Navigate to some sites that you either blocked with the Web filter or Exception List.
You should be displayed with one of the following screens on blocked sites:
Go to the Blocksi Admin dashboard and navigate to Web Analytics > Insights and go to Logs.
Verify that the user browsing done on the Mac Device is showing in the logs.