DNS filtered IP addresses are used for the Blocksi DNS product.
Add as many DNS filtered IP addresses as you need.
To add a DNS filtered IP Address
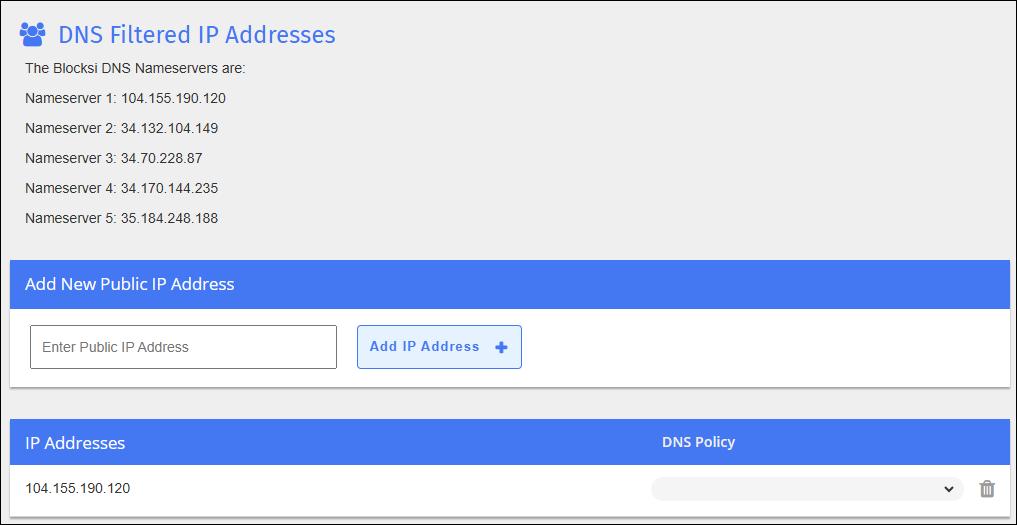
Click Organizations and Entities from the Main Menu and then click DNS Filtered IP Addresses from its sub-menu. The DNS Filtered IP Addresses screen appears.

Type the IP address in the Enter Public IP Address text box.
Click Add IP Address +. The new IP address appears in the list below.
Select the appropriate DNS policy from the drop-down list to the right. The address and its policy are saved automatically when you leave the screen.
Click Update Policies on All Clients after you select the DNS policy to commit the changes.
Update the nameservers for your network to point to the Blocksi DNS Server listed in the DNS Filtered IP Addresses page. The Blocksi DNS Nameserver is 104.155.190.120. The secondary Blocksi DNS IP is 35.188.219.254. This ensures that the DNS filtering is fully active.
Change the policy of a DNS filtered IP address as needed.
To change the policy of a DNS filtered IP address
Click Organizations and Entities from the Main Menu and then click DNS Filtered IP Addresses from its sub-menu. The DNS Filtered IP Addresses screen appears.

Locate the IP address for which to change the policy.
Select the desired policy from the DNS Policy drop-down list. The address and its new policy are saved automatically when you leave the screen.
Delete a DNS filtered IP address when you no longer need it.
To delete a DNS filtered IP address
Click Organizations and Entities from the Main Menu and then click DNS Filtered IP Addresses from its sub-menu. The DNS Filtered IP Addresses screen appears.

Locate the IP address to delete.
Click the
 icon. A confirmation prompt appears.
Click OK to delete the policy.