FileWave - iOS Configuration Guide - Filtering by Serial Number
Note
Blocksi supports iOS 13.1 and higher.
To get your organization ID and name
Sign in to your Apple School Manager account with your Administrator credentials.
Click your account name in the bottom left of the sidebar.
Go to Preferences > Organization Information.
Locate your Organization Name. This name appears above your Organization ID.
Send this information to Blocksi to add your organization to the approved list of customers who can use Blocksi's filtering app.
To configure volume purchasing
Log in to your company's account at Apple Business Manager (business.apple.com) or Apple School Manager (school.apple.com).
Click Preferences at the bottom of the sidebar.
Click Payments and Billing.
Click Download in the Content Tokens section next to the correct server location token under the Apps and Books tab. The token is downloaded to the Downloads folder on your machine.
Navigate to the FileWave Admin console.
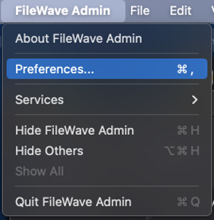
Click FileWave Admin > Preferences.
Navigate to the VPP & DEP tab.
Click Configure Tokens and sign in with your FileWave superuser credentials. The following window opens.
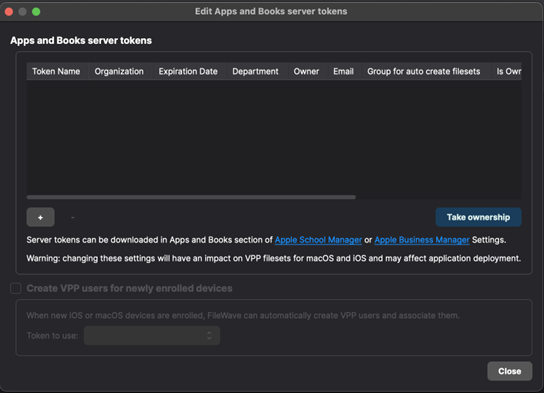
Click the + button to add a new VPP service token. The following window opens.
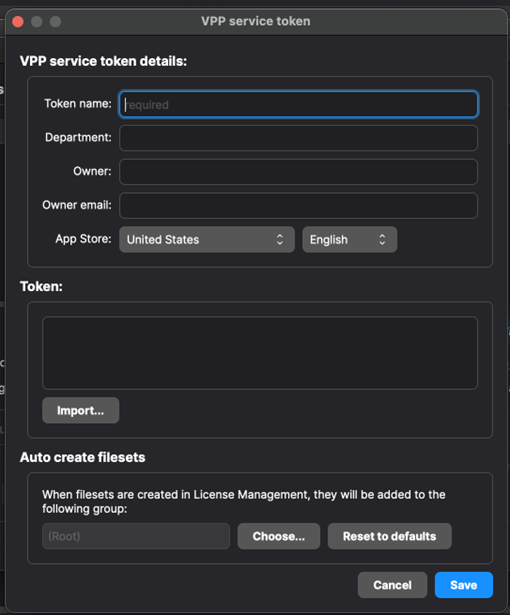
Give the token a name; for example: Blocksi VPP token.
Select your desired App Store.
Click the Import button in the Token section and import the .vpptoken downloaded from the ABM or ASM.
Choose a desired fileset group in the Auto create filesets section. The page should look like this once done.
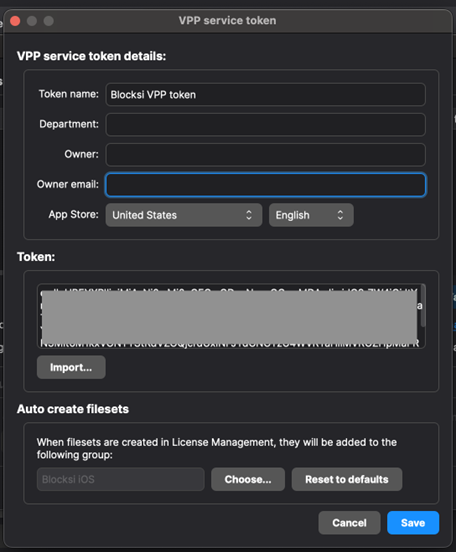
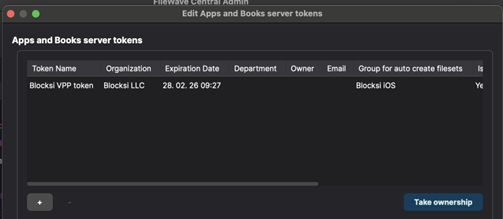
Click Save to finish. The token should appear in the Apps and Books server tokens table, as shown below.
To add the app to a fileset
Close the Preferences window and navigate to the License Management menu on the FileWave Central Admin console.

Click the Blocksi For iPad application in the License Management table and click Create Fileset. The app is automatically added to your Fileset location.
Note
If you selected a specific group for the VPP token assignment, the app is added to that Fileset Group. In case you have not yet created a group, we recommend creating one on the Fileset menu.
To configure the app preferences
Locate the Blocksi For iPad app in the Fileset menu.
Click Properties.
Configure the Details tab as necessary.
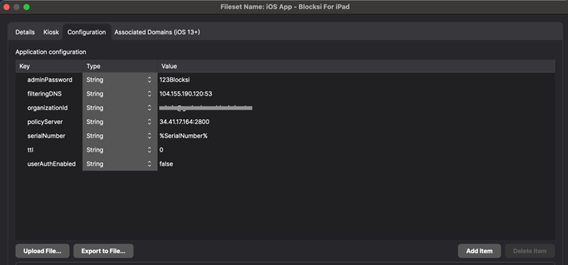
Navigate to the Configuration tab and upload the following PLIST configuration.
<?xml version="1.0" encoding="UTF-8"?>;
<!DOCTYPE plist PUBLIC "-//Apple//DTD PLIST 1.0//EN" "http://www.apple.com/DTDs/PropertyList-1.0.dtd">
<plist version="1.0">
<dict>
<key>adminPassword</key>
<string>123Blocksi</string>
<key>filteringDNS</key>
<string>35.188.25.216:53</string>
<key>organizationId</key>
<string>$admin_email</string>
<key>policyServer</key>
<string>34.41.17.164:2800</string>
<key>serialNumber</key>
<string>%SerialNumber%</string>
<key>ttl</key>
<string>0</string>
<key>userAuthEnabled</key>
<string>false</string>
<key>showDisclaimer</key>
<string>false</string>
<dict>
<plist>
Note
The PLIST file is also part of these instructions for easier import. Replace the value of the password example 123Blocksi with any string. Replace the $admin_email value with the super-admin email address you are using with Blocksi.
The configuration tab should look like this when you are finished.
Click OK to save the changes.
To create the fileset for DNS proxy profile
Select your fileset group and click the New Fileset button on the Fileset menu.
Select Apple > Profile.
Click the Load Profile button and upload the .mobileconfig file downloaded with these instructions.
Open the DNS Proxy setting and modify the Provider Configuration section.
Replace the value of the password example 123Blocksi with any string.
Replace the $admin_email value with the super-admin email address you are using with Blocksi.
Ensure that this configuration is the same as the one you configured in the App Configuration step.
Click Save. The Fileset group should look like this.

To create a deployment profile and assign the fileset group to target devices
Navigate to the Deployments menu on the FileWave Central Admin Console.
Click the New Deployment button to create a new deployment.
Give the deployment a name; for example, Blocksi for iPad deployment.
Click the + button and select the target devices in the Targets section.
Navigate to the Filesets tab, click the + button, select the previously configure Fileset Group, and click OK.
Click the Options tab.
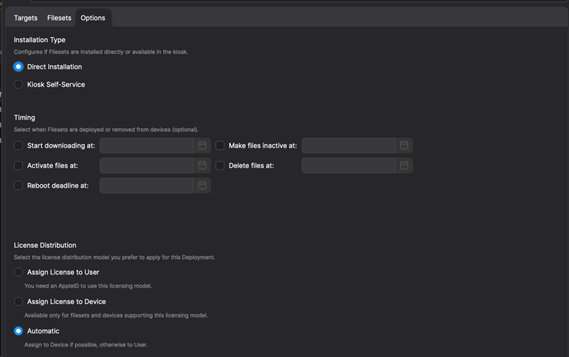
Select Direct Installation as the Installation Type.
Leave Timing with default values (all checkboxes cleared).
Select Automatic under License Distribution. The Options tab should look like this when you are finished.
Click OK to complete the configuration of the deployment profile.
Important
After you have finished with the setup, do not forget to click Update Model to start the deployment process to target devices.
To install the TestFlight version of the app
Your Apple Account needs to be added to the list of emails that can download the test and unreleased version of the Blocksi for iPad app (version 1.1) in order for you to have the option of using and downloading the TestFlight version of the app.
After that is completed, you have to download the TestFlight app on a target iPad. When the app is installed, you will have the option to download the test version of the Blocksi For iPad application.
To verify the installation and deployment
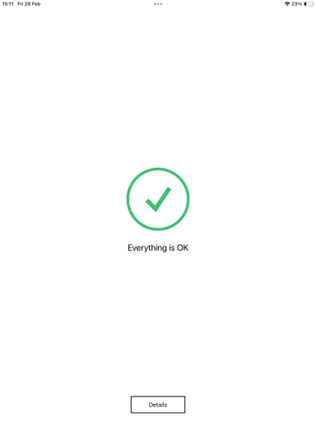
To ensure the DNS Proxy profile and app were correctly configured and deployed, open the installed Blocksi for iPad application on the target device. When it opens, you should see the following message: Everything is OK.
To ensure the DNS Proxy is running correctly, open the Settings app.
Navigate to General > VPM & Device Management.
Click the DNS row under Restrictions and Proxies. The DNS Proxy profile should be showing as Running.
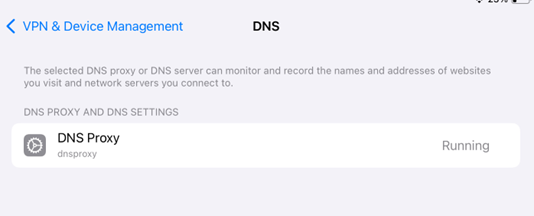
If both of the above are running properly, open a browser and verify that filtering by serial number is working correctly.
To create the filtering policy, please see Configuring the iOS Filtering Policy on the BMEE Admin Dashboard.