JAMF School - iOS Configuration Guide
The following contains procedures for configuring JAMF School for iOS.
You must have the following ready prior to deployment:
iPad Devices already enrolled in your JAMF School Dashboard.
Device Groups defined for student iPad devices.
To get your organization ID and name
Sign in to your Apple School Manager account with your Administrator credentials.
Click your account name in the lower left-hand corner, and then choose Preferences from the drop-down menu.
Locate your Organization ID and Company Name.
Send this information to Blocksi to add your organization to the approved list of customers who can use Blocksi's filtering app.
To configure volume purchasing
Sign in to Apple School Manager at https:school.apple.com.
Click your account name in the lower left-hand corner, and then choose Preferences from the drop-down menu.
Click Payments and Billing.
Click Download in the Content Tokens section next to the correct server location token under the Apps and Books tab. The token downloads to the Downloads folder on your computer.
Navigate to Organization > Settings in the sidebar of the Jamf School MDM portal.
Click the Content (Volume Purchasing) payload.
Click Add Service Token and upload the token you downloaded.
Click Apply, and then click Edit.
Clear the Primary account checkbox if this account is not your primary account, and choose a license assignment method.
To invite users to Apple School Manager when they enroll in Jamf School, select the Automatically invite user checkbox. You can do this either from a pop-up on the device or add a Web Clip to the Home screen.
Click Apply. The content is added to the Apps or Documents table in Jamf School. You must synchronize your volume purchasing account with Jamf School after purchasing or adding content via volume purchasing.
To add and configure the Blocksi for iPad Application
Sign in to your Jamf School MDM portal, and click Apps in the sidebar.
Click Inventory.
Click the Sync with Apple School Manager button to have the Blocksi for iPad application synced into your inventory.
Note
This may take some time depending on when the Volume Purchasing of the application was completed. If the application does not appear, you may click +Add App > Add iOS App to search for Blocksi for iPad and add it to your inventory.

Click the Blocksi for iPad application to edit the configuration of the app after the application is listed in your inventory.
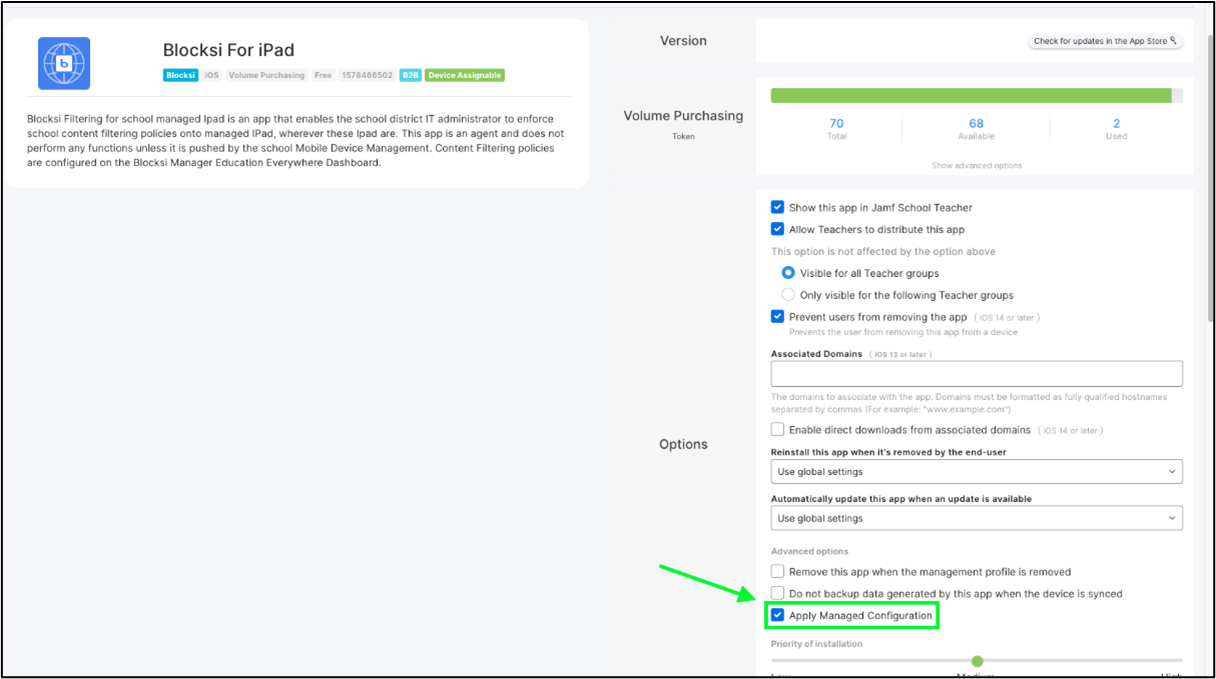
Check the next settings in the Options section:
Show this app in Jamf School Teacher
Allow Teachers to distribute this app
Prevent users from removing the app
Click Show Advanced Settings in the Options section to modify the Managed Configuration of the application.
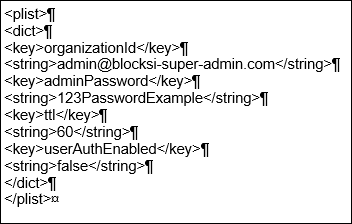
Add the following XML configuration In the text box for new XML.
Note
Replace the admin@blocksi-super-admin.com value with your school’s super-admin email.
Note
You may also change the 123PasswordExample password string to whatever password you choose or leave it as is.
Click Save. When you have finished, you should see the following screen:
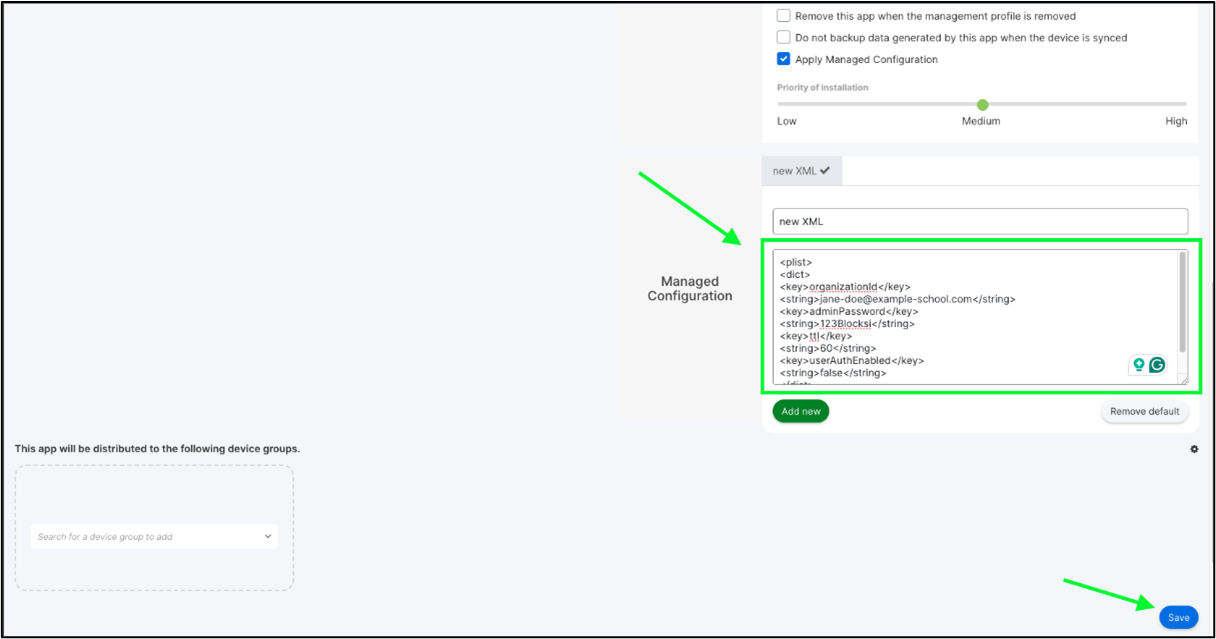
In the This app will be distributed to the following device groups section for adding device groups, select the group of devices to push the Blocksi for iPad application.
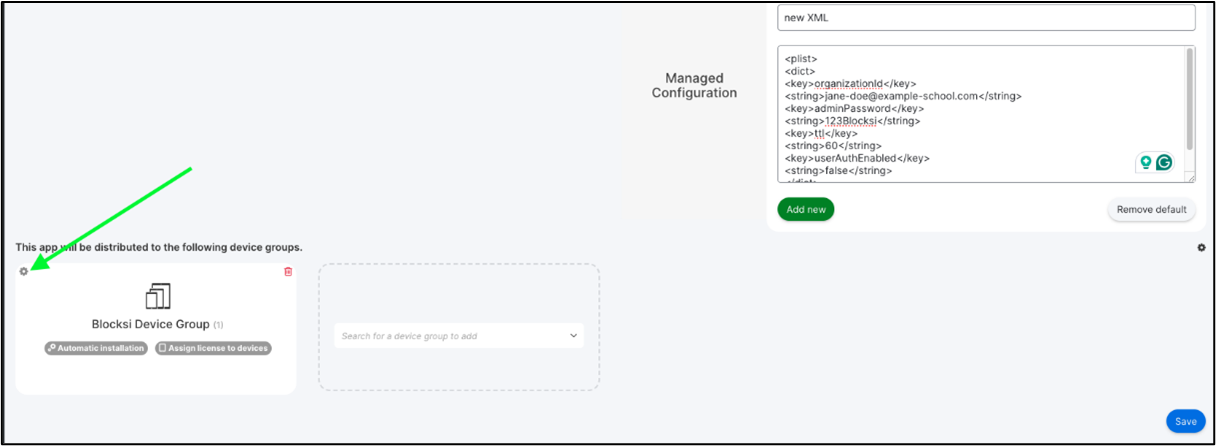
Once added, click the settings cogwheel for the Group to ensure that the XML-managed configuration is applied to the Device Group.
Note
A check mark next to the Managed Configuration text indicates that the XML configuration created is selected. If there is no checkmark, click Managed Configuration: new XML to select this for the device group.
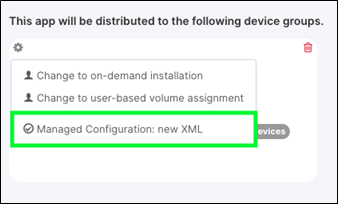
Click Save.
To create a profile
Click Profiles > Overview in the left sidebar menu in the JAMF School portal.
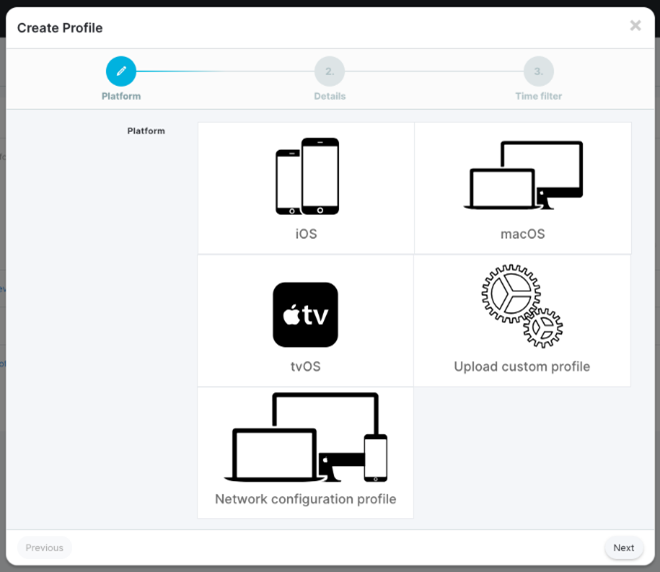
Click + Create Profile to create a new profile. The following window opens.
Note
You may also modify an existing profile. If you do, you may skip this section.
For the platform, select iOS. The following window opens.
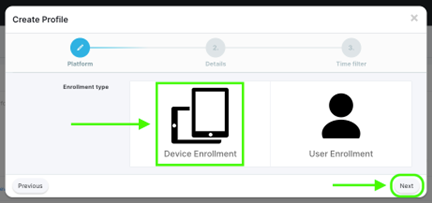
On the next screen, select Device Enrollment and click Next.
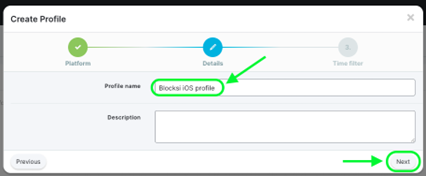
Chose a Profile name (example: Blocksi iOS Profile) and click Next.
Click Finish.
To configure the scope
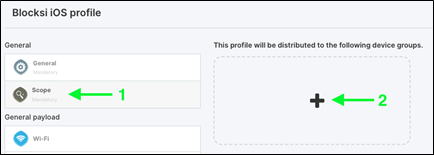
Click Scope under General settings on the Profile Setting Configuration page.
Click the + button to add the Device Groups that need this profile installed. The following window opens.
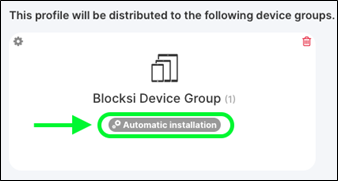
Make sure Automatic installation is set for the device groups. The following window opens.
Click Save.
To configure the iOS payload
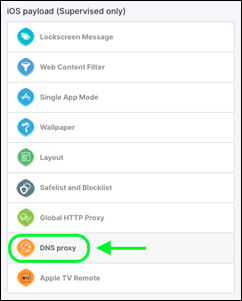
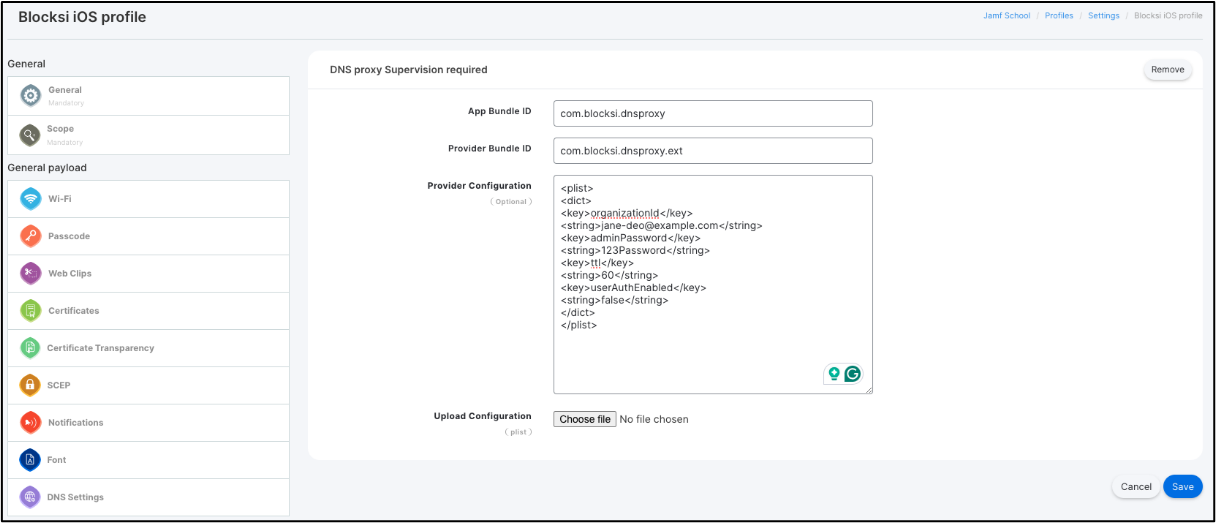
Select DNS proxy under iOS Payload (Supervised only) in Profile Settings Configuration.
Click Configure.
Add com.blocksi.dnsproxy in the App Bundle ID field.
Add com.blocksi.dnsproxy.ext in the Provider Bundle ID field.
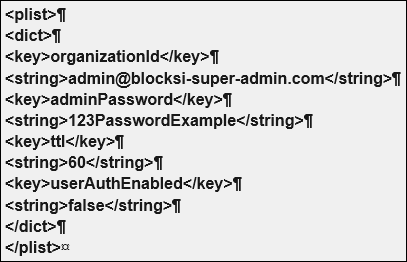
Add the following configuration in the Provider Configuration field:
Note
You need to change BlocksiSuperAdmin@domain.com to match your main super-admin account for Blocksi. You may also change 123Blocksi to any password of your choice or keep 123Blocksi as the standard password to access app details.
Click Save. When you have finished, the configuration should look like this:
The deployment configuration is now complete. All that is needed now is to verify if the configuration is correctly installed on the target enrolled devices.
To create the filtering policy, please see Configuring the iOS Filtering Policy on the BMEE Admin Dashboard