Create custom categories for websites that might not be covered under one of the web filter categories or for multiple websites that may belong to different web categories. Custom categories that you create can be website exceptions that you may want to block or allow that are different than your web categories or exception lists.
Create as many custom categories as you need and block or allow them within your web filter. See Web Filters for more details.
To create a custom category
Click Content Filtering from the Main Menu and then click Filters from its sub-menu.
Click CUSTOM CATEGORY at the top of the screen. The Custom Category screen appears.
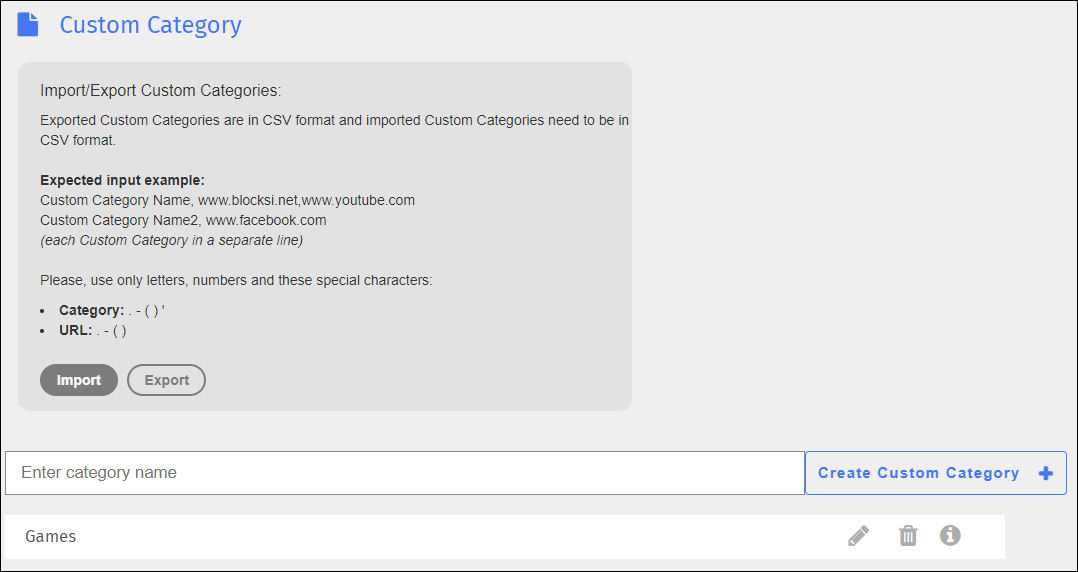
Type the name of the category in the Enter category name text field.
Click Create Custom Category + to add the category. The edit page appears.
To add a URL to a custom category
Click Content Filtering from the Main Menu and then click Filters from its sub-menu.
Click CUSTOM CATEGORY at the top of the screen. The Custom Category screen appears.
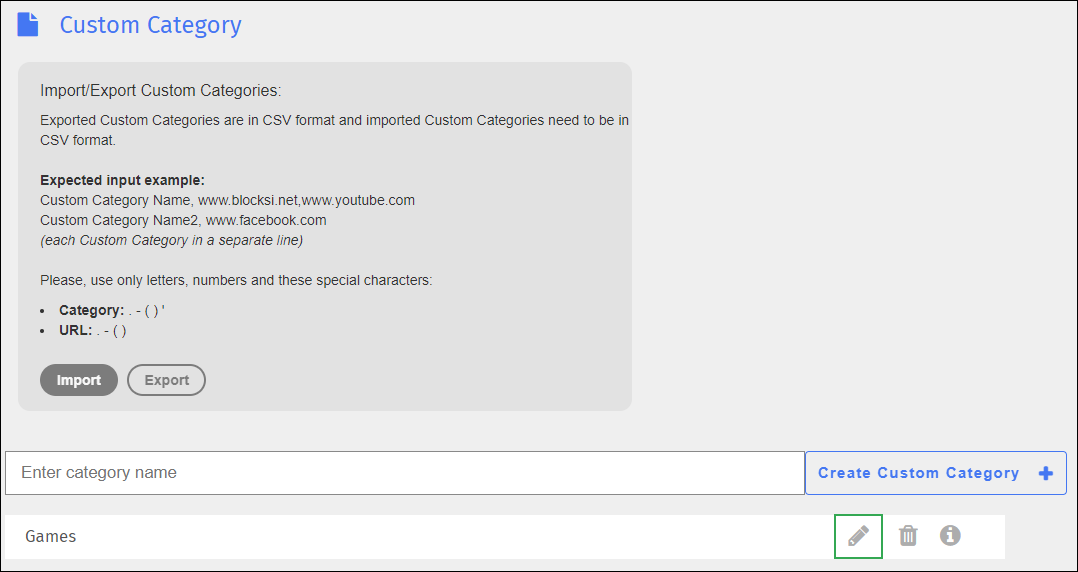
Locate the custom category to which to add the URL, and click the
 icon. The Edit screen appears.
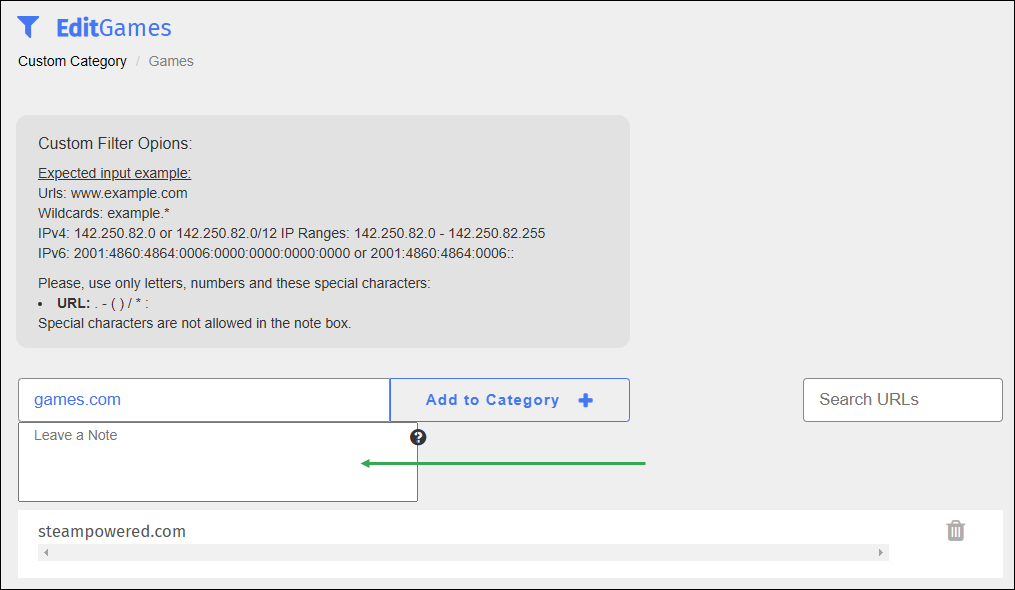
Type the URL to add in the Enter URL text box. You are given the option to add a note to this URL entry.
Click Add to Category + to add the URL. The site appears in the listing. If you added a note, it appears to the right of the URL entry.
Warning
Deleting the last URL from a custom category also deletes the category.
To delete a URL from a custom category
Click Content Filtering from the Main Menu and then click Filters from its sub-menu.
Click CUSTOM CATEGORY at the top of the screen. The Custom Category screen appears.

Locate the custom category that contains the URL to delete, and click the
 icon. The Edit screen appears.
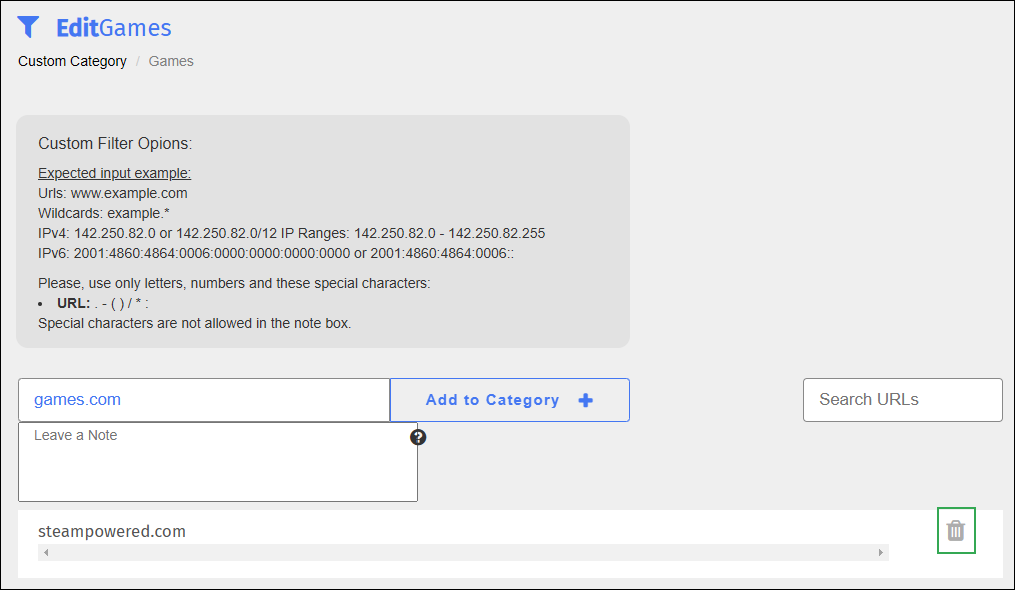
Locate the URL to delete and click the
 icon. A confirmation prompt appears.
Click OK to delete the URL and close the prompt.
Modify a custom category as needed.
To modify a custom category
Click Content Filtering from the Main Menu and then click Filters from its sub-menu.
Click CUSTOM CATEGORY at the top of the screen. The Custom Category screen appears.

Locate the name of the category to modify, and click the
 icon to the right of the category name. The Edit screen appears.
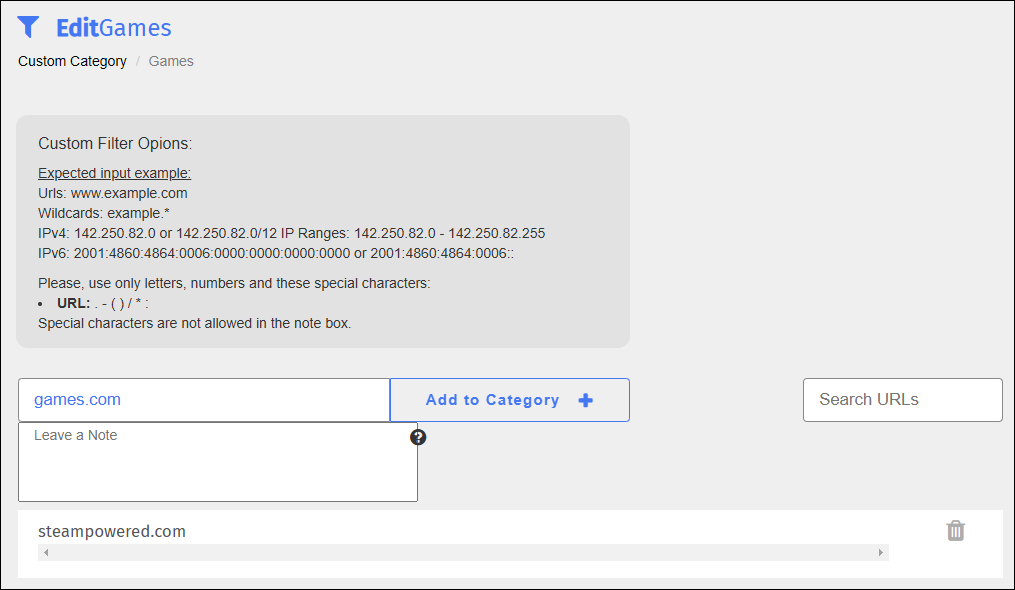
Make the necessary changes to the category.
Export custom categories to a CSV file to keep for your records.
To export custom categories
Click Content Filtering from the Main Menu and then click Filters from its sub-menu.
Click CUSTOM CATEGORY at the top of the screen. The Custom Category screen appears.
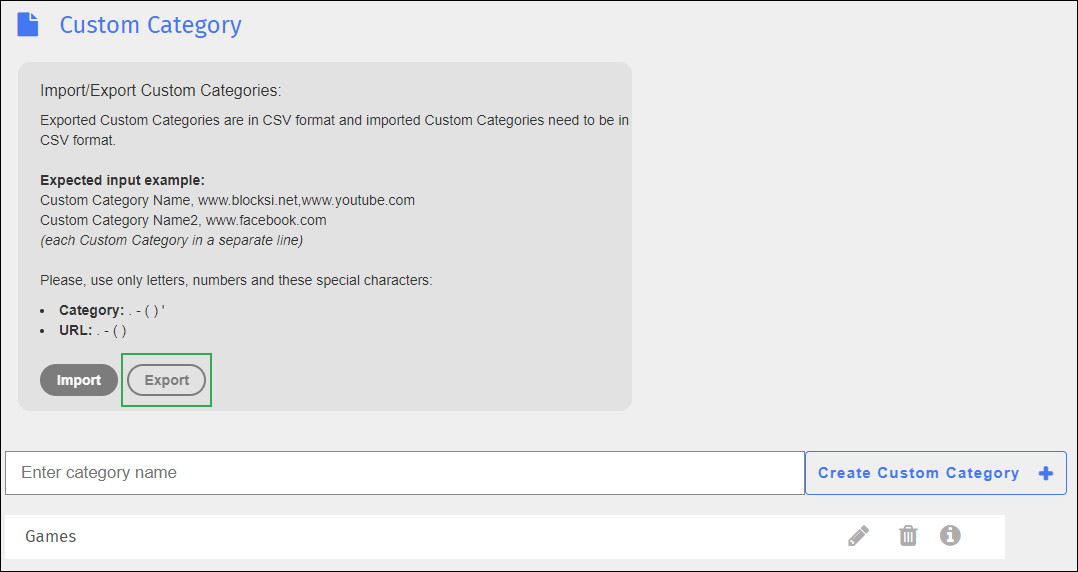
Click the Export button to export the file. The file appears in the upper right-hand corner of your screen in your spreadsheet program. Click it to open and save it.
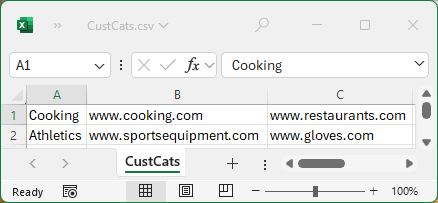
The following is an image showing an example of exported custom categories.
Import custom categories from an Excel or CSV file.
To import custom categories
Click Content Filtering from the Main Menu and then click Filters from its sub-menu.
Click CUSTOM CATEGORY at the top of the screen. The Custom Category screen appears.
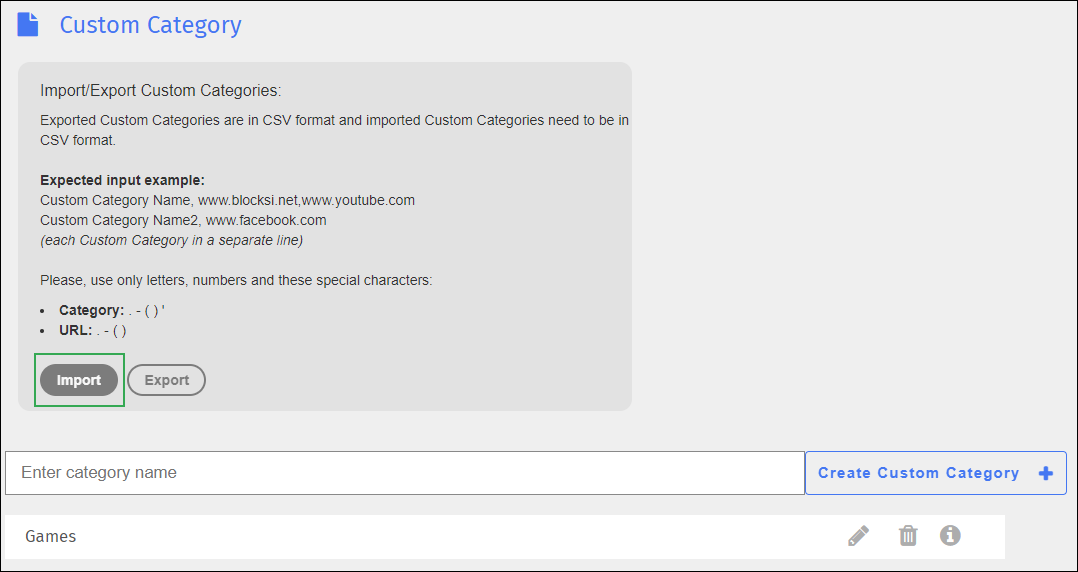
Click the Import button to import the file. The Open dialog opens.
Navigate to the desired folder, select the file, and click Open. The categories are imported and appear at the bottom of the custom categories.
If you are importing custom categories from an Excel file, ensure that the Excel file appears as in the image below.

In the spreadsheet, the name of the custom category should be added to Column A. The first website domain is added to Column B and the third website domain is added to Column C. Also note that each new custom category list appears in a separate row.
If you are importing custom categories from a CSV file (for example, Notepad), ensure that the text file appears as in the image below.
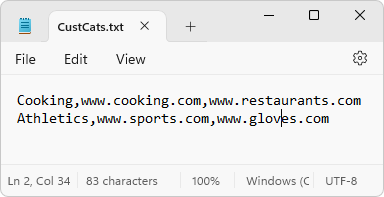
In the text file, the first entry is the custom category name, followed by a comma and then followed by the first domain without any spaces. After the domains for this category are added, return to the next line to start a new custom category list. When finished, save as a CSV file.
Search for URLs in a custom category.
To search for URLs
Click Content Filtering from the Main Menu and then click Filters from its sub-menu.
Click CUSTOM CATEGORY at the top of the screen. The Custom Category screen appears.

Locate the name of the category to search, and click the
 icon to the right of the category name. The Edit screen appears.
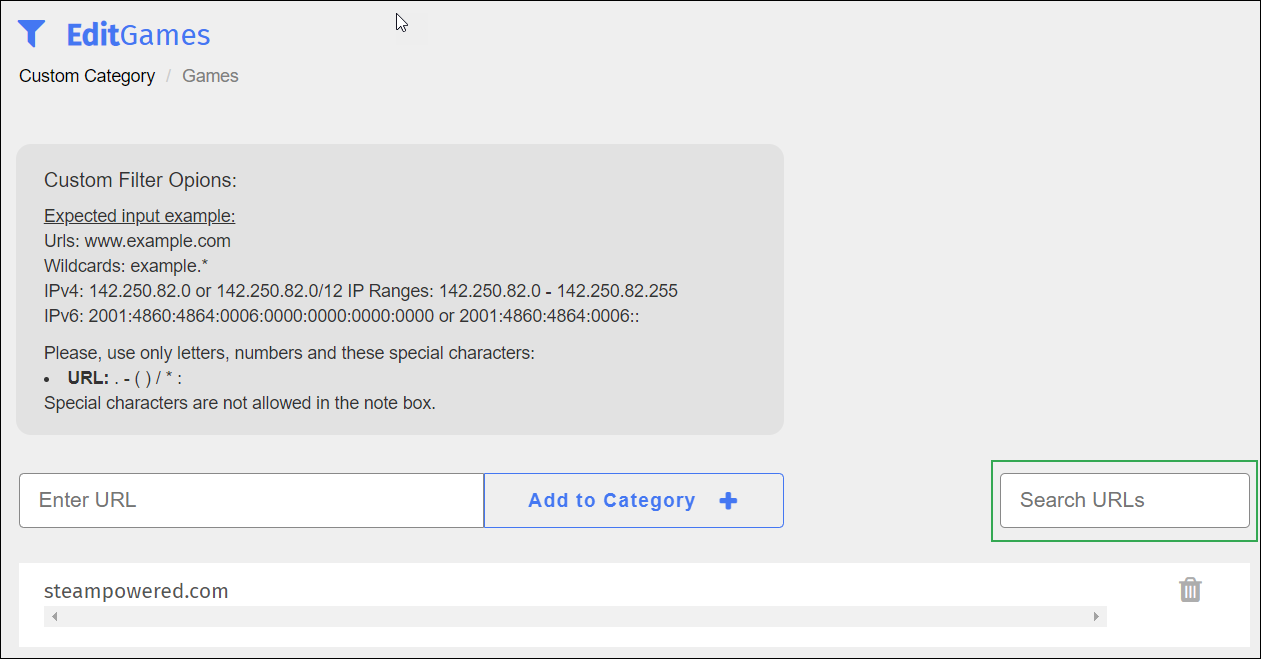
Type the URL in the Search URLs box. The URL appears as you type.
Delete custom categories when you no longer need them.
To delete a custom category
Click Content Filtering from the Main Menu and then click Filters from its sub-menu.
Click CUSTOM CATEGORY at the top of the screen. The Custom Category screen appears.
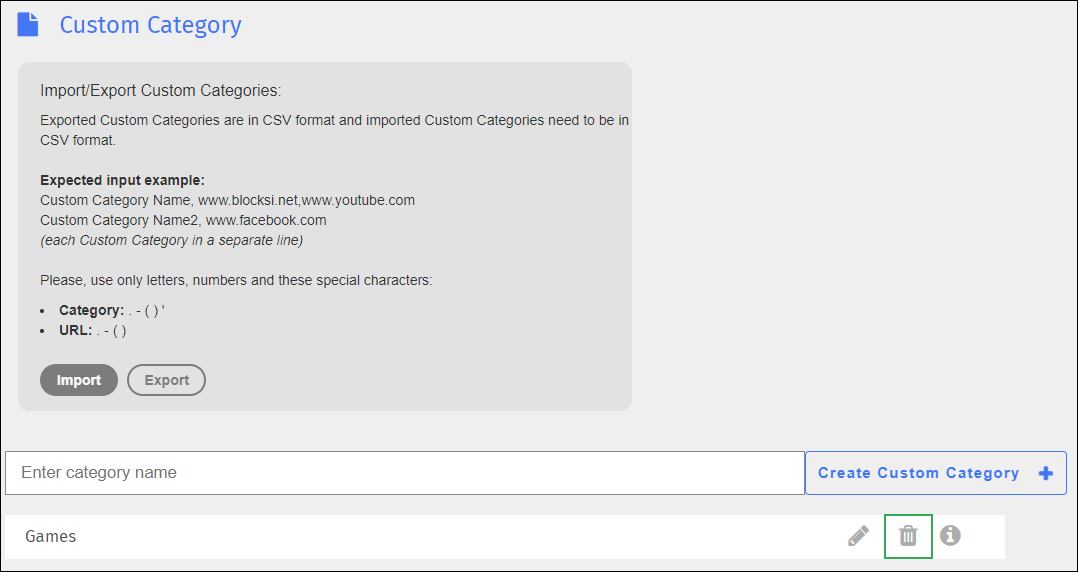
Locate the category to delete, and click the
 icon to the right of the category. A confirmation prompt appears.
Click OK to delete the category and close the prompt.