Penalty Box
The Penalty Box lets you apply dedicated in-school and out-of-school policies to individual students or to groups of students. A policy assigned in the Penalty Box takes precedence over the policy assigned to the student's organizational unit for as long as the student remains in the Penalty Box. While the student is in an active class, the class policy takes precedence over their Penalty Box policy unless the student is locked.
Manage penalized students by adding them individually or in groups, filtering and searching the list, setting an expiry date for the penalty, locking students so their Penalty Box policy stays in force during class and delegates cannot manage them, and managing penalized students and groups in bulk.
To access the Penalty Box page, click Content Filtering from the Main Menu, then click Penalty Box from its sub-menu.
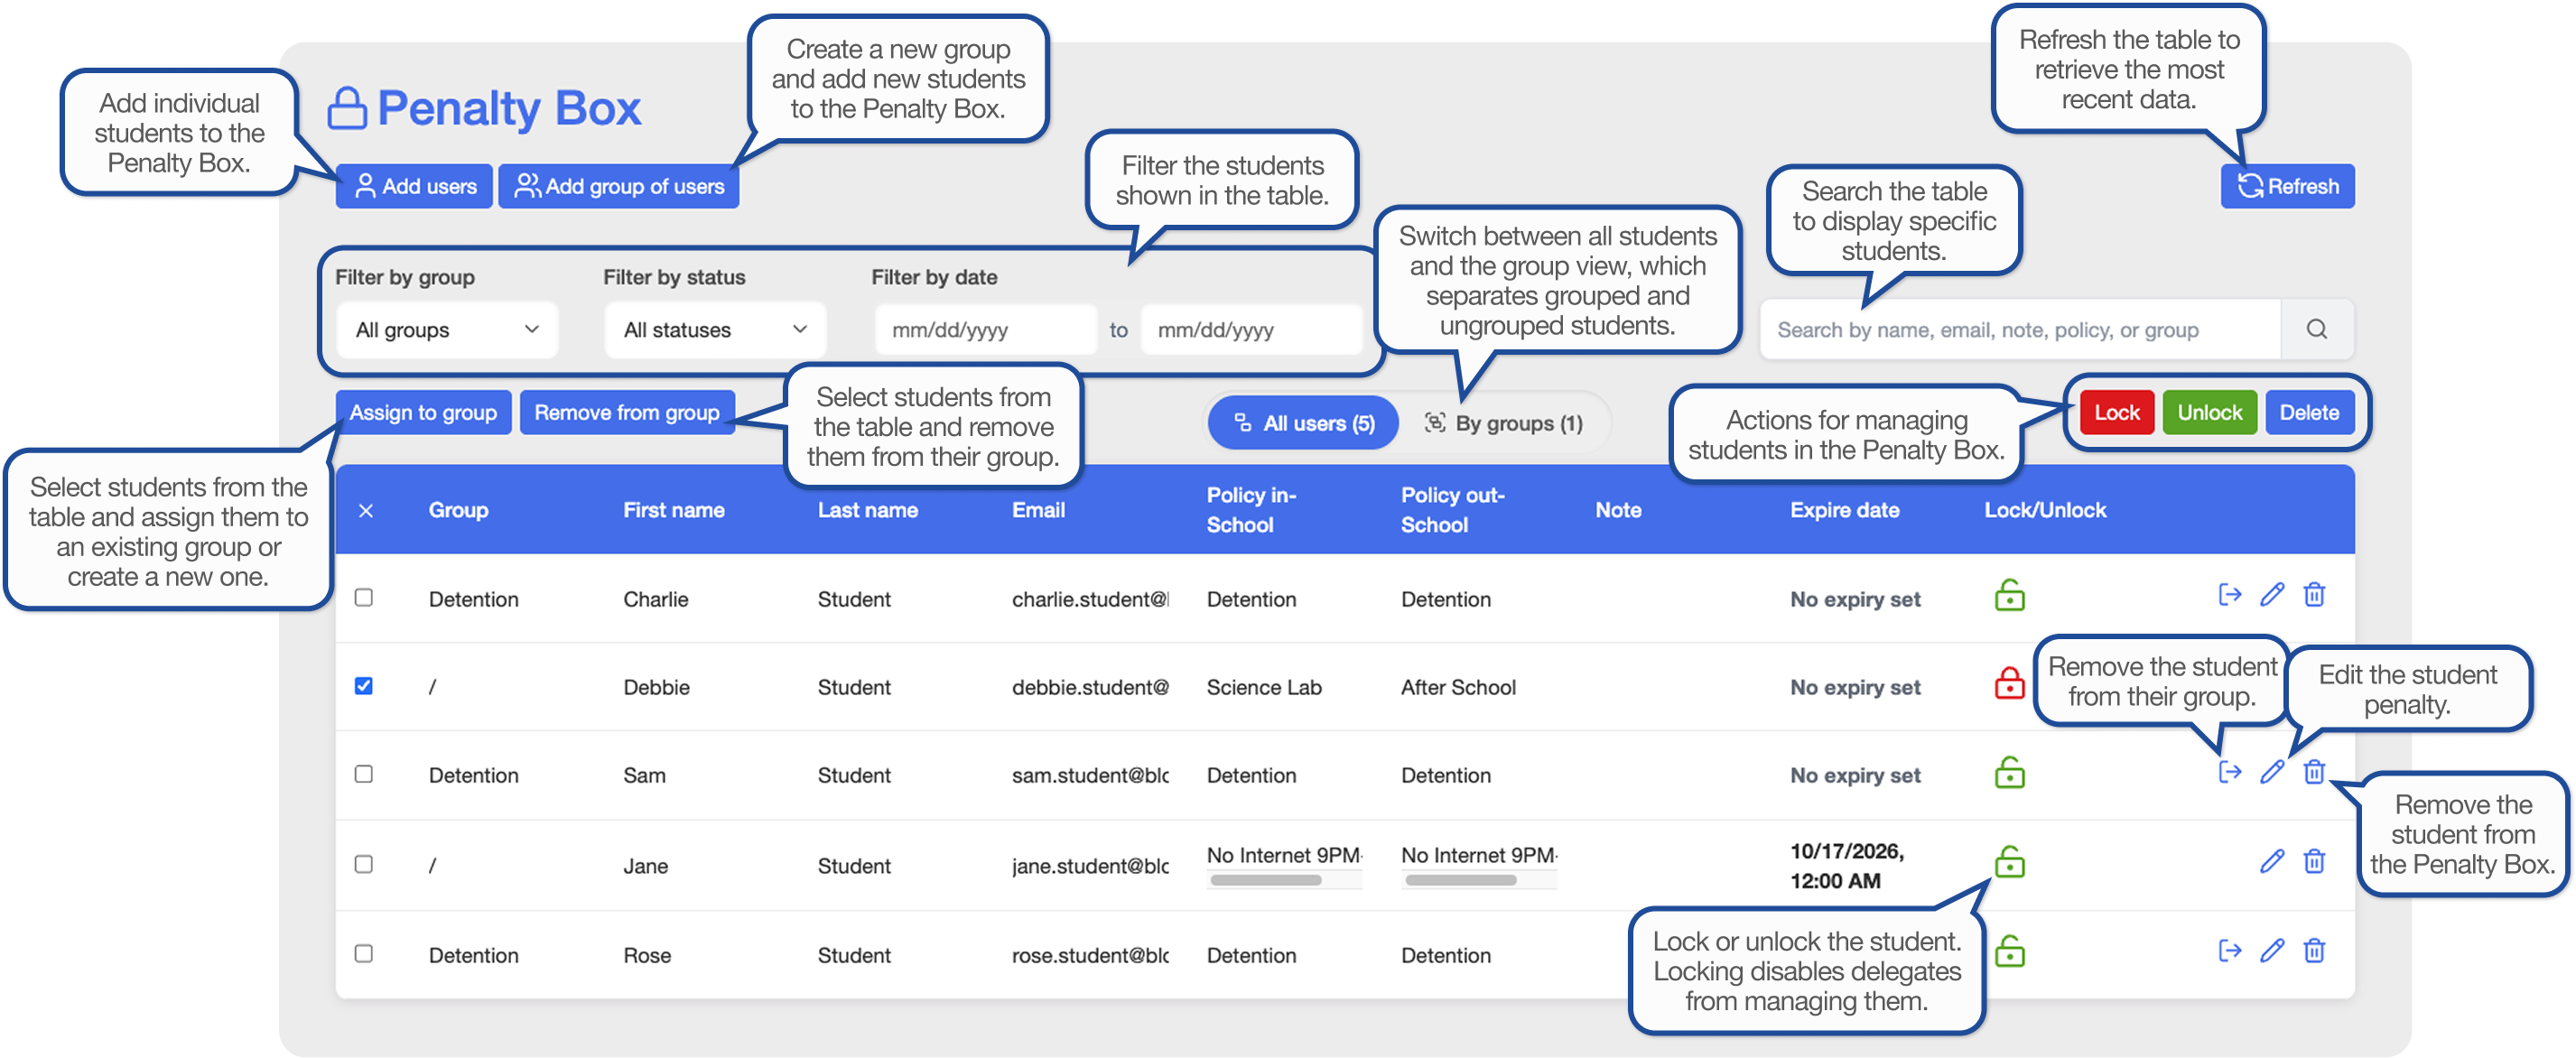
To restrict a student to a specific list of websites, for example a student with special needs.
To grant a student additional website access while they work on a school project.
To apply stricter filtering to a student who is not paying attention in class or is being disruptive.
To enforce a restricted policy while a student is on in-school suspension.
To apply a restricted policy for the remainder of a term, lifting automatically at the end date.
Penalty Box by Group View
The By groups view organizes students by the penalty group they belong to. Students who do not belong to a group are listed under Ungrouped.
Each group has its own header row with buttons that act on every student in that group at once, so you can lock or unlock a whole group, clear its expiry date, edit it, or delete it without selecting its members individually.
The filters, search, and selection buttons work the same way in both views.
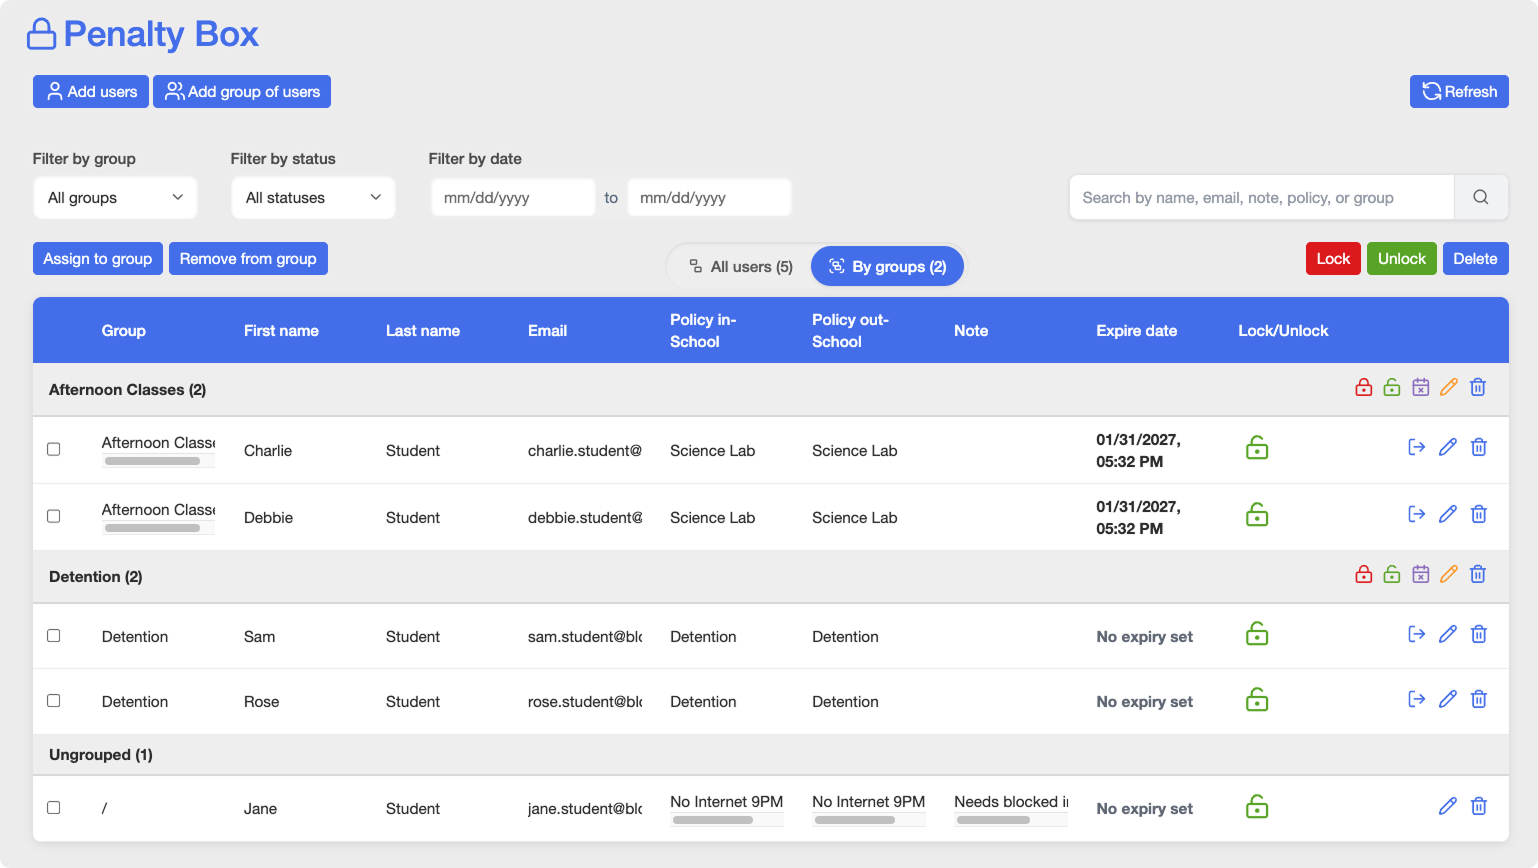
Button | Action | Description |
|---|---|---|
| Lock | Locks all students in the group. |
| Unlock | Unlocks all students in the group. |
| Remove Expire Date | Removes the expiry date for all students in the group. |
| Edit Group | Opens the Edit Group window, where you can change the group name, expiry date, and policies, and add or remove students. |
| Delete Group | Deletes the group and removes all its students from the Penalty Box. |


Add students to the Penalty Box individually when each needs their own policies and expiry date, or as a group when the same penalty applies to all of them.
Note
Adding a student enforces the Penalty Box policy immediately, without clicking the  button.
Add students to the Penalty Box one at a time, searching for each by name or email address and setting their policies individually.
On the Penalty Box page, click the
 button. The Add Users To Penalty Box window opens.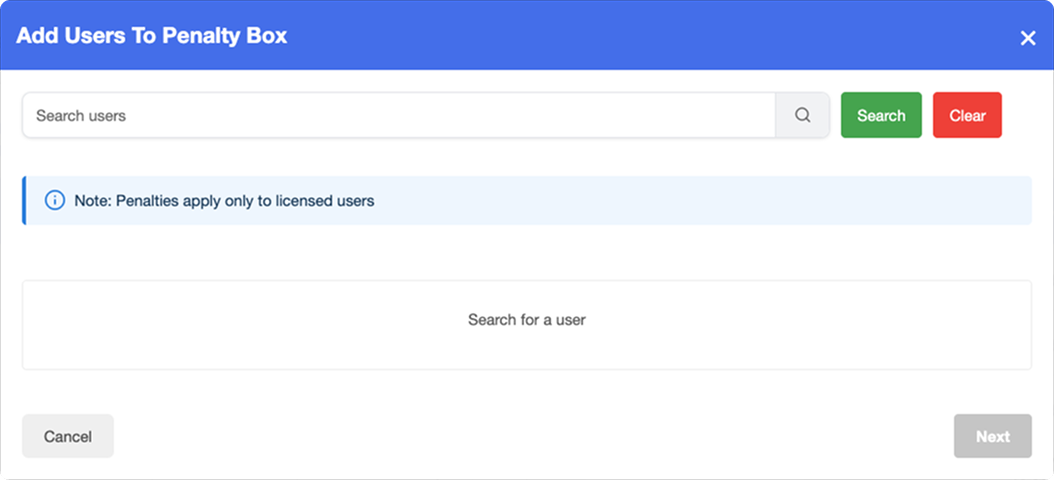
Type a name or email address in the search box and click the
 button. Matching students appear below, with the total shown as Found users. Click the
  button to start a new search.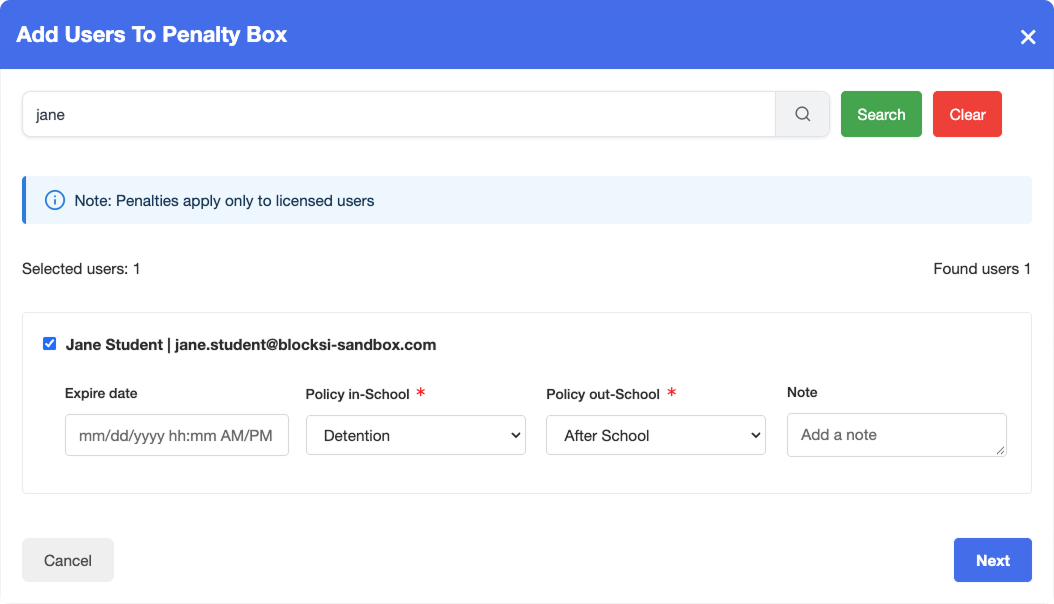
Select the checkbox next to each student you want to add to the Penalty Box. The number of selected students is shown as Selected users.
Configure the following for each selected student:
Expire date - Date and time the penalty ends. Leave it empty to penalize the student until you remove them manually.
Policy in-School - Policy applied while the student is in school.
Policy out-School - Policy applied while the student is out of school.
Note - Optional note about the penalty.
Important
Only regular policies can be assigned in the Penalty Box.
Click Next, then select one of the following:
Add separately - Adds each student to the Penalty Box without a group. This option is selected by default.
Add into a new group - Adds the selected students to a new group. Type a name in the Enter a group name box.
Add into an existing group - Adds the selected students to an existing group. Select the group from the Select group drop-down list.
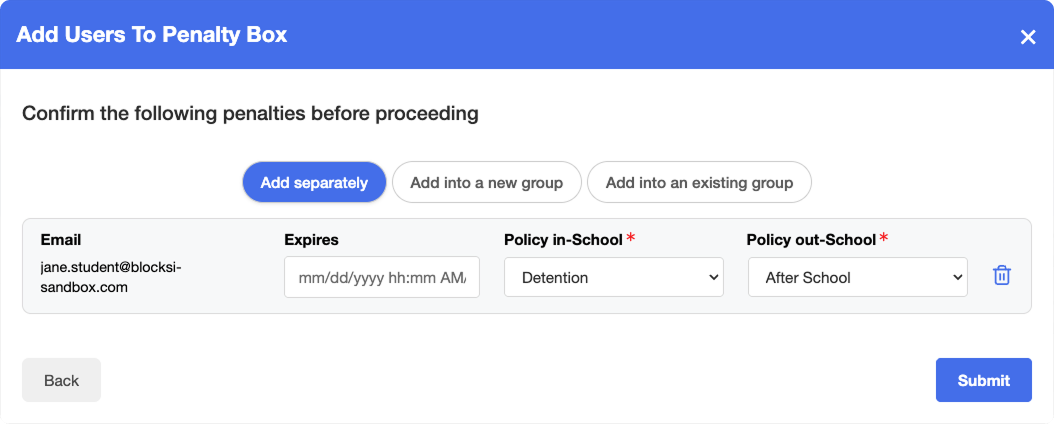
Review the entries. You can still change the Expires date and either policy, or click the
 button to drop a student from the list. Click Back to return to the search results.
Click Submit. The students are added to the Penalty Box table.
Add several students to the Penalty Box at once as a named group, with one set of policies and one expiry date applied to every member.
On the Penalty Box page, click the
 button. The Add Group Of Users To Penalty Box window opens.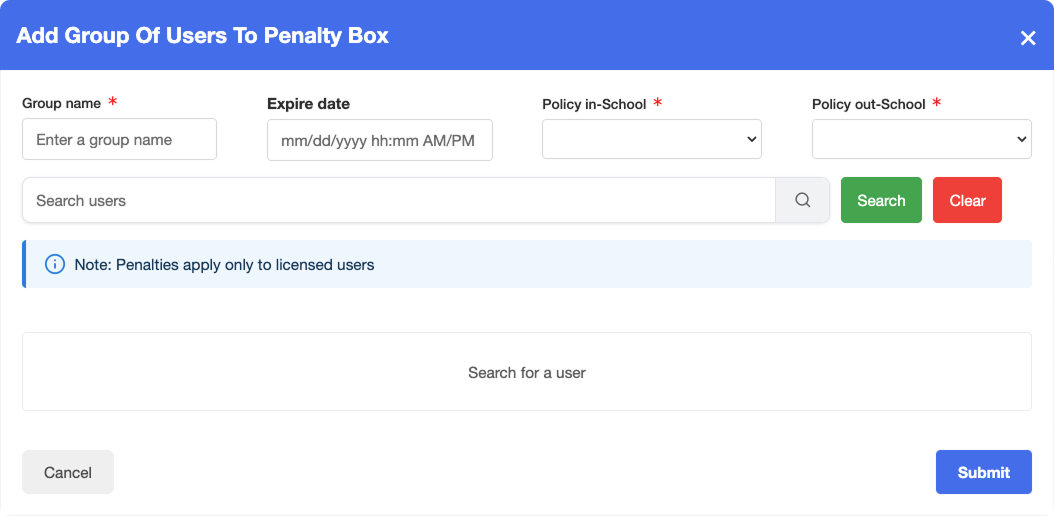
Configure the following for the group:
Group name - Name of the penalty group.
Expire date - Date and time the penalty ends for every member of the group. Leave it empty to penalize the group until you remove them manually.
Policy in-School - Policy applied to every member of the group while they are in school.
Policy out-School - Policy applied to every member of the group while they are out of school.
Important
Only regular policies can be assigned in the Penalty Box.
Type a name or email address in the search box and click the
button. Click the button to start a new search.Select the checkbox next to each student you want to add to the group. Selected students appear on the right, with the total shown as Selected users.
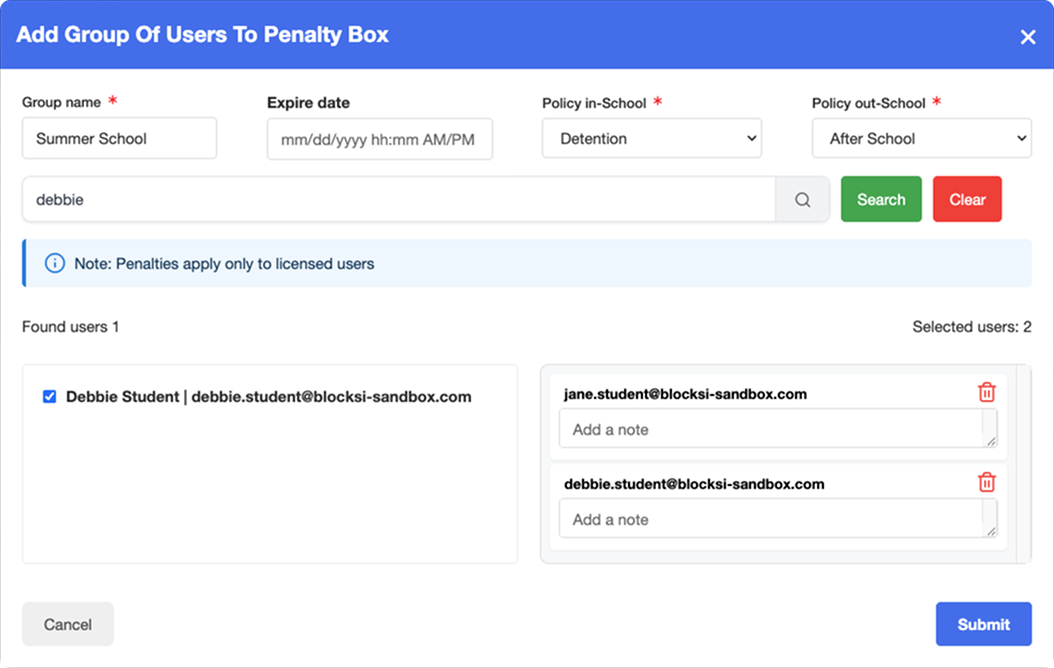
Optionally, type a note for each selected student in the Add a note box beneath their email address. To remove a student from the group, click the
 button next to their email address.
Click Submit. The group is added to the Penalty Box table.
After students are in the Penalty Box, manage them by changing their policies and expiry date, assigning them to penalty groups, locking them so their penalty cannot be overridden or changed, and releasing them from the Penalty Box.
The Assign to group, Remove from group, Lock, Unlock, and Delete buttons act on every student you select with the row checkboxes, so you can apply the same change to several students at once. The buttons in each row act on that student only.
Move students in the Penalty Box into a penalty group to manage them together. Students who do not belong to a group have no group name in the Group column.
Select the checkbox next to each student you want to assign, then click the
 button. The Assign Users to a Group window opens.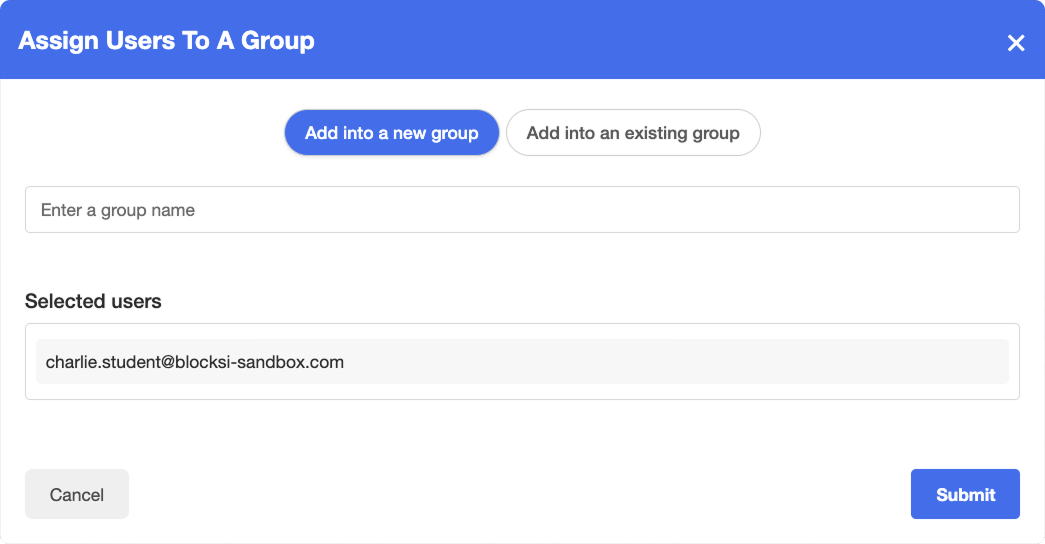
Select one of the following:
Add into a new group - Adds the selected students to a new group. Type a name in the Enter a group name box.
Add into an existing group - Adds the selected students to an existing group. Select the group from the Select group drop-down list.
Click Submit. The students are added to the group and the group name appears in the Group column.
Remove a student from a penalty group when you want to manage their penalty individually. Removing a student from a group does not release them from the Penalty Box. Their policies continue to apply, and the Group column shows a forward slash to indicate they no longer belong to a group.
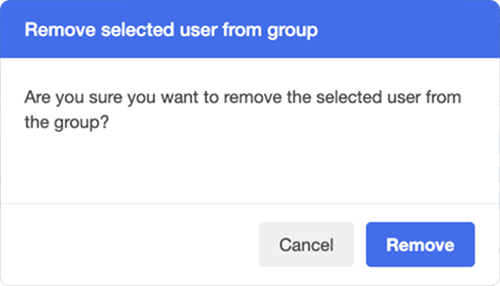
Select the checkbox next to each student you want to remove, then click the  button. In the Remove selected user from group window, confirm by clicking Remove. The students are removed from their group and remain in the Penalty Box.
Tip
To remove a single student, click the  button in their row instead.
Edit a penalty to change the policies applied to a student, move them into a penalty group, adjust when the penalty ends, or update the note attached to it.
On the Penalty Box page, locate the student and click the
 button in their row. The Edit User Penalty window opens.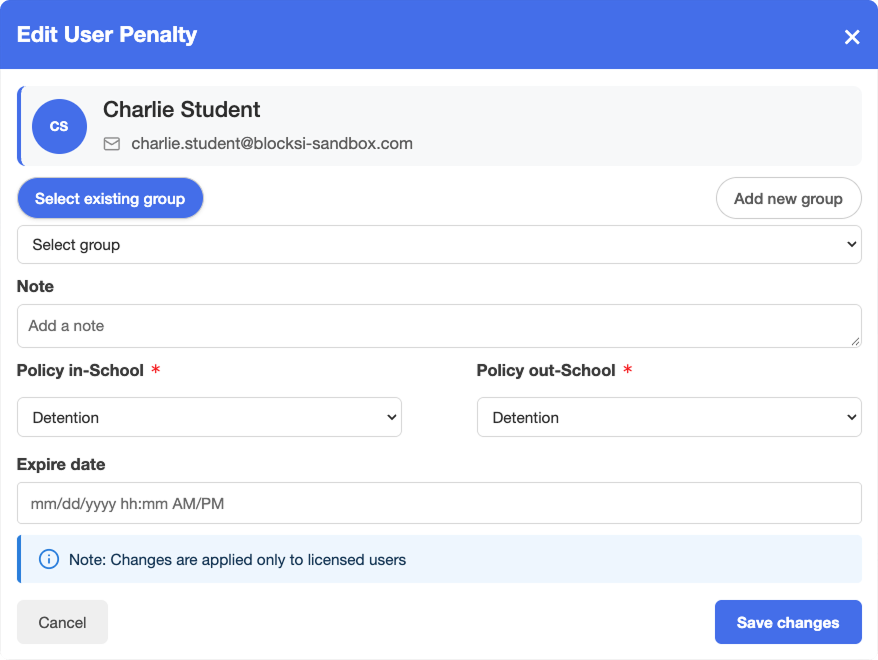
To assign the student to a penalty group, select one of the following:
Select existing group - Adds the selected students to an existing group. Select the group from the Select group drop-down list.
Add new group - Adds the selected student to a new group. Type a name in the Enter a group name box.
Type or edit the text in the Note box. Clear the box to remove an existing note.
Select a policy from the Policy in-School and Policy out-School drop-down lists.
Set or change the Expire date. Clear it to penalize the student until you remove them manually.
Click Save changes.
Lock a student to keep their Penalty Box policy in force at all times, both in and out of class. Locked students stay locked until you unlock them. The Lock/Unlock column shows the current state of each student:  locked,
  unlocked.
The class policy does not override their Penalty Box policy.
Teachers cannot change their policy from the student tile on the Teacher Dashboard.
Delegates cannot modify their penalty.
Select the checkbox next to each student you want to lock or unlock, then click the  or
or  button. To lock or unlock a single student, click the padlock button in their Lock/Unlock column instead.
Note
Teachers can still push content to a locked student and allow or block sites for them during class, even if the Penalty Box policy blocks those sites. This does not apply to categories or entries that are locked in the Web Filter or Exception List assigned to the Penalty Box policy.
Remove a student from the Penalty Box when the penalty is over. The policies assigned in the Penalty Box stop applying, and the student reverts to the policy assigned to their organizational unit.
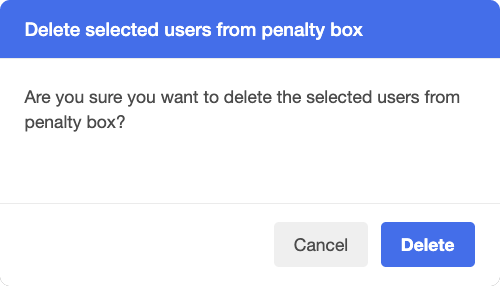
Select the checkbox next to each student you want to remove, then click the  button. In the Delete selected users from penalty box window, click Delete. The students are removed from the Penalty Box and their organizational unit policies take effect immediately.
Tip
To remove a single student, click the button in their row instead. The confirmation window shows that student's email address.