Keyword Filter
Keyword filters block web pages based on the words they contain. Add the words you want to restrict to a keyword list, and students are prevented from reaching any page that includes them. Because the filter matches on words rather than specific web addresses, it restricts inappropriate or irrelevant content wherever those words appear.
Create as many keyword filters as you need.
Click Content Filtering from the Main Menu and then click Filters from its sub-menu.
Click KEYWORD FILTER at the top of the screen. The Keyword Filter screen appears.
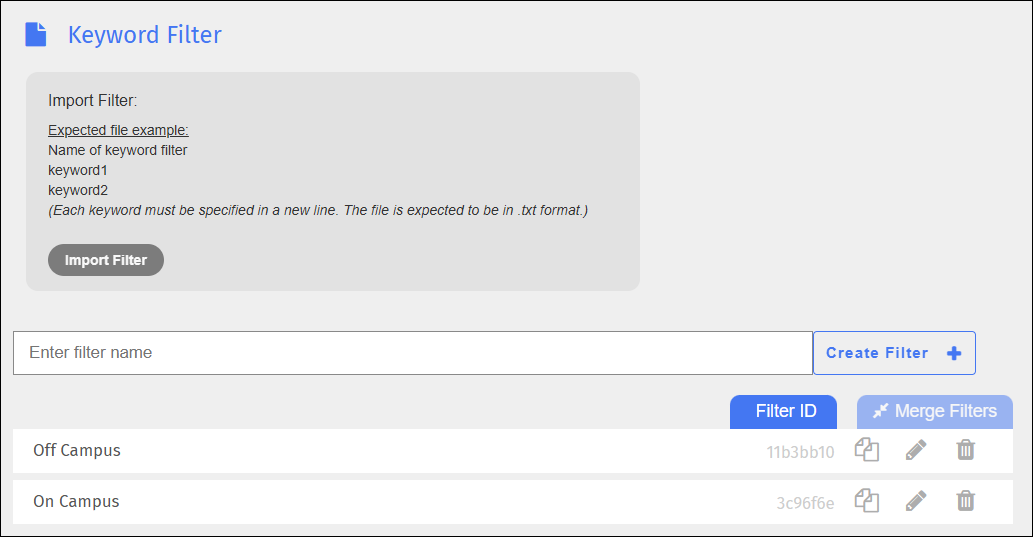
Type the name of the filter in the Enter filter name text field.
Click Create Filter + to add the filter. The new filter appears at the bottom of the list.
Click the
 icon. The Edit screen appears.
Note
The Filter ID and keyword number appear on the Access Denied page on the student's device and is used to identify the specific word that generated the denial.
Administrators can add keywords to or remove them from a keyword filter. Keywords match as whole words, not substrings - for example, adding rap blocks only sites with the exact word rap in their title or description, not sites whose text merely contains those letters (such as photography).
Click Content Filtering from the Main Menu, then click Filters from its sub-menu.
Click Keyword Filter from the Context Filters section. The Keyword Filter screen appears.
Locate the filter you want to edit, then click the edit icon. The Edit screen appears.
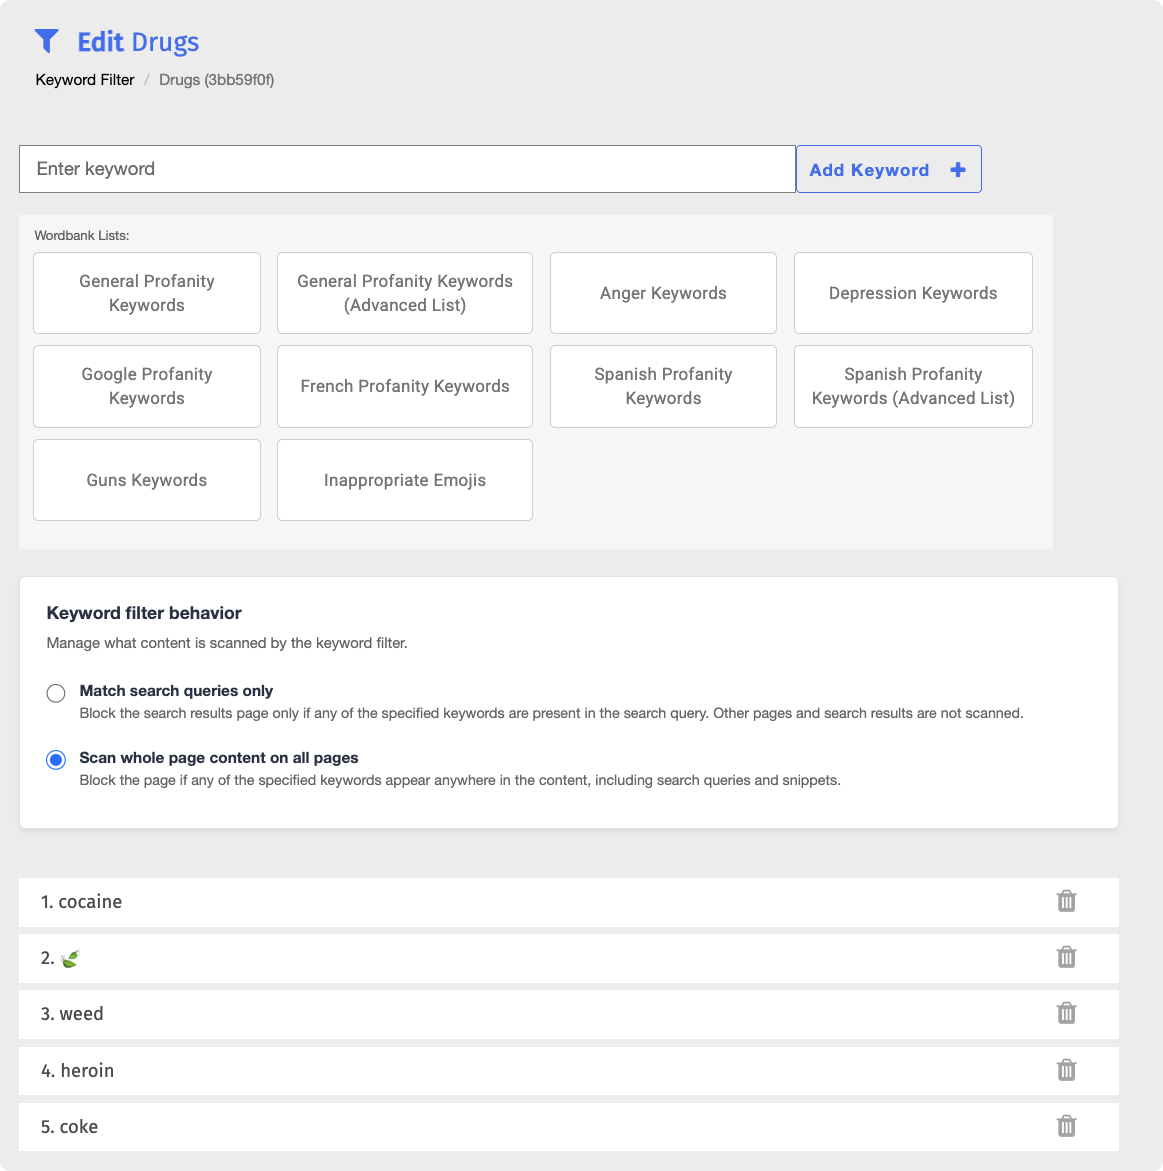
From the Edit screen, add keywords from a preconfigured keyword bank, add your own, or delete existing keywords.
Tip
Blocksi provides preconfigured keyword banks, including several foreign-language lists, to help with configuring your keyword filters. The full set of banks is available in the Edit screen.
Click the desired keyword bank button. The corresponding keyword bank window opens.
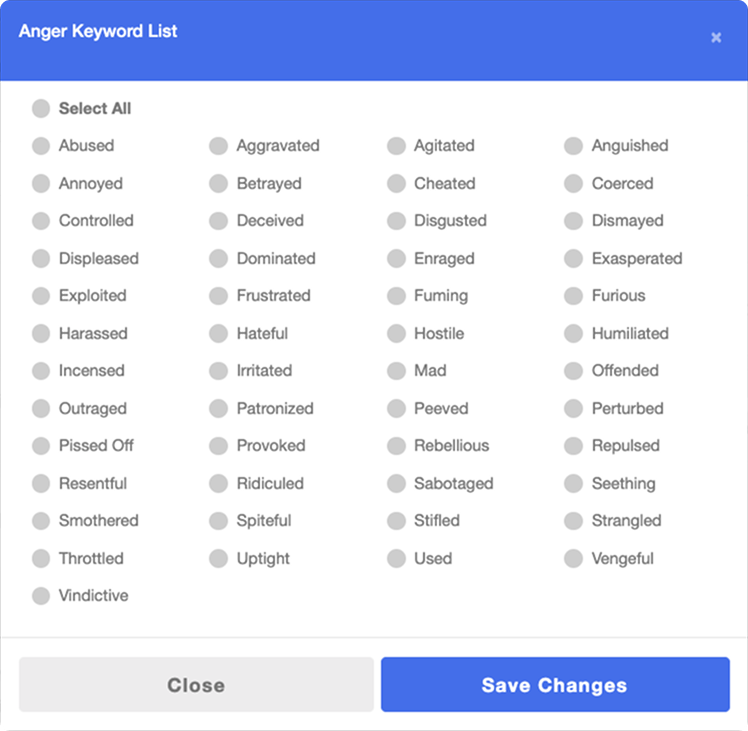
Select one or more keywords from the list, or click Select All to include the entire list.
Click Save Changes. The selected keywords appear at the end of the keyword list.
Type the keyword in the Enter keyword field.
Click the Add Keyword + button. The keyword appears at the end of the keyword list.
Locate the keyword you want to delete, then click the
 icon to its right. A confirmation prompt appears.
Click OK to delete the keyword.
Note
Each keyword has a number to its left indicating its position in the list. When a keyword blocks a student, this position number and the keyword filter ID are shown together, so administrators can identify exactly which keyword caused the block. For example, #1 is the keyword's position and 66a311f3 is the filter ID.
Each keyword filter entry includes a behavior setting that determines where the keyword looks for a match.
Match search queries only - The keyword matches only when it is typed as a query into a supported search engine. Other pages are not scanned, which significantly reduces false positives from search result snippets.
Note
This option is only supported on Google, Bing, DuckDuckGo, Yandex, Yahoo, Ecosia, Kiddle, Kidrex, and Qwant. It does not filter keywords entered into AI chatbots, in-page site search, the browser's URL bar, or unsupported search engines.
Scan whole page content on all pages (default) - The keyword matches anywhere on a search page, including both the searched query and the text of search result snippets.
Important
Keyword filtering applies only to the Google Chrome browser with an active Blocksi extension running.
Merge two or more keyword filters into one new keyword filter.
Click Content Filtering from the Main Menu and then click Filters from its sub-menu.
Click KEYWORD FILTER at the top of the screen. The Keyword Filter screen appears.
Click each one of the filters to merge. The filters you select turn blue.
Click Merge Filters. The New Merged Filter window opens.
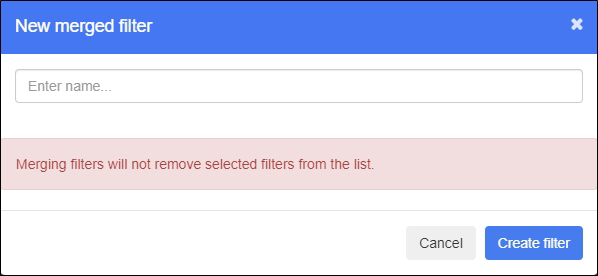
Type the name of the new filter in the Enter name text box.
Click Create Filter to save the new filter.
Import keyword filters from an Excel file or a CSV file.
Click Content Filtering from the Main Menu and then click Filters from its sub-menu.
Click KEYWORD FILTER at the top of the screen. The Keyword Filter screen appears.
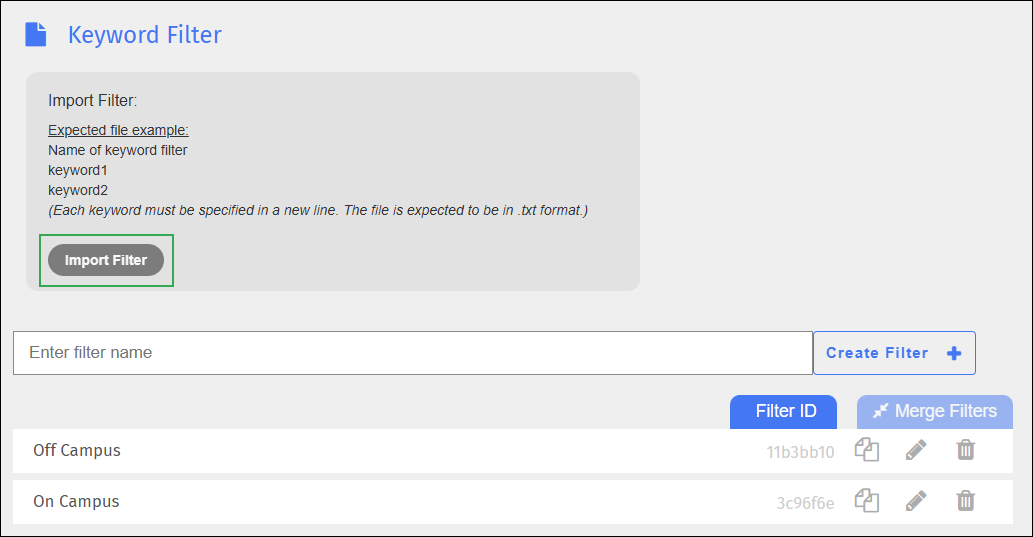
Click the Import Filter button to import the list. The Open dialog opens.
Navigate to the desired folder, select the file, and click Open. The filter is imported and appears at the bottom of the keyword filters.
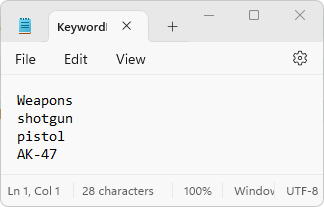
Example Keyword Filter Import File
Rename a keyword filter as needed.
Click Content Filtering from the Main Menu and then click Filters from its sub-menu.
Click KEYWORD FILTER at the top of the screen. The Keyword Filter screen appears.
Locate the filter to rename, and click the filter name. A box opens to allow you to rename the filter. Note that Blocksi added Save and Cancel buttons to the right of the name, as shown below.
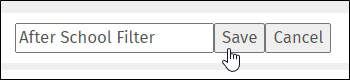
Rename the filter, and click the Save button.
Modify a keyword filter as needed.
Click Content Filtering from the Main Menu and then click Filters from its sub-menu.
Click KEYWORD FILTER at the top of the screen. The Keyword Filter screen appears.
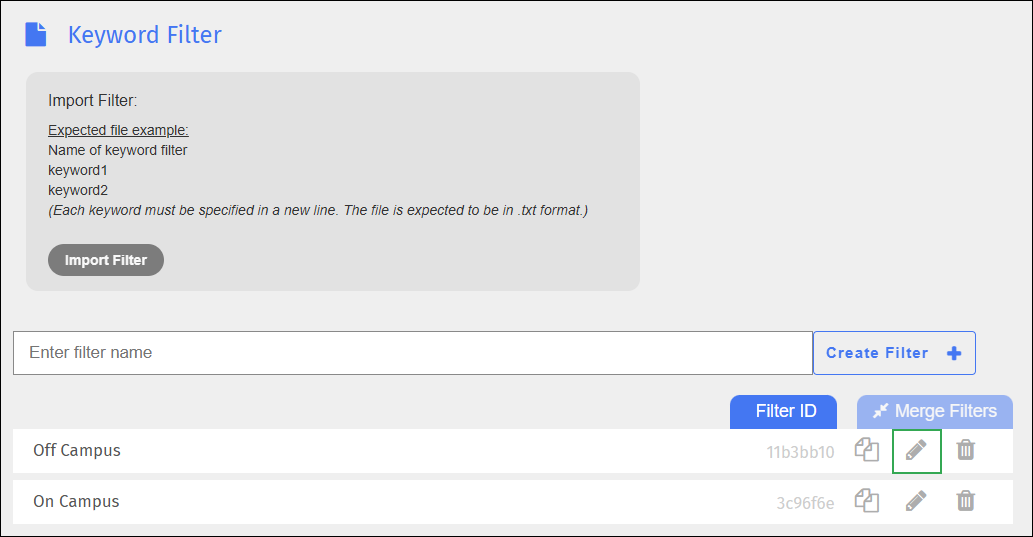
Locate the name of the filter to modify, and click the
icon to the right of the filter name. The Edit screen appears.Make the necessary changes to the filter.
Use an existing filter to create a new one.
Click Content Filtering from the Main Menu and then click Filters from its sub-menu.
Click KEYWORD FILTER at the top of the screen. The Keyword Filter screen appears.
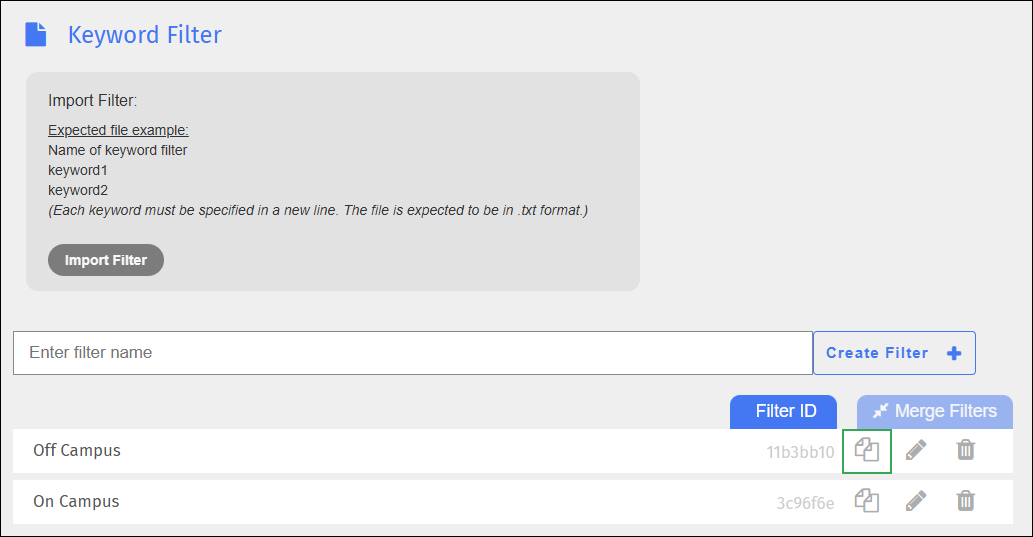
Locate the filter to duplicate, and click the
 icon. The Duplicate Filter window opens.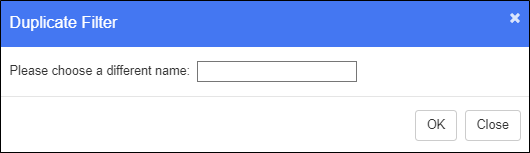
Type the name of the new filter in the text box.
Click OK to add the filter and close the window. The duplicated filter appears at the bottom of the list. It contains the same keywords as the original filter.
Make any changes to the new filter and save it.
Delete keyword filters when you no longer need them.
Click Content Filtering from the Main Menu and then click Filters from its sub-menu.
Click KEYWORD FILTER at the top of the screen. The Keyword Filter screen appears.
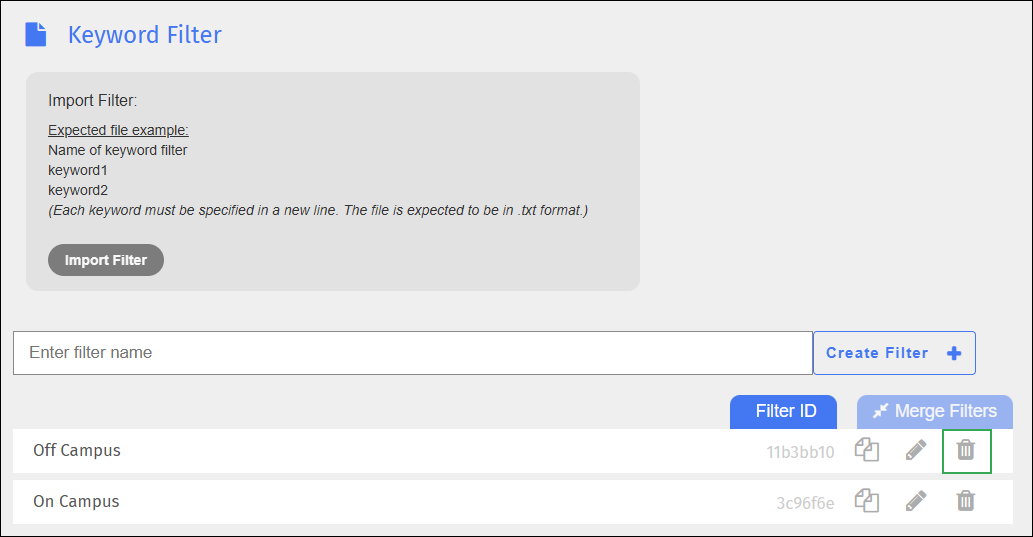
Locate the filter to delete, and click the
icon to the right of the filter. A confirmation prompt appears.Click OK to delete the filter.