Setting Teacher Access Schedules
The Access Schedule allows administrators to define when teachers can access their Teacher Dashboards to view and monitor student screens. By configuring these time settings, you can ensure that access to the Teacher Dashboard is available only during designated periods, such as class hours or approved supervision times. Outside of these defined time ranges, teachers will not be able to access their dashboards.
These settings can be applied at both the district-wide level and for individual teachers, providing flexibility to accommodate different schedules, roles, and classroom requirements.
Click Dashboard Settings from the Main Menu, then click Teacher Dashboard from its sub-menu. The Teacher Accounts screen appears.
Scroll down to the teacher email list at the bottom of the Teacher Dashboard page.
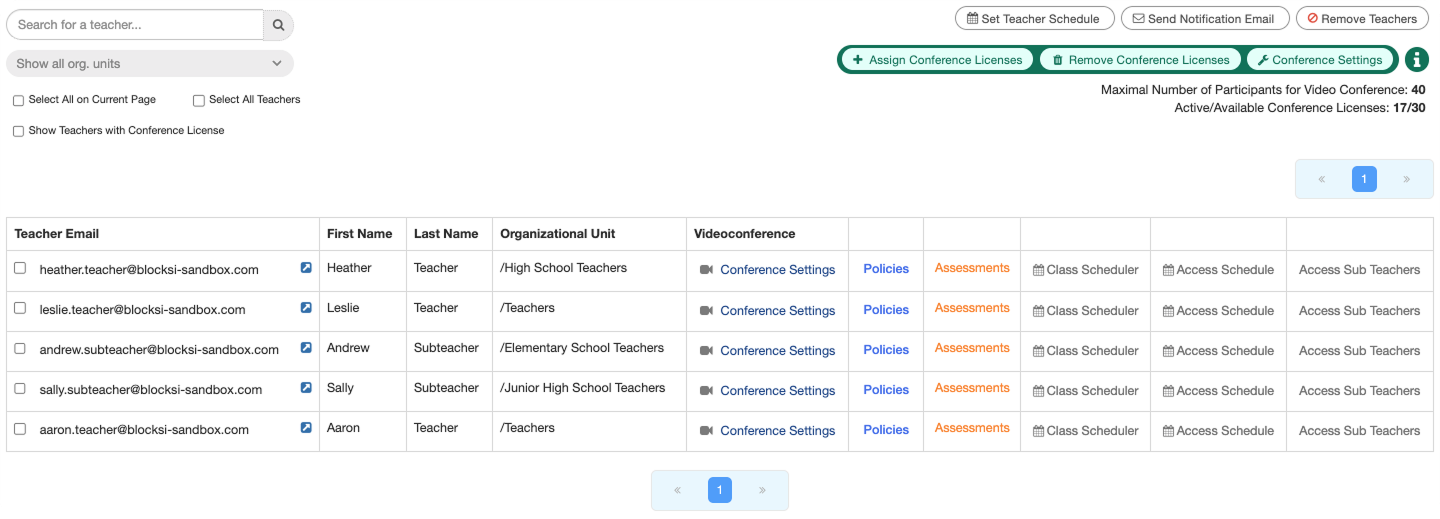
Click the Set Teacher Schedule button. The Teacher Schedule window opens.
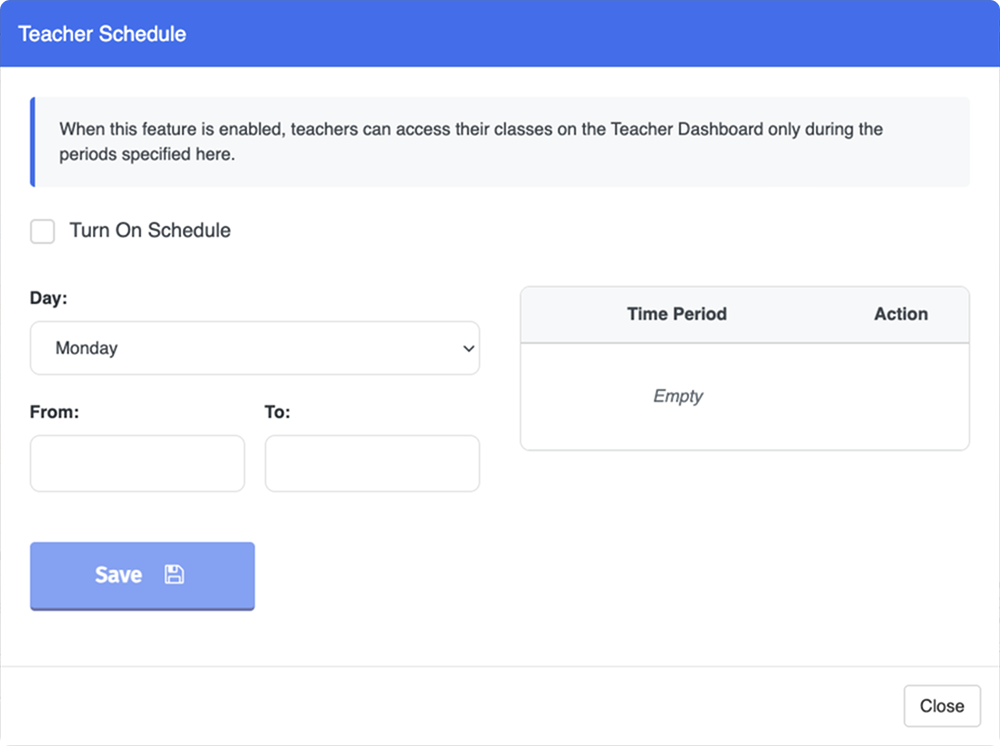
Select the Turn On Schedule checkbox to enable this feature, then select the day on which teachers are allowed to access their classes from the Day drop-down list.
Important
The Teacher Access Schedule can be set for individual days only. Repeat the following process for each day you want to apply the Access Schedule to.
Set the time period using the From and To fields. Clicking either field opens a time selector, where you will be prompted to enter a time. This defines the period during which teachers can access their classes.
Important
The hour and minute must each be selected using separate pop-up windows.
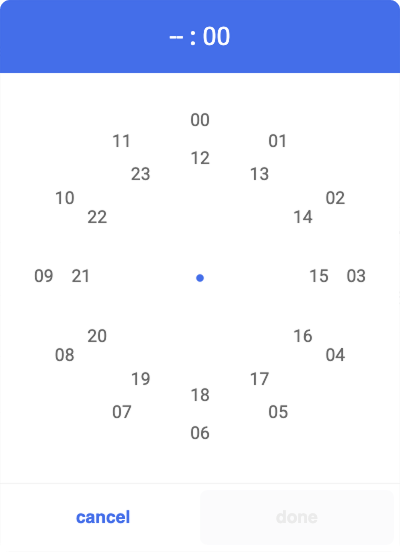
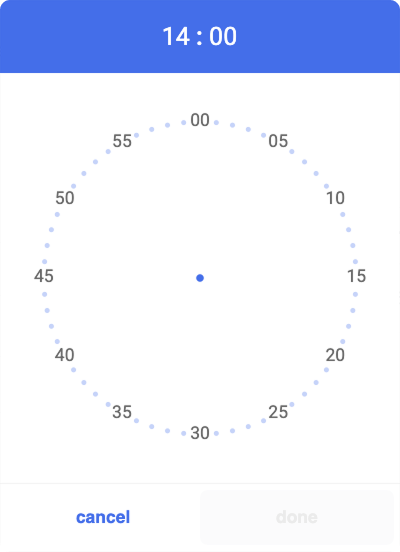
Click Save when you are done to create a time period for the selected day.
Repeat this process for each additional day as needed. You can review the selected times by choosing a day from the Day drop-down menu.
Tip
When reviewing the Time Periods set for a day, you can click the Remove button to delete the selected Time Period.
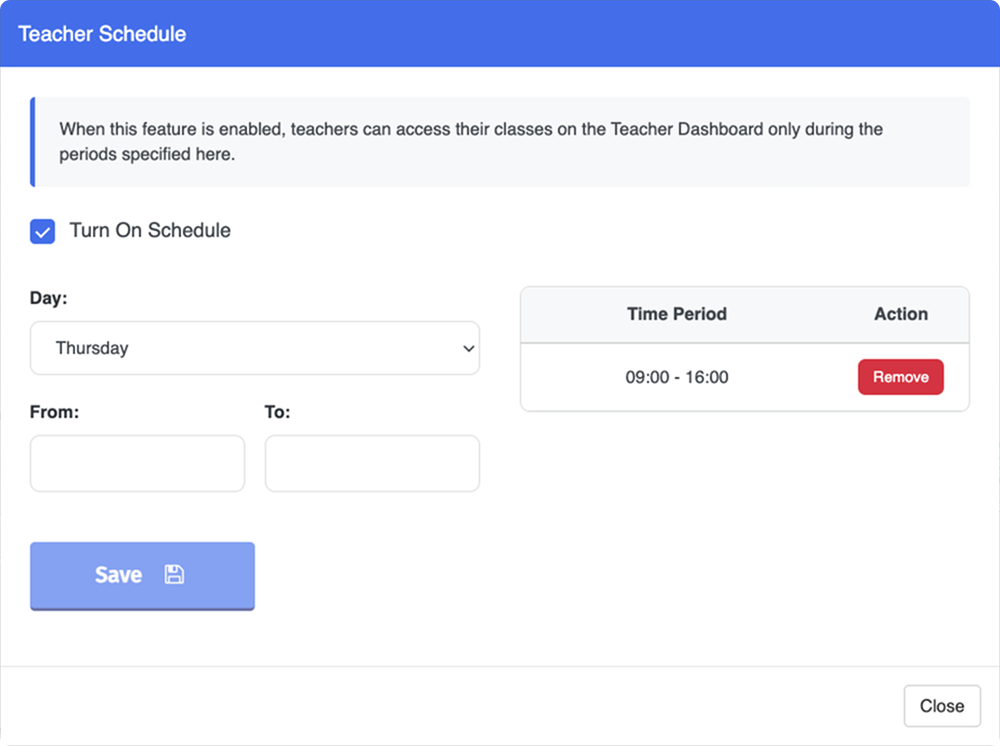
Click Close to close the window when you are done.
Click Dashboard Settings from the Main Menu, then click Teacher Dashboard from its sub-menu. The Teacher Accounts screen appears.
Scroll down to the teacher email list at the bottom of the Teacher Dashboard page.
Search for a teacher whose Access Schedule you want to configure using the search box.
Tip
If you need help searching for teacher accounts, refer to the Searching for a Teacher Account section.
Click the Access Schedule button in the same row as the teacher whose Access Schedule you want to edit. The Teacher Schedule window opens.

Select the Turn On Schedule checkbox to enable this feature, then select the day on which teachers are allowed to access their classes from the Day drop-down list.
Important
The Teacher Access Schedule can be set for individual days only. Repeat the following process for each day you want to apply the Access Schedule to.
Set the time period using the From and To fields. Clicking either field opens a time selector, where you will be prompted to enter a time. This defines the period during which the teacher can access their classes.
Important
The hour and minute must each be selected using separate pop-up windows.
Click Save when you are done to create a time period for the selected day.
Repeat this process for each additional day as needed. You can review the selected times by choosing a day from the Day drop-down menu.
Note
When reviewing the Time Periods set for a day, you can click the Remove button to delete the selected Time Period.
Click Close to close the window when you are done.