Deploying Blocksi Enterprise Edition for ChromeOS
The Blocksi Enterprise Edition (BEE) extension is available on Google Workspace Marketplace and Chrome Webstore. Administrators can install it using the Google Admin Console. This article will guide you through the entire installation process for Chromebooks and other ChromeOS-based devices.
You will require access to your organization's Google Workspace as well as the Blocksi Admin Dashboard for completing these steps.
This installation guide has been broken down into three parts for readability and clarity:
The first part of the guide covers deploying the Blocksi Enterprise Edition to managed ChromeOS devices via the Google Admin Console, enabling content filtering, classroom monitoring, and teacher commands.
Sign in to the Google Admin console using your Google Admin credentials.
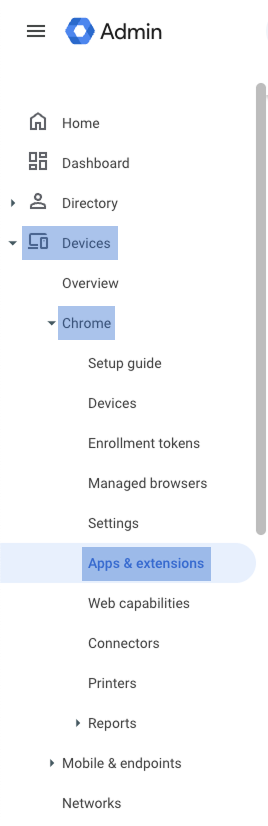
Navigate to Devices > Chrome > Apps & extensions from the Main Menu to the left.
Click the Users & browsers tab.
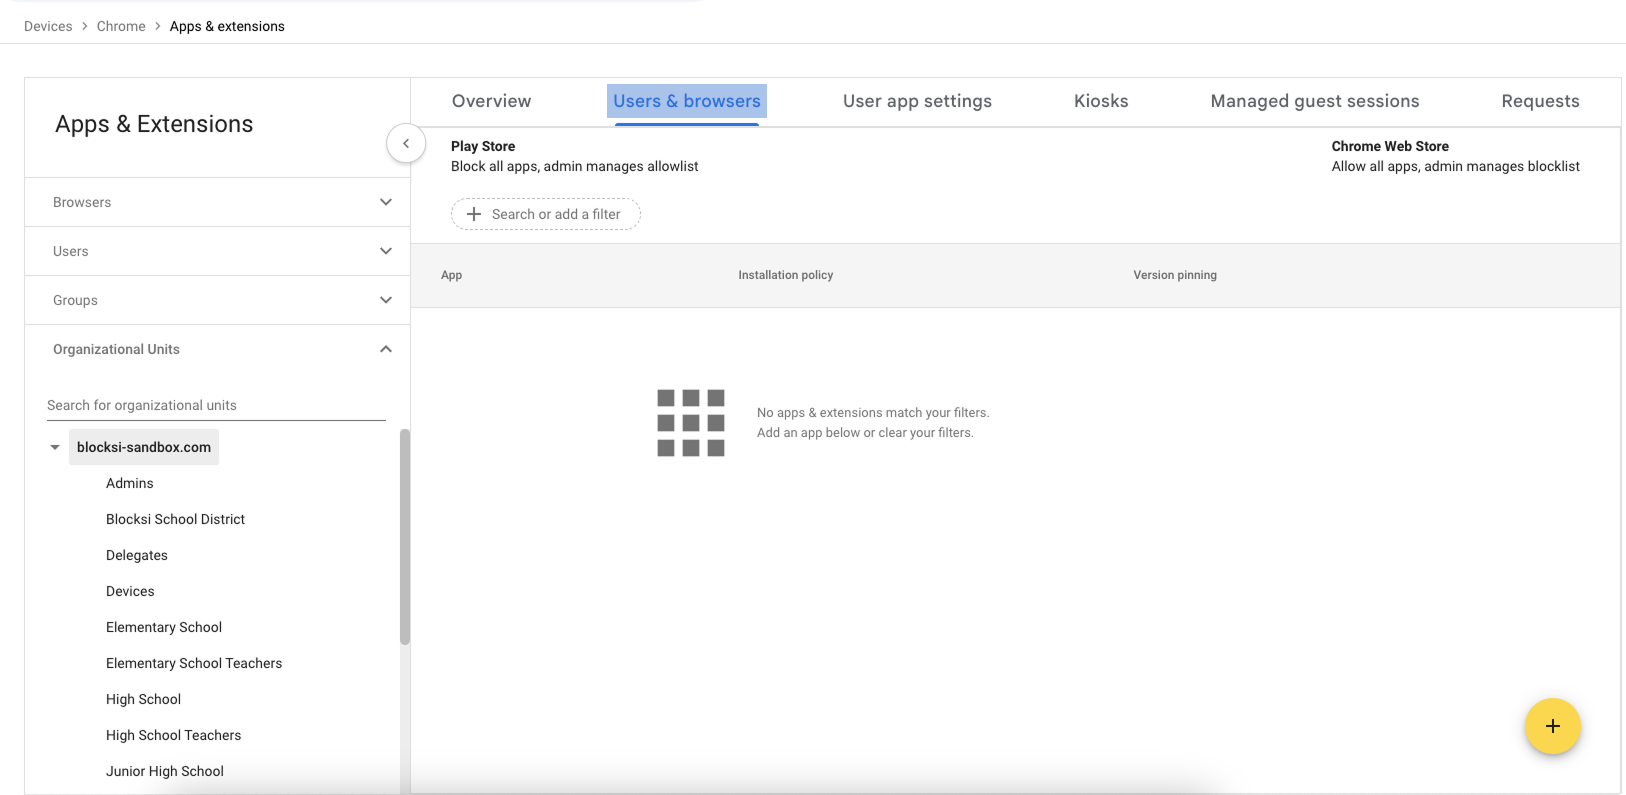
On the left, select the Organizational Unit (OU) you want to deploy the extension to. If you want it deployed for everyone, stay on the top-level OU.
Hover your mouse cursor over the
 icon located in the lower right-hand corner of the screen and click the
  icon. The Add Chrome app or extension by ID window opens.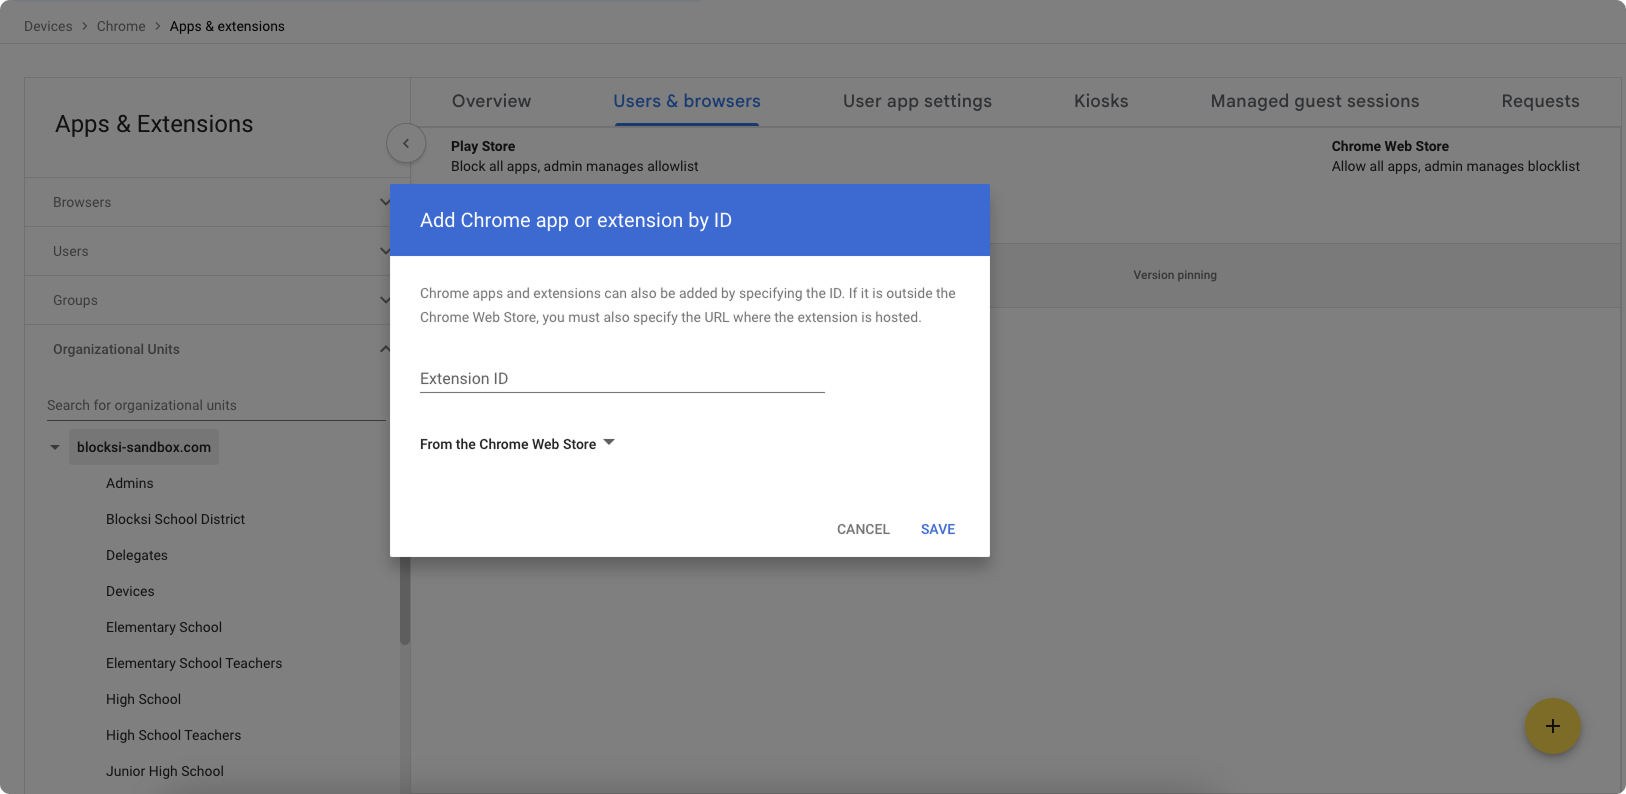
Sign in to your Blocksi Admin Dashboard.
Click the Copy Blocksi Enterprise ID button on the Action Bar of the Admin Dashboard to copy the extension ID to your clipboard.

Return to the Google Admin console and paste the ID into the Extension ID text box.
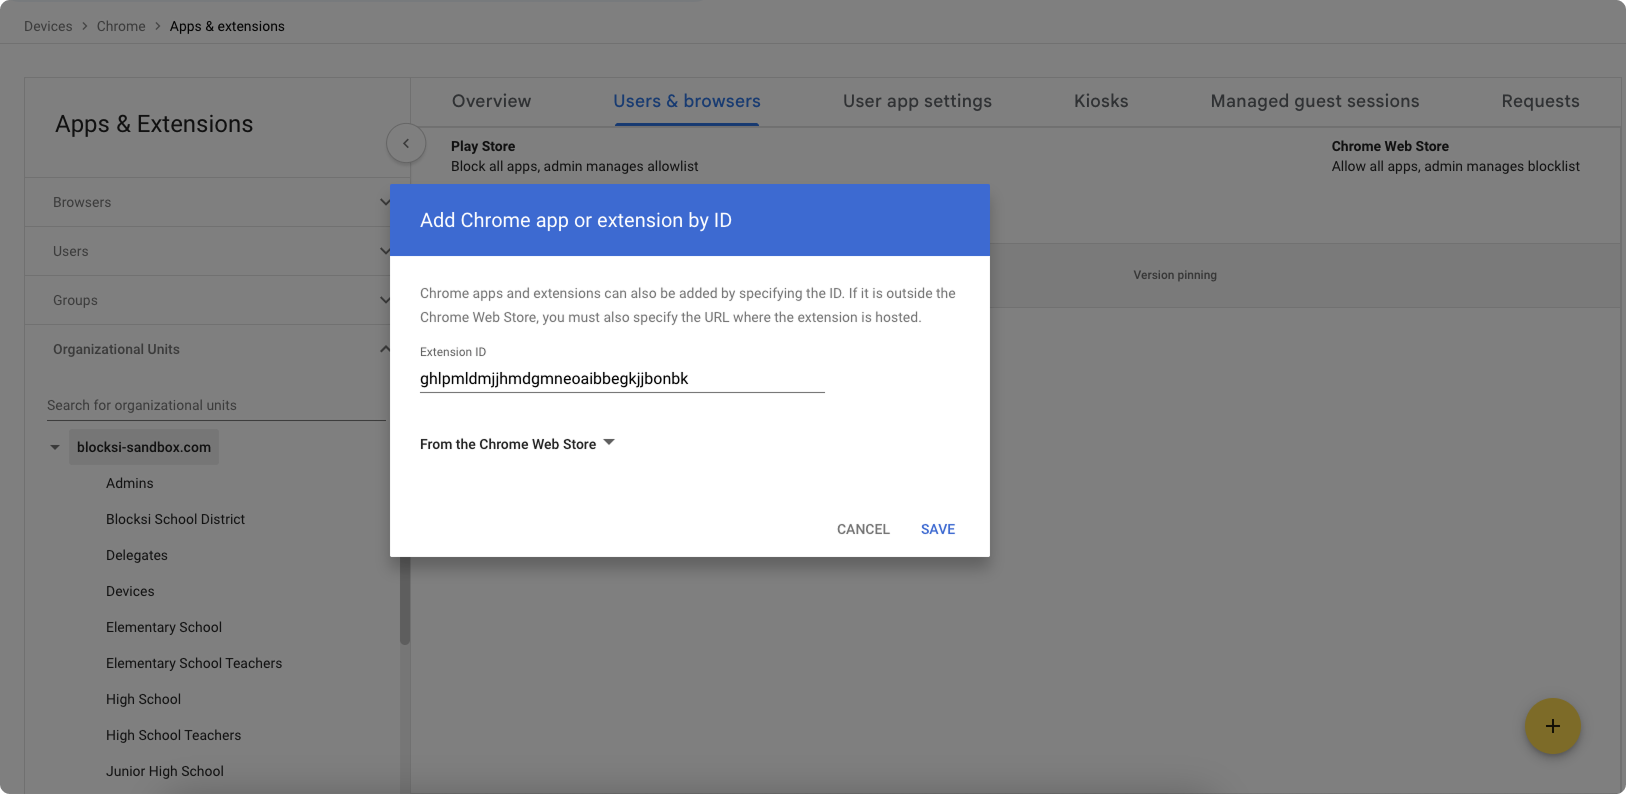
Click Save. The Google Admin console now displays the Blocksi Enterprise Extension. By default, the extension is set to Allow install under its Installation policy settings.
Click Allow install. The Installation policy panel opens to the right.
Click the down arrow to the right of the Allow install option and switch it to Force install.
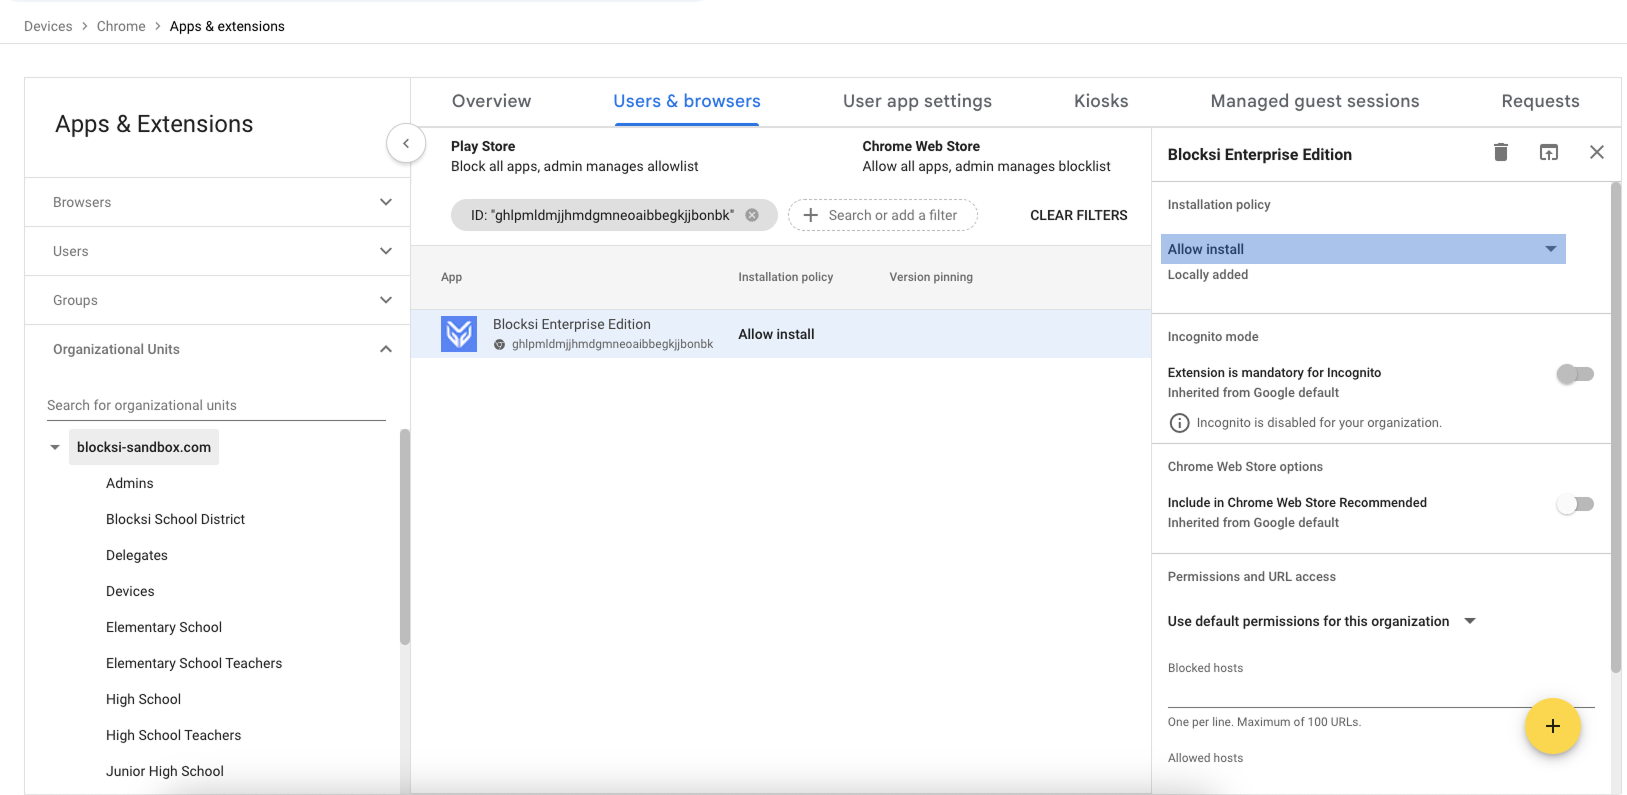
Click Save in the upper right-hand corner of the console to save your selection. The Blocksi Enterprise Edition extension with the ID
ghlpmldmjjhmdgmneoaibbegkjjbonbkand installation policy set to Force install should now appear in your Google Admin Console. See image below for reference.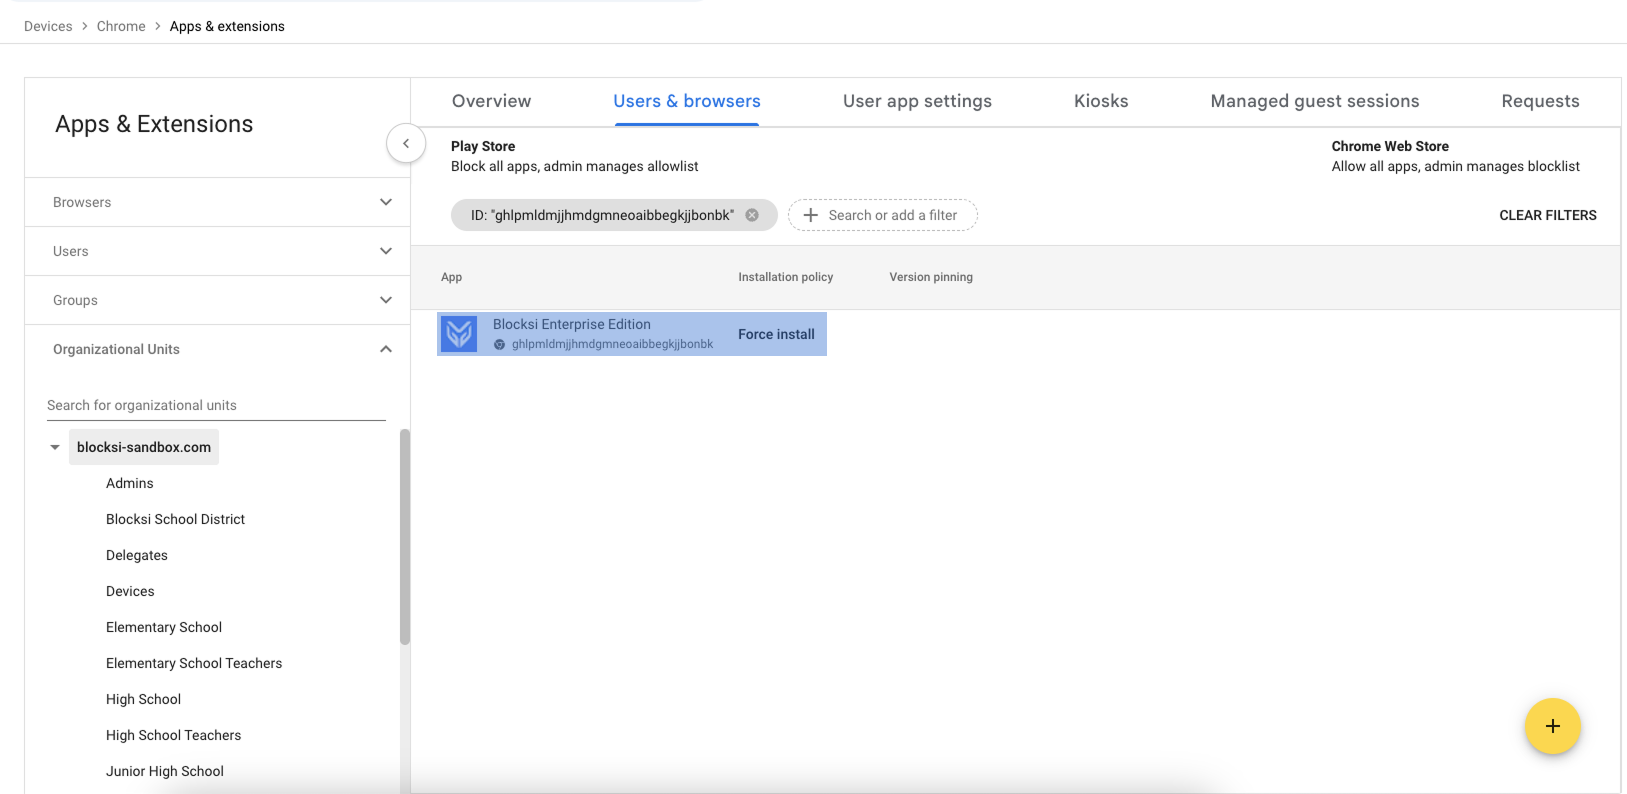
Warning
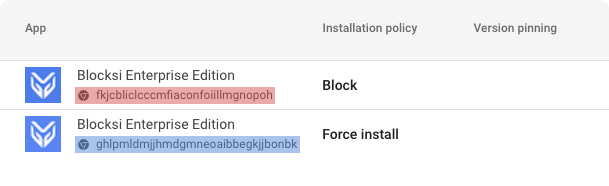
If there are any other Blocksi Enterprise Edition extensions being currently allowed or force installed, make sure to set them to Block, or remove them altogether in order for the extension to be functioning as expected. The only allowed Blocksi Enterprise Edition should have the ID matching the Blocksi Enterprise ID found on your Admin Dashboard. For reference, see example below.
The second part of the guide outlines key safety settings in the Google Admin Console for managed devices. These settings ensure the Blocksi Enterprise Edition extension functions properly and help prevent students from bypassing filtering and monitoring.
Sign in to the Google Admin console using your Google Admin credentials.
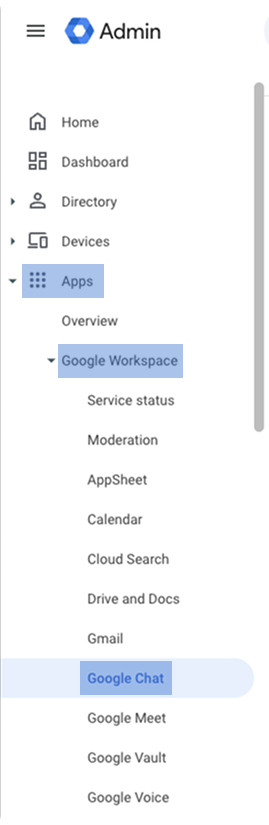
Navigate to Apps > Google Workspace > Google Chat from the Main Menu to the left.
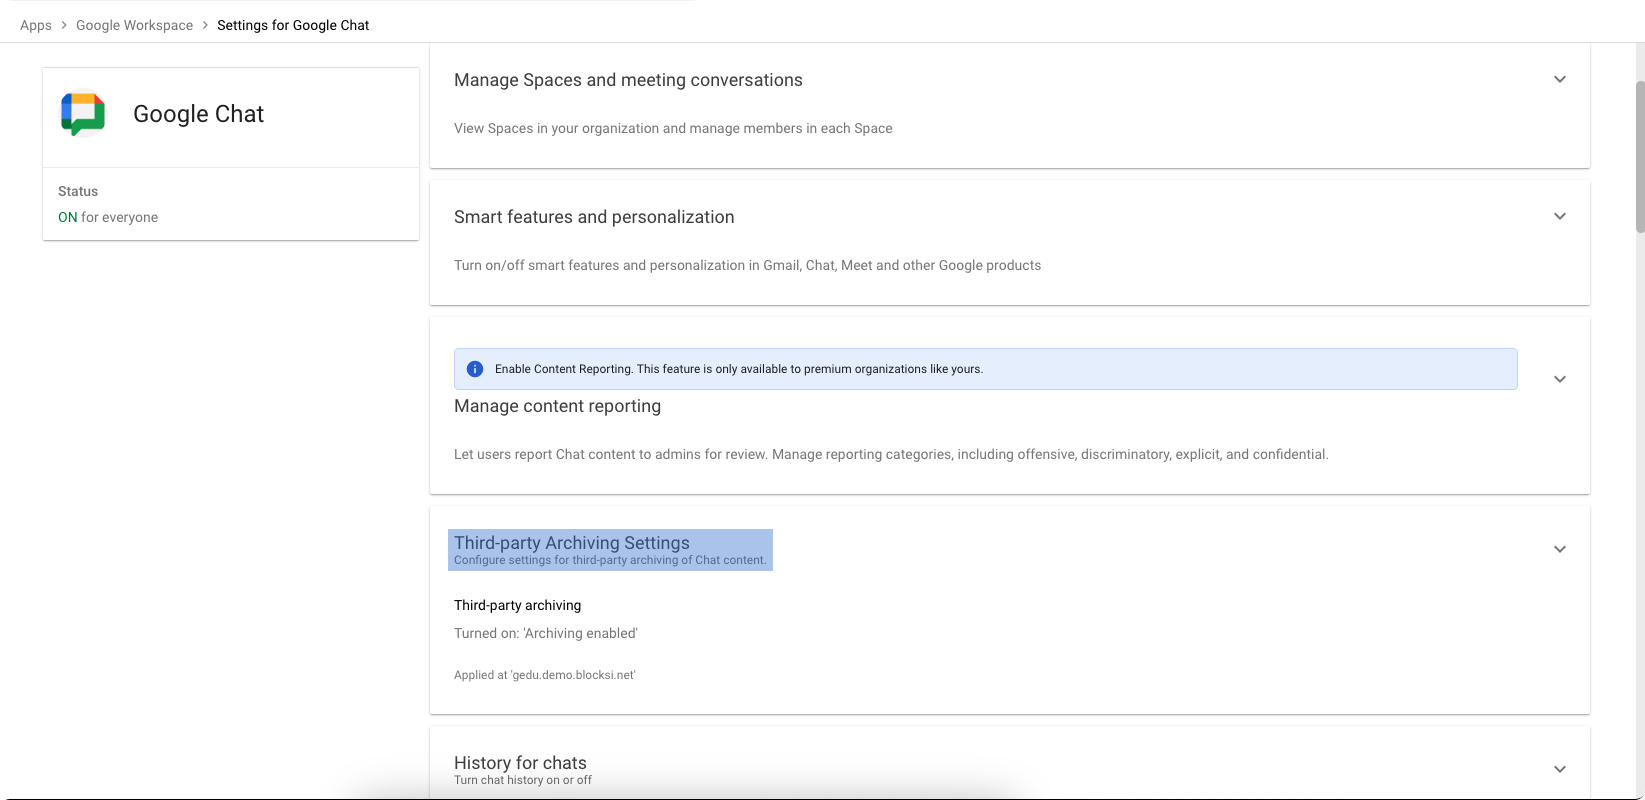
Click on Third-party Archiving Settings.
On the left, select the Organizational Unit (OU) you want to configure chat scanning for. If you want these settings applied for everyone, stay on the top-level OU.
Check the box for Archiving enabled.
Enter student.safety@blocksi.net as the destination address, and configure the archival frequency to 1 hour.
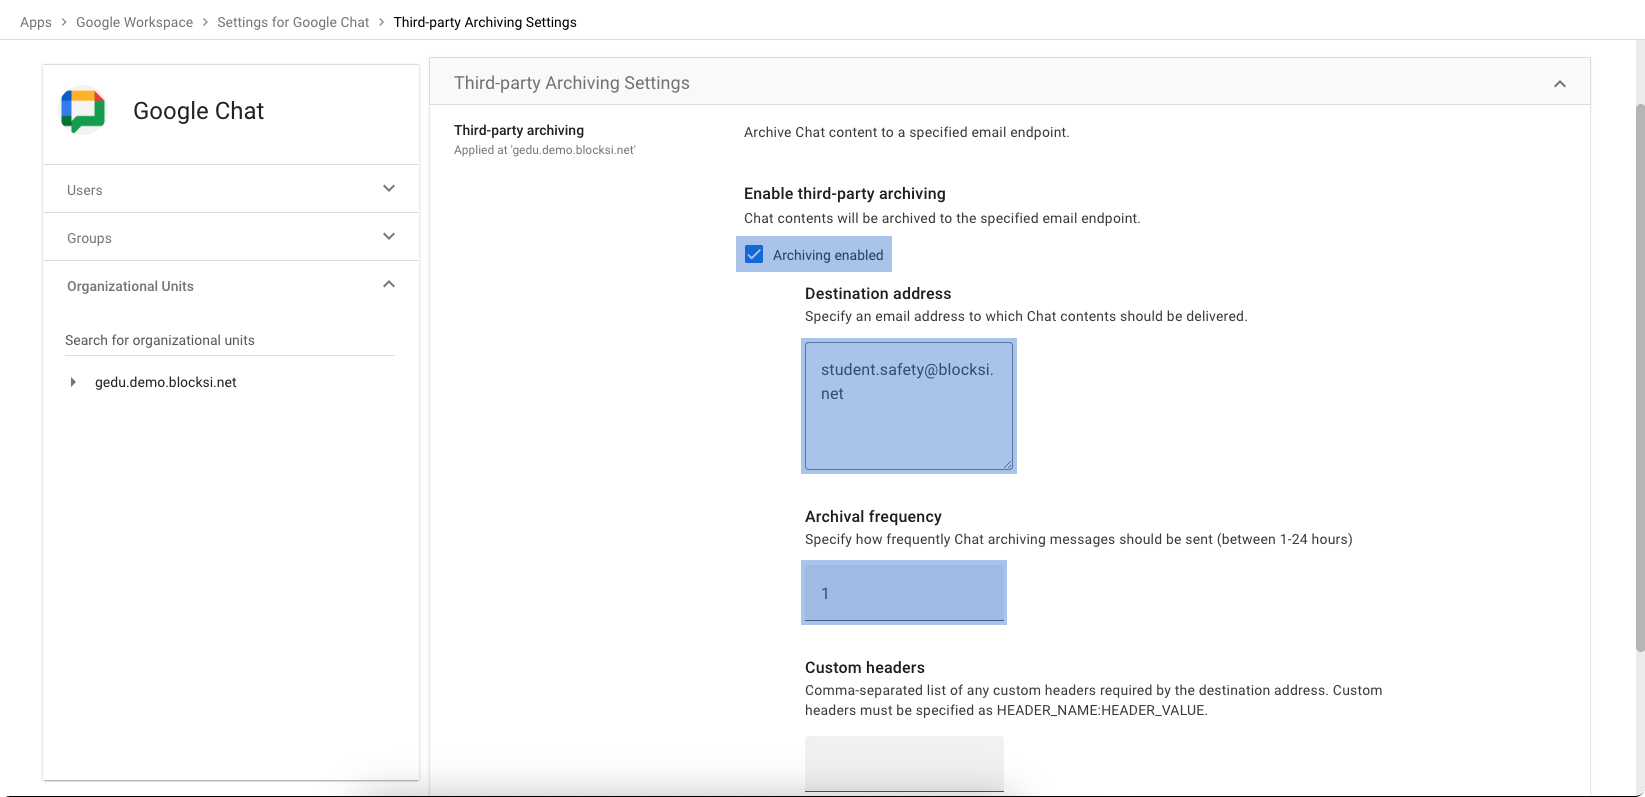
Click Save.
Note
The "Third-party archiving" setting is subscription plan-dependent. If this option is missing from your Google Admin console, your current Google Workspace subscription might not offer this feature.
Sign in to the Google Admin console using your Google Admin credentials.
Navigate to Devices > Chrome > Settings from the Main Menu to the left.
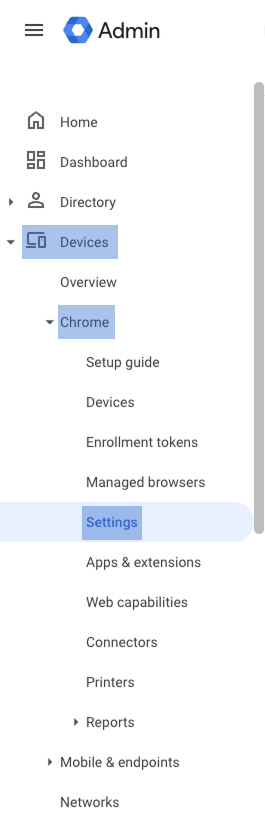
Click the User & browser settings tab.
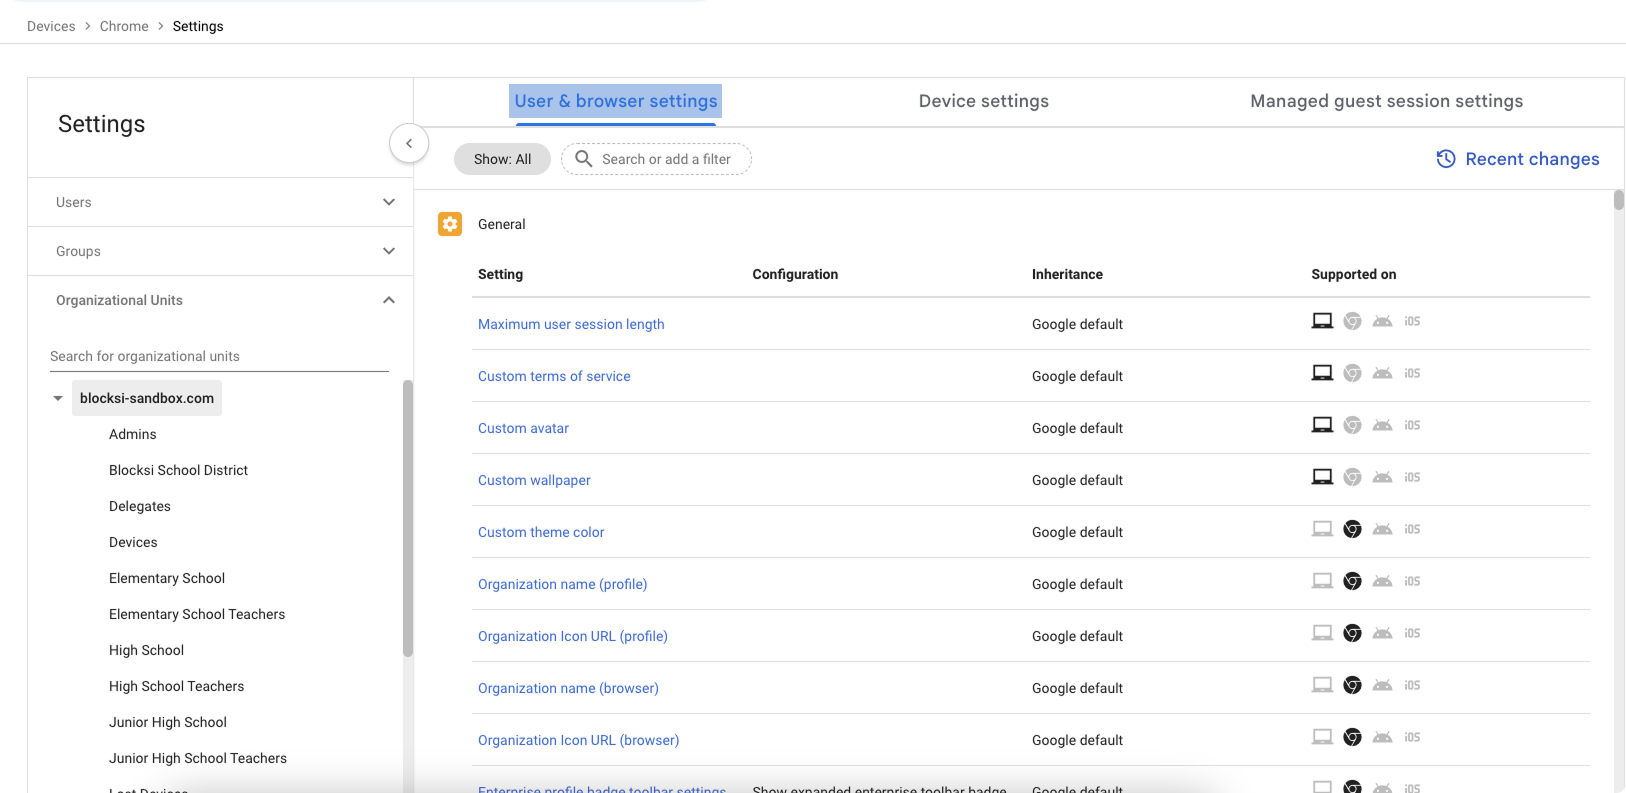
Select the student Organizational Unit (OU) that you are deploying screen monitoring settings to.
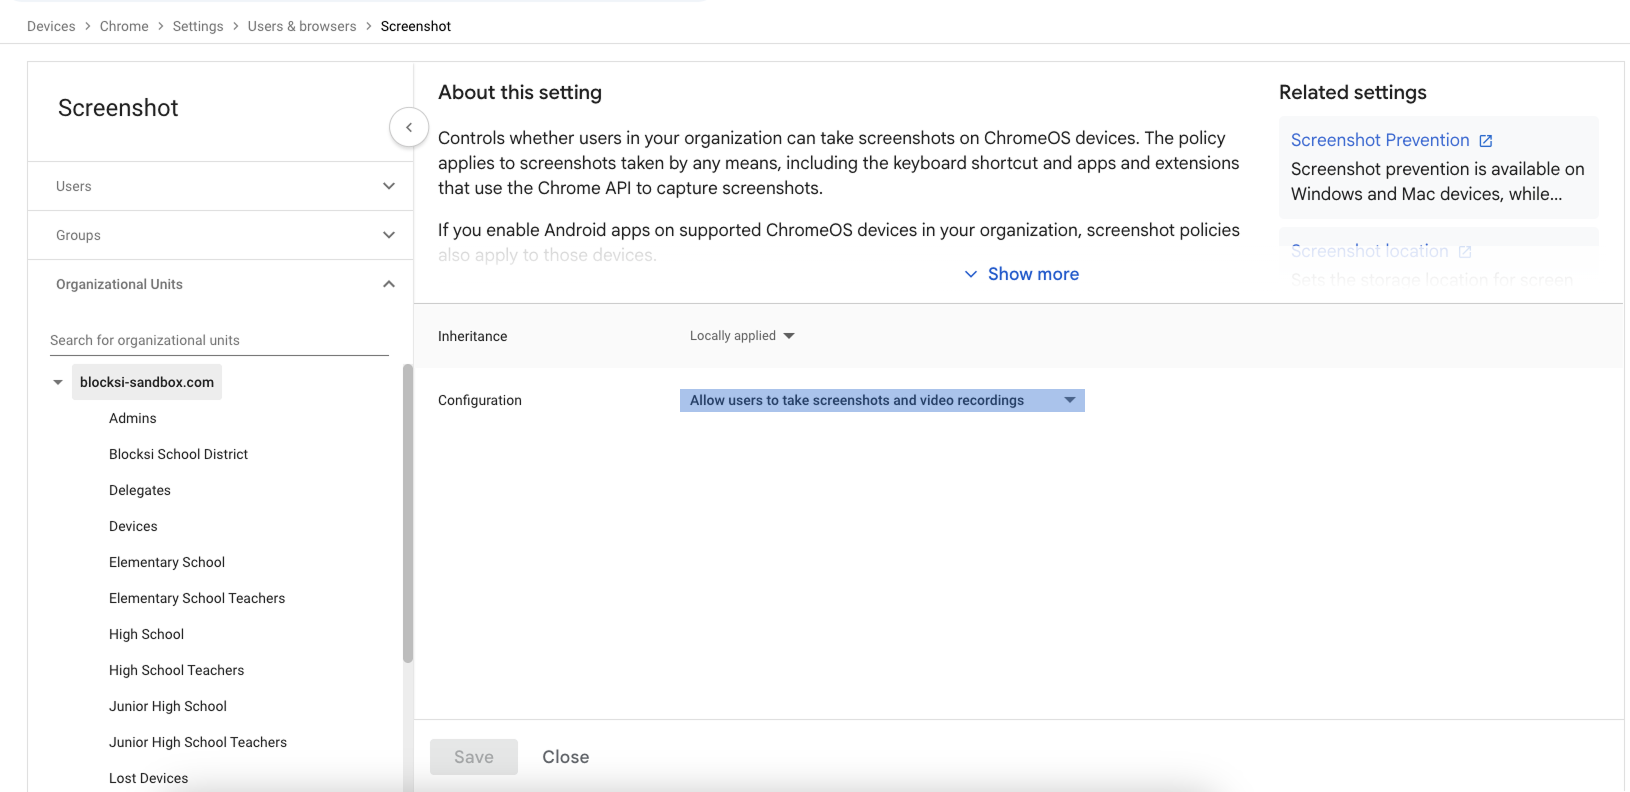
Type screenshot in the + Search or add a filter field and press Enter. Click on the Screenshot option and ensure it is set to "Allow users to take screenshots and video recordings."
Note
This enables the capture of screenshots and video recordings of student devices by teachers for monitoring and assessment purposes.
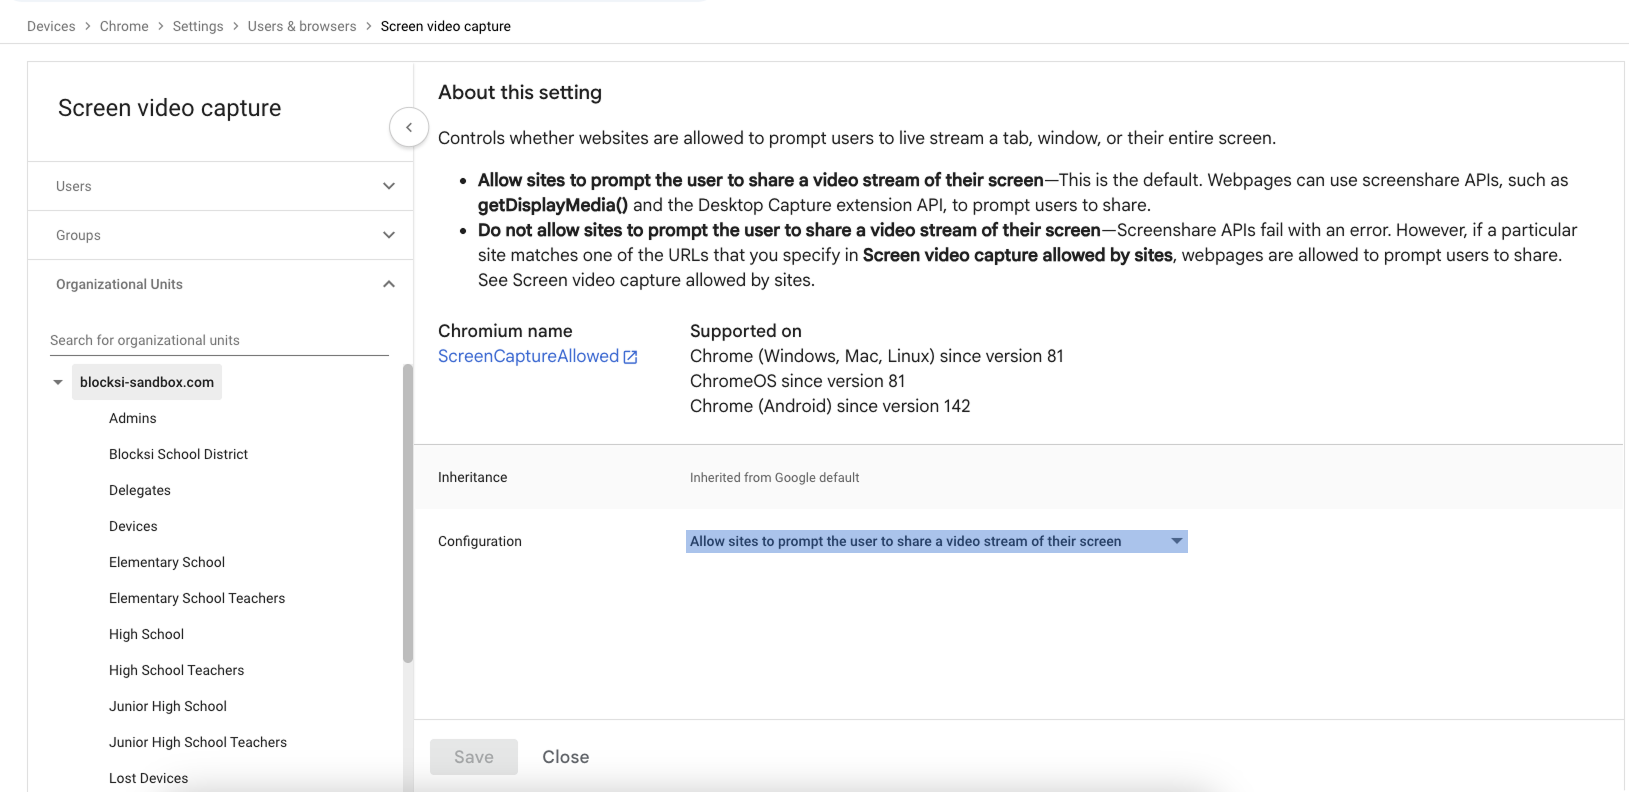
Type screen video capture in the + Search or add a filter field and press Enter. Click on the Screen video capture option and ensure it is set to "Allow sites to prompt users to share a video stream of their screen."
Note
Enabling this setting allows teachers and students to share their screens to the Teacher Dashboard or student devices, enhancing collaboration and instructional capabilities.
Click Save in the upper right-hand corner of the console to save your selections for this OU.
Note
Repeat the steps for all student organizational units.
Sign in to the Google Admin console using your Google Admin credentials.
Navigate to Devices > Chrome > Settings from the Main Menu to the left.
Click the User & browser settings tab.
Select the student Organizational Unit (OU) that you want to prevent from accessing Task Manager, Incognito Mode, and Developer Tools.
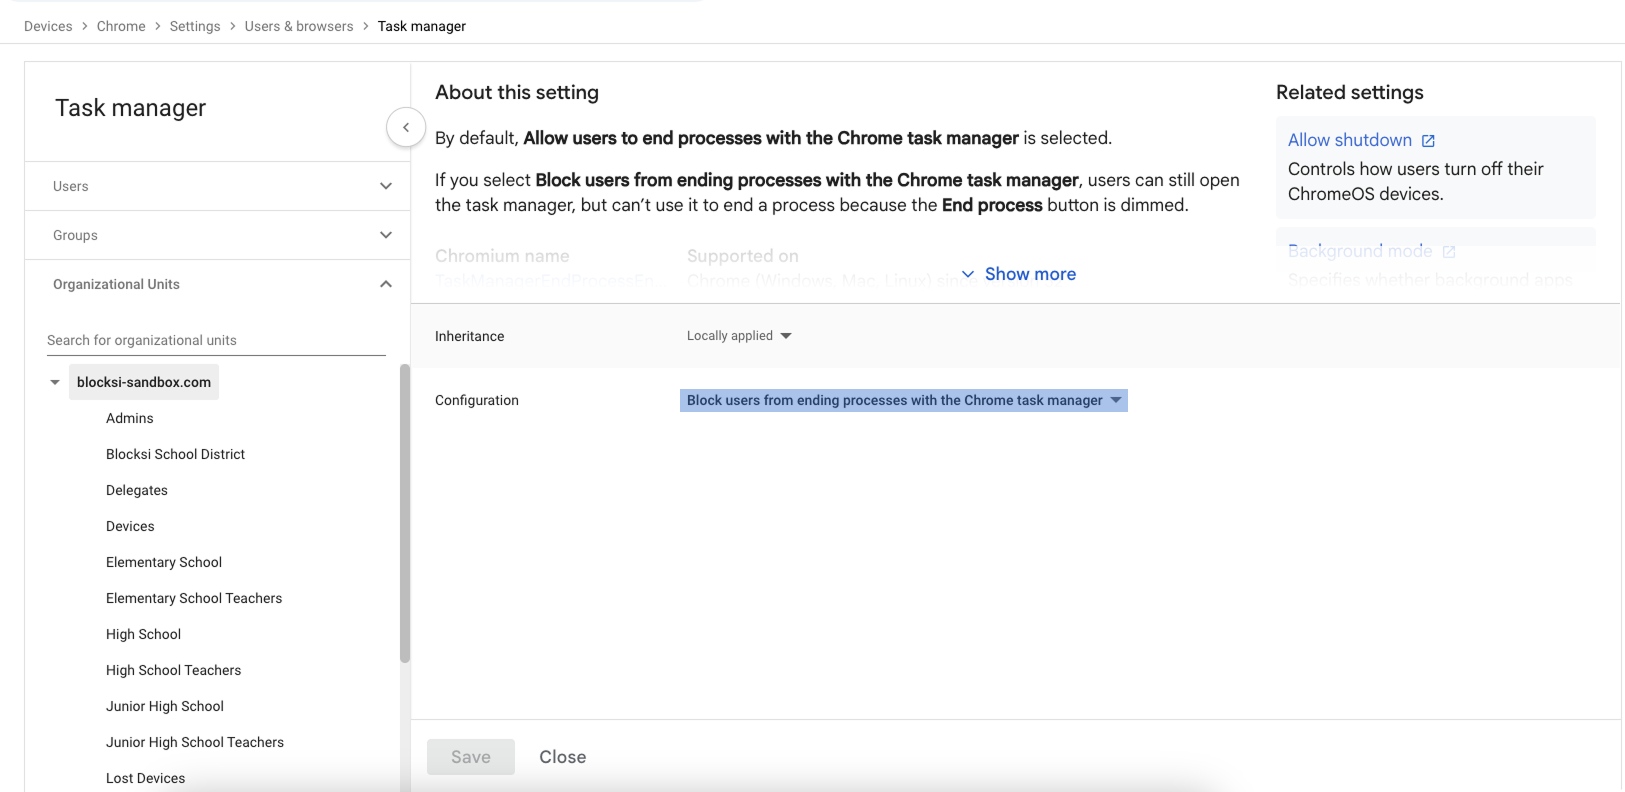
Type task manager in the + Search or add a filter field and press Enter. Click on the Task manager option and switch it to "Block users from ending processes with the Chrome task manager."
Note
Enabling this setting prevents students from ending the Blocksi extension process through the Chrome Task Manager and gaining temporary unrestricted access.
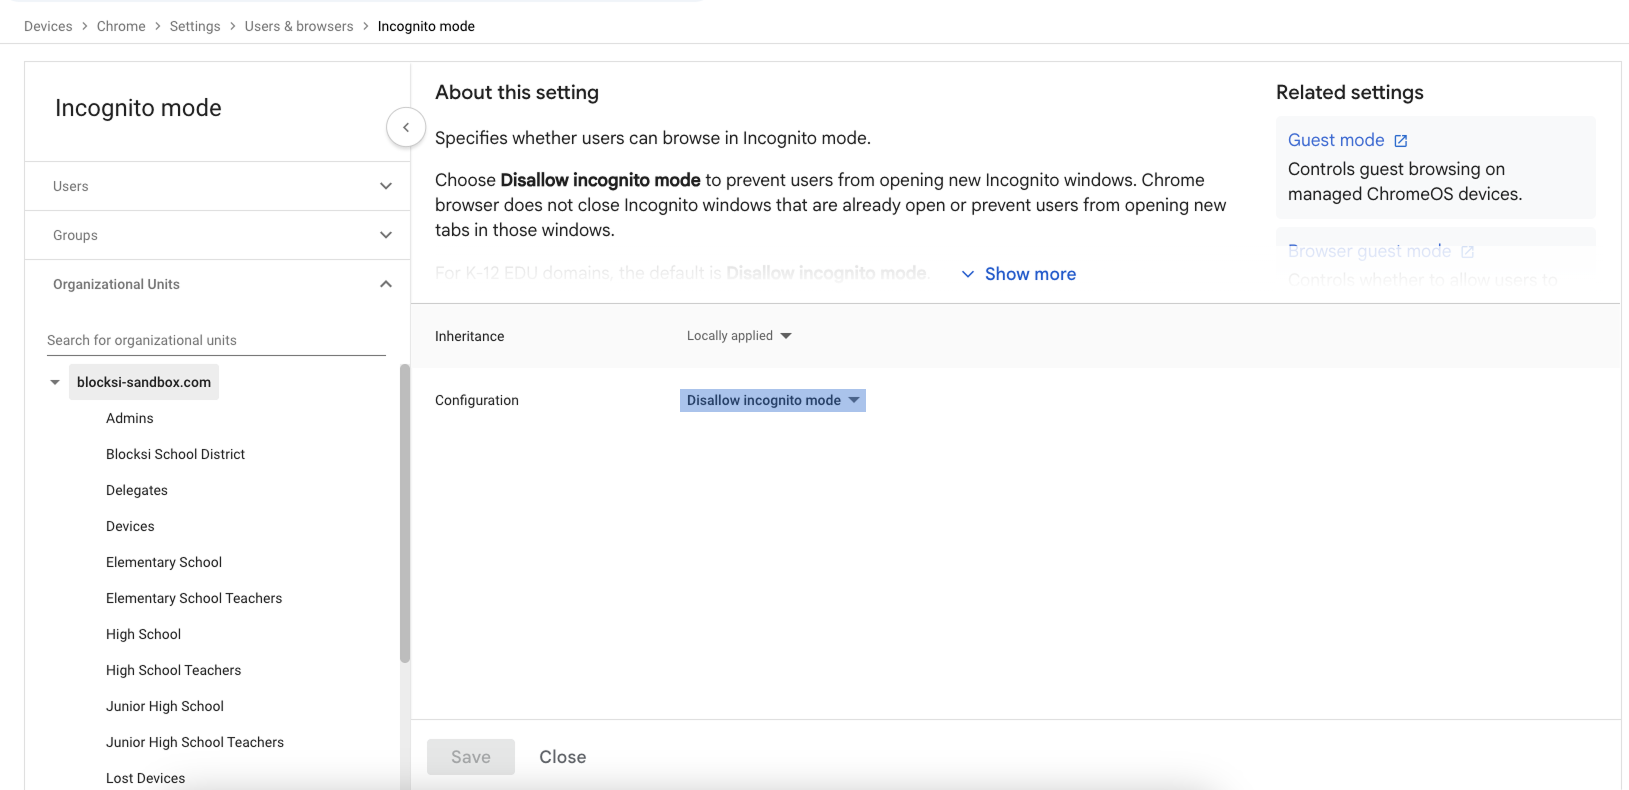
Type incognito mode in the + Search or add a filter field and press Enter. Click on the Incognito mode option and switch it to "Disallow incognito mode."
Note
Disallowing Incognito Mode prevents students from disabling extensions, including Blocksi. This ensures that Blocksi can continue to effectively monitor, manage, and filter student activities.
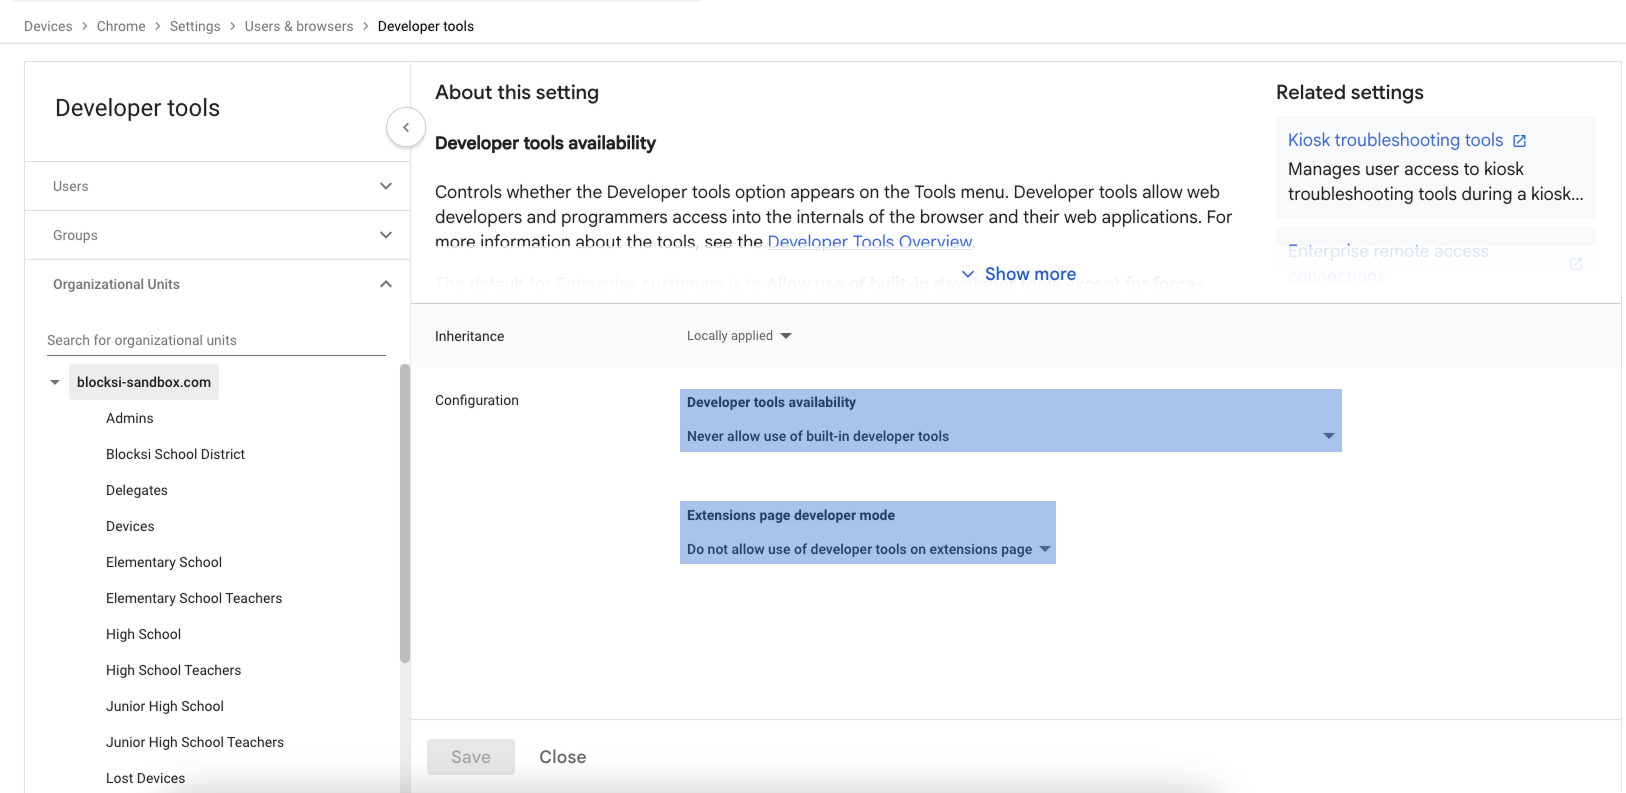
Type developer tools in the + Search or add a filter field and press Enter. Click on the Developer tools option and switch it to "Never allow use of built-in developer tools" and "Do not allow use of developer tools on extensions page."
Note
Repeat the steps for all student organizational units.
Sign in to the Google Admin console using your Google Admin credentials.
Navigate to Devices > Chrome > Settings from the Main Menu to the left.
Click the User & browser settings tab.
Select the student Organizational Unit (OU) that you that you want to configure URL blocking for.
Type URL blocking in the + Search or add a filter field and press Enter. Click the URL blocking setting.
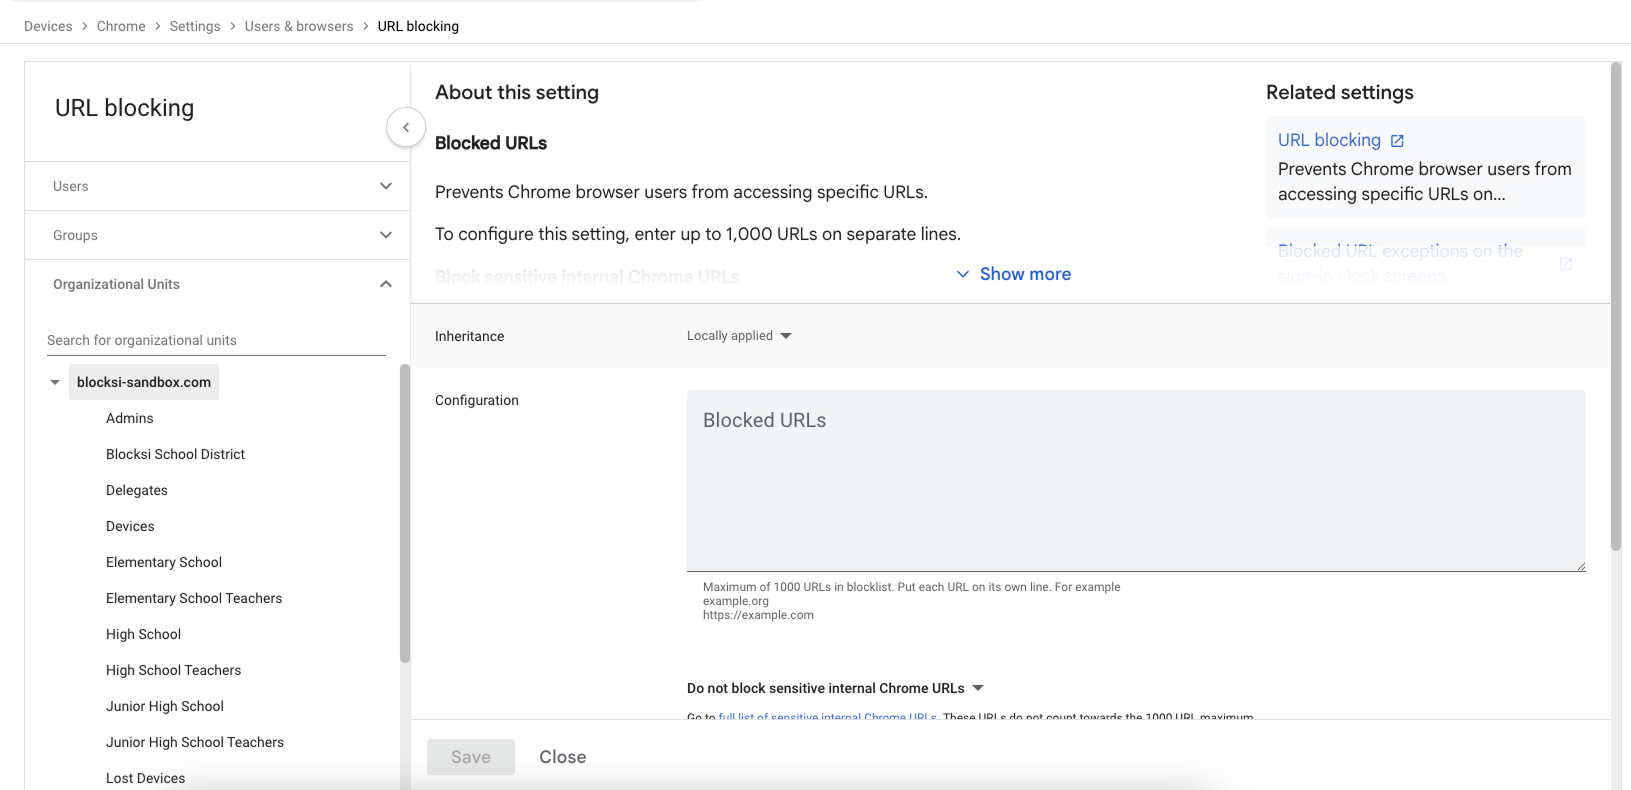
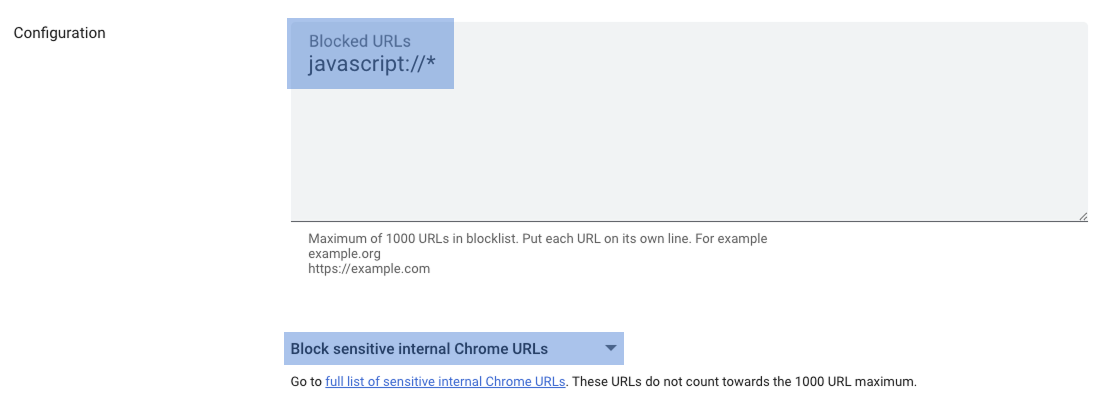
Type javascript://* in the Blocked URLs section and press Enter.
Tip
If you wish to prevent students from opening locally downloaded files, you can add file://* to the list of blocked URLs.
Select “Block sensitive internal Chrome URLs” and click Save.
Tip
You can add exceptions in Blocked URL exceptions for chrome://policy or other URLs that might be needed in troubleshooting scenarios.
The third part of the guide addresses ChromeOS sign-in options and restrictions. To ensure the Blocksi Enterprise Edition is deployed to student devices, users must sign in with their school-managed credentials.
Sign in to the Google Admin console using your Google Admin credentials.
Navigate to Devices > Chrome > Settings from the Main Menu to the left.
Click the Device settings tab.
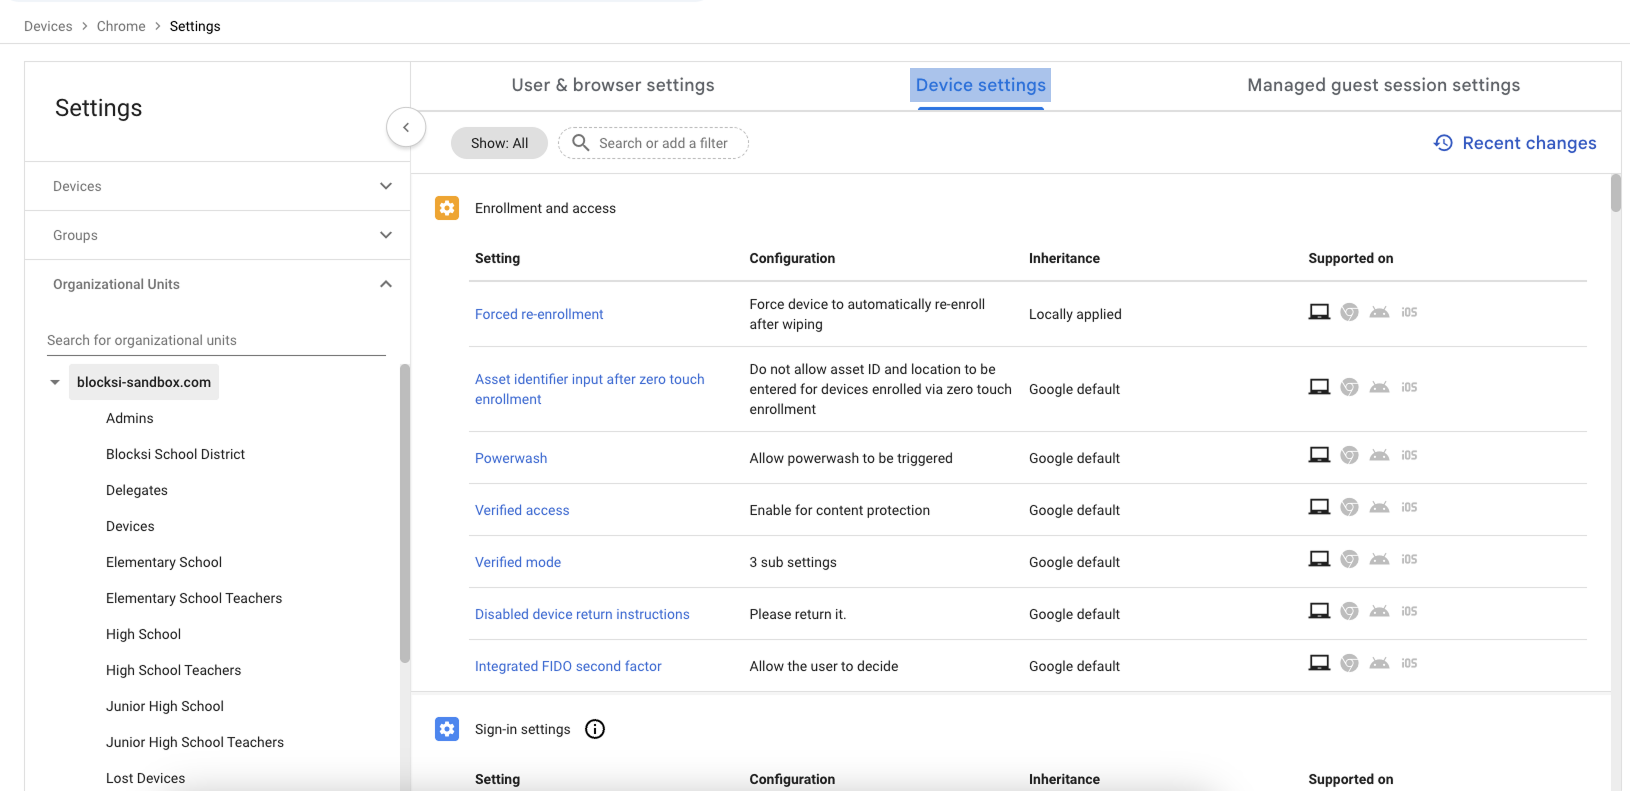
Select the student Organizational Unit (OU) that you are configuring Chrome sign-in settings and restrictions for.
Type guest mode in the + Search or add a filter field and press Enter. Click on the Guest mode option and switch it to "Disable guest mode."
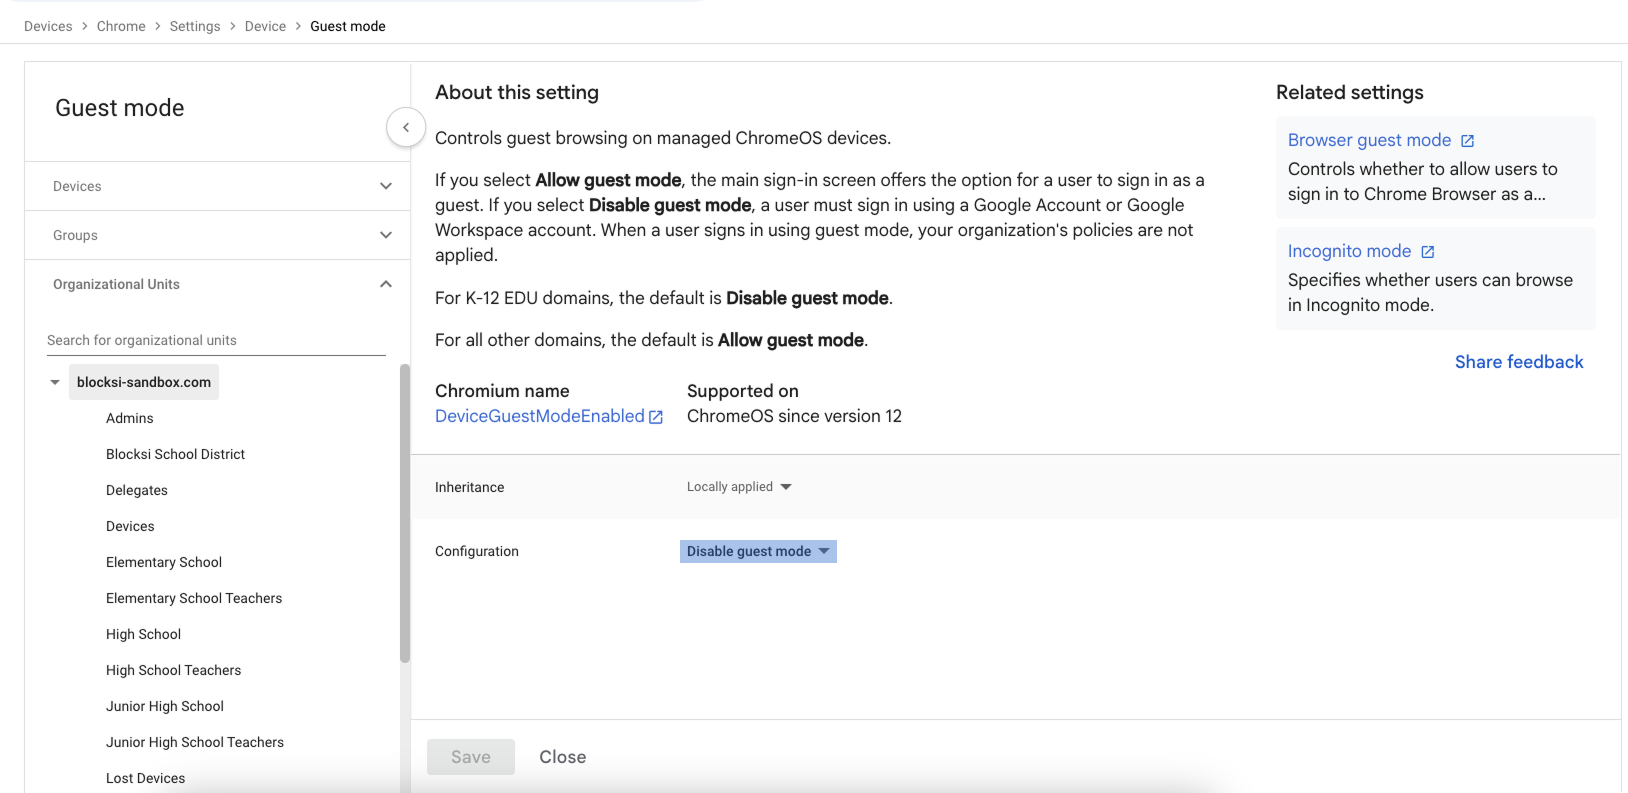
Note
This prevents students from accessing unmanaged sessions on Chromebooks, ensuring that the necessary extensions, including Blocksi, are pushed to their devices.
Type sign-in restriction in the + Search or add a filter field and press Enter.
Click the Sign-in restriction option.
Switch the setting to "Restrict sign-in to a list of users."
In the Allowed users field, type in your domain in form of *@blocksi-sandbox.com.
Warning
Make sure to replace blocksi-sandbox.com with the domain you are using for your students.
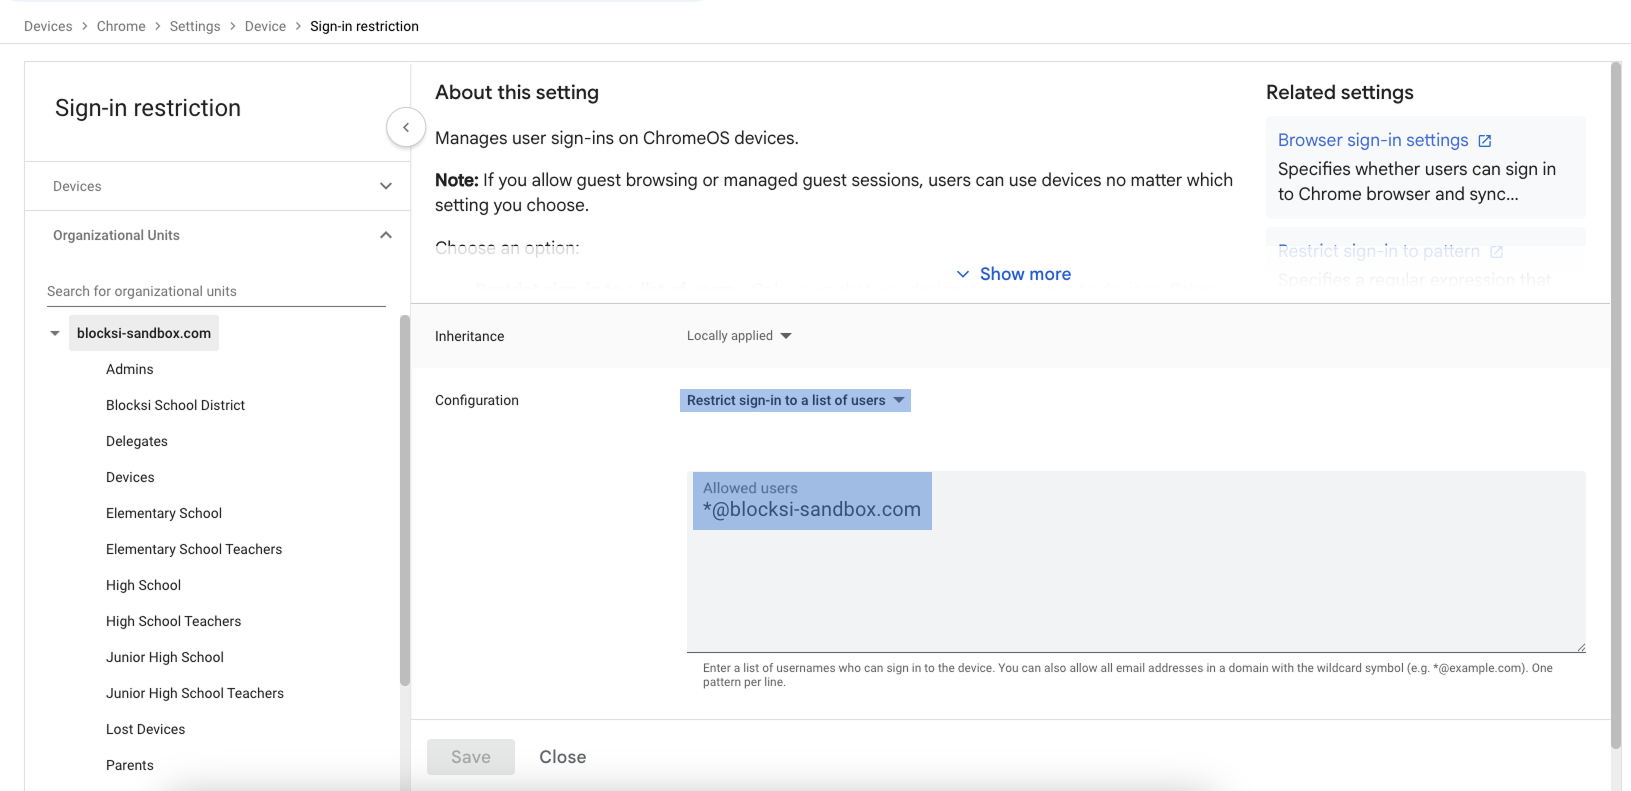
Note
By allowing specific domains, this setting restricts sign-in to only authorized users, enhancing security and control over Chromebook devices.
Type forced re-enrollment in the + Search or add a filter field and press Enter. Click the Forced re-enrollment option and switch it to either "Force device to automatically re-enroll after wiping" or "Force device to re-enroll with user credentials after wiping."
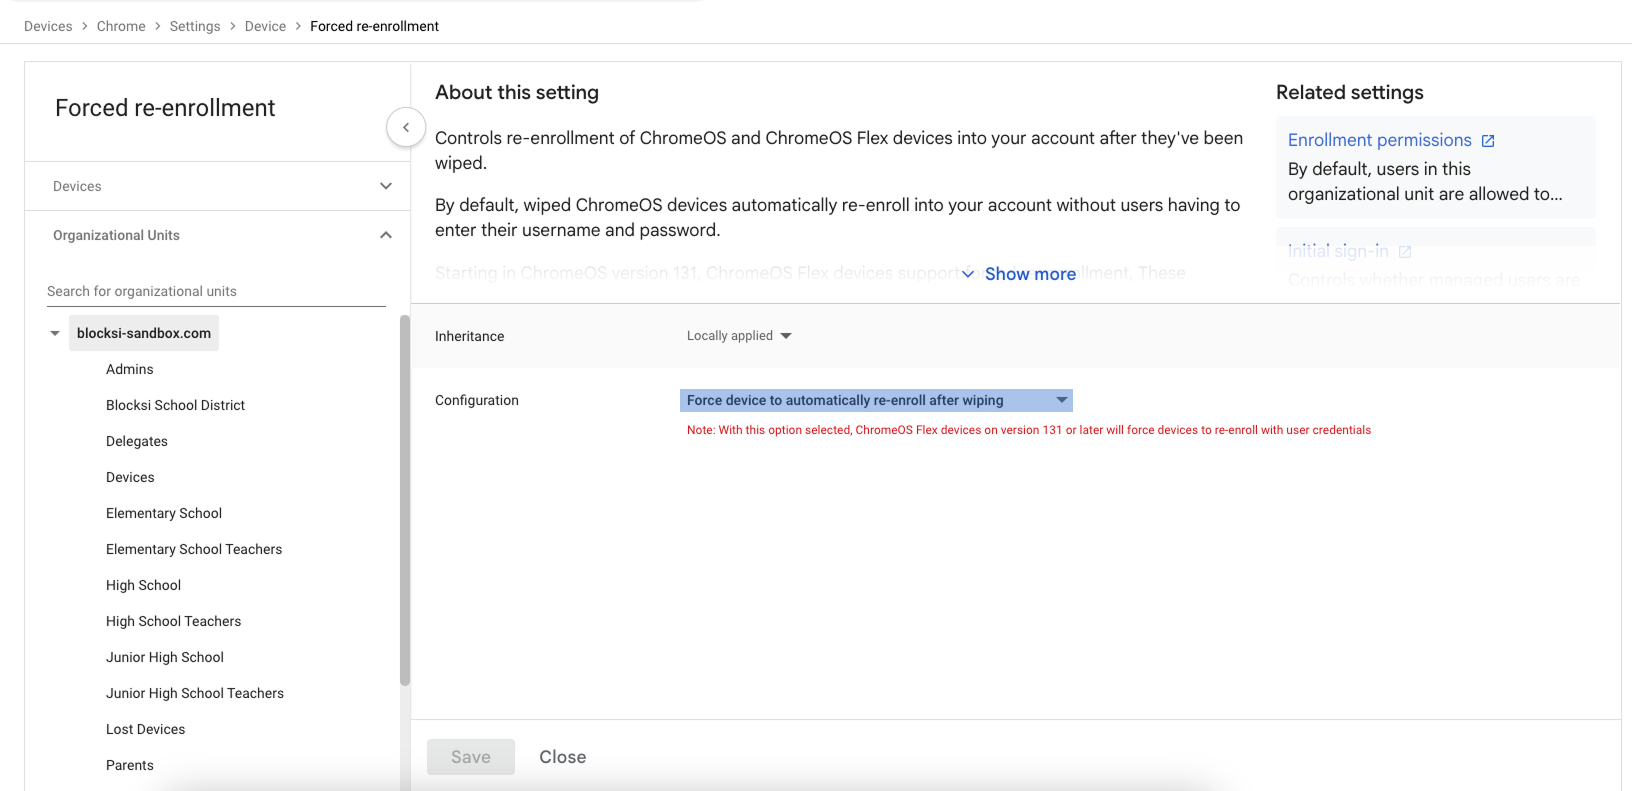
Tip
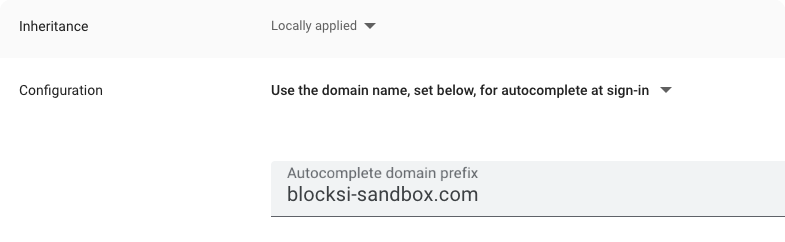
To simplify the sign-in process, search for autocomplete domain in the filter field and select the option to "Use the domain name, set below, for autocomplete at sign-in." Once selected, type your domain in the username@ field that appears. This configuration allows the Chrome browser to prefill the domain for users.