Intune - iOS Configuration Guide
The following contains procedures for deploying Blocksi for iOS through Intune.
Note
Blocksi supports iOS 13.1 and higher.
Prerequisites
Ensure the following prerequisites are in place before proceeding with deployment:
iPad devices must be enrolled in your Microsoft Intune Admin Console. Devices must be enrolled in Supervised Mode for the app to be installed silently without user interaction.
Device groups must be defined for student iPad devices in your Microsoft Intune Admin Console.
Users and Organizational Units must be synced through either Google Workspace or LDAP.
iPad serial number mappings must be added to the Blocksi system through the Blocksi Admin Dashboard.
A filtering policy must be assigned to a Google Workspace OU or LDAP OU.
Sign in to your Apple School Manager account with your Administrator credentials.
Click your account name in the lower left-hand corner, and then click Preferences from the pop-up menu.
Go to Organization Information.
Locate your Organization ID and Organization Name.
Send this information to Blocksi. It is required to add your organization to the approved list of customers who can use Blocksi's filtering app.
Sign in to your company’s account at business.apple.com (Apple Business Manager) or school.apple.com (Apple School Manager).
Click your account name in the lower left corner, then choose Preferences from the drop-down menu.
Click Payments and Billing.
Under the Apps and Books tab, scroll to the Content Tokens section and click Download next to the correct server location token. The token is downloaded to the Downloads folder on your device.
Sign in to the Microsoft Intune Admin Center at intune.microsoft.com.
Navigate to Tenant Administration > Connectors and Tokens > Apple VPP Tokens, then click Create. The Create VPP Token process opens on the Basics tab.
On the Basics tab, specify the following:
Token Name - Enter an administrative name for the token.
Apple ID - Enter the Managed Apple ID of the account associated with the uploaded token.
VPP Token File - Download the Apple Business Manager location token for your account from Apple Business Manager or Apple School Manager and select it here.
Click Next to proceed to the Settings tab and specify the following:
Take Control of Token from Another MDM - Set to Yes to allow the token to be reassigned to Intune from another MDM solution.
Country/Region - Select the VPP country/region store. Intune synchronizes VPP apps for all locales from the selected store.
Type of VPP Account - Select Business or Education.
Automatic App Updates - Select Yes or No to enable or disable automatic updates. When enabled, Intune detects VPP app updates and automatically pushes them to the device when it checks in.
Select the I grant Microsoft permission to send both user and device information to Apple option.
Click Next to proceed to the Scope Tags tab. Click Select Scope Tags to optionally add scope tags for the app, then click Next.
On the Review + Create tab, review your settings and click Create. The token appears in the list of VPP tokens.
Sign in to the Microsoft Intune Admin Center at intune.microsoft.com.
Navigate to Apps > Manage Apps > Configuration and click + Create, then select Managed Devices from the drop-down list.
On the Basics tab, specify the following:
Name - The name of the profile as it appears in the Microsoft Intune Admin Center.
Description - The description of the profile as it appears in the Microsoft Intune Admin Center.
Device Enrollment Type - Set to Managed Devices by default and cannot be changed.
Platform - Select iOS/iPadOS.
Targeted App - Select Blocksi for iPad to associate it with the configuration policy.
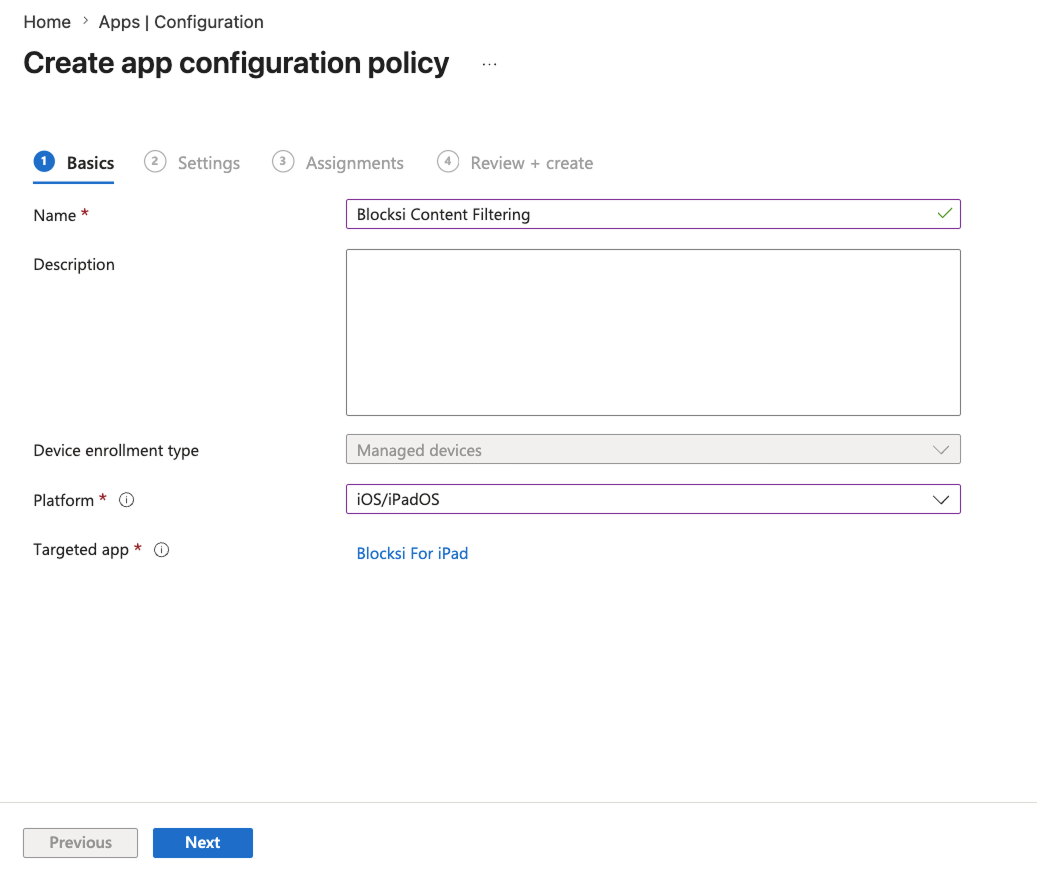
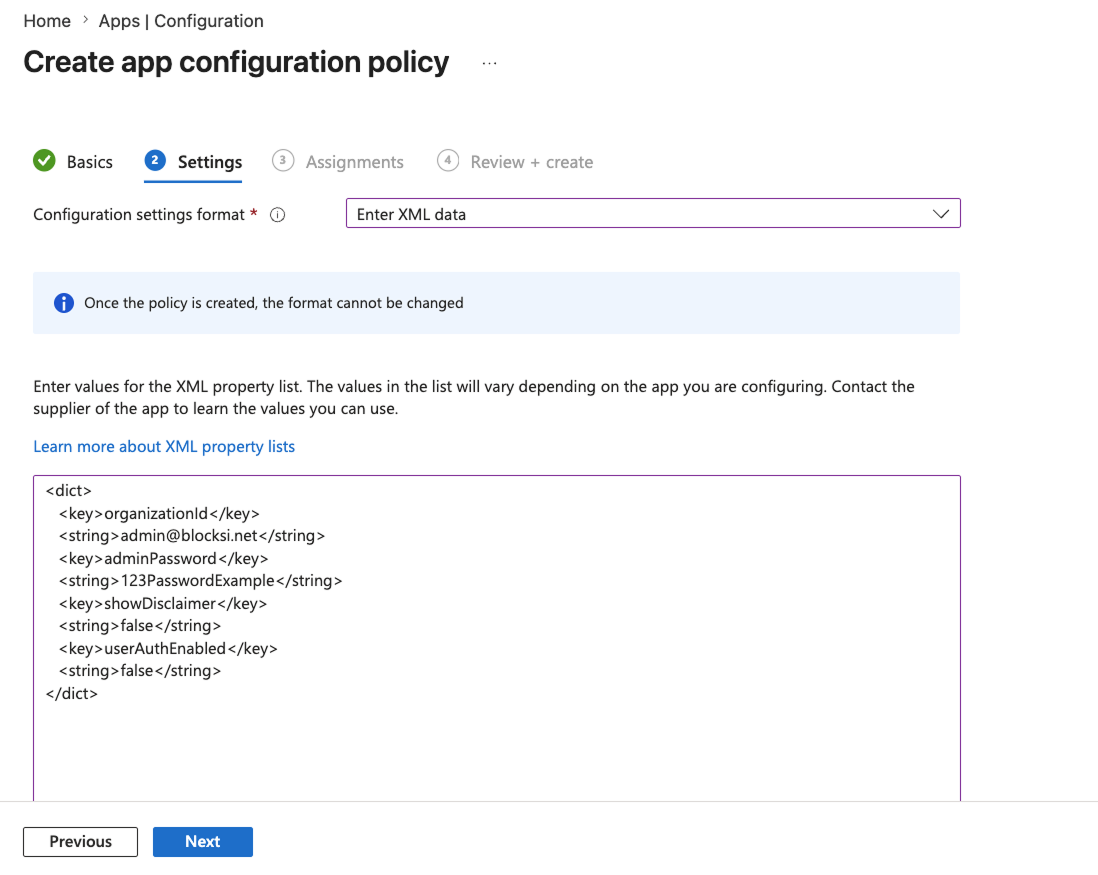
Click Next to proceed to the Settings tab. Select Enter XML Data from the Configuration Settings Format drop-down list, then enter the appropriate app configuration in the text box. Refer to the Selecting the Appropriate XML/PLIST Configuration section for more information.
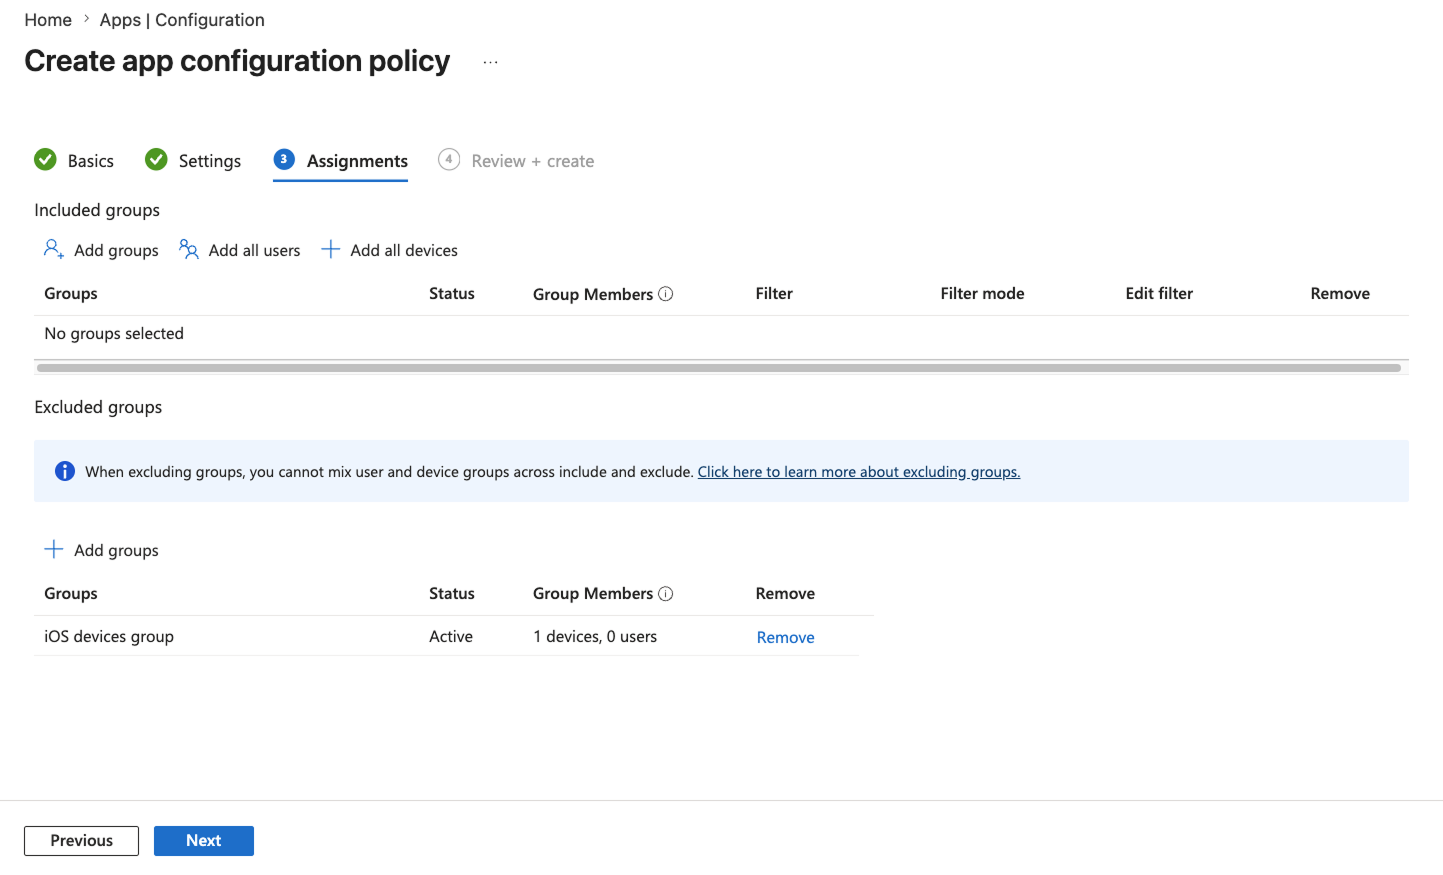
Click Next to proceed to the Assignments tab. Select Add Groups, Add All Users, or Add All Devices to assign the app configuration policy.
Tip
We recommend creating a group specifically for iOS devices and assigning the configuration policy to that group.
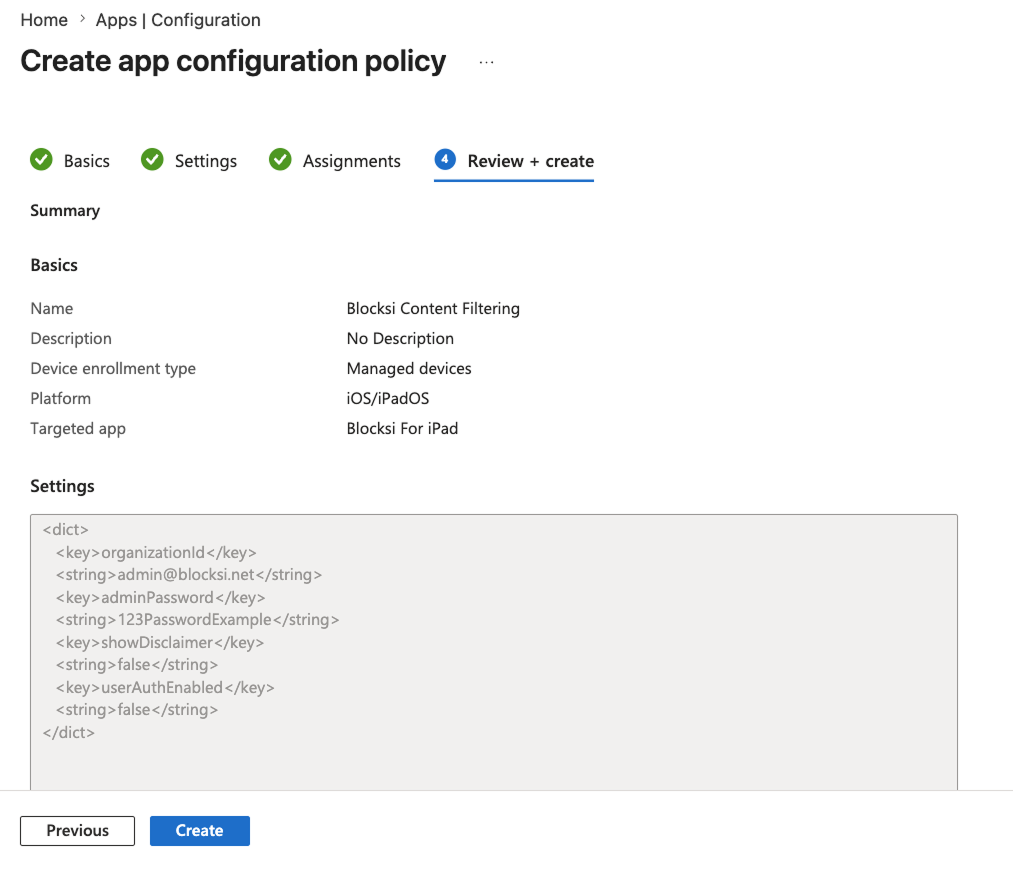
Click Next to proceed to the Review + Create tab, review your settings, then click Create to add the app configuration policy to Intune.
Add the following app configuration in the text box:
<dict>
   <key>organizationId</key>
   <string>admin@blocksi.net</string>
   <key>adminPassword</key>
   <string>123PasswordExample</string>
   <key>showDisclaimer</key>
   <string>false</string>
   <key>userAuthEnabled</key>
   <string>false</string>
</dict>
Note
Replace admin@blocksi.net with your Blocksi super-admin account email address. You may also change 123PasswordExample to a password of your choice, or keep it as the default password for accessing app details.
Add the following app configuration in the text box:
<dict>
   <key>organizationId</key>
   <string>admin@blocksi.net</string>
   <key>adminPassword</key>
   <string>123PasswordExample</string>
   <key>showDisclaimer</key>
   <string>false</string>
   <key>serialNumber</key>
   <string>{{serialnumber}}</string>
   <key>userAuthEnabled</key>
   <string>false</string>
</dict>
Note
Replace admin@blocksi.net with your Blocksi super-admin account email address. You may also change 123PasswordExample to a password of your choice, or keep it as the default password for accessing app details.
Add the following app configuration in the text box:
<dict>
   <key>organizationId</key>
   <string>admin@blocksi.net</string>
   <key>adminPassword</key>
   <string>123PasswordExample</string>
   <key>showDisclaimer</key>
   <string>false</string>
   <key>userId</key>
   <string>{{mail}}</string>
   <key>userAuthEnabled</key>
   <string>true</string>
</dict>
Note
Replace admin@blocksi.net with your Blocksi super-admin account email address. You may also change 123PasswordExample to a password of your choice, or keep it as the default password for accessing app details.
Sign in to the Microsoft Intune Admin Center at intune.microsoft.com.
Navigate to Apps > All Apps and click the Blocksi for iPad application, then choose Properties from the list of apps pane.
Select Edit next to the Assignments section.
Select whether the app will be Required or Available for Enrolled Devices as the assignment type.
Tip
We recommend selecting Required.
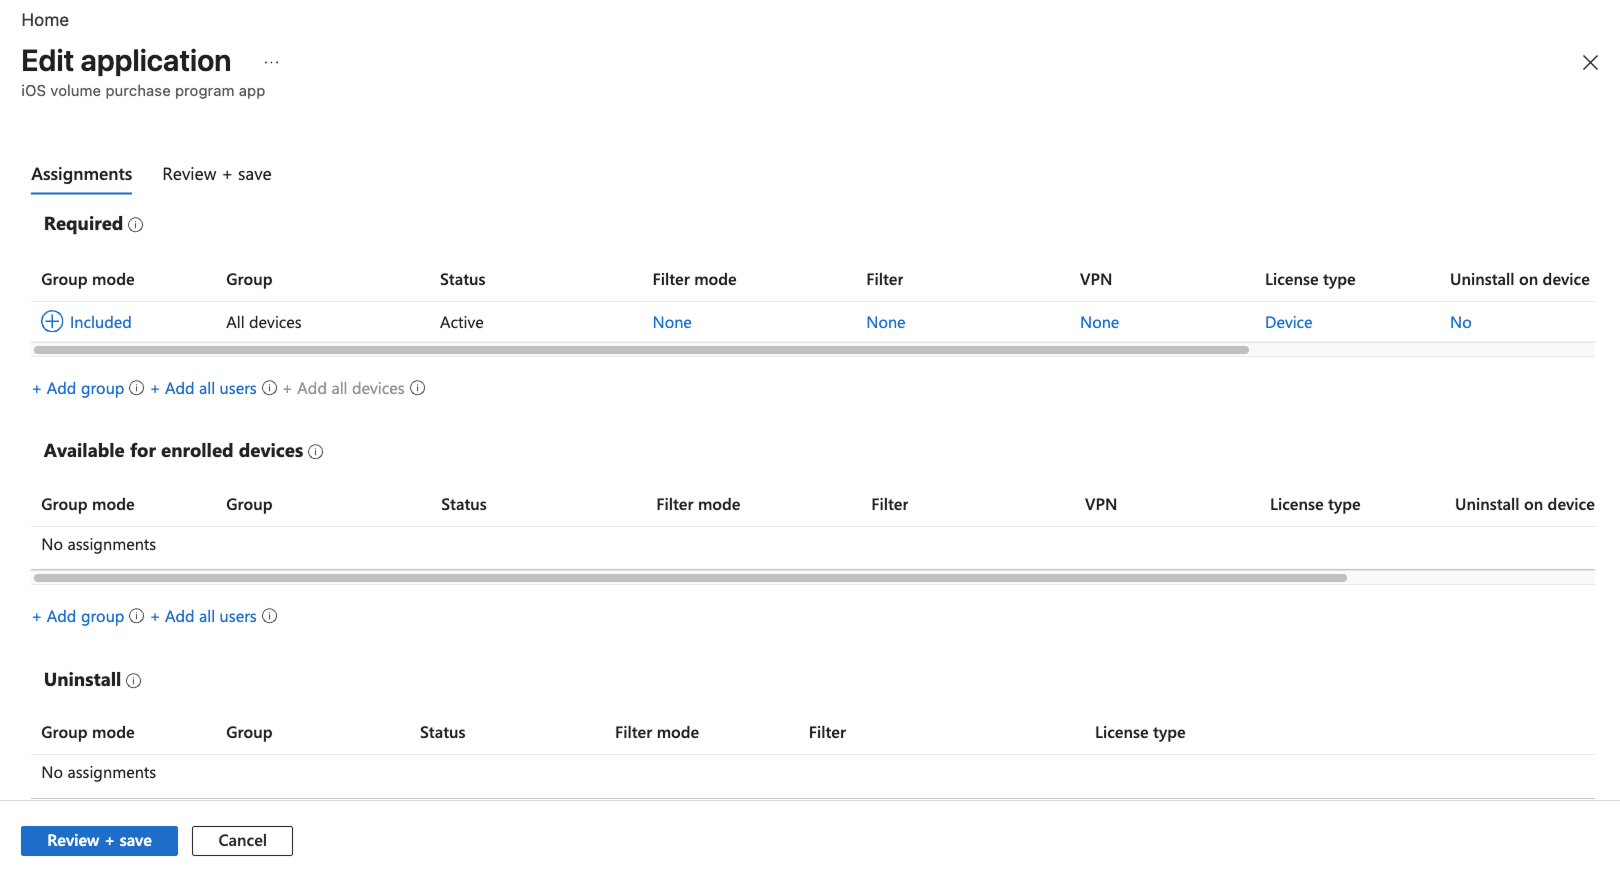
Click Add Group under the selected assignment type, then select the device groups you want to assign the app to in the Select Groups pane.
Click the Added Groups pane to edit the assignment and configure it as follows:
Mode - Included.
VPN - None.
License Type - Device Licensing.
Prevent Automatic App Updates - No.
Uninstall on Device Removal - Yes.
Install as Removable - No.
Prevent iCloud App Backup - Yes/No.
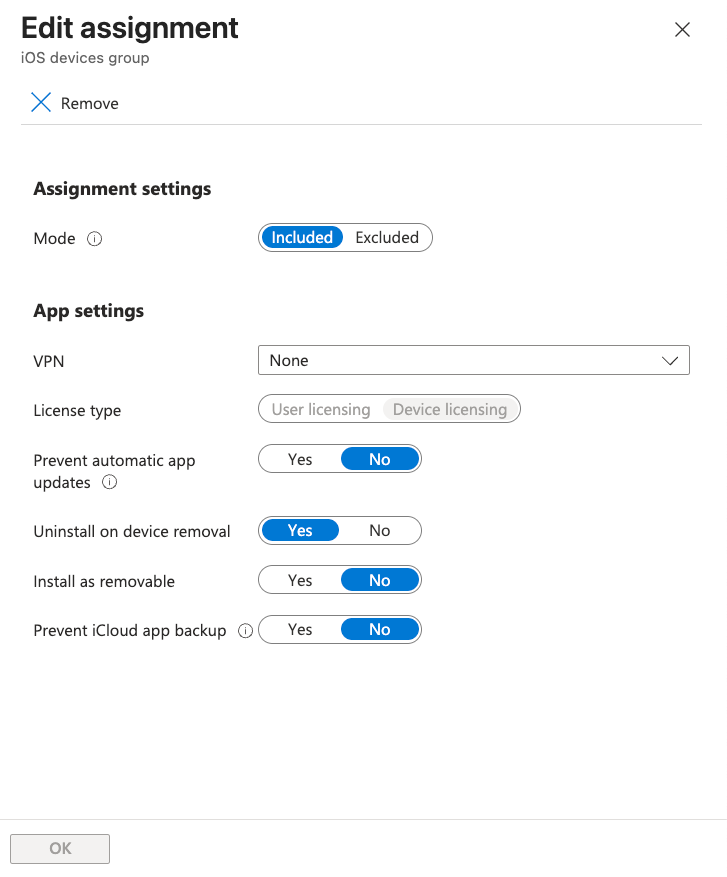
Click OK to save the assignment configuration.
Click Review + Save, then click Save.
Download URLs
The relevant .mobileconfig files can be downloaded using the following links:
ios_company_wide.mobileconfig- For filtering by iOS Blanket Policy.ios_serial_number.mobileconfig- For filtering by serial number.ios_user_id.mobileconfig- For filtering by user.
Download the appropriate
.mobileconfigfile provided above.Open the downloaded
.mobileconfigfile using the appropriate application for your platform:For macOS - Open the file using Apple Configurator, available here.
For Windows - Open the file using any text editor application.
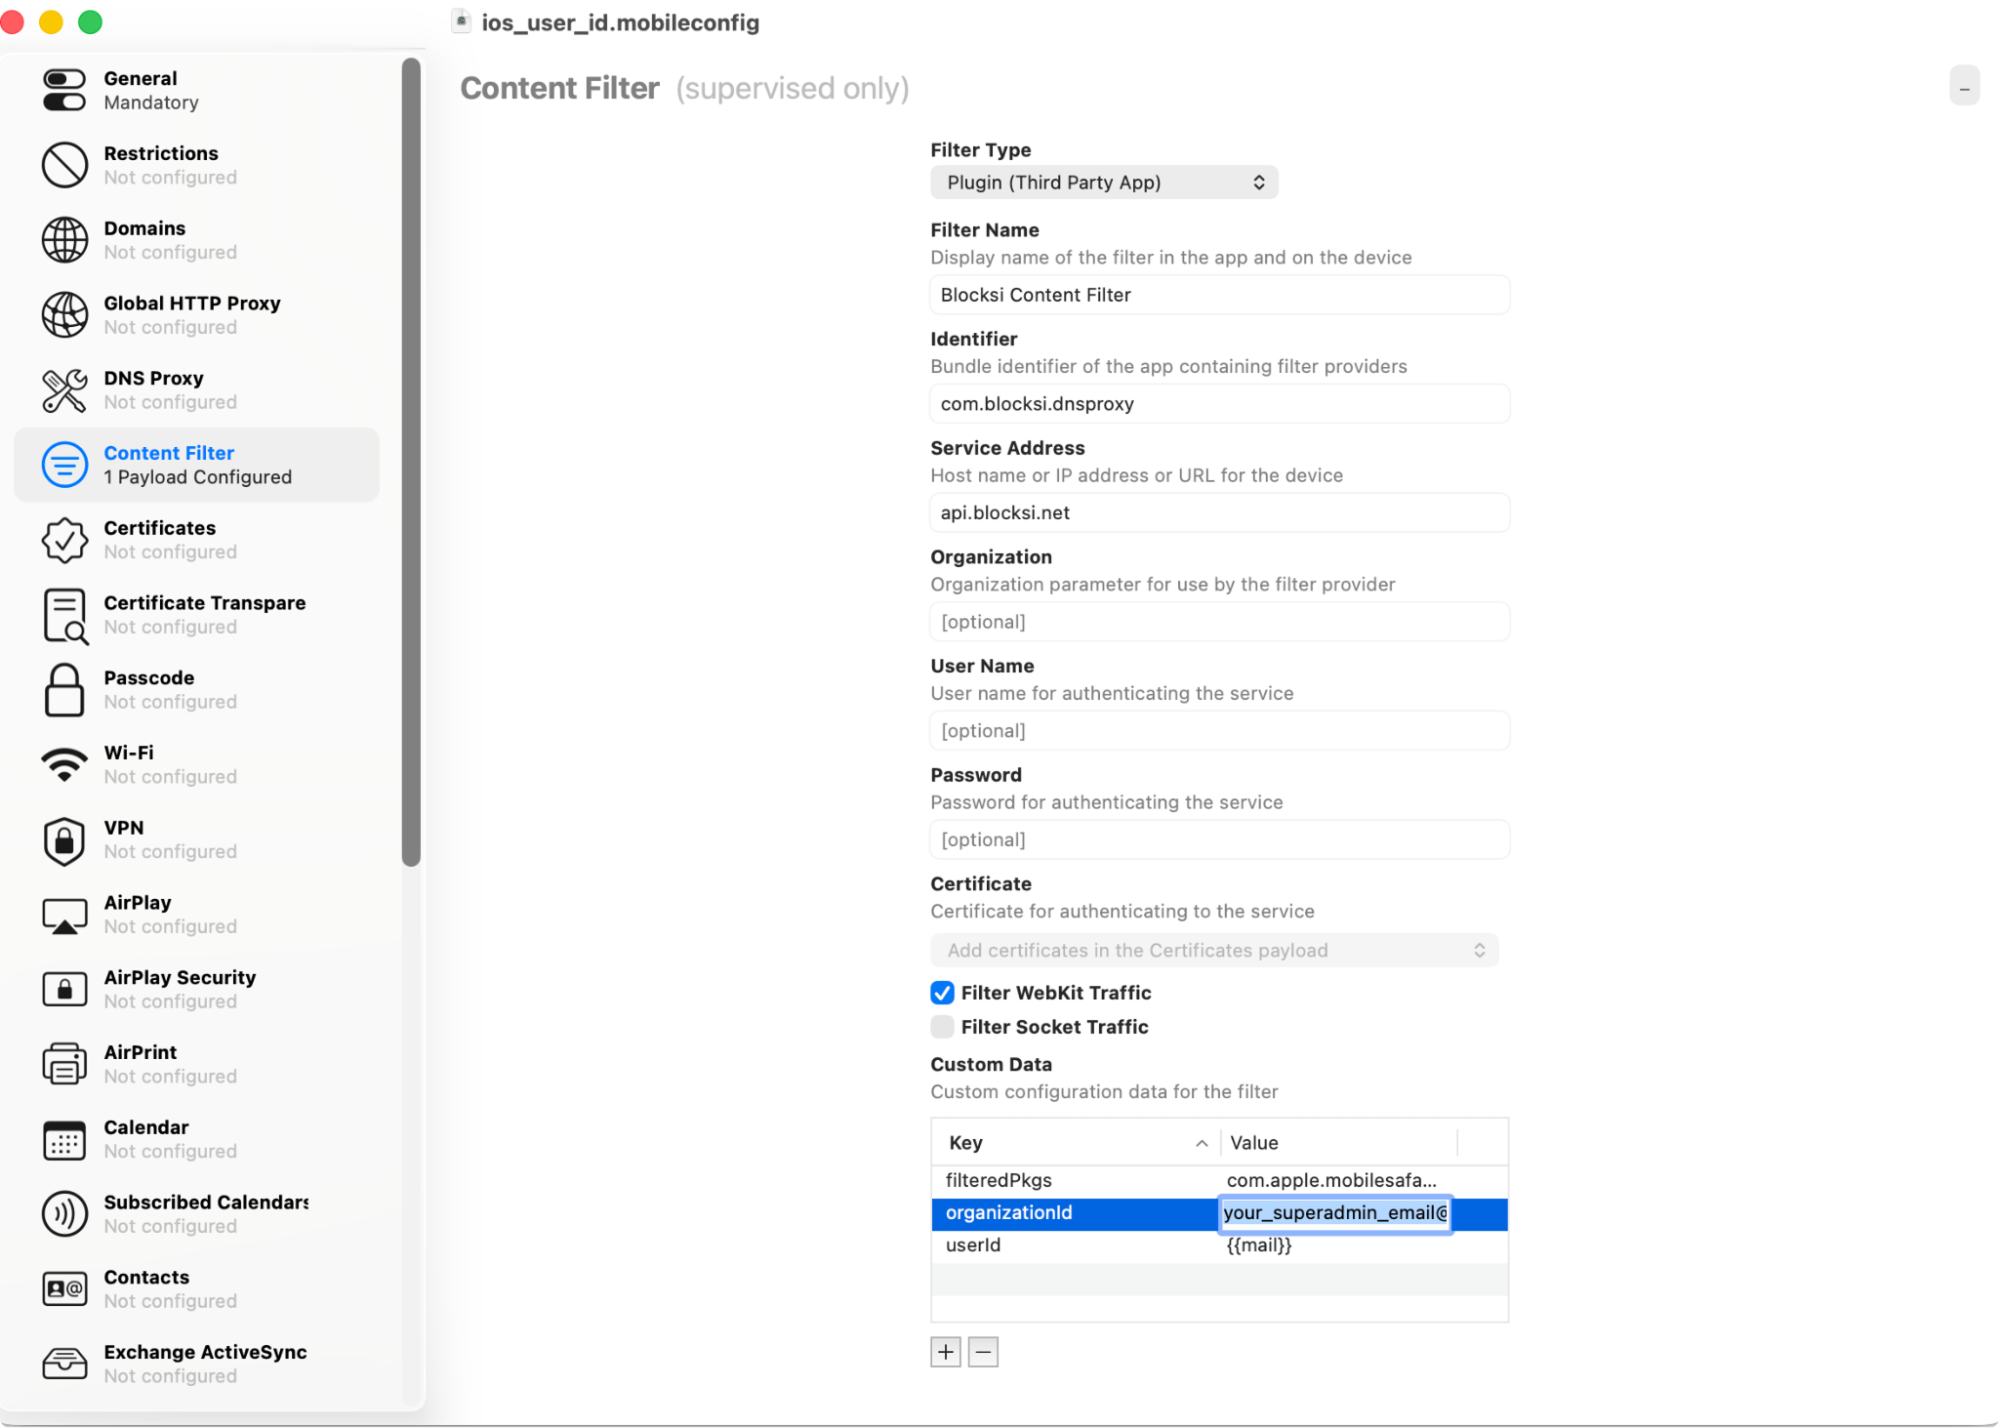
Open the relevant
.mobileconfigand change the organizationId value to match your Blocksi super-admin account.Tip
To edit a value field, double-click it, make your changes, and press Enter.
Click the
.mobileconfigfilename in the top bar, select File, and click Save.
Note
By default, the app filters Safari only. The .mobileconfig files include a filteredPkgs key configured to filter both Safari and Google Chrome.
Sign in to the Microsoft Intune Admin Center at intune.microsoft.com.
Navigate to Devices > Manage Devices > Configuration and select + Create > New Policy. A new panel appears on the right side of the page.
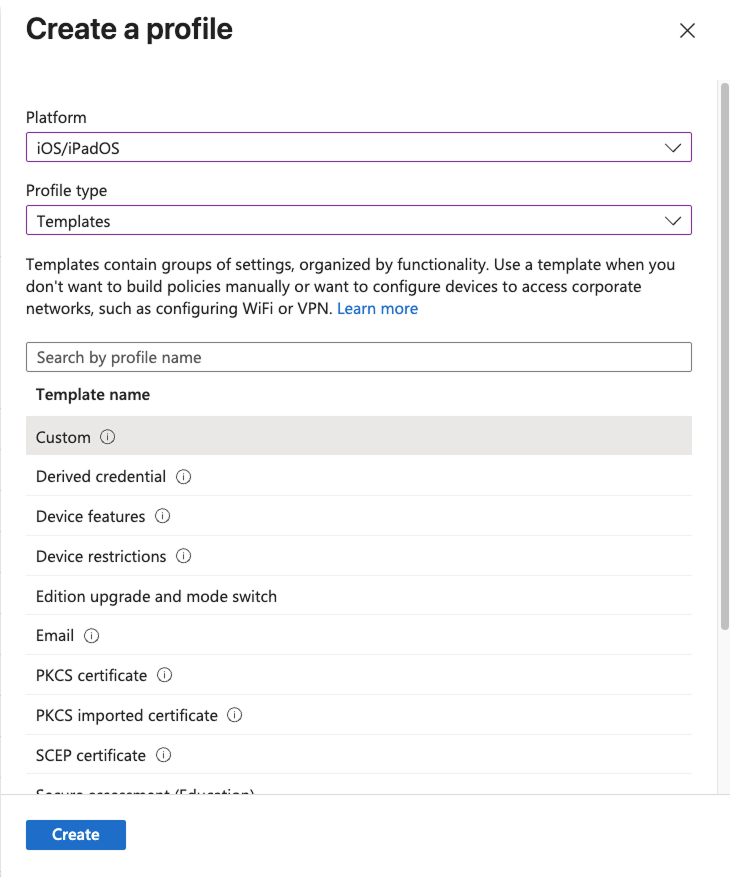
Enter the following properties:
Platform - iOS/iPadOS
Profile Type - Templates > Custom
Click Create.
On the Basics tab, enter the following properties:
Name - Enter a name for the profile (e.g., Blocksi for iPad - Content Filter).
Description - Enter a description for the policy. This setting is optional but recommended.
Note
The Platform and Profile Type fields should already be filled out.
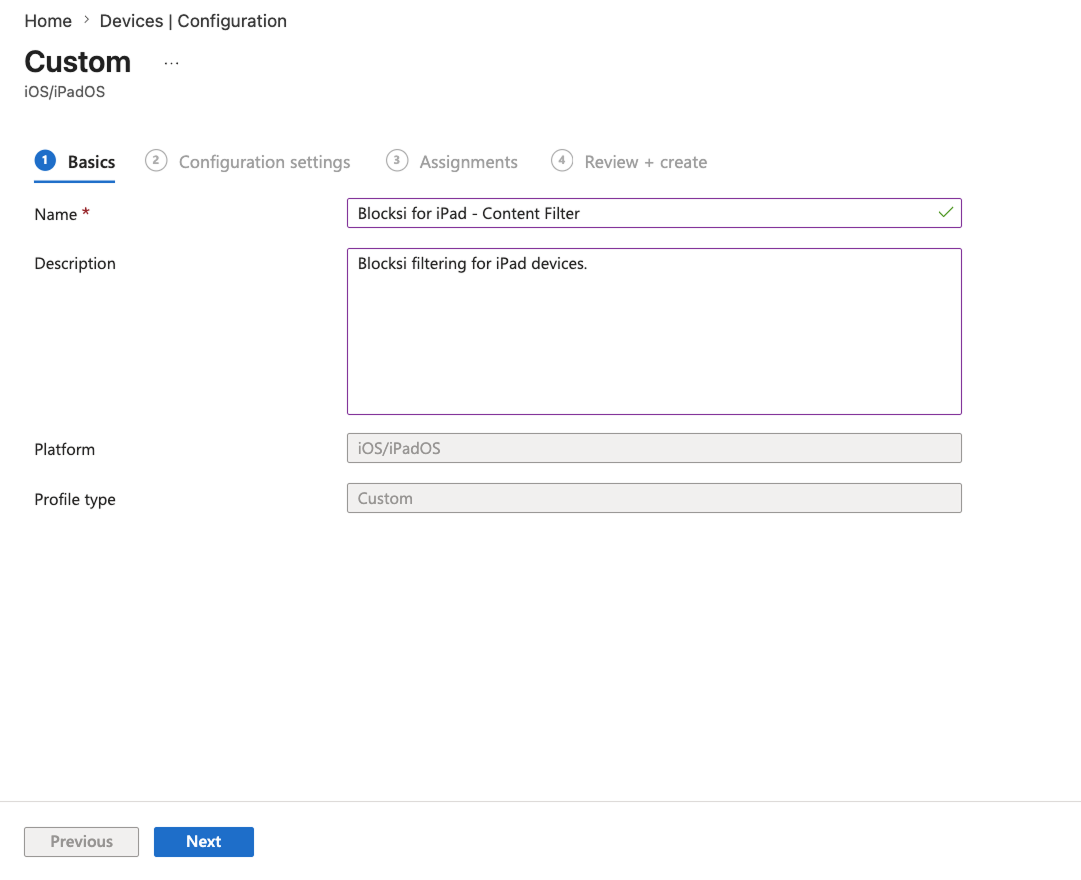
Click Next.
On the Configuration Settings tab, enter a name for the custom configuration profile in the Name field (e.g., Content Filter), then upload the previously downloaded
.mobileconfigfile under the Configuration Profile File section.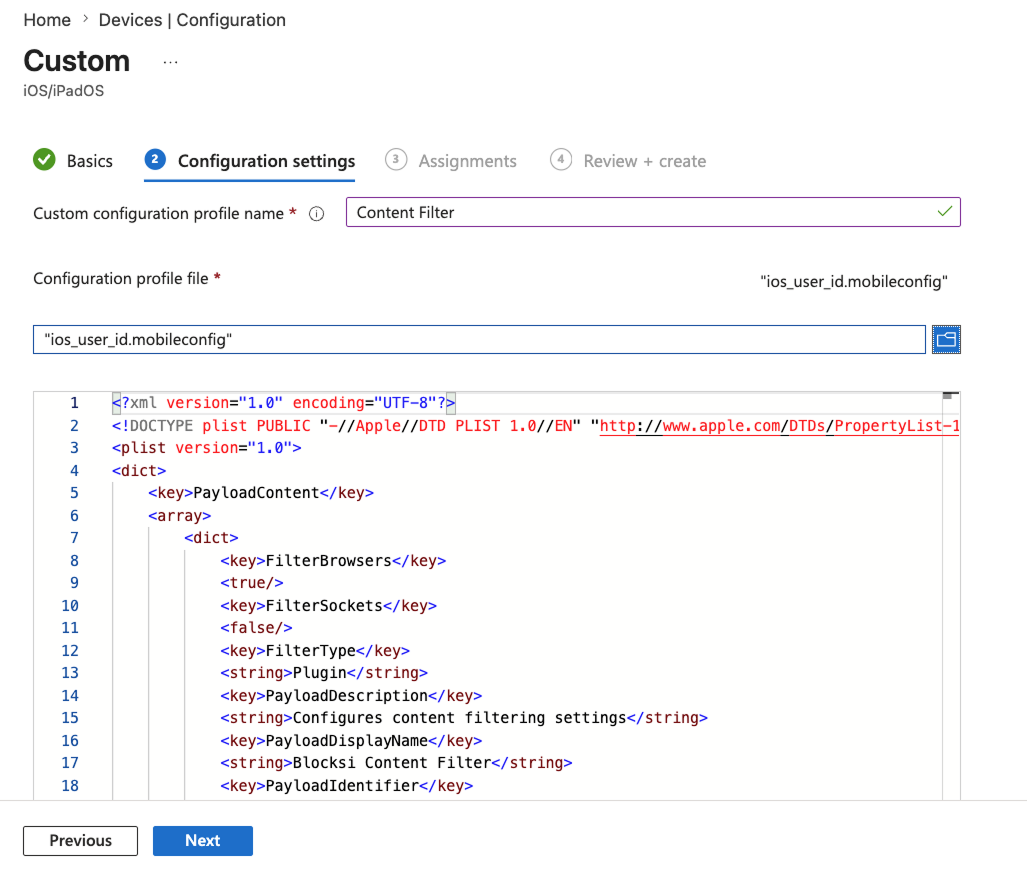
Review the imported file and click Next.
In the Assignments tab, assign the profile to your device groups and click Next.
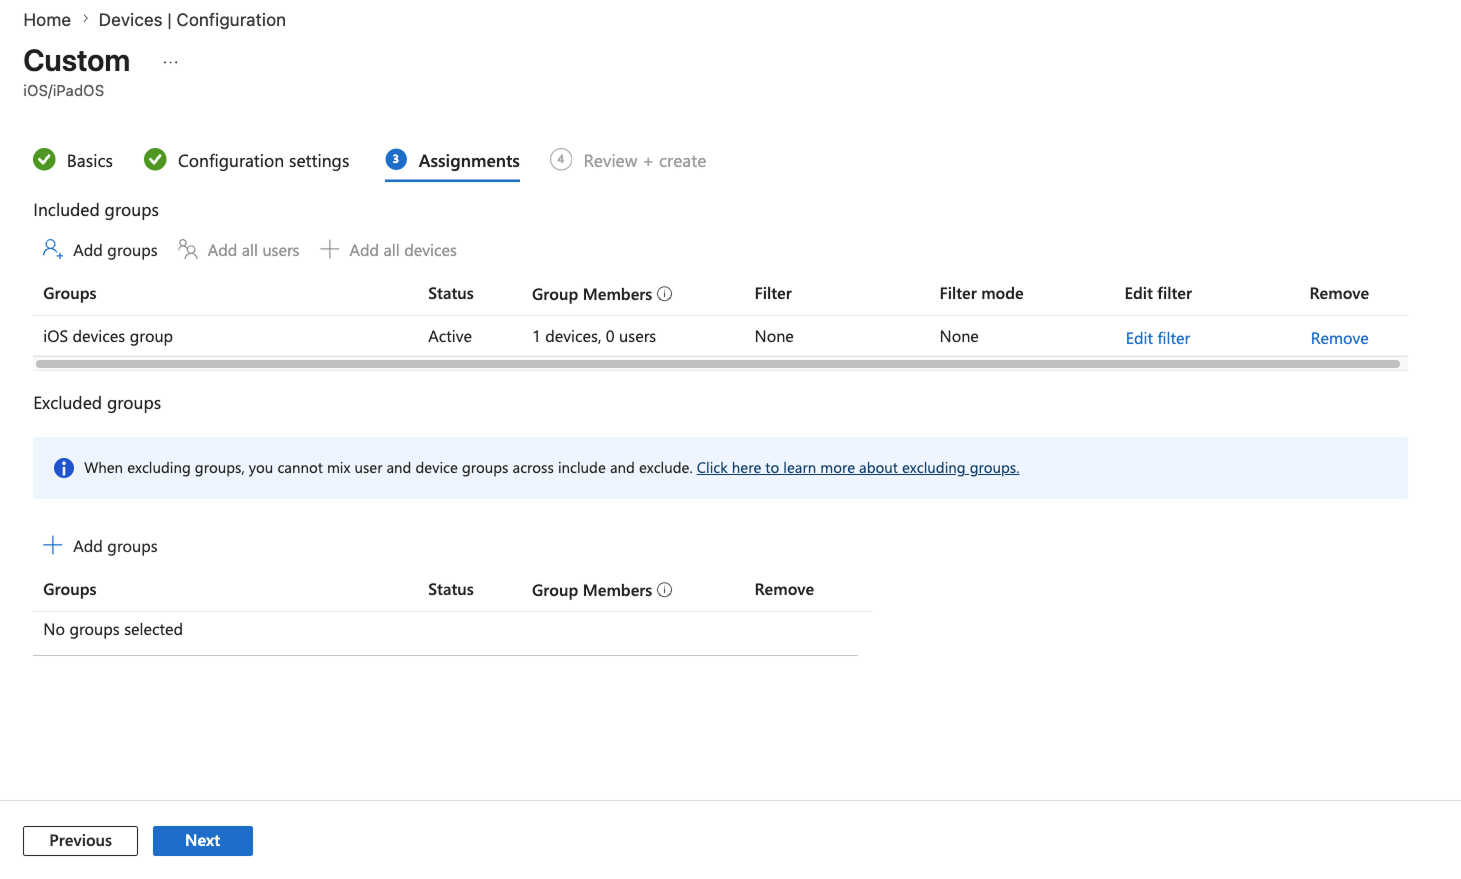
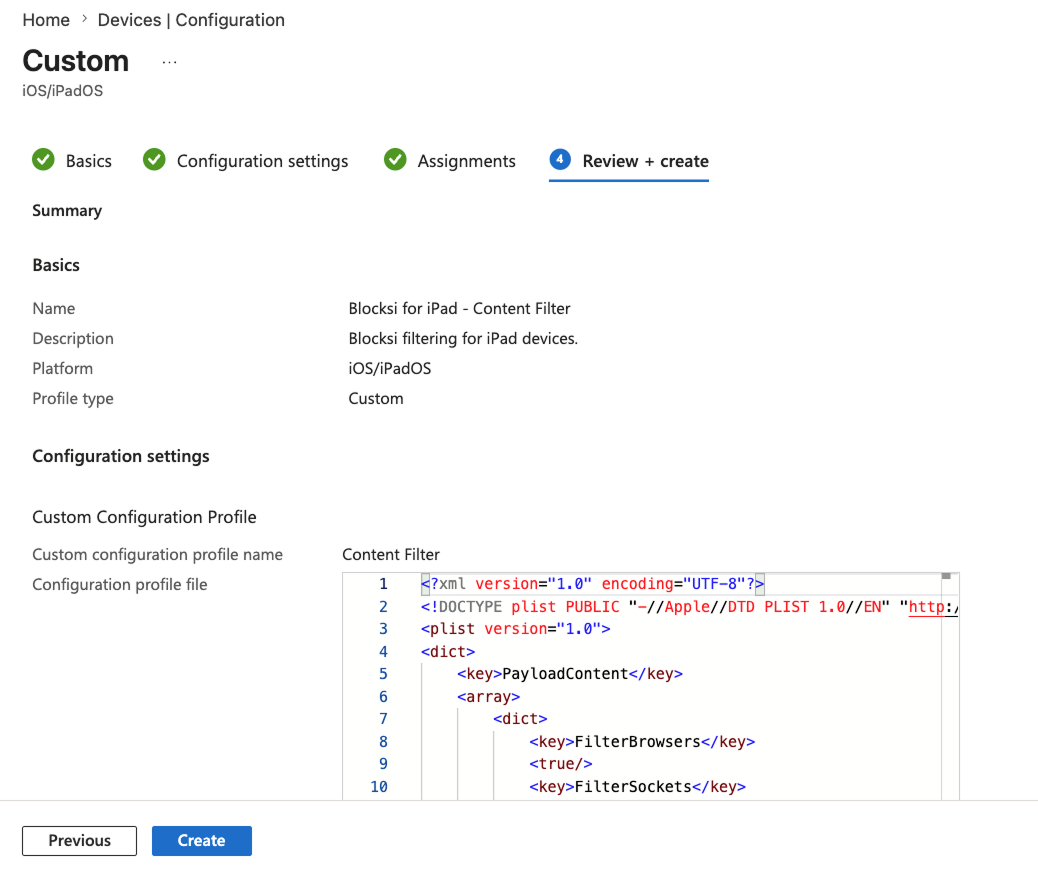
On the Review + Create tab, review your settings and click Create. Your changes are saved, the profile is assigned, and the policy appears in the profiles list.
A DNS Settings payload routes DNS queries through a Blocksi DNS server that enforces SafeSearch and YouTube restrictions. Two servers are available: a strict option and a moderate option.
Sign in to the Microsoft Intune Admin Center at intune.microsoft.com.
Navigate to Devices > Manage Devices > Configuration and select + Create > New Policy. A new panel appears on the right side of the page.
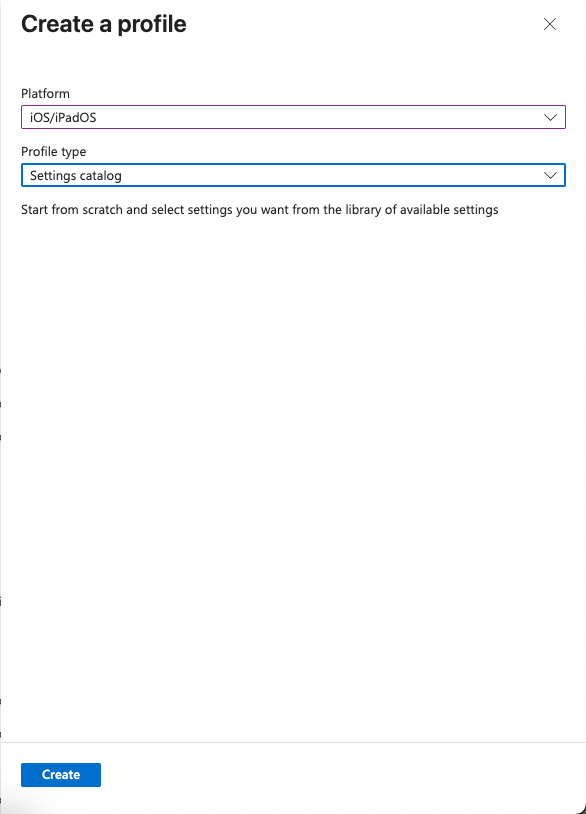
Enter the following properties:
Platform - iOS/iPadOS
Profile Type - Settings catalog
Click Create.
On the Basics tab, enter the following properties:
Name - Enter a name for the profile (e.g., Blocksi for iPad - DNS Settings).
Description - Enter a description for the policy. This setting is optional but recommended.
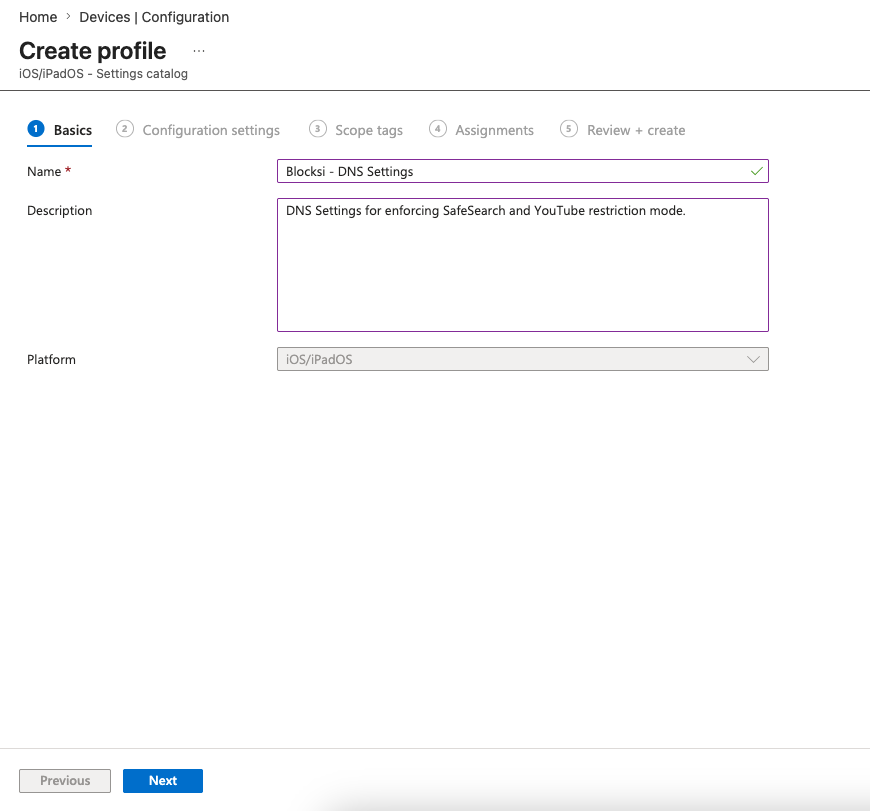
Click Next.
On the Configuration Settings tab, click + Add settings. Select Networking and click DNS Settings. Under Setting name, select DNS Settings and Prohibit Disablement.
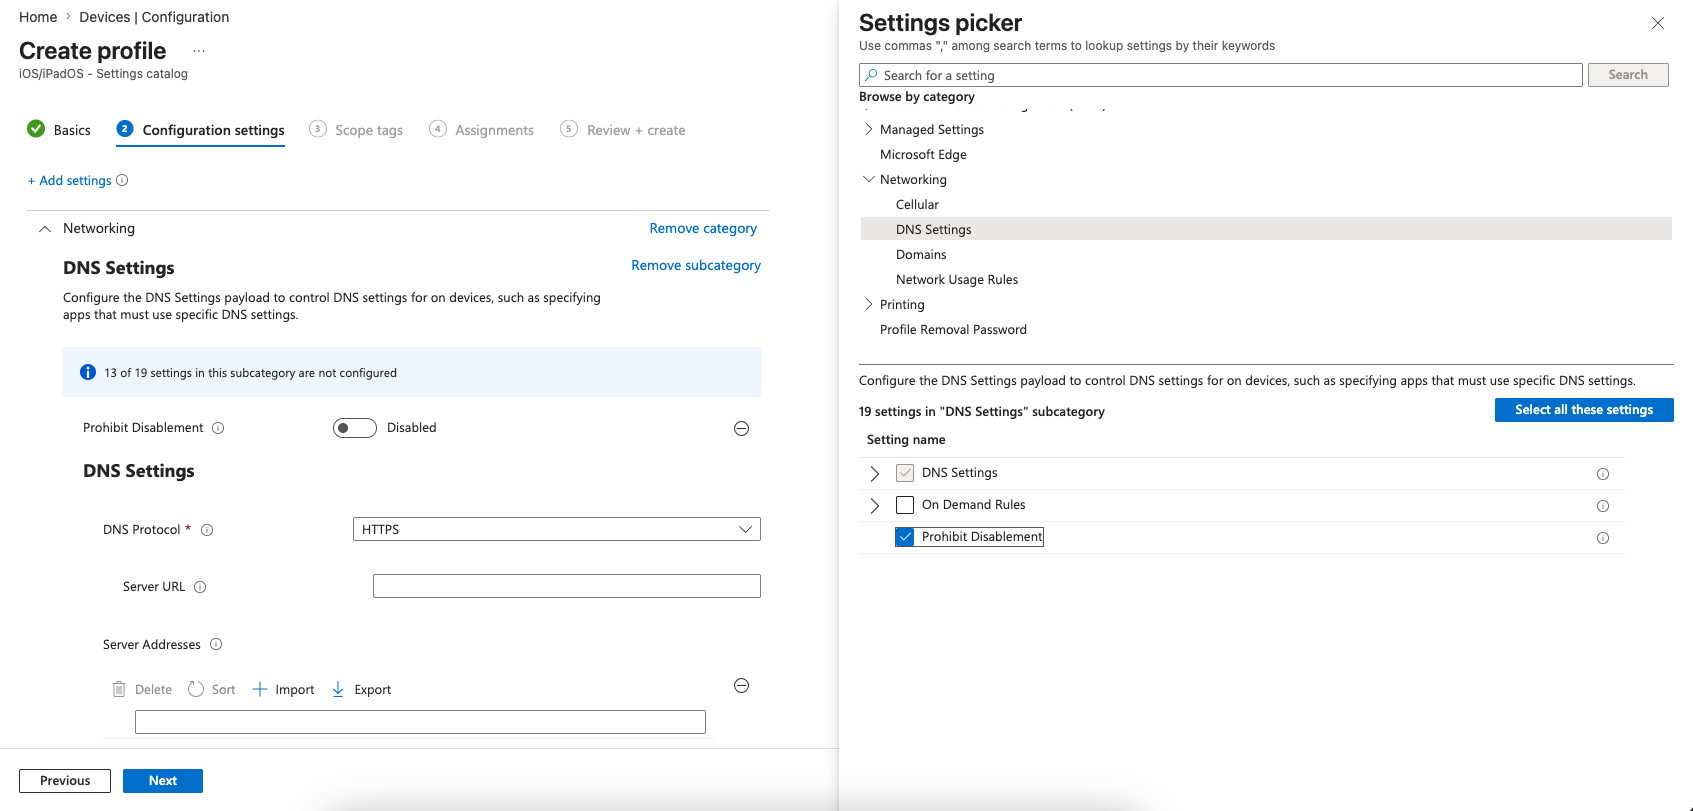
Set Prohibit Disablement to Enabled.
Set the DNS protocol to TLS.
In the Server Name field, enter the hostname for one of the two Blocksi DNS servers, then enter the matching address under Server Addresses:
Description
Server Name
Server Address
SafeSearch + YouTube (strict)
restrict-dns.blocksi.net34.60.103.207SafeSearch + YouTube (moderate)
restrict-moderate-dns.blocksi.net35.238.4.111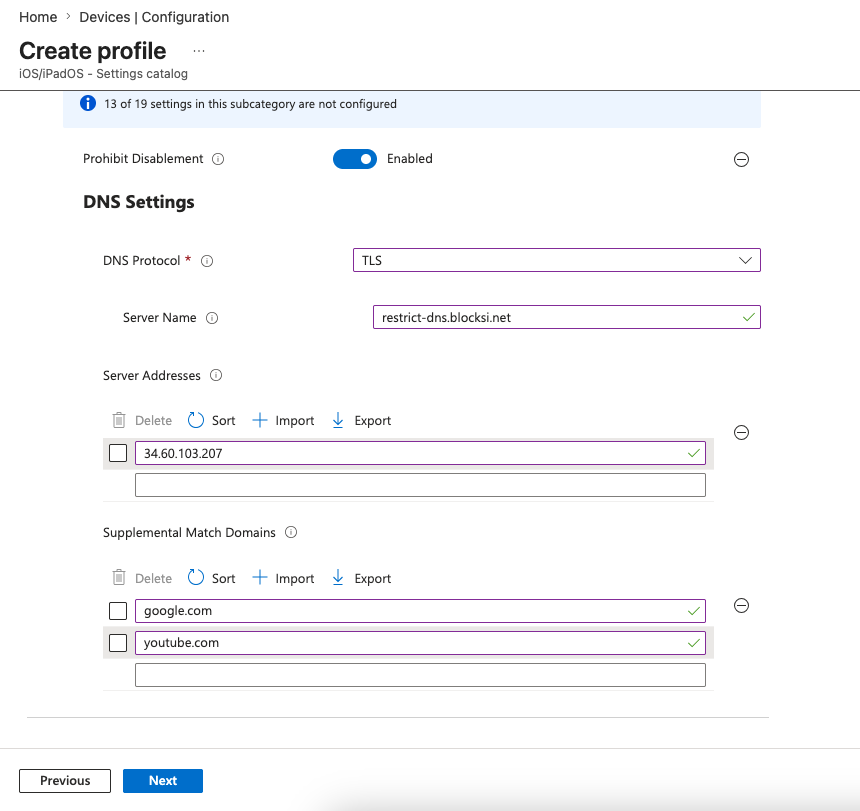
To use Blocksi DNS only for search domains, add
google.comandyoutube.comunder Supplemental Match Domains.Click Next.
In the Assignments tab, assign the profile to your device groups and click Next.
On the Review + Create tab, review your settings and click Create. Your changes are saved, the profile is assigned, and the policy appears in the profiles list.
To validate the deployment, confirm the following:
Open Settings on the iPad and navigate to General > VPN & Device Management.
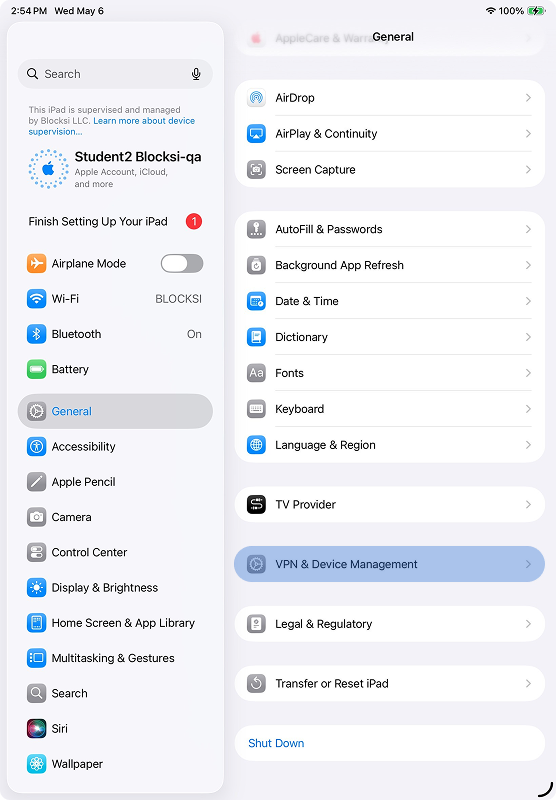
Click Content Filter under Restrictions and Proxies. The Content Filter Profile should display a status of "Running."
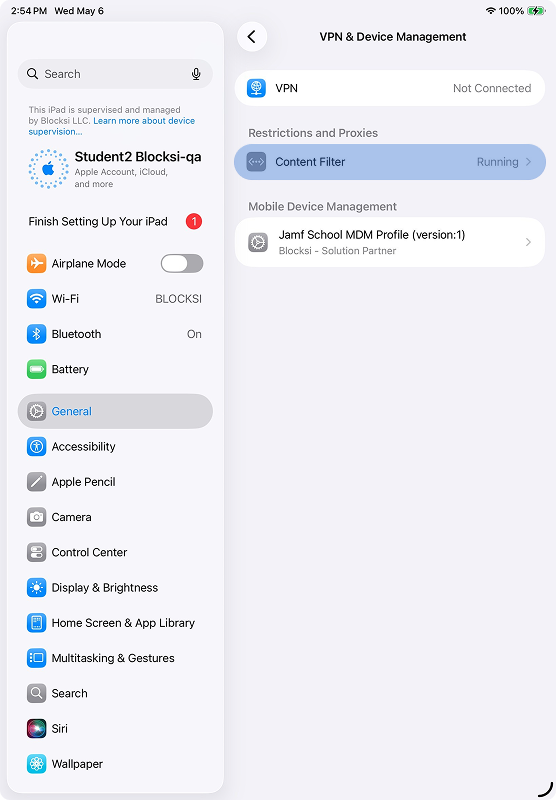
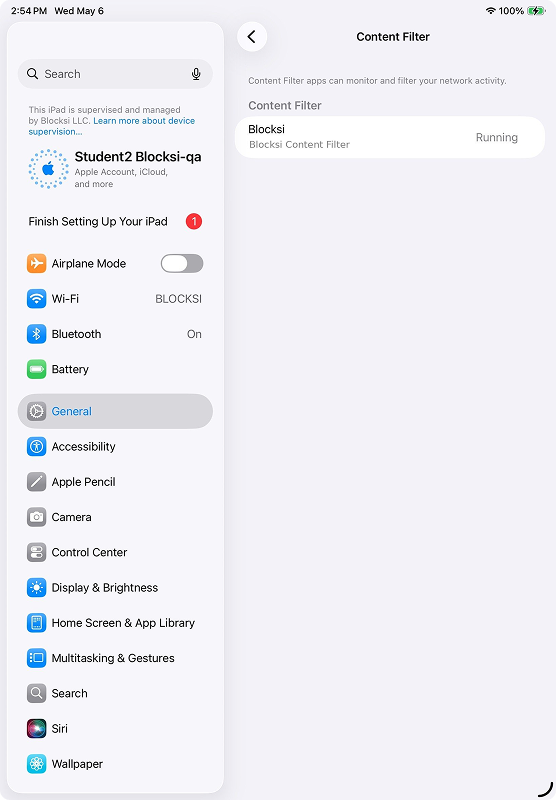
Open the Blocksi for iOS app. You should see an "Everything is OK" screen.
Tap Details.
Enter the admin password provided in the PLIST configuration to reveal the settings.
Confirm that the
organizationIdmatches Blocksi Super Admin email address.
Navigate to a site that is set to Allow on the filtering policy and confirm that the site opens.
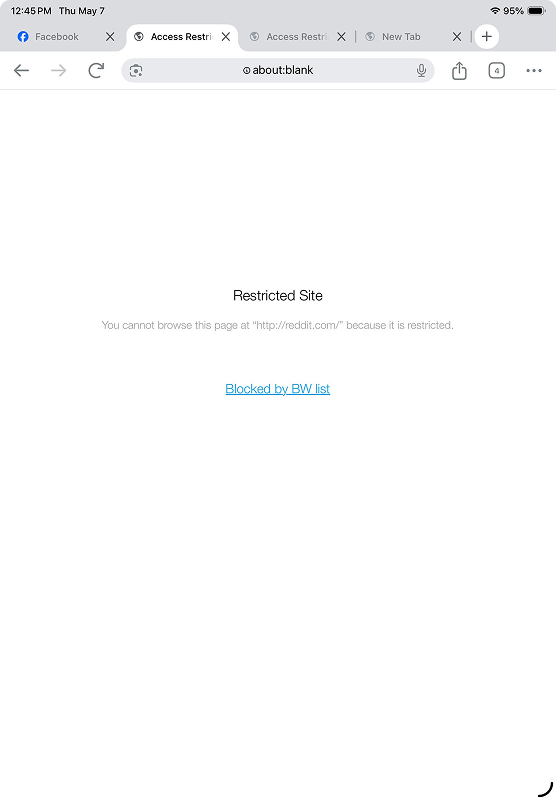
Navigate to a site that is set to Block on the filtering policy. You should be presented with an internal Restricted Site page.
Note
To create the filtering policy, refer to the Configuring the iOS Filtering Policy on the BMEE Admin Dashboard section.