Adding Delegate Accounts
Adding a delegate account authorizes that account to access the Delegate Dashboard with their credentials. Administrators can add delegate accounts manually, import them from a CSV file, or import them from Google Workspace. Delegate accounts can also be exported to a CSV file. When importing delegate accounts, the delegated organizational units must be set.
Important
Delegate Dashboard accounts do not use a Blocksi license and as such do not need to have the Blocksi Enterprise Edition extension deployed to their devices.
Click Dashboard Settings from the Main Menu, then click Delegate Dashboard from its sub-menu. The Delegate Accounts screen appears.
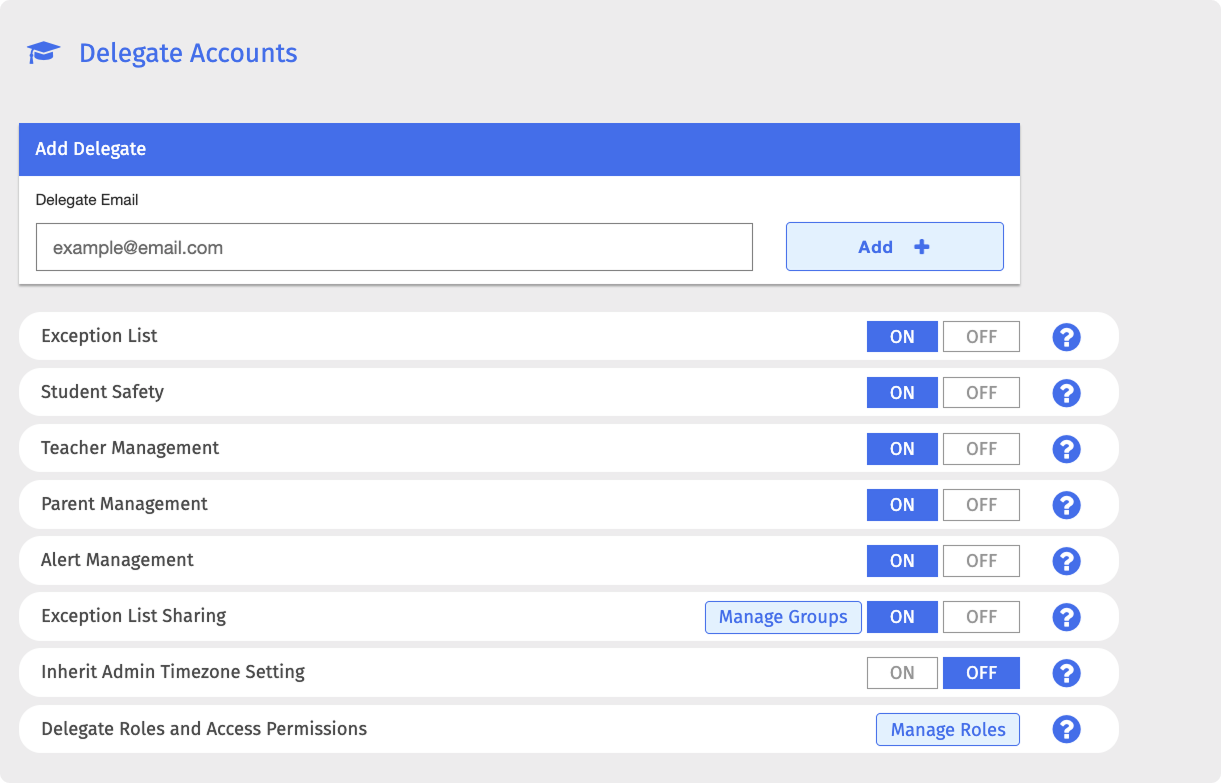
Type the email address of the delegate account to add in the Delegate Email text box in the Add Delegate section.
Click Add + to add the delegate account. The following window opens.
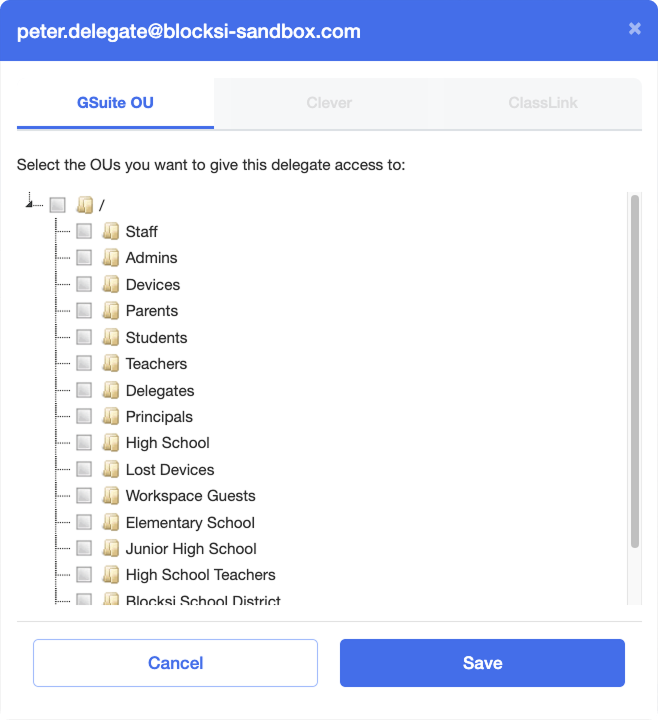
Select the checkboxes to the left of the organizational units that this delegate account can manage.
Tip
Delegated organizational units can also be adjusted later on.
Click Save. Blocksi adds the new delegate account to the list, which can be found at the bottom of the Delegate Dashboard settings.
Import delegate accounts from a CSV file or a Google Workspace organizational unit.
Click Dashboard Settings from the Main Menu, then click Delegate Dashboard from its sub-menu. The Delegate Accounts screen appears.
Under the Import Delegate Accounts from CSV File section, click the Import CSV button.
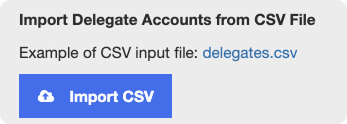
Navigate to the desired folder, select the file, and click Open to complete the import. Delegate accounts are imported and added to the list, which can be found at the bottom of the Delegate Dashboard settings.
Tip
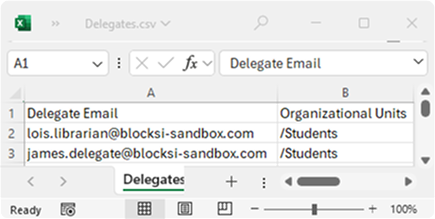
The imported file must be in the .csv file format. You can create .csv files using any spreadsheet editor tools, such as Excel or Google Sheets.
Click Dashboard Settings from the Main Menu, then click Delegate Dashboard from its sub-menu. The Delegate Accounts screen appears.
Under the Import Delegate Accounts from OU section, click the Import OU button to open the Import Delegates window.
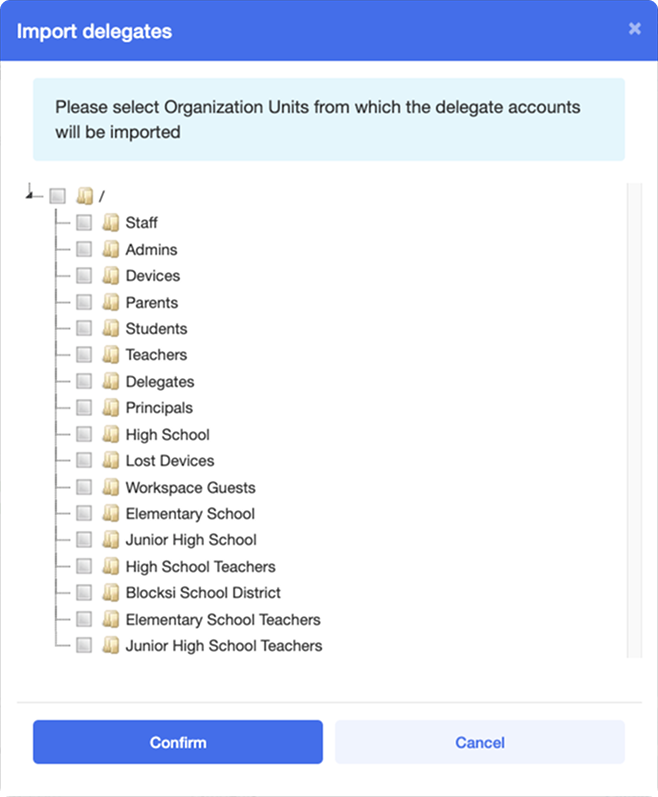
Select the desired organizational units from the list and click the Confirm button. Upon confirmation a new window opens, prompting you to select organizational units which will be accessible by the imported delegates.
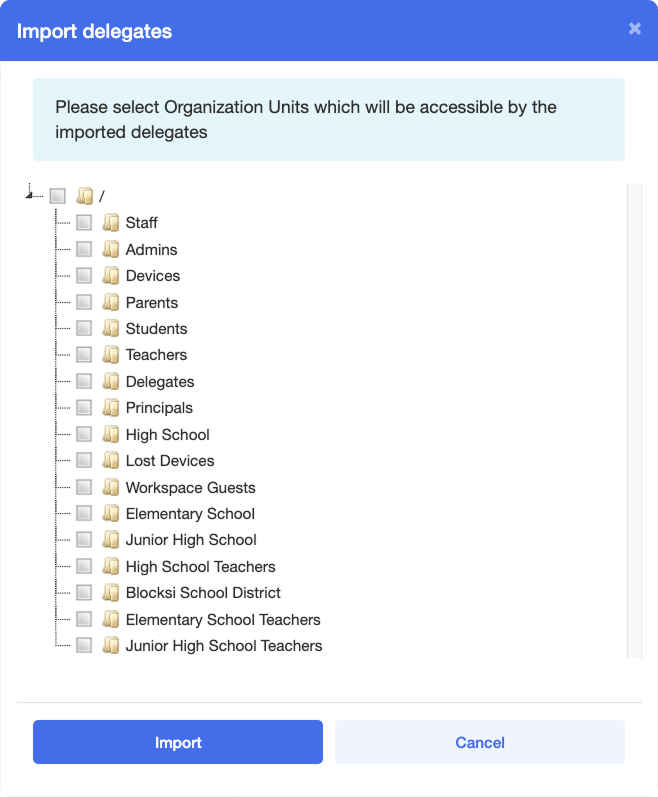
Select the organizational units to be accessible by the imported delegates and click the Import button. Delegate accounts are imported and added to the list, which can be found at the bottom of the Delegate Dashboard settings.
You can export delegate accounts added on your Admin Dashboard to a CSV file.
Click Dashboard Settings from the Main Menu, then click Delegate Dashboard from its sub-menu. The Delegate Accounts screen appears.
Under the Export Delegate Accounts to CSV File section, click the Export CSV button. The file is downloaded to your device.
Note
Delegate accounts are exported in a two-column CSV format, where the first column contains the delegate email addresses and the second column contains the delegated organizational units.