Access Time Control
Access Time Control filters set when students can access the internet, social media, and YouTube. Each filter is a weekly schedule divided into one-hour blocks for each day, where you mark the hours each type of content is blocked.
Note
All hours follow the time zone of the student’s device, not the Admin Dashboard.
Each filter has a General, Social Media, and YouTube tab, each with its own schedule. General covers all browsing and takes priority over the other two. For example, if an hour is blocked on General, students cannot browse at all during that hour, even if Social Media or YouTube is allowed.
Note
Access Time Control filters work only with Regular policies. Time-based policies have their own, more detailed time settings.
During a blocked hour, students see the blocked page regardless of your other filters. Allowed hours do not override your other filters, which continue to apply as usual.
Important
An active class session overrides Access Time Control. When a teacher starts a class session that includes a student under an Access Time Control filter, none of the filter’s blocked hours apply to that student until the class ends.
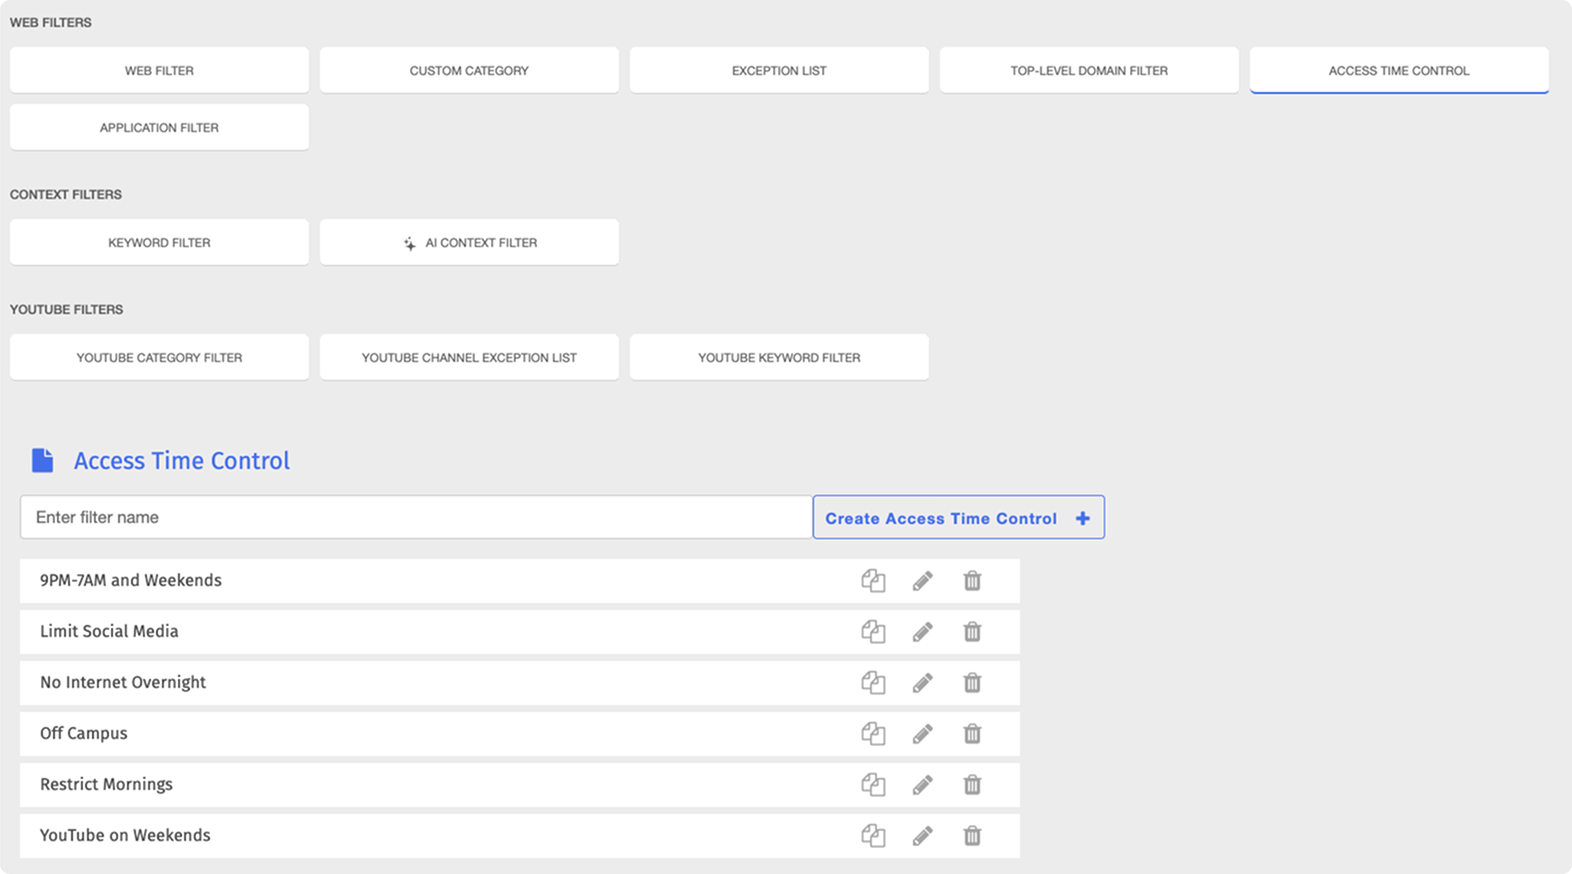
To access the Access Time Control page, click Content Filtering from the Main Menu, then click Filters from its sub-menu. On the Filters page, click Access Time Control listed under Web Filters.
Important
After making any changes to your content filtering or policies, click the  button in the Action Bar at the top of the page to apply the changes.
Example Schedules
The following examples show common ways to set up an Access Time Control filter:
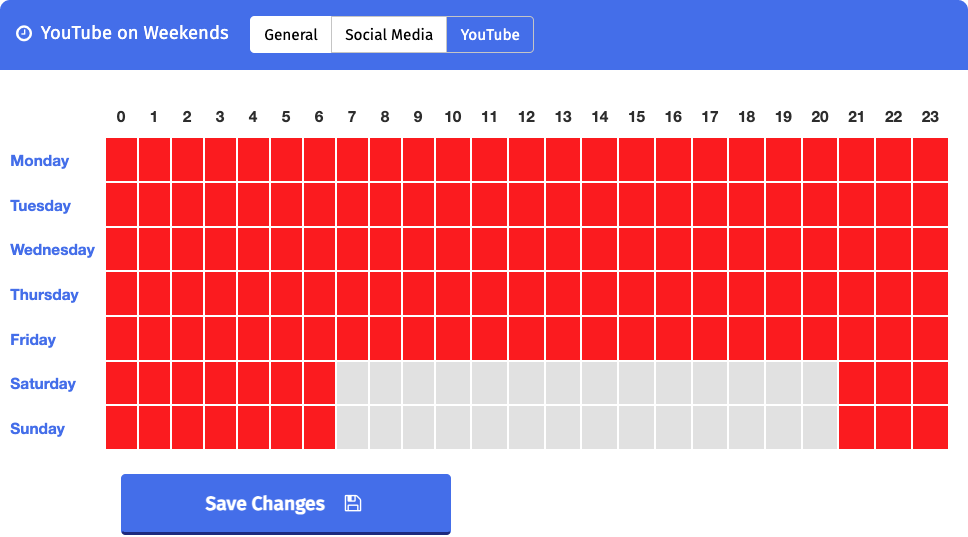
YouTube on weekends only - Students can access YouTube only on Saturday and Sunday, from 7 AM to 9 PM. On the YouTube tab, every cell is blocked except cells 7 to 20 on Saturday and Sunday.
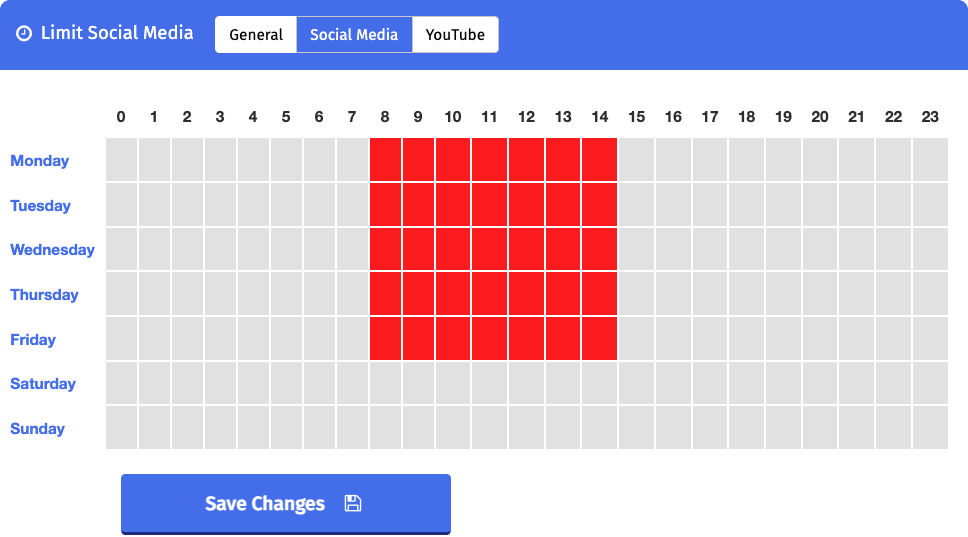
No social media during school hours - Students cannot access social media websites from Monday to Friday, from 8 AM to 3 PM. On the Social Media tab, cells 8 to 14 are blocked for Monday to Friday.
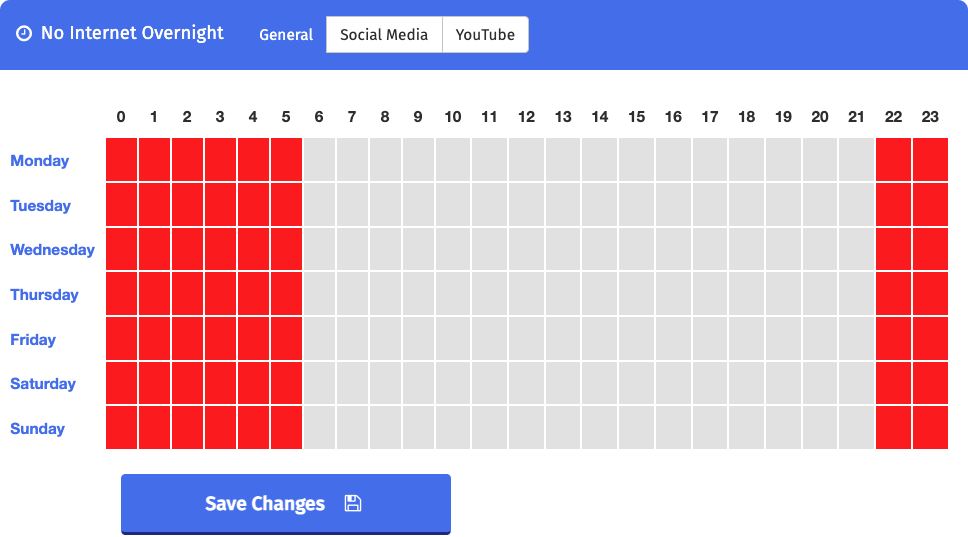
No internet overnight - Students cannot browse at all every night from 10 PM to 6 AM. On the General tab, cells 22, 23, and 0 to 5 are blocked for every day, so social media and YouTube are blocked as well, whatever their own tabs allow.
To set up an Access Time Control filter, create the filter, then block the hours you want to restrict on each tab.
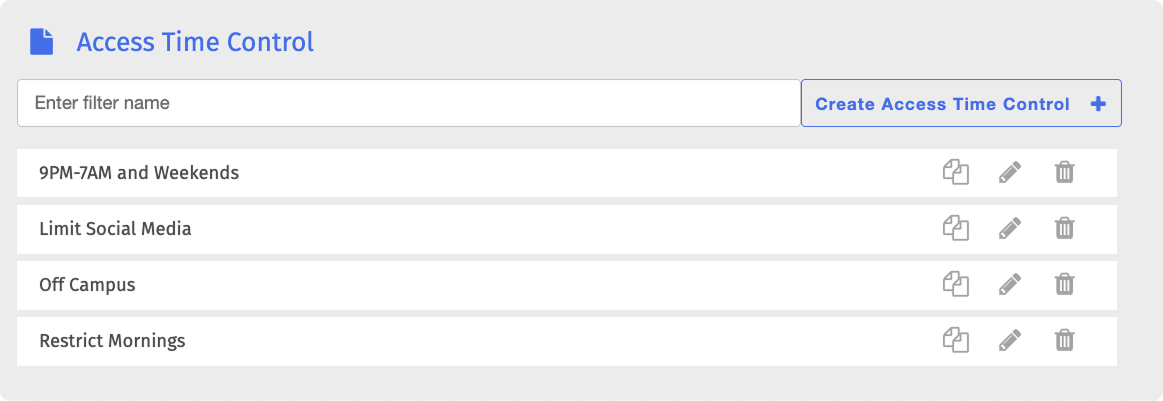
Type a name for the filter in the Enter filter name text box, then click the
 button. The new filter appears on the Access Time Control page.

Click the
 button in the same row as the new filter. The Edit Access Time Control page opens on the General tab.
Important
No hours are blocked by default upon creating an Access Time Control filter. A new Access Time Control filter blocks nothing until you block at least one hour.
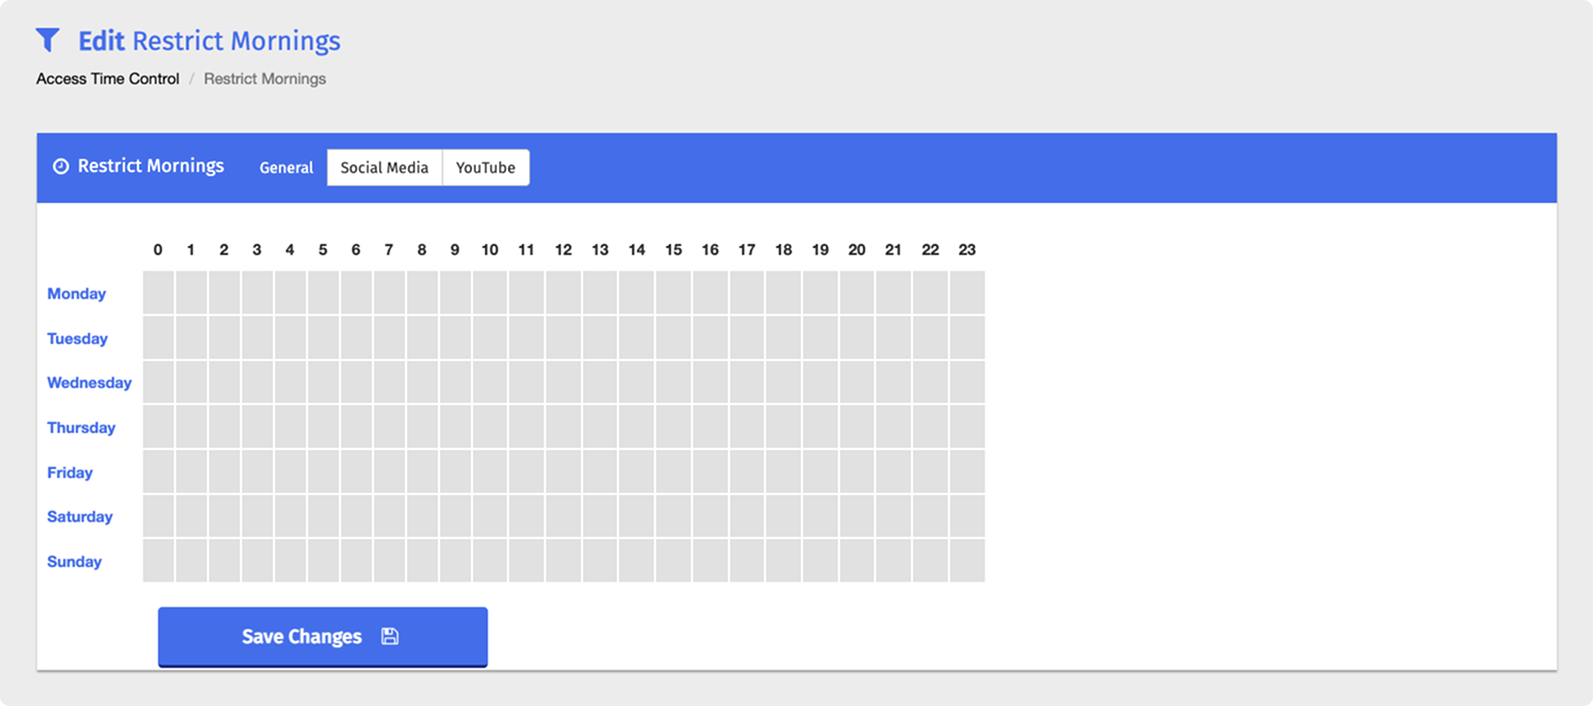
Click the tab for the content you want to schedule:
General - Controls access to all browsing.
Social Media - Controls access to websites in the Social Media and Networking category.
YouTube - Controls access to YouTube.
Click a cell to block that hour, or click and drag across several cells to block a range. Blocked cells turn red.
Note
Each row is a day of the week, and each column is an hour in military time, from 0 to 23.
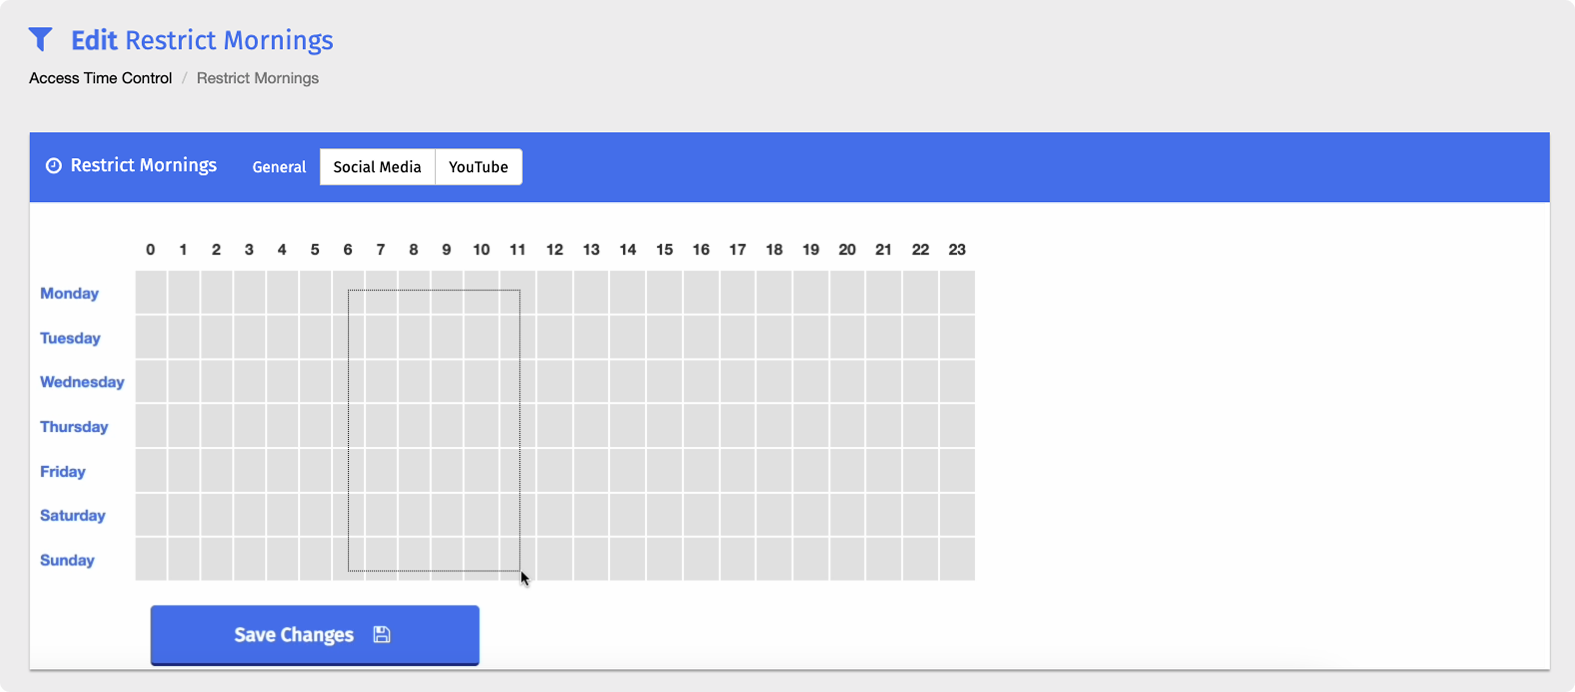
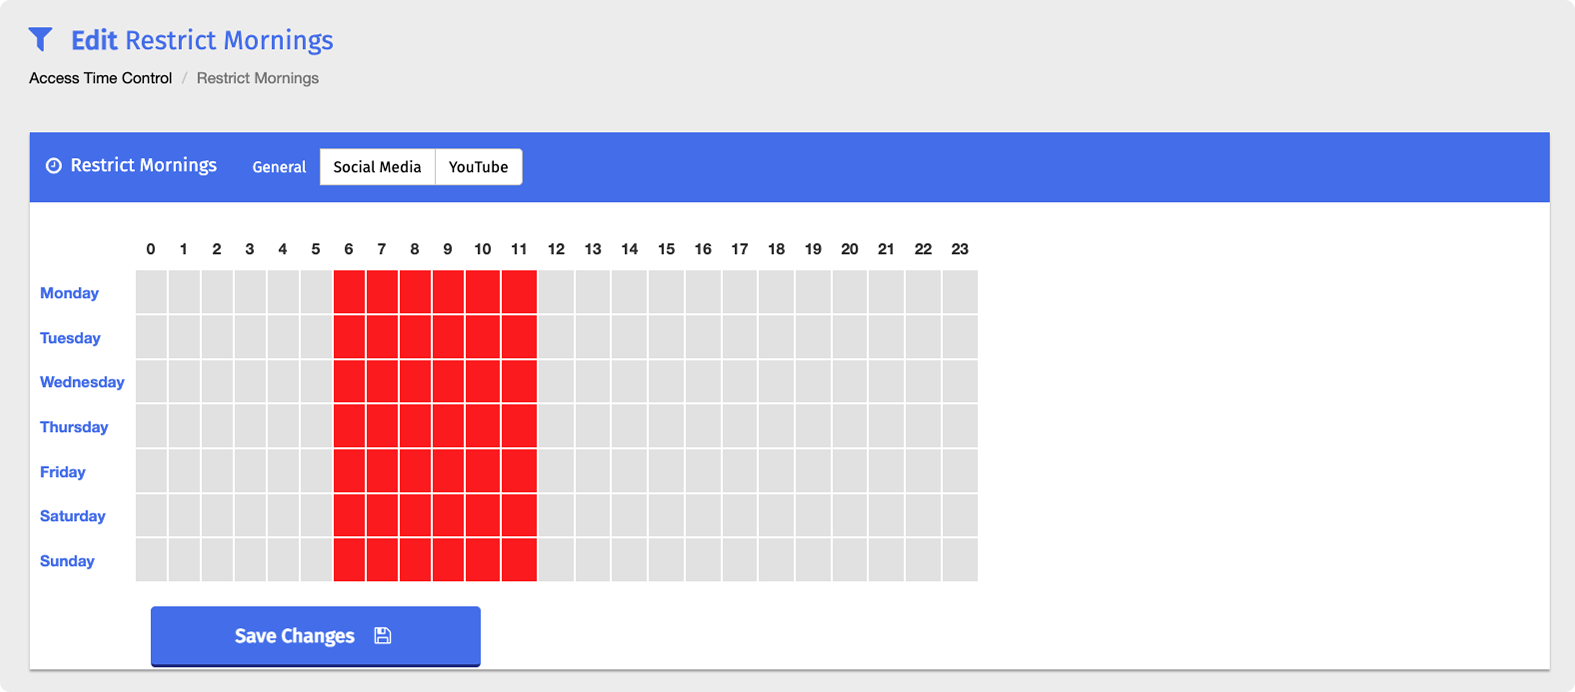
Repeat steps 3–4 for any other tabs you want to schedule.
Click the
 button.
You can manage your Access Time Control filters by editing their access times, renaming, duplicating, or deleting them. All of these actions can be performed directly on the Access Time Control page.
On the Access Time Control page, locate the filter and click the
button. The Edit Access Time Control page opens.Click the tab you want to change, then click or drag across cells to block or unblock hours.
Click the
button.
On the Access Time Control page, locate the filter to rename and click its name. The filter name opens in an editable text box.

Make your changes, then click the Save button.
On the Access Time Control page, locate the filter to duplicate and click the
 button. The Duplicate Filter window opens.
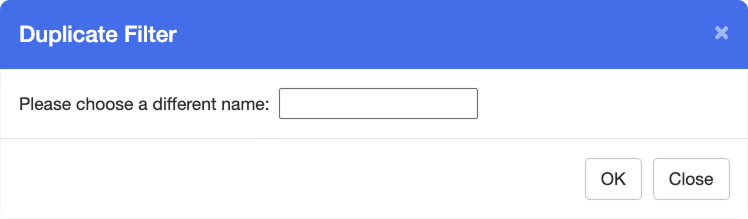
Enter a name for the new filter in the text box, then click OK. The new filter appears on the Access Time Control page.
Note
The duplicate is an exact copy of the original, including the blocked hours on every tab. The original Access Time Control filter is not removed upon duplicating.
Warning
Deleting an Access Time Control filter is a permanent action. Deleted filters cannot be recovered.
On the Access Time Control page, locate the filter to delete and click the
 button to the right of it.
Click OK in the confirmation window. The Access Time Control filter is permanently removed from the list.