Microsoft Entra Deployment
Blocksi connects to your Microsoft tenant through the Blocksi Azure AD enterprise application in Microsoft Entra ID. The app syncs your Entra ID users and groups into Blocksi, so you can import groups and license their users. The app also lets administrators sign in to the Blocksi Admin Dashboard with their Microsoft credentials, and lets Student Safety scan students' Microsoft 365 accounts.
A Global Administrator deploys the Blocksi Azure AD app by accepting the permissions prompt that appears the first time they sign in to the Blocksi Admin Dashboard with their Microsoft credentials.
Refer to the Windows Deployment section to learn about installing the Blocksi Enterprise MSI agent and deploying the Blocksi Enterprise browser extension.
Automatic nightly sync requires admin consent for the application permissions of the Blocksi Azure AD app. A Global Administrator grants this consent when they accept the permissions prompt at first sign-in. If automatic nightly sync does not run, a Privileged Role Administrator or Global Administrator can grant admin consent from Microsoft Entra ID.
This consent also covers the application permissions that Student Safety uses to scan students' Microsoft 365 accounts.
In the Microsoft Entra admin center, navigate to Entra ID > Enterprise apps. The Enterprise applications page opens.
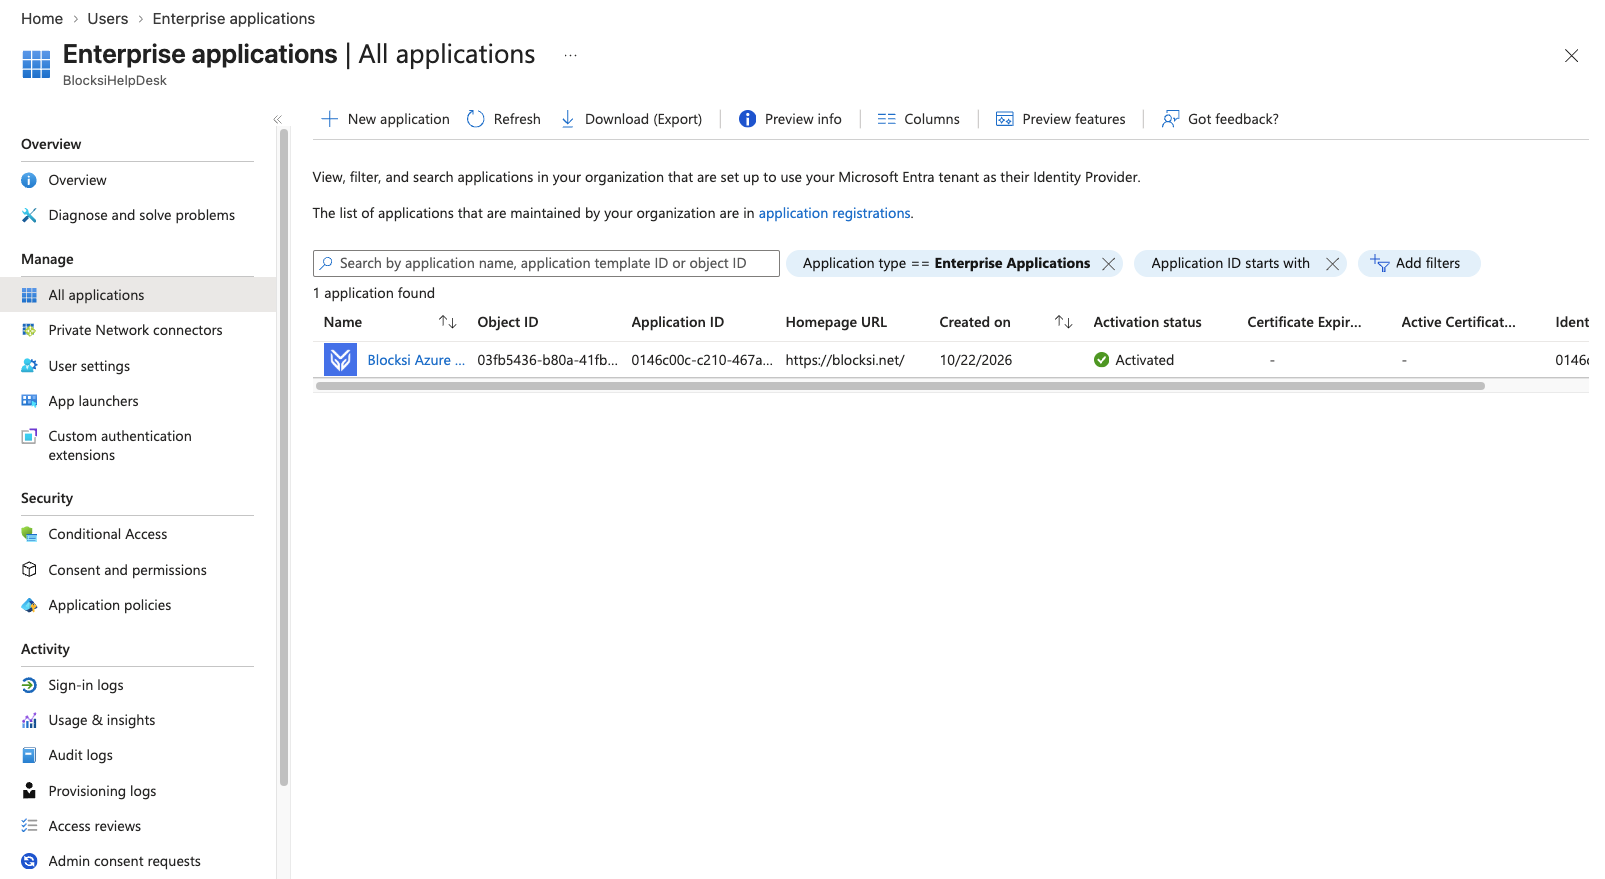
Search for Blocksi Azure AD, then click its name. The Blocksi Azure AD overview page opens.
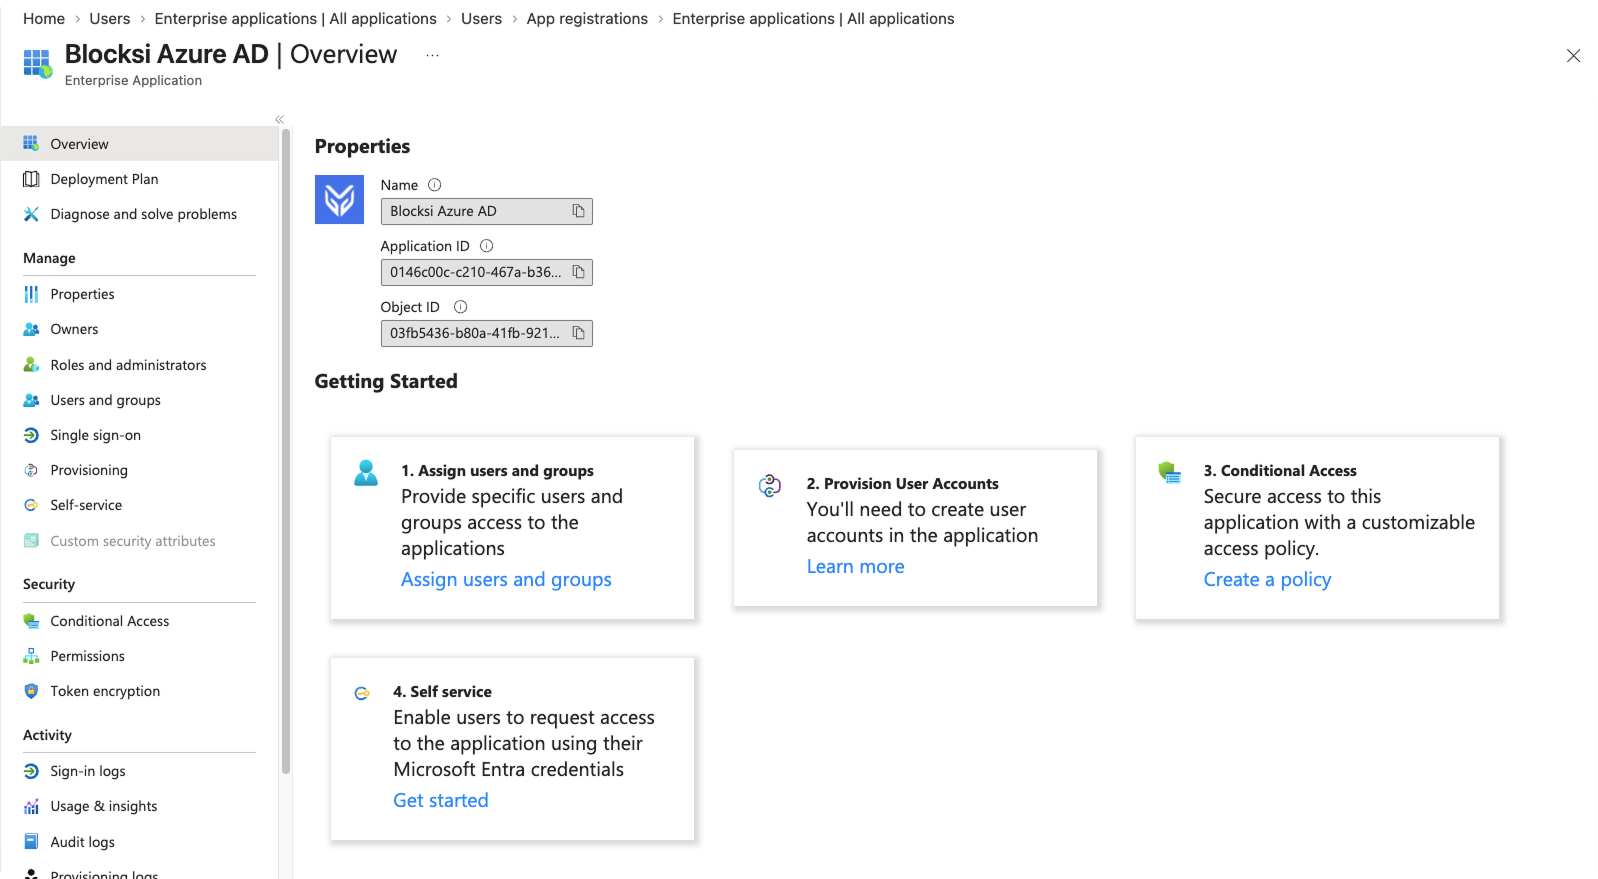
Click Permissions under Security in the left menu. The Permissions page opens on the Admin consent tab.
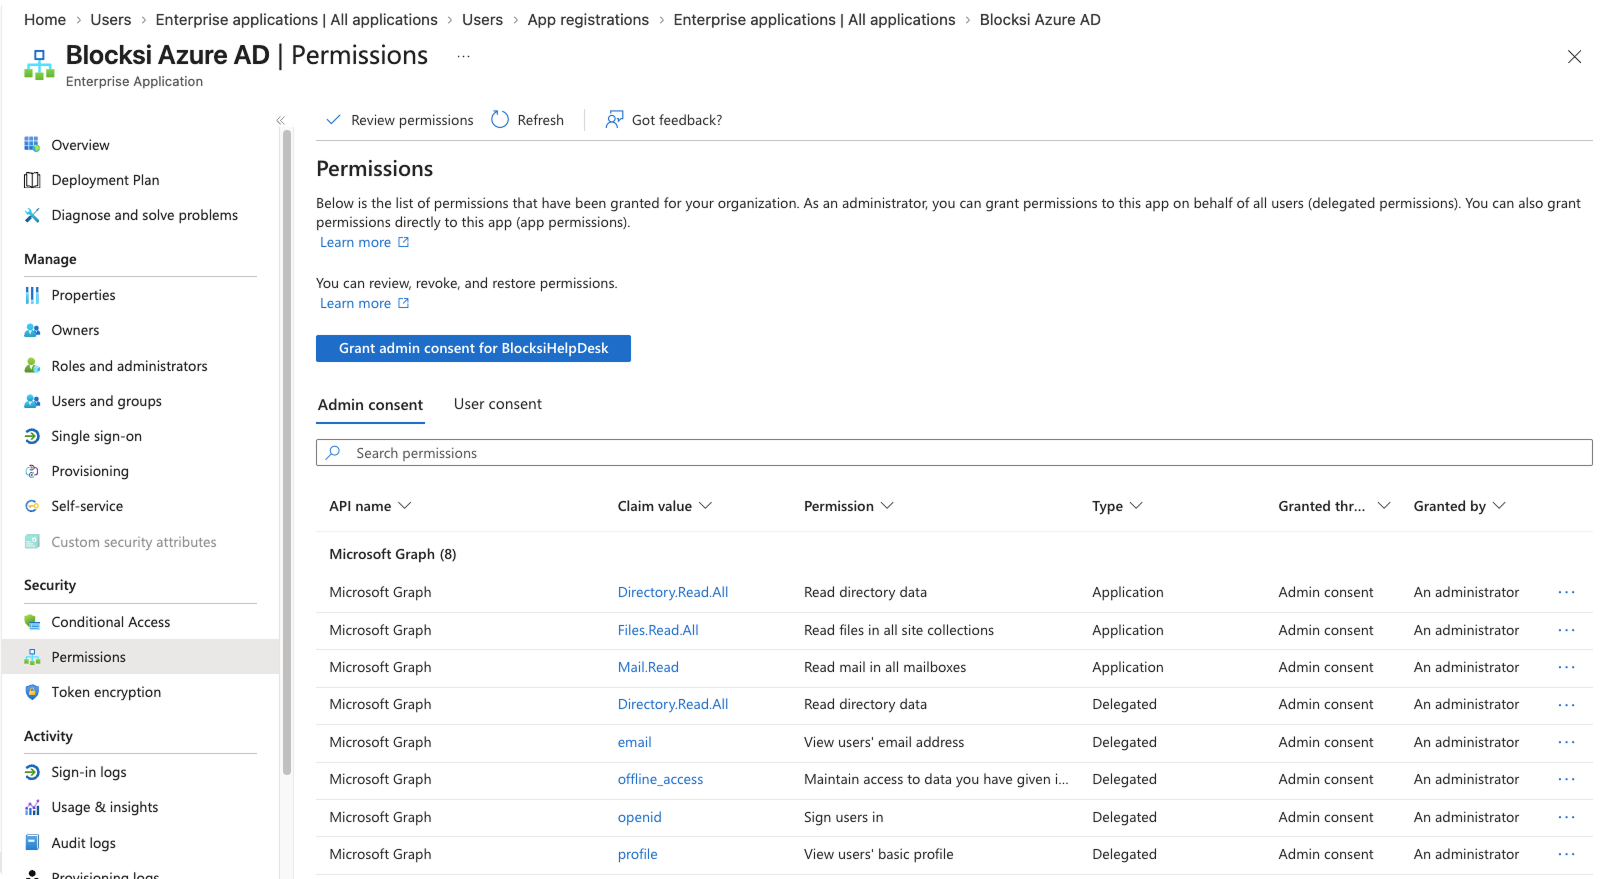
Click the Grant admin consent for [organization name] button. The Permissions requested window opens.
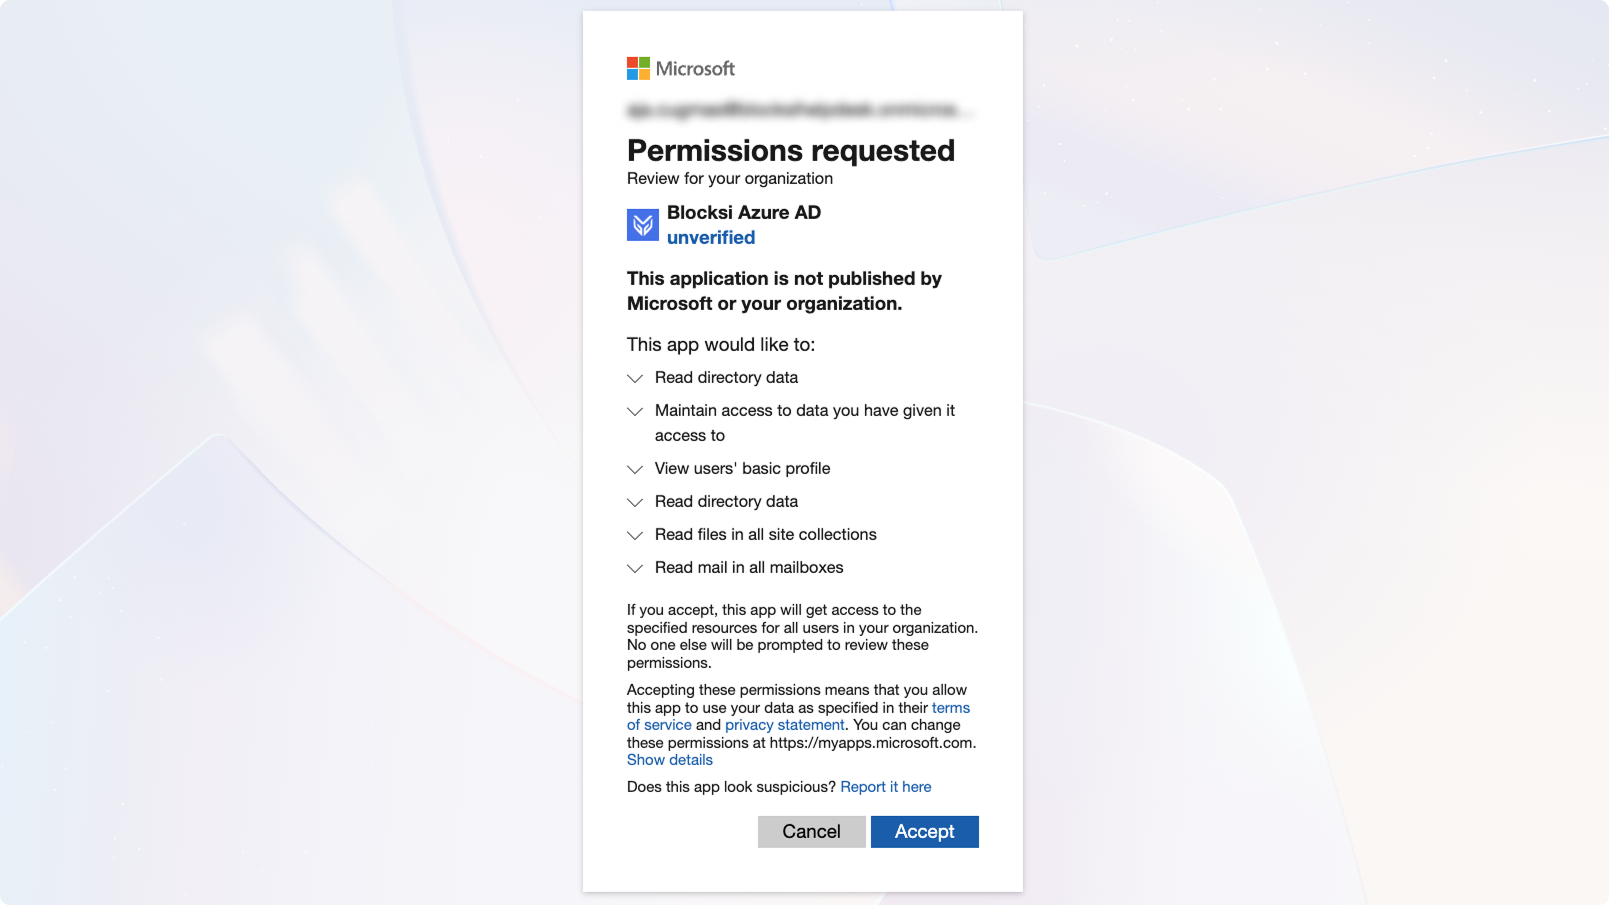
Review the requested permissions, then click Accept. The granted permissions appear on the Admin consent tab.
Blocksi syncs your Microsoft Entra ID users and groups in two ways: manually, when an administrator starts a sync, and automatically, every night. Each sync method uses a different type of Microsoft permission.
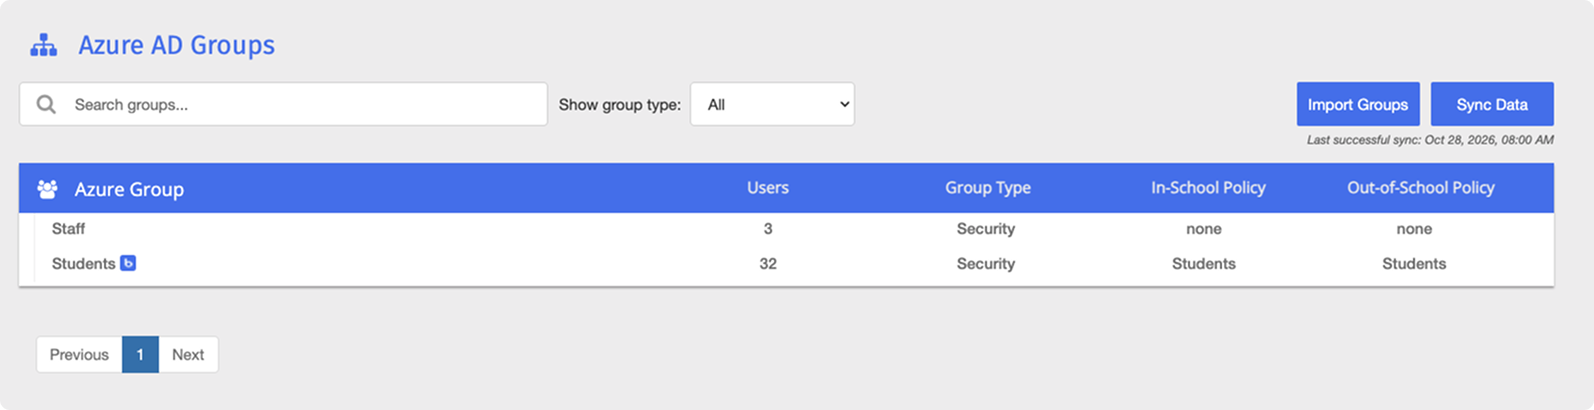
You can start a manual sync and check the sync status on the Azure AD Groups page in the Blocksi Admin Dashboard. To access this page, click Organizations and Entities from the Main Menu, then click Azure AD Groups from its sub-menu.
Manual sync - An administrator clicks the
 button on the Azure AD Groups page. The sync runs on behalf of the signed-in administrator, using their Microsoft account and permissions (delegated permissions).
Automatic nightly sync - The sync runs every night without a signed-in user. The Blocksi Azure AD app runs the sync itself, so it requires application permissions that a Privileged Role Administrator or Global Administrator must grant in your tenant.
The time of the last successful sync appears below the button.
Note
If the Last successful sync time does not update overnight, admin consent may not have been granted for the Blocksi Azure AD app. Refer to the Granting Admin Consent for the Blocksi Azure AD App section.
Student Safety scans the Microsoft 365 accounts of students on your Microsoft domain for signs of cyberbullying, threats, mental health concerns, and other safety issues. Blocksi needs the Files.Read.All permission on the Blocksi Azure AD app in Microsoft Entra before it can scan these accounts.
Alerts support Azure groups. In districts that use Microsoft Entra ID, you can select specific Azure groups that determine when a configured alert triggers. Azure group details also appear in Alerts Analytics, Alerts Logs, and email and SMS alert notifications. Refer to the Alerts Overview section to learn about configuring alerts.
Prerequisites
Ensure the following prerequisites are in place before proceeding with deployment:
Privileged Role Administrator or Global Administrator access to the Microsoft Entra admin center at entra.microsoft.com.
The Blocksi Azure AD enterprise application is deployed in Microsoft Entra. A Global Administrator deploys it by accepting the permissions prompt that appears the first time they sign in to the Blocksi Admin Dashboard with their Microsoft credentials.
Students have a Microsoft 365 A3 license, or an equivalent license, applied.
In the Microsoft Entra admin center, navigate to Entra ID > Enterprise apps. The Enterprise applications page opens.
Search for Blocksi Azure AD, then click its name. The Blocksi Azure AD overview page opens.
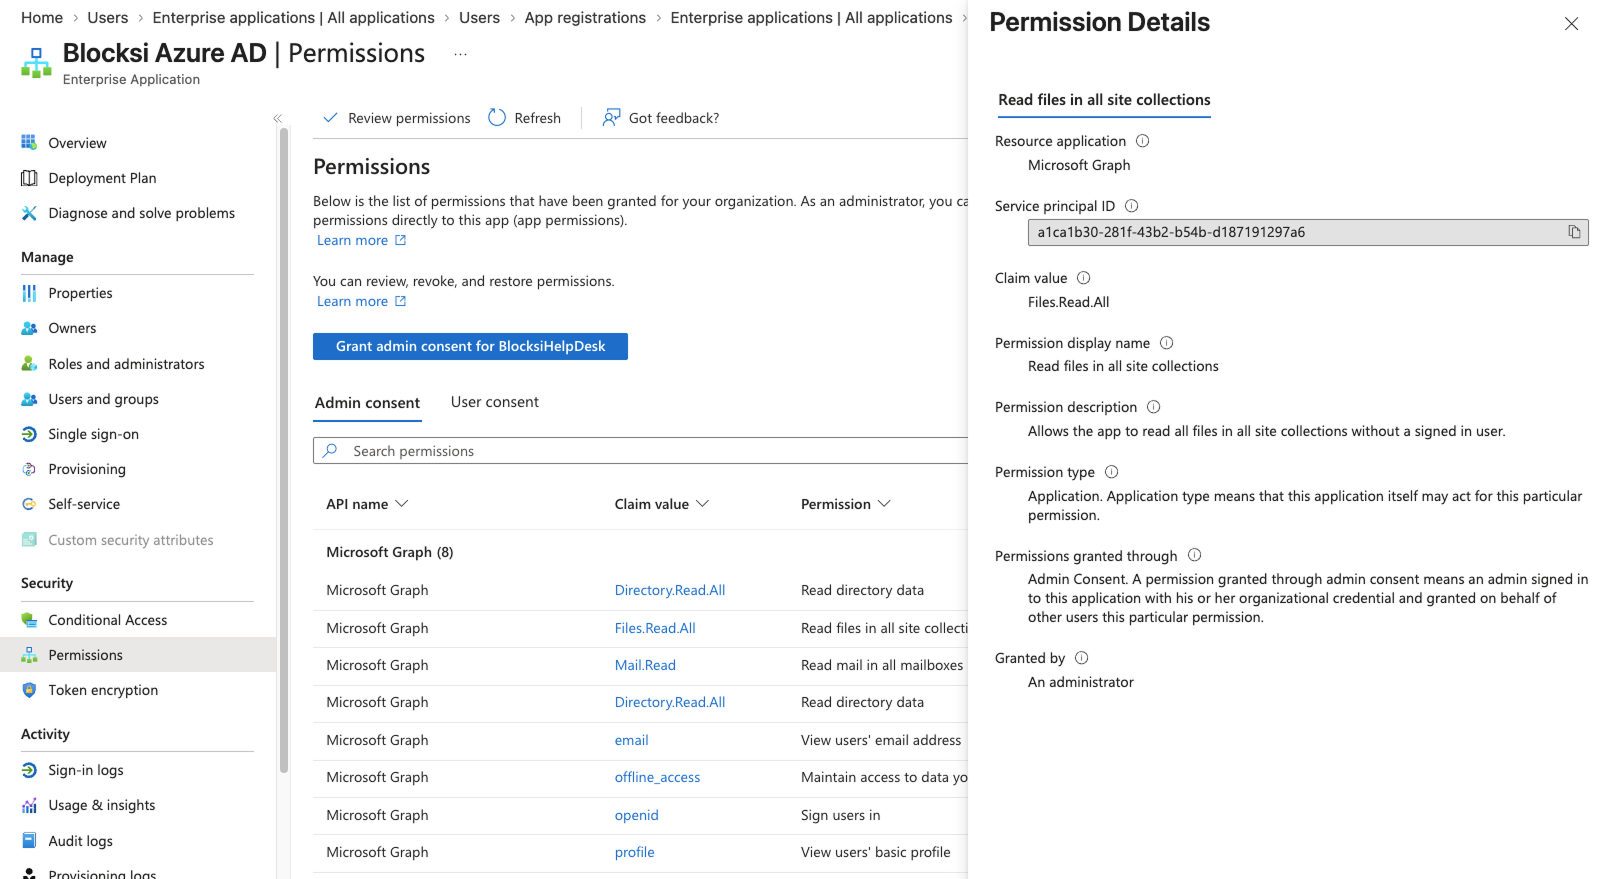
Click Permissions under Security in the left menu. The Permissions page opens on the Admin consent tab.
In the Microsoft Graph list, click the
Files.Read.Allentry with the Application type. The Permission Details panel opens.Confirm the following:
Permission type - Application.
Granted by - An administrator.
If the
Files.Read.Allentry with the Application type is missing, or Granted by does not show An administrator, click the Grant admin consent for [organization name] button on the Permissions page, then click Accept in the Permissions requested window. Otherwise, no further action is needed.