Intune - macOS Configuration Guide
The following contains procedures for deploying Blocksi URL Filtering OSX using Intune. The solution consists of two components:
Proxy - A system-level service that intercepts and filters web traffic.
Agent - A menu bar application that communicates with Blocksi servers to enforce filtering policies.
Prerequisites
Ensure the following prerequisites are in place before proceeding with deployment:
Administrator access to the Microsoft Intune Admin Center at intune.microsoft.com.
Your Blocksi Super-Admin account email address.
Devices are enrolled in Intune and their local account name matches the part of their Blocksi licensed email address before the @ - for example, for
student123@blocksi.netthe local account name isstudent123.Download the following files provided by Blocksi:
Blocksi_Filter.pkg- Installer which installs the proxy and agent.Blocksi_Settings.mobileconfigBlocksi_Proxy.mobileconfigblocksi_uninstall.sh- (Optional) Uninstaller script for the Blocksi Filter agent. Click here to download.
Downloads
Download the Blocksi Filter agent and configuration files from the Admin Dashboard.
Click on your profile icon in the top right of the dashboard.
Click Downloads.
Select the Apple tab and download the appropriate package for your MDM.
Warning
After completing each step, wait a few minutes for the configuration to be pushed to the target devices before proceeding to the next step.
Sign in to the Microsoft Intune Admin Center at intune.microsoft.com.
Navigate to Devices > Manage Devices > Configuration and select + Create > New Policy. A new panel appears on the right side of the page.
Enter the following properties:
Platform - macOS
Profile Type - Templates > Custom
Click Create.
On the Basics tab, enter the following properties:
Name - Enter a name for the profile (e.g., Blocksi Filter - Settings).
Description - Enter a description for the policy. This setting is optional but recommended.
Note
The Platform and Profile Type should already be filled out.
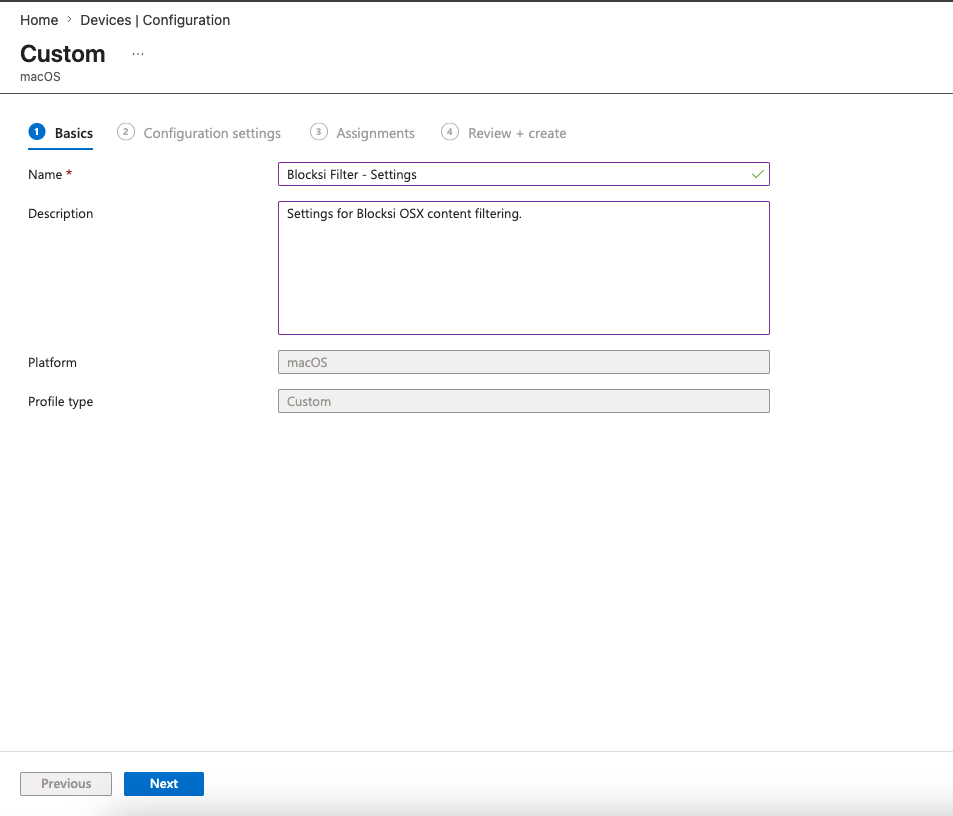
Click Next.
On the Configuration Settings tab, enter a name for the configuration profile in the name field (e.g., Blocksi Settings), set the Deployment channel to Device channel, then upload the
Blocksi_Settings.mobileconfigfile under the Configuration profile file section.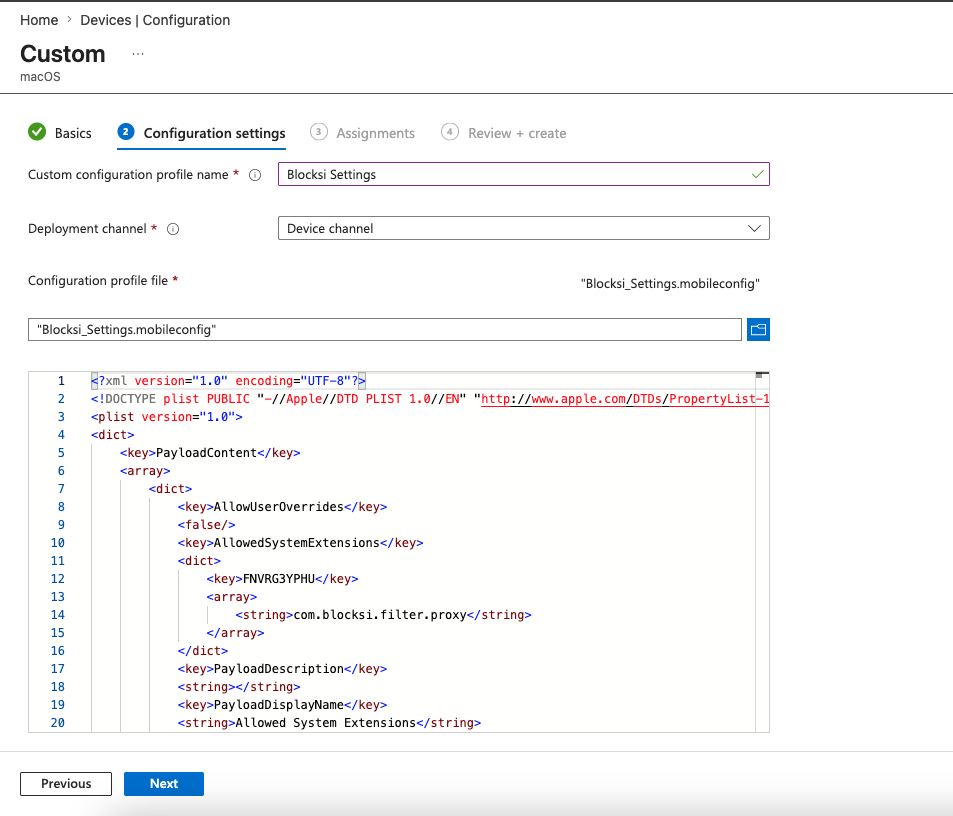
Search for the
organizationIdkey and replaceadmin@blocksi.netwith your Blocksi Super Admin account (CompanyId) within the<string></string>fields.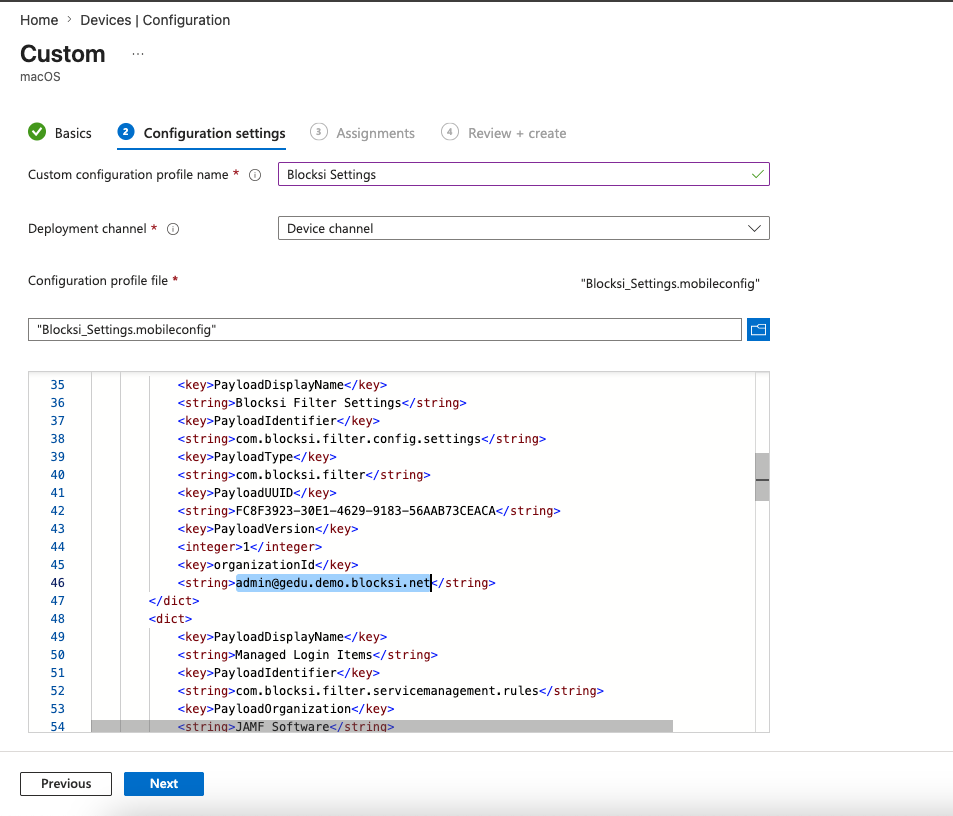
Review the imported file and click Next.
In the Assignments tab, assign the profile to your device groups and click Next.
On the Review + Create tab click Create. Your changes are saved, the profile is assigned, and the policy appears in the profiles list.
Note
The bundle_id key is used to configure which apps are filtered by the Blocksi agent. The provided .mobileconfig file is configured to filter the most commonly used web browsers: Chrome, Safari, Edge, Brave, Firefox, and Opera. You can filter additional apps by adding <string>package_name</string> lines to the configuration.
Sign in to the Microsoft Intune Admin Center at intune.microsoft.com.
Navigate to Apps > macOS and select + Create.
For App type, select macOS app (PKG), then click Select.
Click Select app package file, browse to
Blocksi_Filter.pkg, and click OK.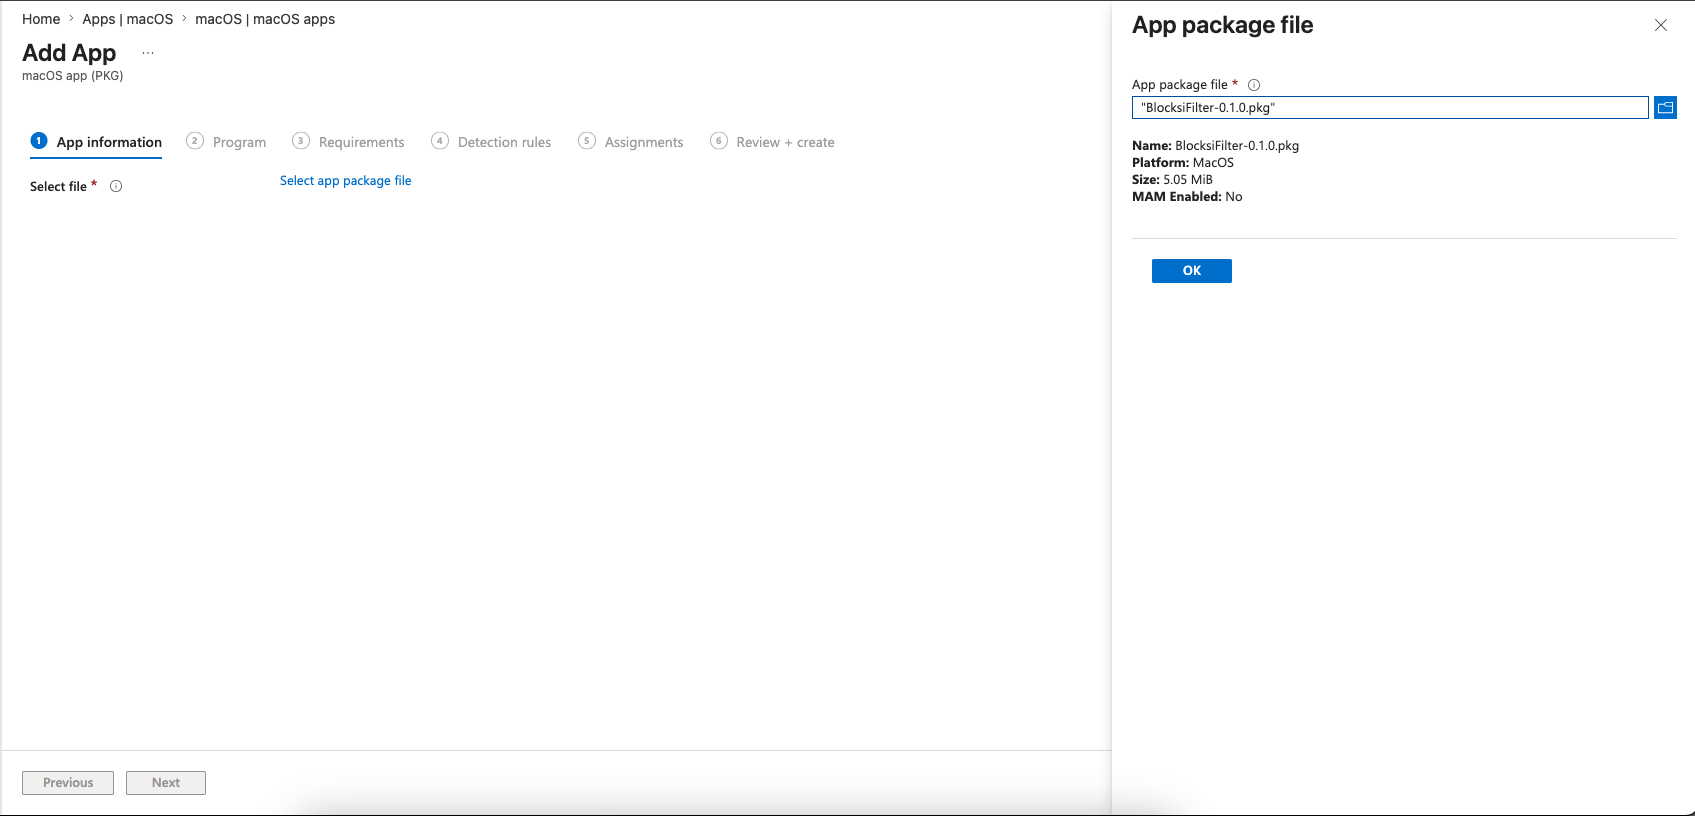
On the App information tab, enter the following properties, then click Next:
Name - The name of the app as it appears in the Microsoft Intune Admin Center (e.g., Blocksi for OSX).
Description - A description of the app.
Publisher - Blocksi.
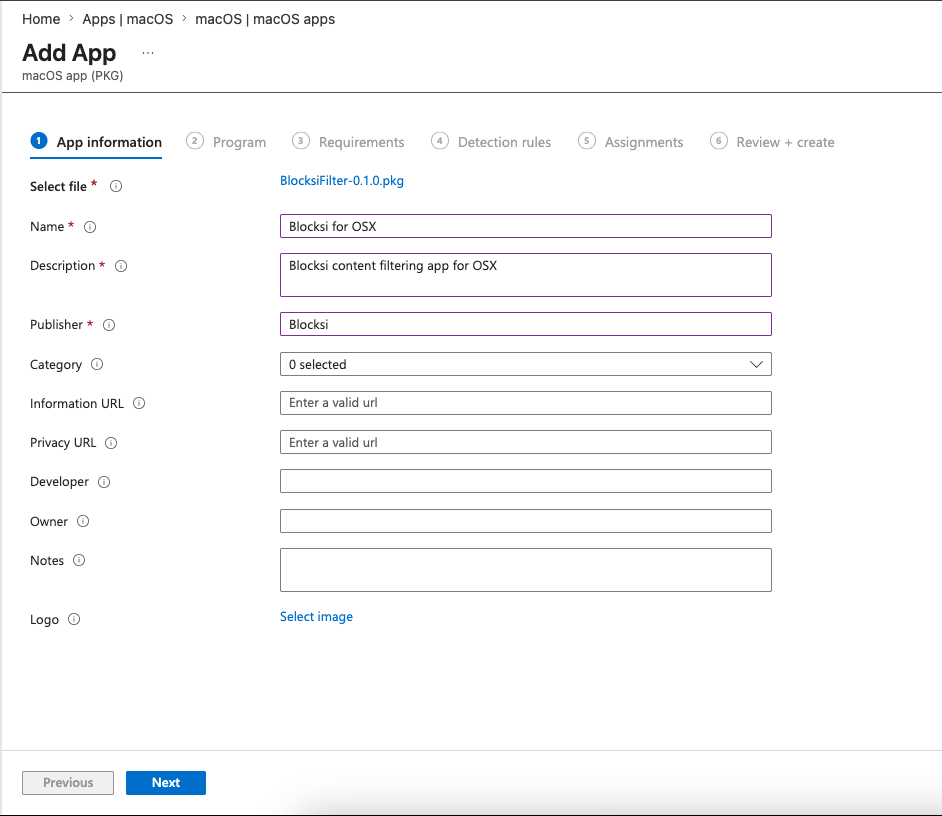
On the Program tab, click Next.
On the Requirements tab, set Minimum operating system to macOS Monterey 12.0. Click Next.
On the Detection rules tab, the included app's bundle ID is detected automatically:
Included app bundle ID -
com.blocksi.filterSet Ignore app version to Yes so reinstalls aren't forced on every version. Click Next.
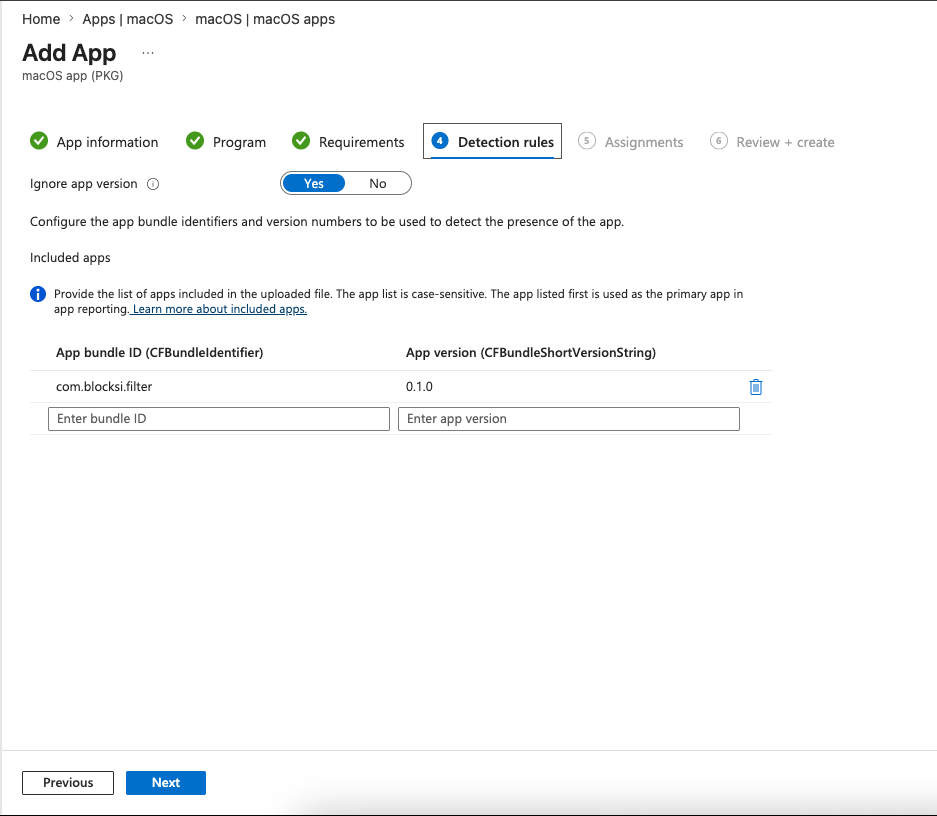
On the Assignments tab, add the same target device group as Required. Click Next.
On the Review + Create tab, confirm the settings and click Create.
Sign in to the Microsoft Intune Admin Center at intune.microsoft.com.
Navigate to Devices > Manage Devices > Configuration and select + Create > New Policy. A new panel appears on the right side of the page.
Enter the following properties:
Platform - macOS
Profile Type - Templates > Custom
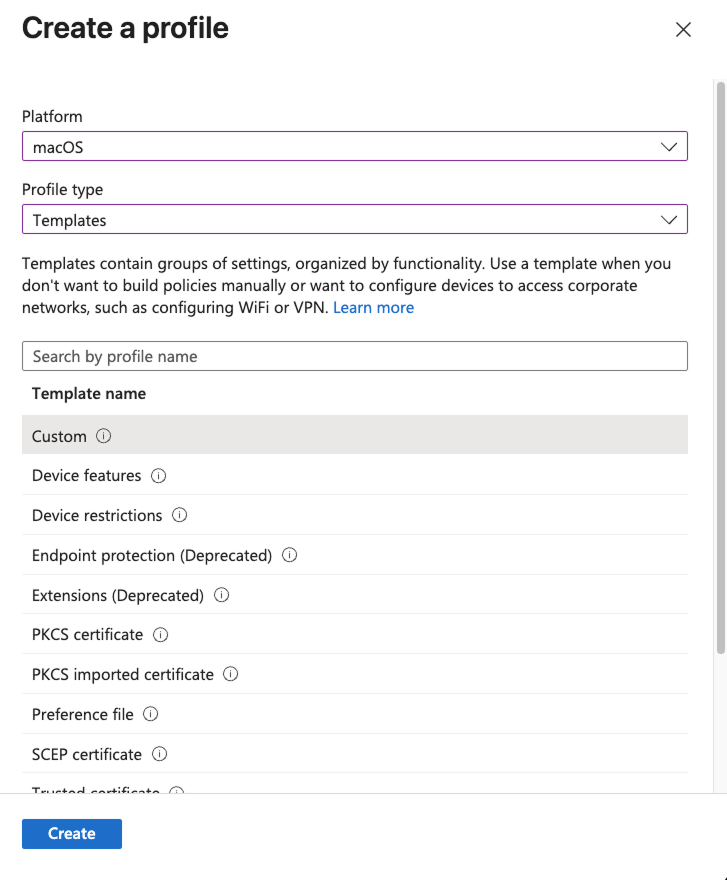
Click Create.
On the Basics tab, enter the following properties:
Name - Enter a name for the profile (e.g., Blocksi Filter - Proxy).
Description - Enter a description for the policy. This setting is optional but recommended.
Note
The Platform and Profile Type should already be filled out.
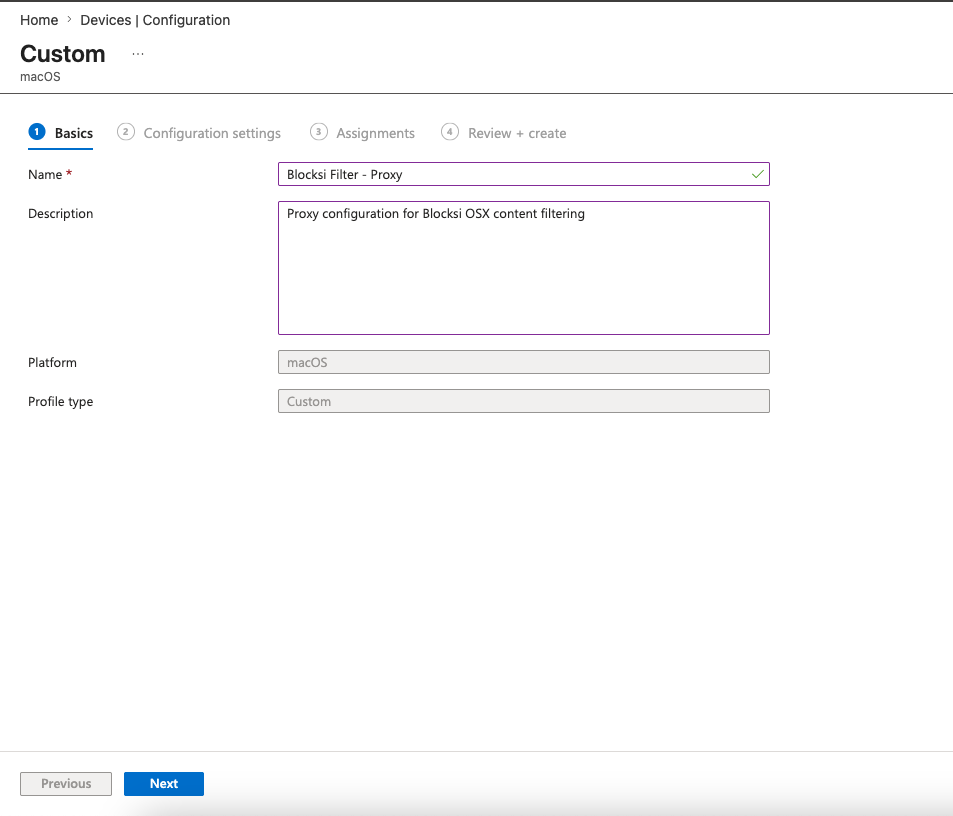
Click Next.
On the Configuration Settings tab, enter a name for the configuration profile in the name field (e.g., Blocksi Proxy), set the Deployment channel to Device channel, then upload the previously downloaded
Blocksi_Proxy.mobileconfigfile under the Configuration profile file section.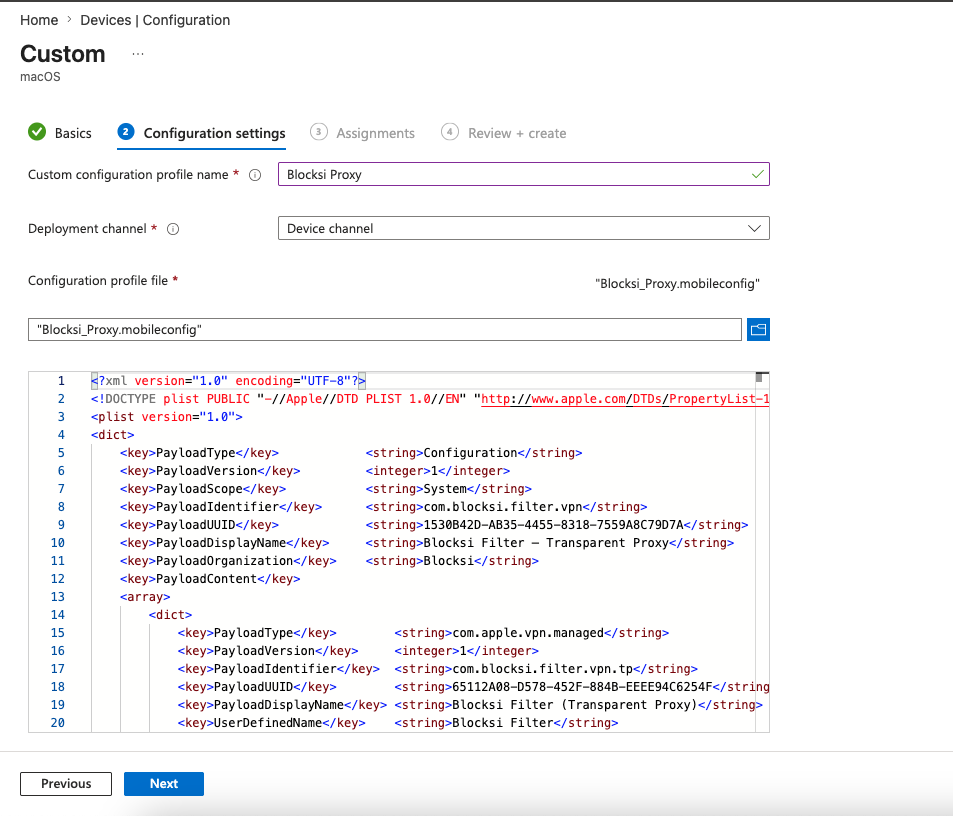
Review the imported file and click Next.
In the Assignments tab, assign the profile to your device groups and click Next.
On the Review + Create tab click Create. Your changes are saved, the profile is assigned, and the policy appears in the profiles list.
To validate the deployment, verify that the profiles, services, and filtering agent are installed on the target device correctly.
Open Terminal on the target Mac and run the following command:
launchctl list | grep blocksi
The output should include com.blocksi.proxy.
Open Terminal on the target Mac and run the following command:
systemextensionsctl list
The output should include FNVRG3YPHU com.blocksi.filter.proxy (1.0/1) com.blocksi.filter.proxy [activated enabled].
Navigate to System Settings.
Click Network in the sidebar, then click Filters.
The Blocksi Filter should show with a status of Enabled.
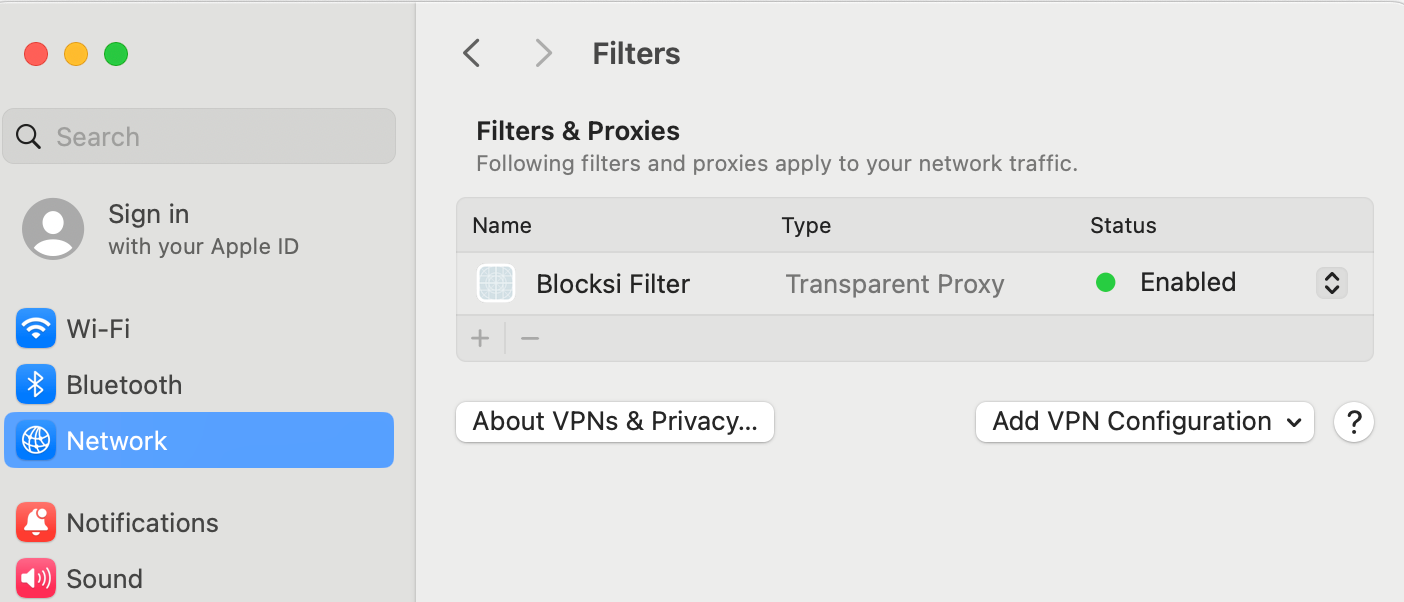
After login, verify that the Blocksi Filter icon appears in the menu bar.
Click the icon. The status should show Connected.
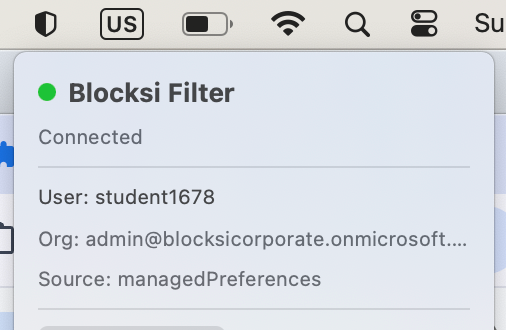
Log in to the Mac device with a licensed user that has a policy assigned.
Navigate to some sites that should be blocked by your policy.
Verify that the Blocksi Access Denied page appears:
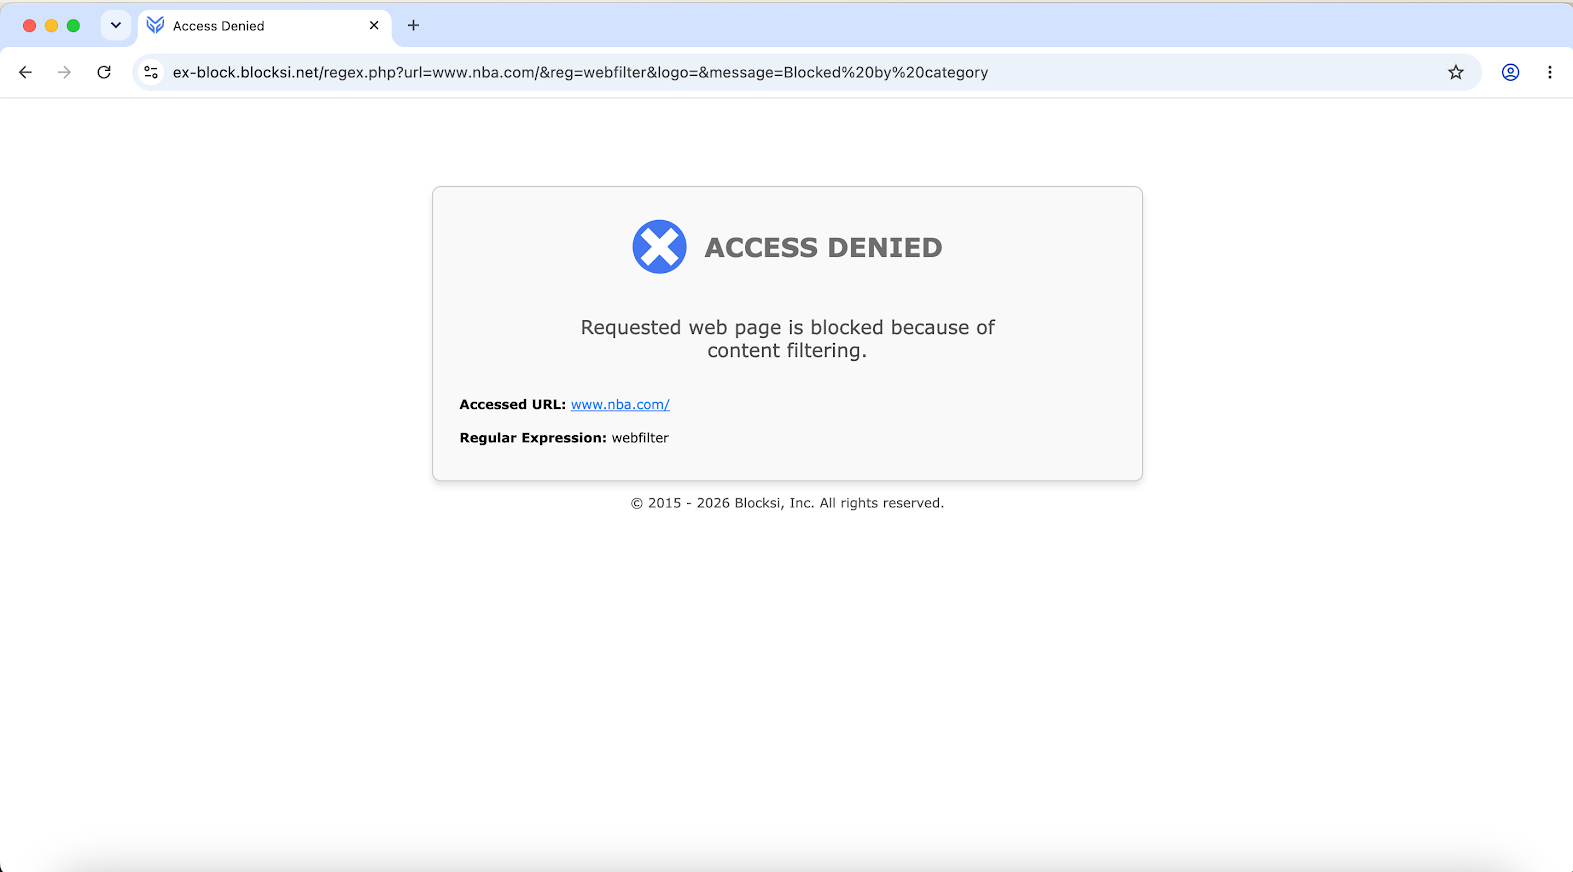
On the Blocksi Admin Dashboard, navigate to Insights from the Main Menu, click Web Analytics from its sub-menu, then switch to Logs.
Verify that the browsing activity from the device appears in the logs.
Updating Blocksi Filter replaces the installed application package with a newer version. You can update Blocksi Filter on managed devices without re-enrolling them or re-creating the Blocksi Settings and Blocksi Proxy configuration profiles.
Note
Do not unassign the Blocksi Settings or Blocksi Proxy configuration profiles during an update. These profiles are not replaced by the new package, and removing them requires re-deploying them before filtering resumes.
In your MDM, remove the target device groups from the scope of the Blocksi Filter application package so the package is not redeployed while the update is in progress.
Deploy the uninstall script to the same device groups. The deployment procedure is the same one described in Uninstalling Blocksi Filter in this guide.
Important
Download the uninstall script using this direct link.
Wait for the script to run on the target devices, then confirm that the Blocksi Filter icon no longer appears in the menu bar.
Upload the new version of the Blocksi Filter package to your MDM, replacing the existing package. Refer to Configuring the Application Package Deployment in this guide.
Note
Download the Blocksi Filter agent package from the Admin Dashboard.
Click on your profile icon in the top right of the dashboard.
Click Downloads.
- Select the Apple tab and download the appropriate package for your MDM.
Add the target device groups back to the scope of the Blocksi Filter package.
Confirm that the new version is installed and filtering is active. Refer to Validating the Deployment in this guide.
Important
Unassign the Blocksi application package deployment and both Blocksi configuration profiles from the target devices before proceeding with deploying the uninstall script.
Sign in to the Microsoft Intune Admin Center at intune.microsoft.com.
Navigate to Devices > macOS > Manage Devices > Scripts and click + Add.
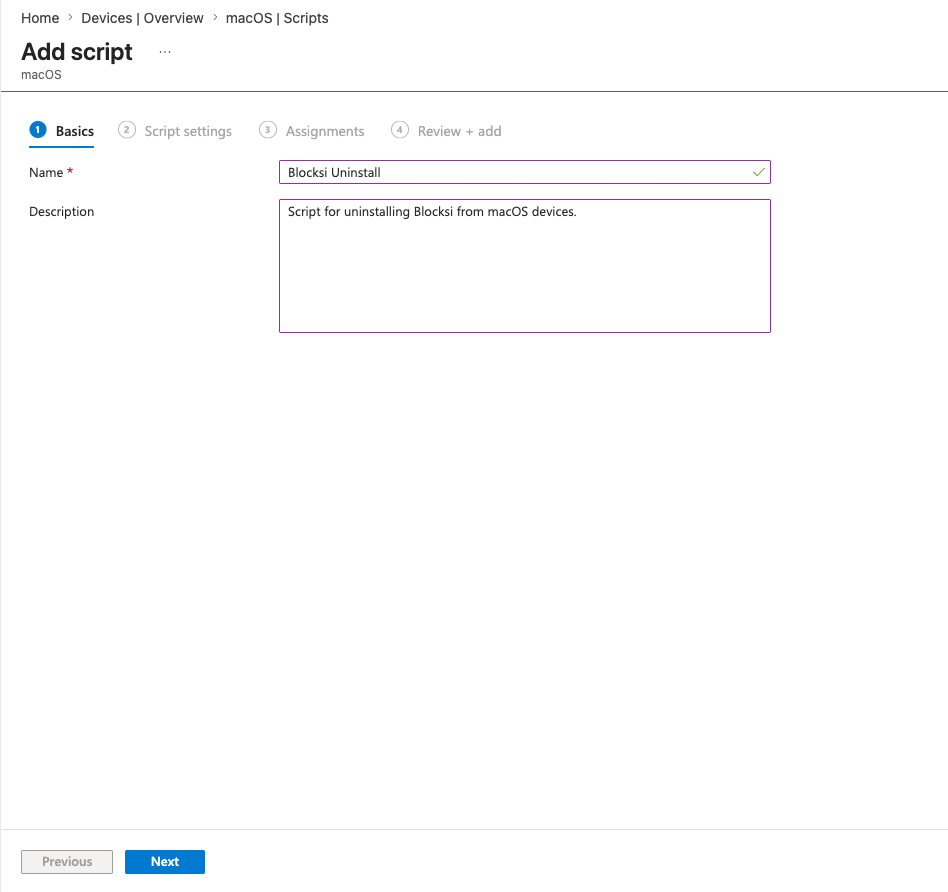
On the Basics tab, enter the following properties:
Name: Blocksi Uninstall
Description: Enter a description for the script. This setting is optional but recommended.
On the Script settings tab: upload the previously downloaded
blocksi_uninstall.shfile under Upload script. The script is available for download here.Switch Run script as signed-in user to No.
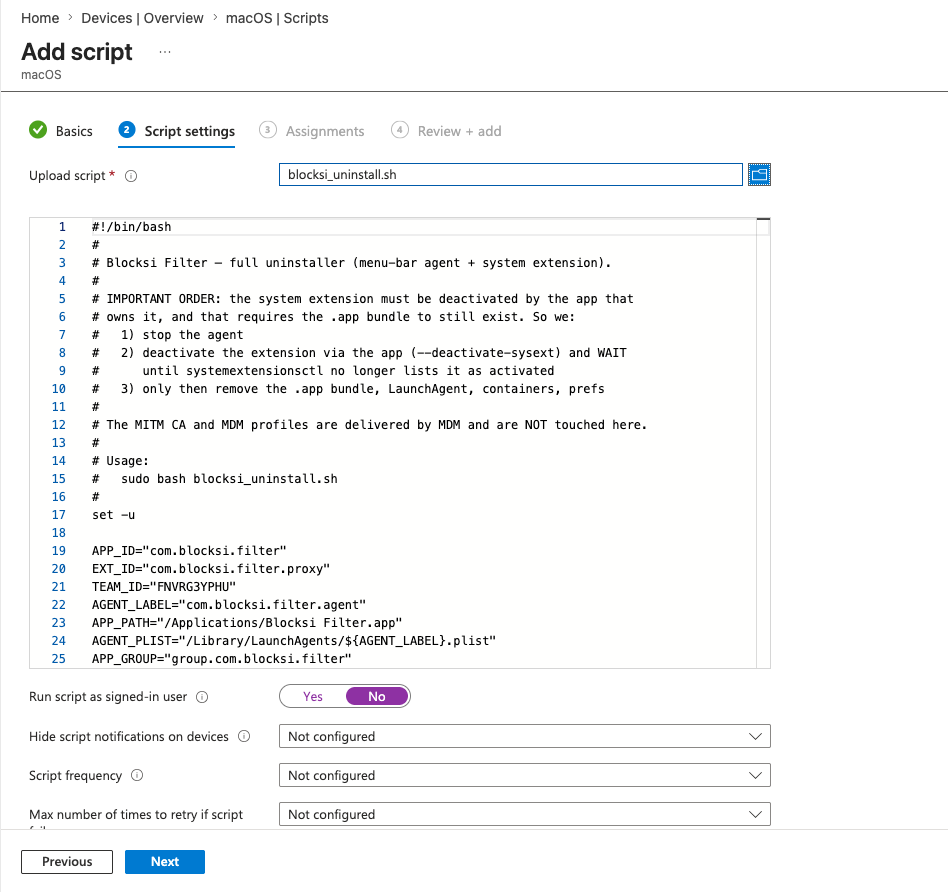
Click Next.
In the Assignments tab, assign the script to your device groups and click Next.
On the Review + Add tab click Add.
If you are having issues with uninstalling Blocksi from OSX devices using Intune, create a new configuration profile that allows identified developers.
Navigate to Devices > Manage Devices > Configuration and select + Create > New Policy. A new panel appears on the right side of the page.
Enter the following properties:
Platform: macOS
Profile type: Settings catalog
On the Basic tab, enter the following properties:
Name: macOS - Allow Identified Developers
On the Configuration settings tab, click + Add settings.
Within the Settings picker, scroll down to System Policy Control > System Policy Control, and select Allow Identified Developers.
Under System Policy Control, switch Allow Identified Developers to True.
In the Assignments tab, assign the configuration profile to your device groups and click Next.
On the Review + Create tab click Create.
Note
Wait for the new profile to push down to the devices, and then repeat the uninstalling procedure.