Exception List
Exception Lists let you define a custom set of rules for blocking or allowing specific websites that your other filtering rules do not cover. Each entry can target a full domain, a subdomain, or part of a URL, and wildcards let a single entry match multiple URLs at once.
Use an Exception List whenever one website or domain needs to behave differently from the category it belongs to:
Games are blocked, but one educational game needs to be available. Add the game's URL to an Exception List as allowed.
Google Sites stays open for classwork, but students find a gaming site hosted there. Add that site to an Exception List as blocked.
YouTube is blocked, but one video is required for a lesson. Add the video's URL to an Exception List as allowed.
An Exception List has the highest priority of all filters, so its entries override the rules set by your other filters.
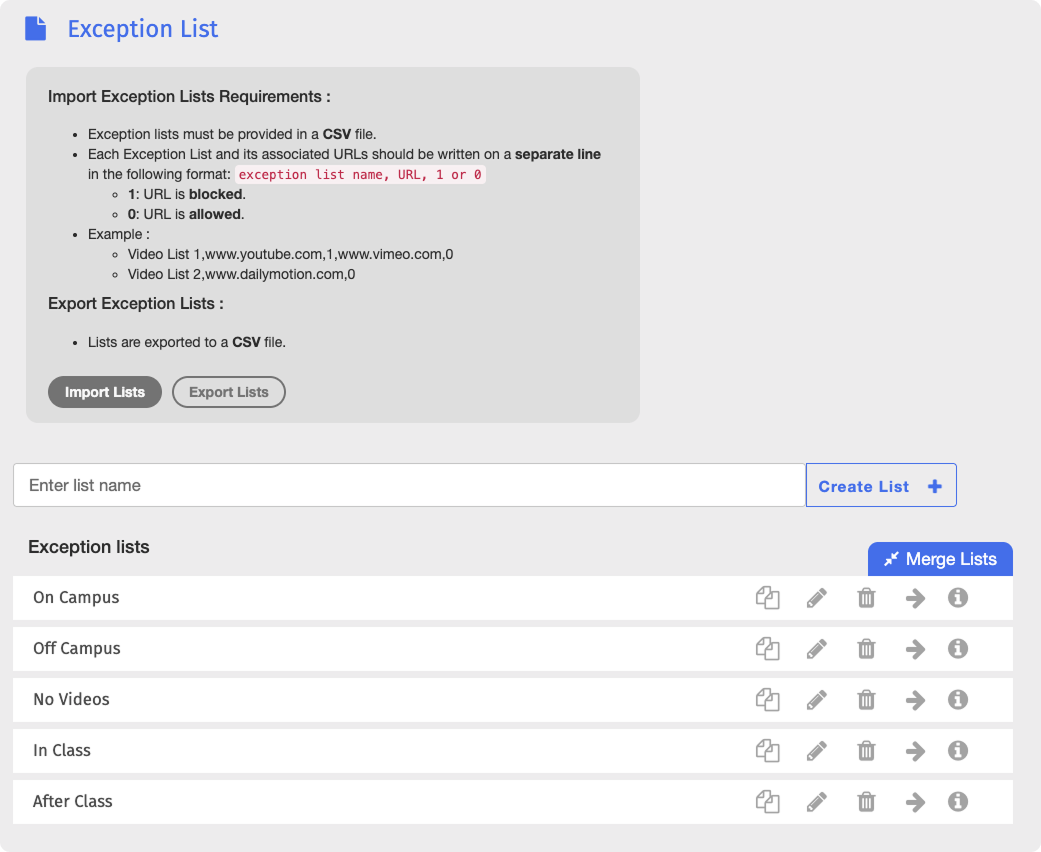
To access the Exception List page, click Content Filtering from the Main Menu, then click Filters from its sub-menu. On the Filters page, click Exception List listed under Web Filters.
Important
After making any changes to your content filtering or policies, click the  button in the Action Bar at the top of the page to apply the changes.
To set up an Exception List, create the list, add the URLs you want blocked or allowed, then configure the settings that apply to it.
Type a name for the list in the Enter list name text box, then click the
 button. The new list appears on the Exception List page.
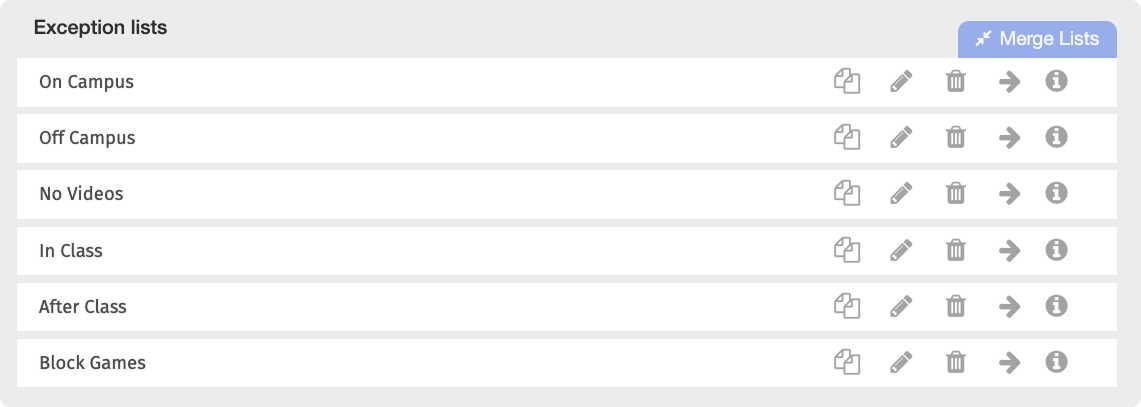
Click the
 button in the same row as the new list. The Edit Exception List page opens.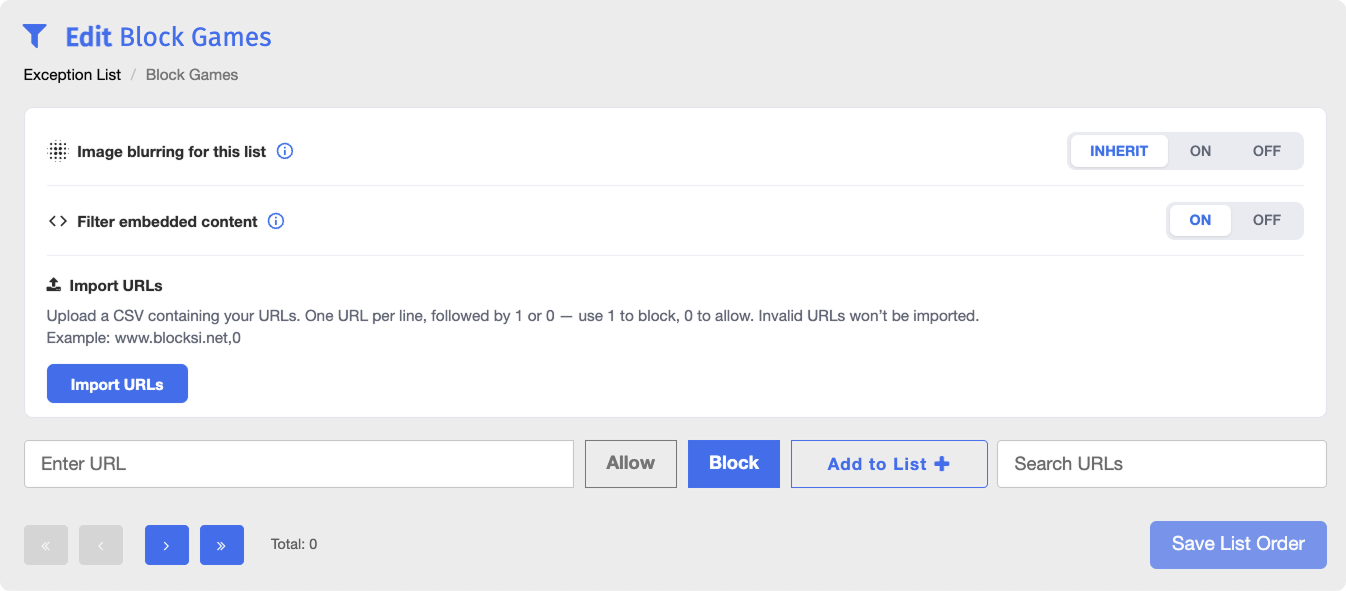
Configure the following settings for this list:
Image Blurring for This List - Sets whether to blur images on the websites in this list. Select INHERIT (default) to follow the image blurring settings of the policy the list is applied to, ON to always blur images, or OFF to never blur them.
Filter Embedded Content - Set whether to apply filtering to embedded content on the websites in this list, such as YouTube videos, iframes, and widgets. Select ON (default) to block embedded content, or OFF to allow it.
Type a URL in the Enter URL text box, click Block or Allow, then click the
 button. The URL is added to the list.
Tip
You can add a note to any new Exception List entry. Notes appear to the right of the URL, next to the date added.
Note
You can also add URLs in bulk by clicking the  button and uploading a CSV file. Refer to the Importing URLs into an Exception List section for the full procedure.
A wildcard, or asterisk (*), is a placeholder representing zero or more unknown characters in a URL. Using wildcards helps you refine which URLs are blocked or allowed without listing each one individually. The position of the wildcard determines which part of the URL is variable.
Important
Entries higher on the Exception List take priority over entries below them. Refer to the Reordering Entries section.
Using Wildcards With URLs
There are a couple of rules as to where to place the wildcard to block or allow specific URLs, sub-domains, or paths. Refer to the example using apple.com below, showing how the position of the wildcard affects which URLs are matched.
*apple.com- Matches the domain, all of its subdomains, and all of its paths. It also matches any domain ending in the same characters, such asnotapple.com. This works the same as*apple.com*.apple.com*- Matches the domain and all of its paths, but not its subdomains. The domain must match exactly, sonotapple.comis not matched.*apple.com*- Matches any URL that containsapple.comanywhere, covering both subdomains and paths.*.apple.com- Matches the domain along with all of its subdomains and paths, such asapple.com,music.apple.com, andapple.com/store. Unlike*apple.comand*apple.com*, it does not matchnotapple.com.
Note
Some URLs appear within other URLs - for example, go.com within lego.com, or x.com within hbomax.com. In these cases, be cautious when blocking or allowing entries with a wildcard in front of the domain (such as *x.com or *x.com*), as the pattern may match more URLs than intended.
Using Wildcards With Keywords
Wildcards can also be used to block individual keywords appearing in a URL. Wrapping the keyword in wildcards blocks any URL containing that keyword, including URLs where the keyword appears as part of another word. Refer to the examples below.
*game*- Also blocks URLs containingmathgames,coolmathgames, orboardgames.*bet*- Also blocks URLs containingalphabet,diabetes, orsherbet.*round*- Also blocks URLs containingroundabout,around, orground.*pot*- Also blocks URLs containingspot,potato, ordepot.
Tip
Adding keyword wildcards to the Exception List also blocks search engine queries. When a student searches for a blocked keyword on Google or another search engine, the search URL contains the keyword (e.g., google.com/search?q=games), which the wildcard then matches.
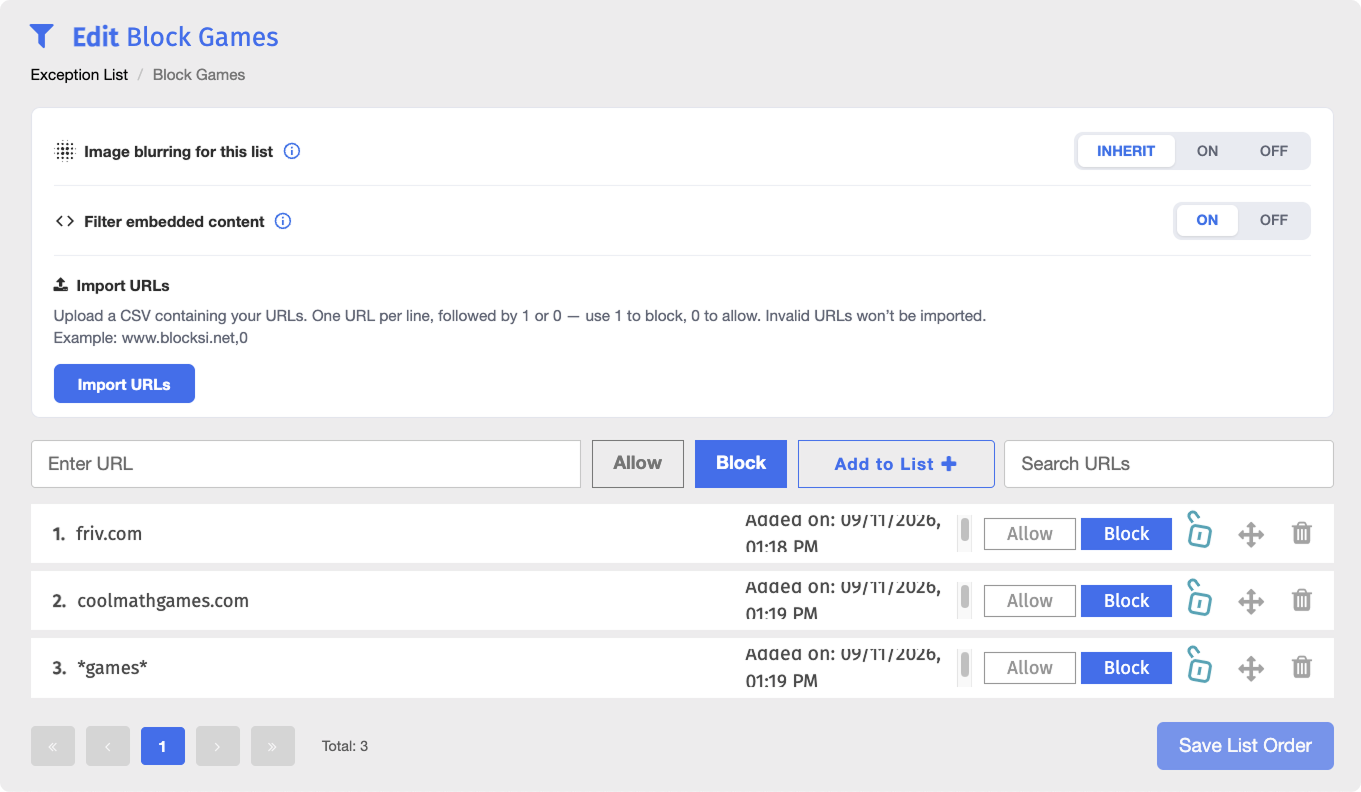
You can manage the entries in an Exception List by adding new ones to an existing list, editing or reordering existing entries, locking an entry, or deleting it.
To manage your Exception List entries, click the button to open the Edit Exception List page.
Tip
To find a specific entry in a long list, type in the Search URLs box. Any matching entries appear as you type.
On the Edit Exception List page, type a URL in the Enter URL text box.
Click either the Block or Allow button based on your desired action.
Click the
button. The entry is appended to the bottom of the list.
On the Edit Exception List page, locate the entry to edit and click it. A text box opens allowing you to edit the entry.

Make your changes, then click the Save button.
The order of entries on an Exception List determines their priority - entries higher on the list take priority over those below them. For example, if you add *games* as a blocked entry and *coolmathgames.com* as an allowed one:
If
*games*is above*coolmathgames.com*,coolmathgames.comis not accessible.If
*coolmathgames.com*is above*games*,coolmathgames.comis accessible.
Note
New entries are always appended to the bottom of the list, which gives them the lowest priority.
On the Edit Exception List page, locate the entry to reorder, then click and drag it to the desired position.
Click the
 button to save changes.
Tip
Alternatively, click the  button to open the Move URL window and enter the new position for the entry.
Locking an entry prevents delegates from assigning any Exception List that contains it to their delegated organizational units.
To lock an entry, locate it on the Edit Exception List page and click the  button to the right of it. Click the
  button to unlock it again.

On the Edit Exception List page, locate the entry to delete and click the
 button to the right of it.
Click OK in the confirmation window. The entry is permanently removed from the list.
You can manage your Exception Lists by renaming, duplicating, merging, or deleting them, and review the history of changes made to a list. All of these actions can be performed directly on the Exception List page.
On the Exception List page, locate the list to rename and click its name. The list name opens in an editable text box.

Make your changes, then click the Save button.
On the Exception List page, locate the list to duplicate and click the
 button. The Duplicate List window opens.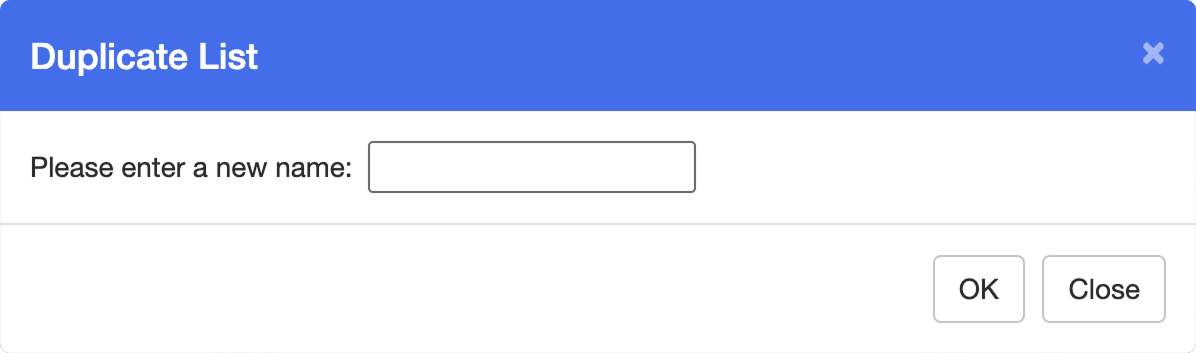
Enter a name for the new list in the text box, then click OK. The new list appears on the Exception List page.
Note
The duplicate is an exact copy of the original, including all entries, their order, block or allow state, notes, and lock status. The original Exception List is not removed upon duplicating.
On the Exception List page, click the row of each list you want to include in the merged list. Selected lists are highlighted in blue.
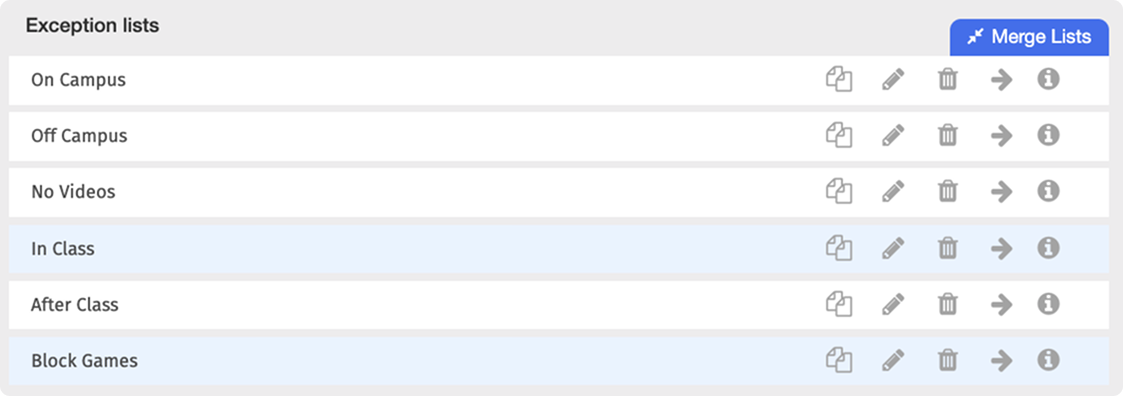
Click the
 button at the top of the Exception Lists section. The New Merged List window opens.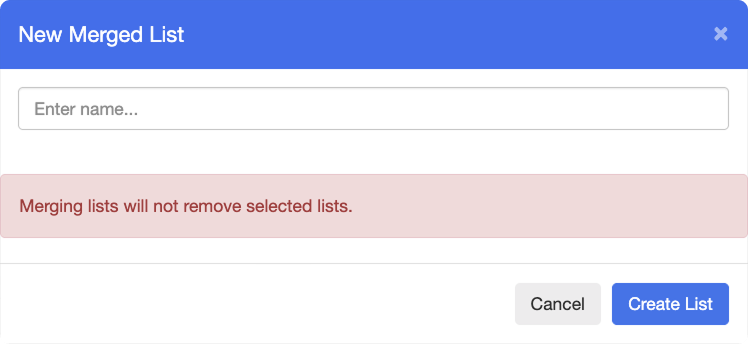
Enter a name for the merged list in the Enter name... text box, then click the
 button. The merged list appears on the Exception List page.
Tip
Entries are grouped by their original list, and those groups are ordered alphabetically by the original list names. Because entries higher on a list take priority, check the order of the merged list and reorder it if needed. Refer to the Reordering Entries section.
Note
The merged list contains all entries from the original lists, including their block or allow state, notes, and lock status. The original Exception Lists are not removed upon merging.
Warning
Deleting an Exception List is a permanent action. Deleted lists along with their entries cannot be recovered.
On the Exception List page, locate the list to delete and click the
button to the right of it.Click OK in the confirmation window. The Exception List is permanently removed from the list.
Each Exception List has its own History of Changes, an audit trail showing changes made to the list, including who changed it and when.
To review the history of an Exception List, locate the list on the Exception List page, then click the  button to the right of it. The History of Changes window opens, displaying a table of the changes made to the list.
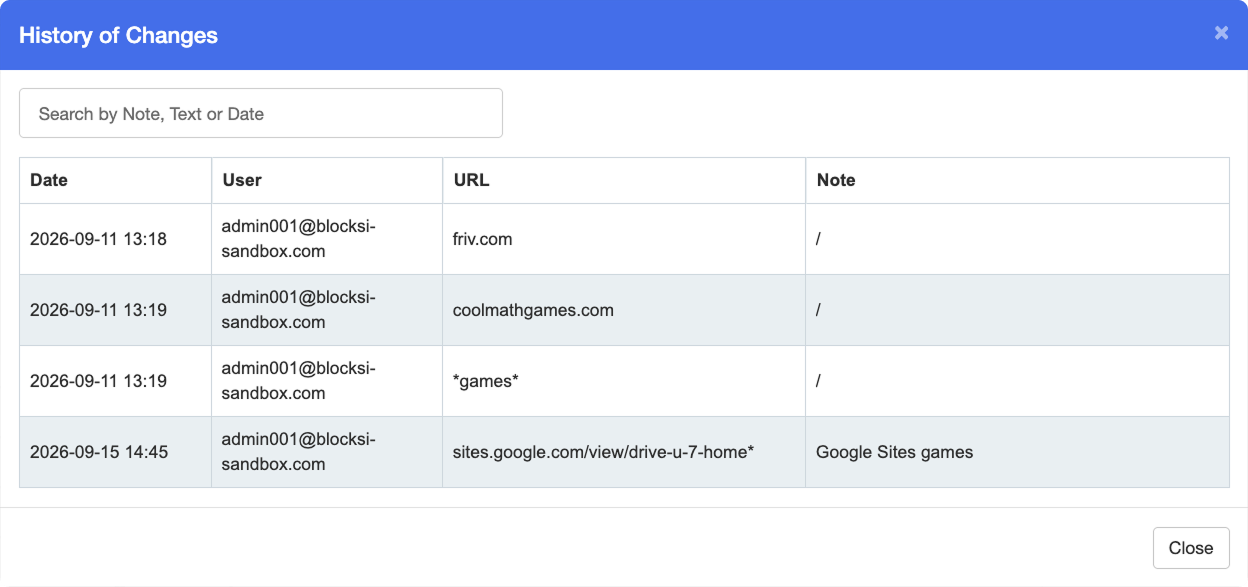
Date - The date and time the change was made in the following format:
YYYY-MM-DD HH:MMUser - The email address of the account that made the change.
URL - The entry that was changed or added.
Note - The note attached to the entry. If no note was added, a
/is displayed instead.
You can filter the table by note, text, or date by typing in the search box. Matching results appear as you type.
Note
If no changes have been recorded for the Exception List, the window displays There is no history record for this list instead. This also appears for imported lists that have not been changed manually.
You can import an entire Exception List, including its name and all entries with their blocked or allowed state, or import entries into a list that already exists.
Exports work the same way. You can export all of your Exception Lists at once, or export the entries of a single list. The two exports produce different file formats.
All imports and exports use CSV files.
Warning
This procedure imports complete lists. Each line in the file creates a new Exception List, so a file containing 100 lines creates 100 lists. To add entries to a list you already have, refer to the Importing Exception List Entries section.
You can import one or more Exception Lists at once from a single CSV file. Each imported list appears on the Exception List page alongside your manually created lists.
Prerequisites
The CSV file name must contain only letters and numbers, with no spaces or special characters.
Each Exception List and all of its entries must be written in a single line, in the following format: exception list name,URL,1 or 0,URL,1 or 0, ...
Use 1 to block a URL and 0 to allow it. To import several lists at once, write each list in its own line.
For example, the following imports two Exception Lists. The first blocks youtube.com and allows any URL starting with vimeo.com. The second allows any URL containing dailymotion.com.
Exception List 1,youtube.com,1,vimeo.com*,0
Exception List 2,*dailymotion.com*,0

On the Exception List page, click the
 button above your Exception Lists. A file browser window opens.
Select a CSV file on your device, then click Open. The imported Exception Lists appear on the Exception List page.
Warning
This procedure adds entries to an existing Exception List. To import complete lists, refer to the Importing Exception Lists section.
You can import new entries into an existing Exception List from a CSV file. Imported entries are added to the list of existing entries, if any are already on the Exception List, and appear at the bottom.
Prerequisites
The CSV file name must contain only letters and numbers, with no spaces or special characters.
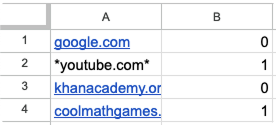
Each entry must be written in its own line in the following format: URL,1 or 0
Use 1 to block a URL and 0 to allow it.
For example, the following imports four entries into your Exception List.
google.com,0
*youtube.com*,1
khanacademy.org,0
coolmathgames.com,1
On the Exception List page, click the
button to the right of the Exception List you want to add the entries to. The Edit Exception List page opens.Under the Import URLs section, click the
 button. A file browser window opens.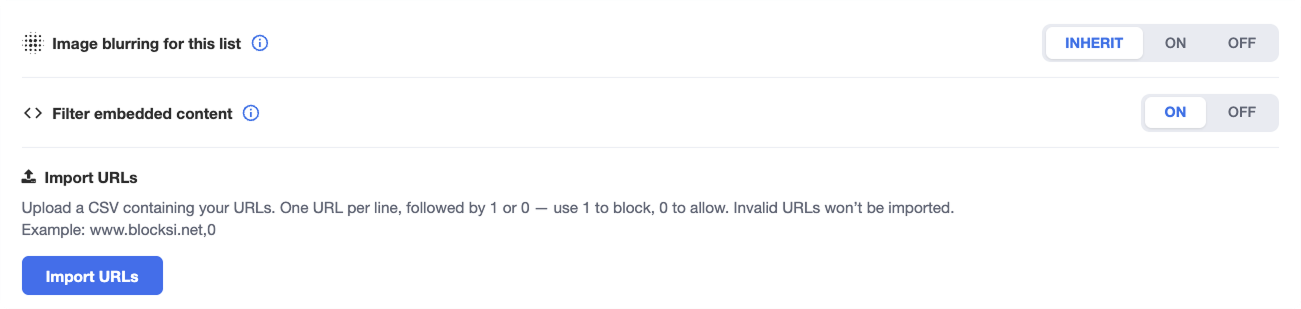
Select a CSV file on your device, then click Open. The imported entries appear in the Exception List.
You can export every Exception List on your Admin Dashboard to a single CSV file. The exported file uses the same format as the one used for importing, with each list in its own line: exception list name,URL,1 or 0,URL,1 or 0, ...

To export all your Exception Lists, click the  button above your Exception Lists on the Exception List page. The file is downloaded to your device.
You can export the entries of a single Exception List to a CSV file. Unlike a full export, the file does not include the list name, and each entry is written in its own line in the following format: URL, 1 or 0, MM/DD/YYYY HH:MM, note, true or false
URL - The entry as it was added to the list, including any wildcards.
1 or 0 - Whether the entry is blocked or allowed.
1blocks the URL,0allows it.MM/DD/YYYY HH:MM - The date and time the entry was added.
note - The note attached to the entry, if any.
true or false - Whether the entry is locked or unlocked.

To export one Exception List, locate the list to export on the Exception List page, then click the  button to the right of it. The file is downloaded to your device.