Mosyle - iOS Configuration Guide
The following contains procedures for deploying Blocksi for iOS through Mosyle.
Note
Blocksi supports iOS 13.1 and higher.
Prerequisites
Ensure the following prerequisites are in place before proceeding with deployment:
Send your Organization ID and organization name to Blocksi Support to authorize your district's use of the iOS filtering app. Refer to the Getting Your Organization ID and Name section for more information.
Ensure that Custom Apps and the Volume Purchase Program (VPP) are fully enabled and configured. Refer to the Configuring Volume Purchasing section for more information.
Purchase VPP licenses for the Blocksi for iOS app.
Create and configure an iOS filtering policy on the Blocksi Admin Dashboard. Depending on your needs, you may choose one of the following:
iOS Blanket Time-based Policy - For uniform filtering across devices.
Regular Policy - For user-based filtering.
Sign in to your Apple School Manager account with your Administrator credentials.
Click your account name in the lower left-hand corner, and then click Preferences from the pop-up menu.
Go to Organization Information.
Locate your Organization ID and Organization Name.
Send this information to Blocksi. It is required to add your organization to the approved list of customers who can use Blocksi's filtering app.
Sign in to your company’s account at business.apple.com (Apple Business Manager) or school.apple.com (Apple School Manager).
Click your account name in the lower left corner, then choose Preferences from the drop-down menu.
Click Payments and Billing.
Click Download in the Content Tokens section next to the correct server location token under the Apps and Books tab. The token downloads to the Downloads folder on your computer.
Upload the downloaded token to the Mosyle Content (Volume Purchasing) payload. The Blocksi for iPad application should now be available for assignment in the Mosyle app library.
Click Install App in the left side menu.
Click Add new profile or click Click to Add and App to existing profile:
Profile Name: Blocksi for iPad
Installation Source: Apps and Books (VPP)
Assignment Method: Device based - Assign licenses to device serial number
Click to add an app, search and add Blocksi for iPad
Configure Blocksi for iPad:
Once added, click on settings cogwheel under application icon.
In the app configuration, click the Configure App Auto Install and Update dropdown and choose Configure App Plist.
Add the appropriate XML/PLIST configuration (see Selecting the Appropriate XML/PLIST Configuration).
Enable Enable Variables for this AppConfig PLIST.
Add device assignment and save.
Type the following configuration in the Provider Configuration box:
<dict>
   <key>organizationId</key>
   <string>admin@blocksi.net</string>
   <key>adminPassword</key>
   <string>123PasswordExample</string>
   <key>showDisclaimer</key>
   <string>false</string>
   <key>userAuthEnabled</key>
   <string>false</string>
</dict>
Important
This option applies the iOS Blanket Policy filtering to all iOS devices managed by the district.
Note
Replace admin@blocksi.net with your Blocksi super-admin account email address. You may also change 123PasswordExample to a password of your choice, or keep it as the default password for accessing app details.
Type the following configuration in the Provider Configuration box:
<dict>
   <key>organizationId</key>
   <string>admin@blocksi.net</string>
   <key>adminPassword</key>
   <string>123PasswordExample</string>
   <key>showDisclaimer</key>
   <string>false</string>
   <key>serialNumber</key>
   <string>%SerialNumber%</string>
   <key>userAuthEnabled</key>
   <string>false</string>
</dict>
Important
The serial number key value pair must be included in the XML as shown above and added as a key in the Web Filter profile configured in the Custom Data section.
Note
Replace admin@blocksi.net with your Blocksi super-admin account email address. You may also change 123PasswordExample to a password of your choice, or keep it as the default password for accessing app details.
Type the following configuration in the Provider Configuration box:
<dict>
   <key>organizationId</key>
   <string>admin@blocksi.net</string>
   <key>adminPassword</key>
   <string>123PasswordExample</string>
   <key>showDisclaimer</key>
   <string>false</string>
   <key>serialNumber</key>
   <string>%SerialNumber%</string>
   <key>userId</key>
   <string>%UserId%</string>
   <key>userAuthEnabled</key>
   <string>true</string>
</dict>
Important
Both the serial number and username must be uploaded to Blocksi Device Inventory. Filtering is processed through the Blocksi DNS Policy assigned to the Organizational Unit that the user belongs to in the Blocksi Admin Dashboard. These variables require configuration in the Custom Data section.
Note
Replace admin@blocksi.net with your Blocksi super-admin account email address. You may also change 123PasswordExample to a password of your choice, or keep it as the default password for accessing app details.
Download URL
The .mobileconfig file can be downloaded using this direct link.
Download the required
ios_Blocksi_Content_filter_profile.mobileconfigfile provided above.Open the downloaded
.mobileconfigfile using the appropriate application for your platform:For macOS - Open the file using Apple Configurator, available here.
For Windows - Open the file using any text editor application.
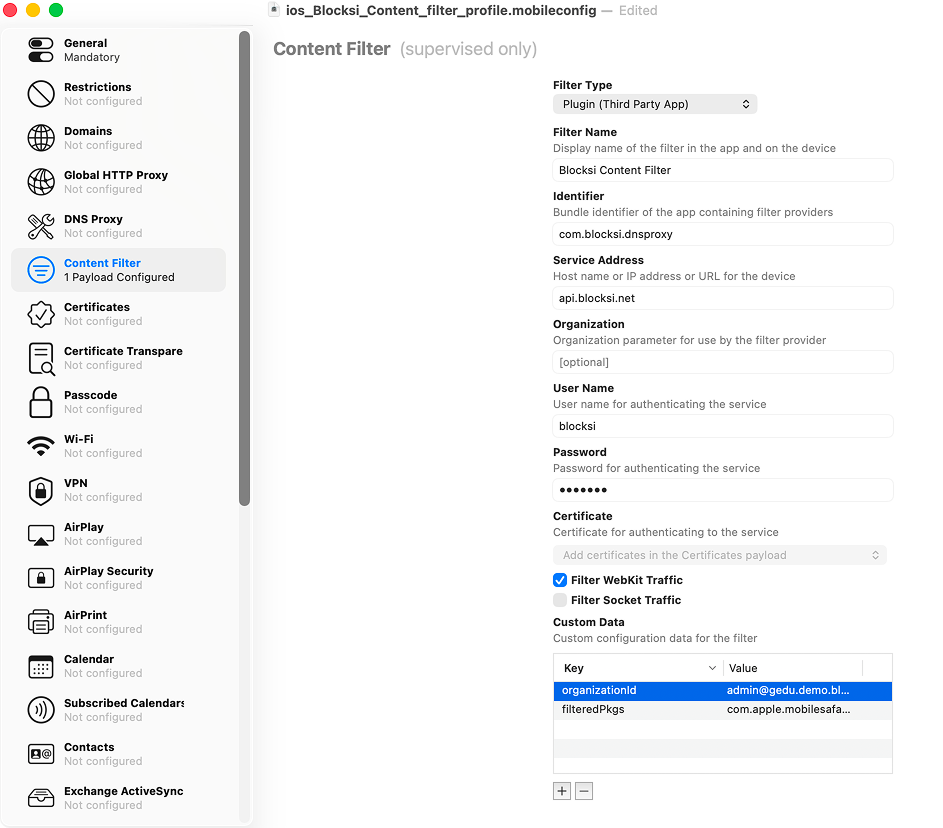
Change the organizationId value to match your Blocksi super-admin account.
Tip
To edit a value field, double-click it, make your changes, and press Enter.
If you are filtering based on users or serial numbers, add the following keys under Custom Data:
Key
Value
serialNumber
%SerialNumber%
userId
%UserId%
Tip
To add a key, click the plus icon under Custom Data.
Click
ios_Blocksi_Content_filter_profile.mobileconfigin the top bar, select File, and click Save.
Note
By default, the app filters Safari only. The .mobileconfig files include a filteredPkgs key configured to filter both Safari and Google Chrome.
Navigate to your Mosyle administrator dashboard.
Navigate to Management from the top menu and select Certificates / Custom Profiles from the left-hand sidebar.
Click the + Add New Profile button.
Enter a name for the profile.
Click Select the File to upload your
.mobileconfigfile.Select the device group for assignment and click Save to deploy the profile.
To validate the deployment, confirm the following:
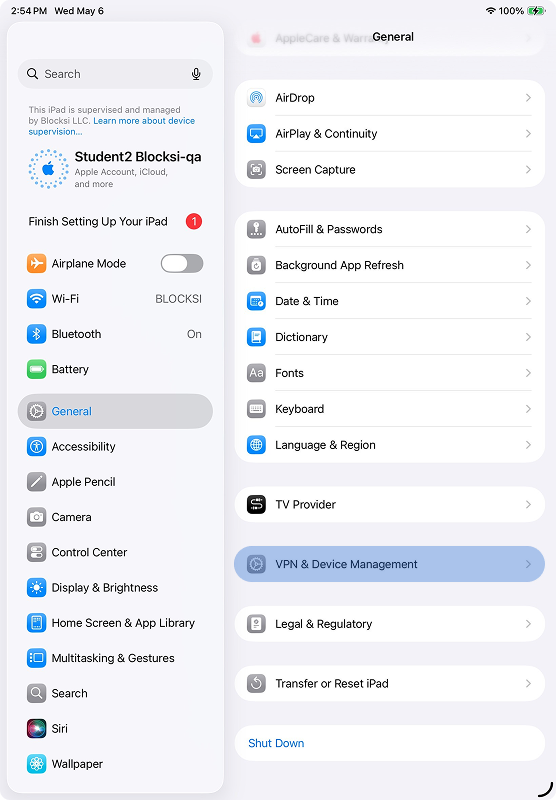
Open Settings on the iPad and navigate to General > VPN & Device Management.
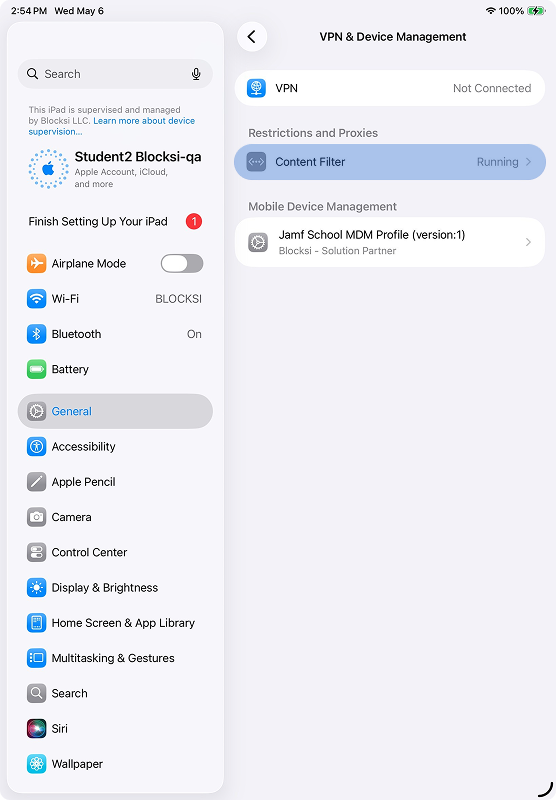
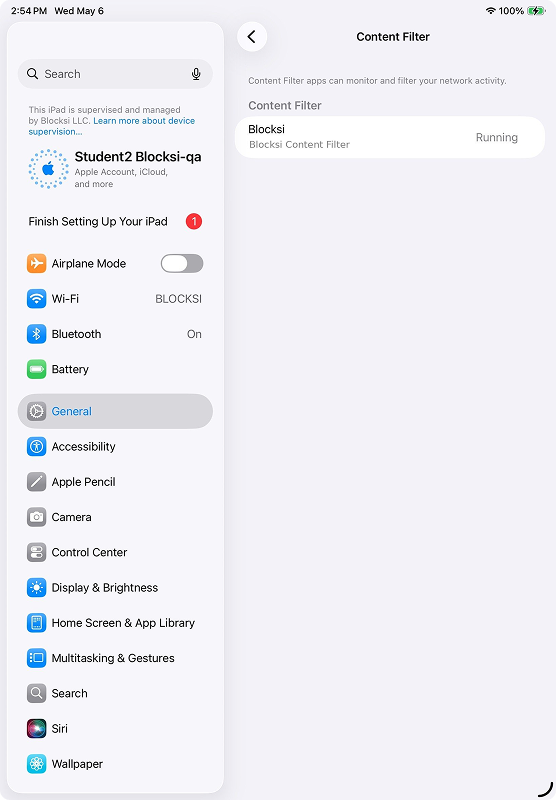
Click Content Filter under Restrictions and Proxies. The Content Filter Profile should display a status of "Running."
Open the Blocksi for iOS app. You should see an "Everything is OK" screen.
Tap Details.
Enter the admin password provided in the PLIST configuration to reveal the settings.
Confirm that the
organizationIdmatches Blocksi Super Admin email address.
Navigate to a site that is set to Allow on the filtering policy and confirm that the site opens.
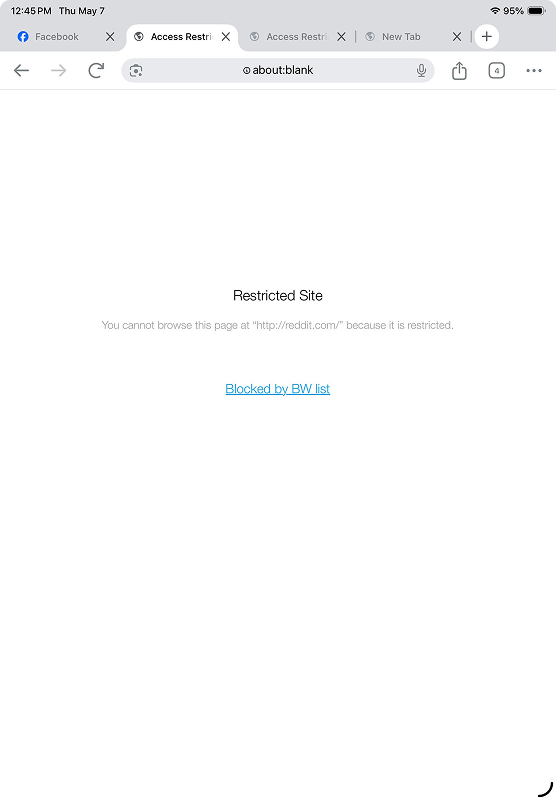
Navigate to a site that is set to Block on the filtering policy. You should be presented with an internal Restricted Site page.
Note
To create the filtering policy, refer to the Configuring the iOS Filtering Policy on the BMEE Admin Dashboard section.