Learning Hub Marketplace
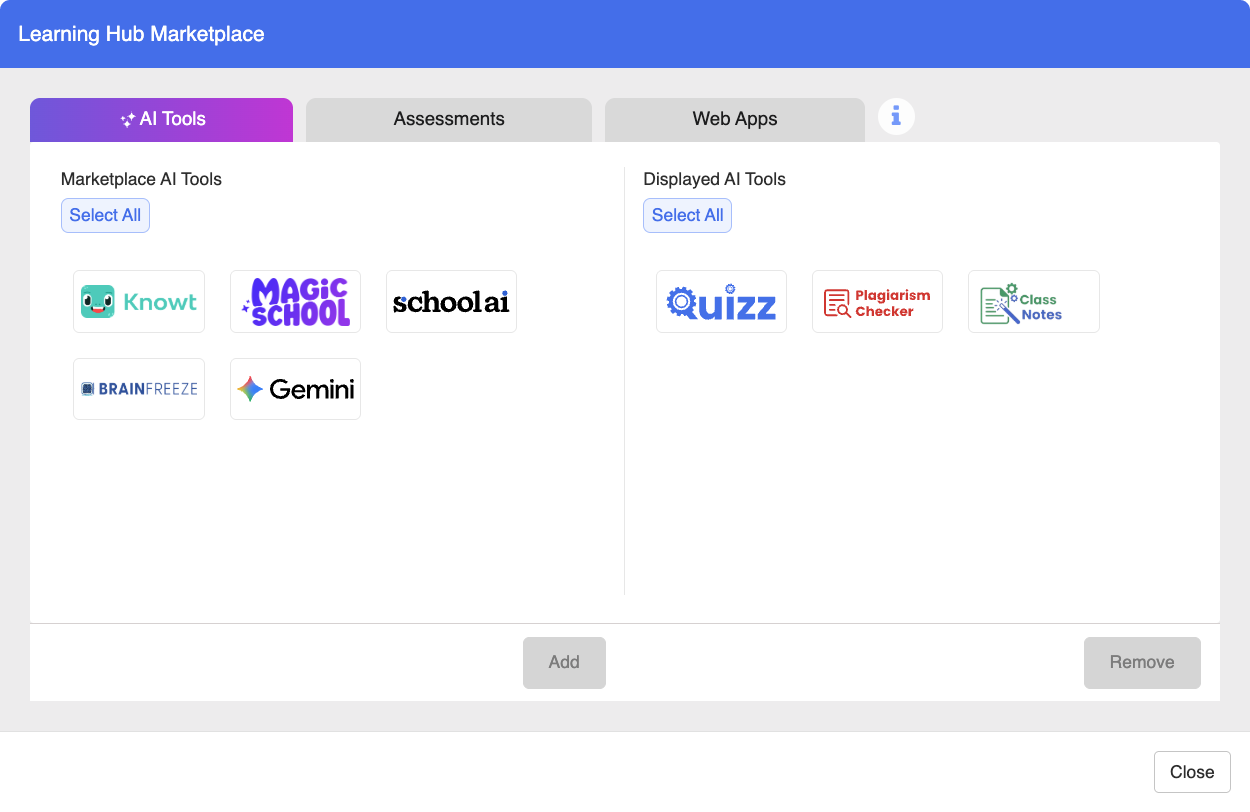
The Learning Hub Marketplace offers a selection of AI tools, Assessments, and Web Apps for administrators to provision for teacher use. Once enabled, these tools become accessible to teachers via the Teacher Dashboard within the Assessment and AI Hub features. Administrators can choose from a wide range of options, from granting access to the AI-powered Plagiarism Checker, Quiz Generator, and Class Notes to adding “Assessment” presets for various LMSs and educational platforms.
Administrators can enable access to the Plagiarism Checker, Quiz Generator, Class Notes, and AI Tools Shortcuts. Once added, these tools appear on the Teacher Dashboard within the AI Hub. Refer to AI Hub on Teacher Dashboard to learn more about Blocksi’s AI Tools.
Click Dashboard Settings from the Main Menu, then click Teacher Dashboard from its sub-menu. The Teacher Accounts screen appears.
Scroll down on the Teacher Dashboard screen to view General Settings.
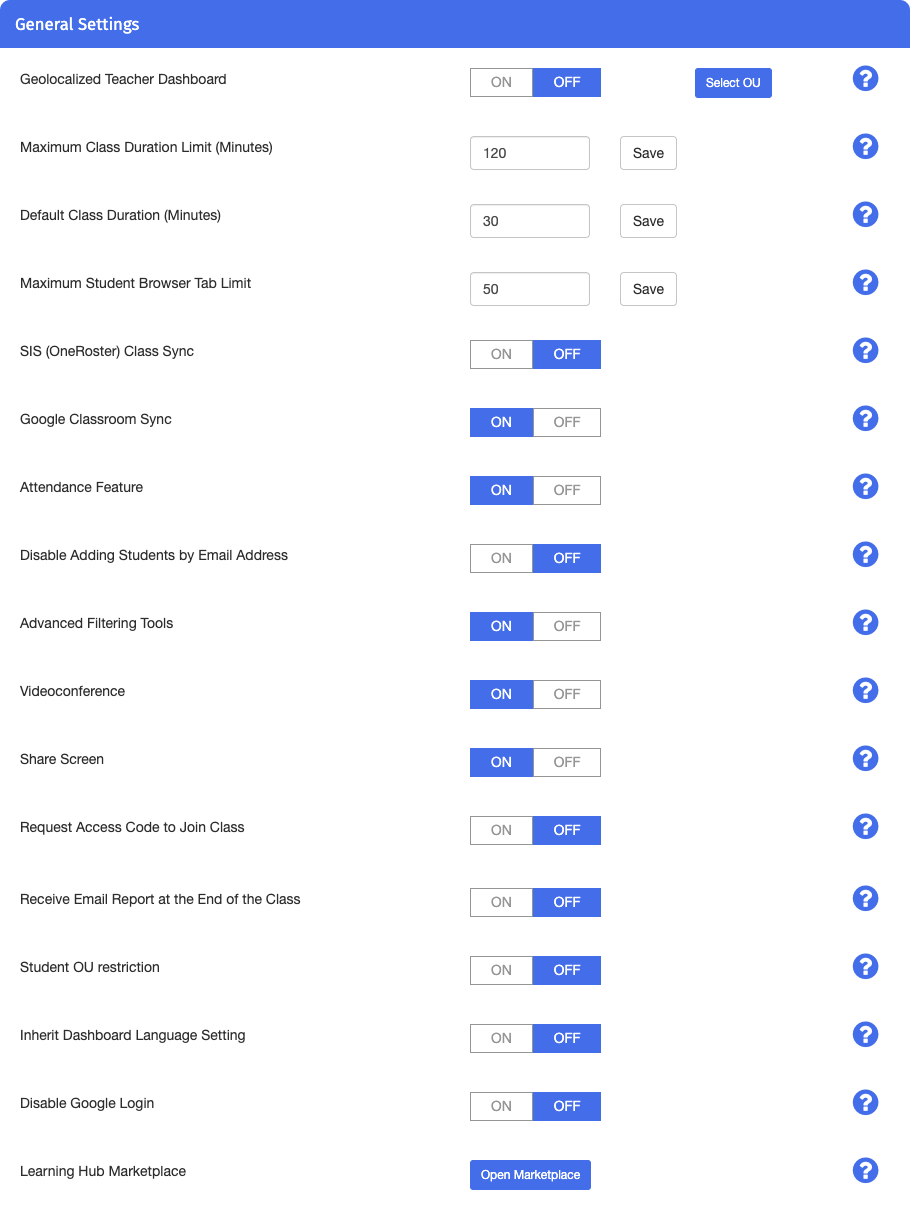
Click the
 button next to the Learning Hub Marketplace setting. The
  tab is opened by default.
To add a tool, click its icon from the left-hand side under Marketplace AI Tools, and select the Add button. Added tools are displayed on the right-hand side under Displayed AI Tools.
To remove a tool, select the item from the Displayed AI Tools list and click the Remove button.
Important
To use Class Notes teachers must complete the Class Notes Setup after these three steps are completed on the Admin Dashboard.
Sign in to the Google Admin Console using your Google Admin credentials.
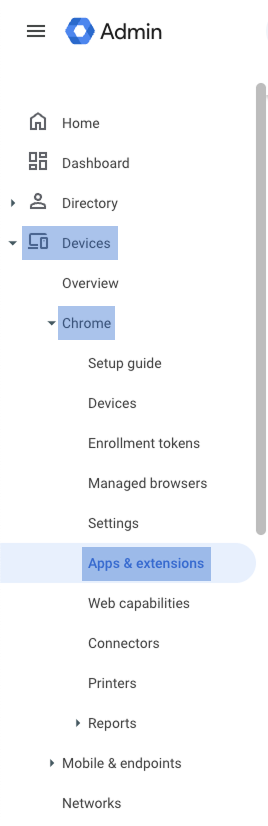
Navigate to Devices > Chrome > Apps & extensions from the Main Menu to the left.
Click the Users & browsers tab.
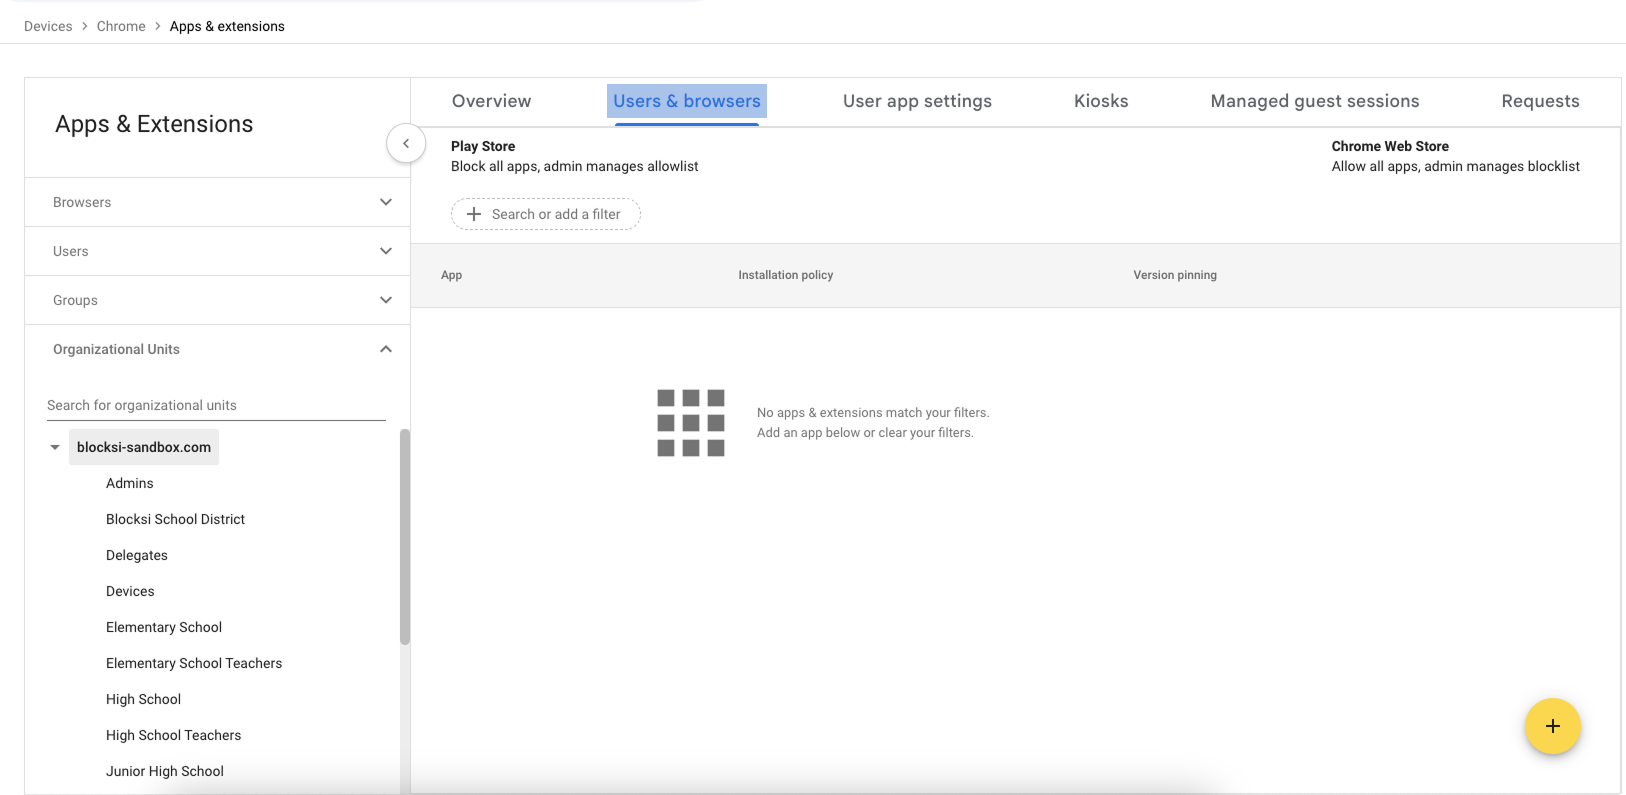
On the left, select the Teacher Organizational Unit (OU) you want to deploy the extension to.
Hover your mouse cursor over the
 icon located in the lower right-hand corner of the screen and click the
  icon. The Add Chrome app or extension by ID window opens.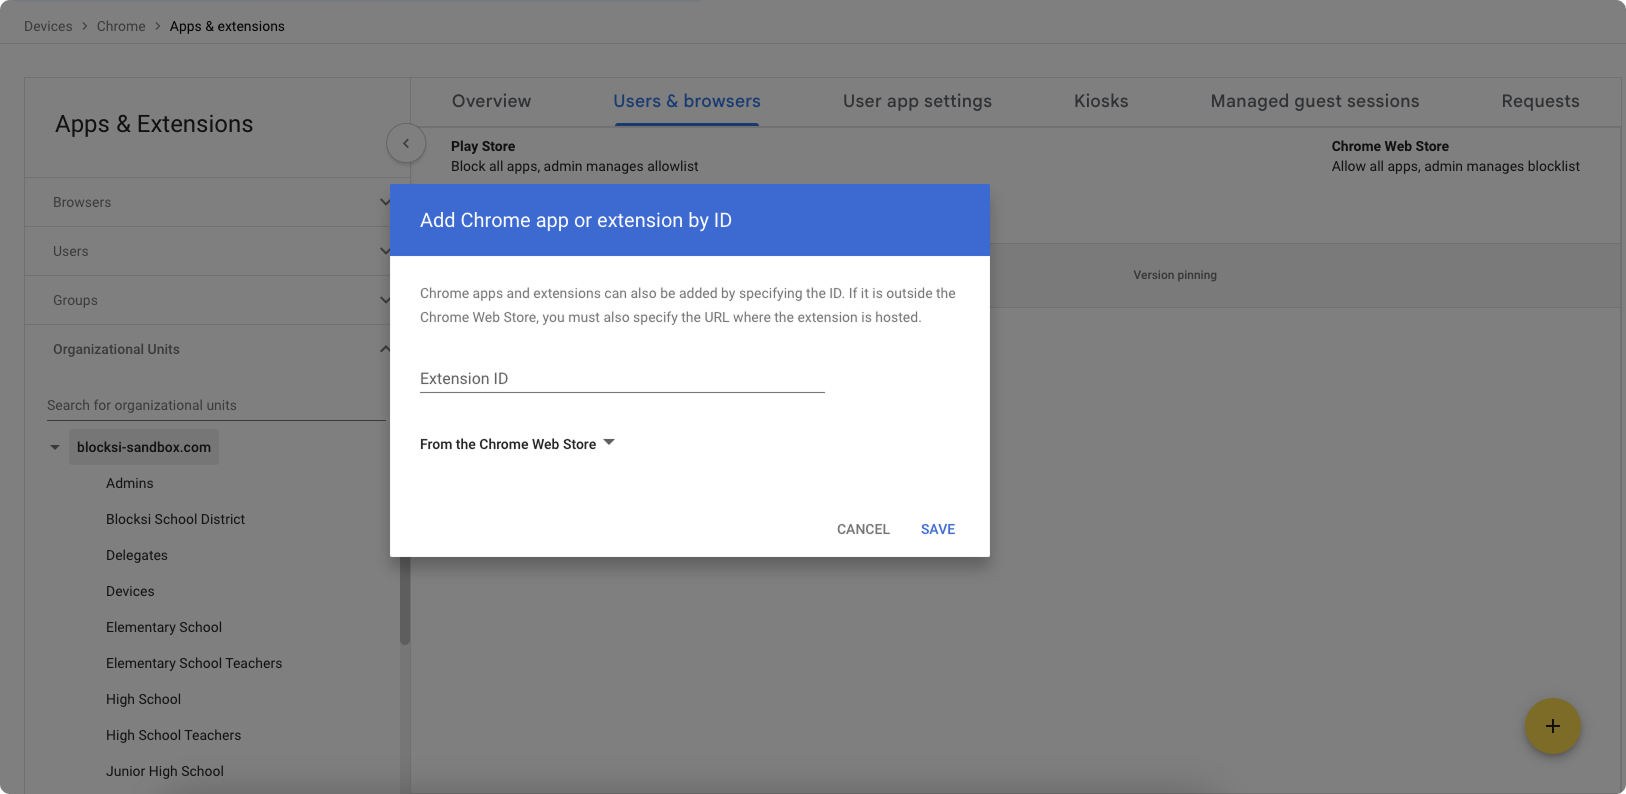
Sign in to your Blocksi Admin Dashboard and locate the Blocksi Teacher Extension ID at the top of the Action Bar. Click the Blocksi Teacher Extension ID button to copy the extension ID to your clipboard.

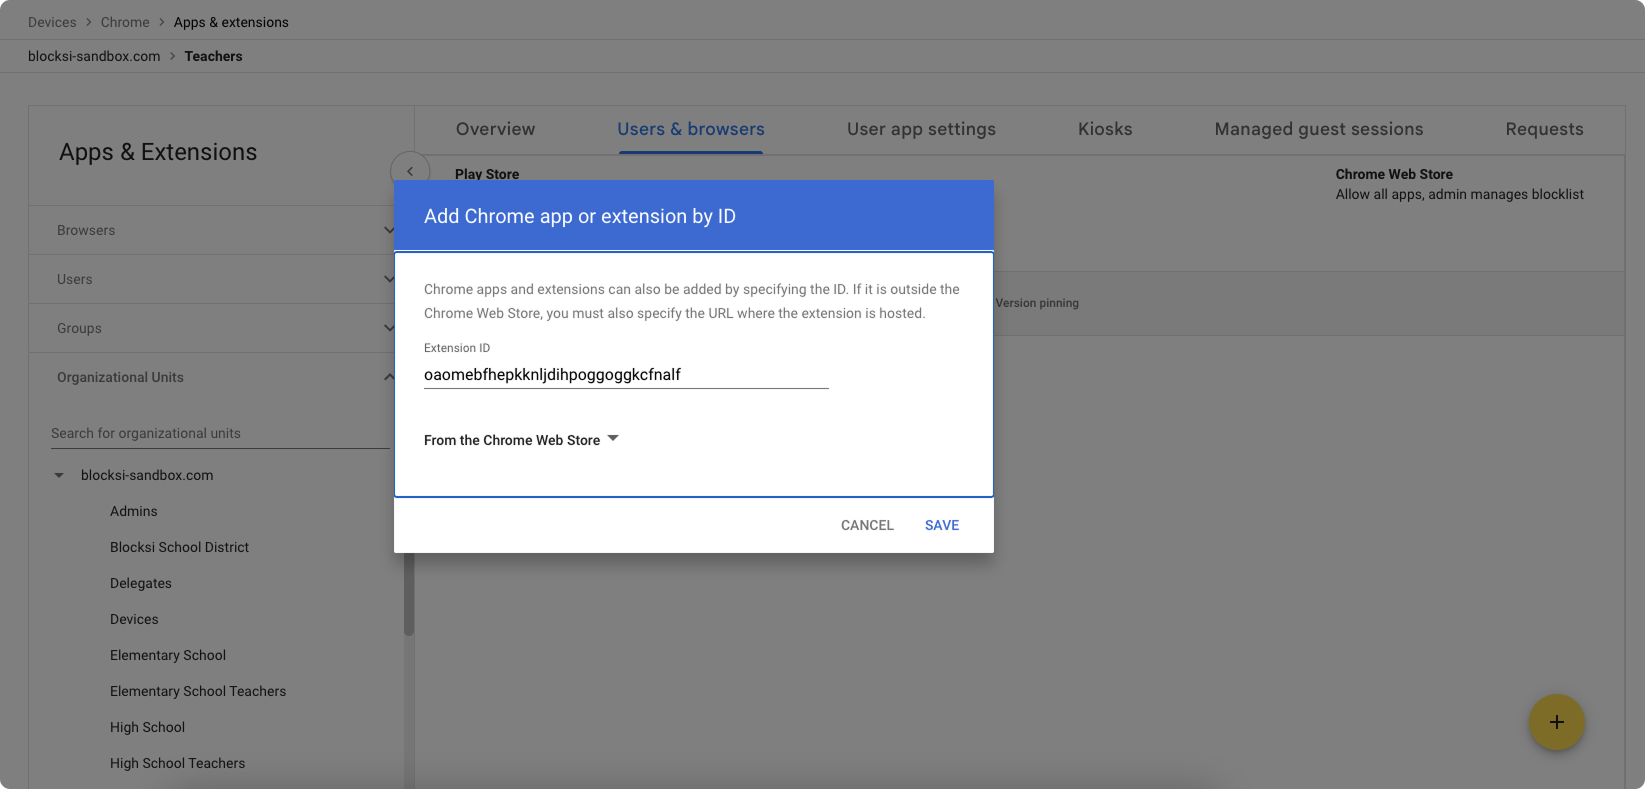
Return to the Google Admin Console and paste the copied extension ID into the Extension ID text box.
Tip
Alternatively, you can paste the following extension ID manually:
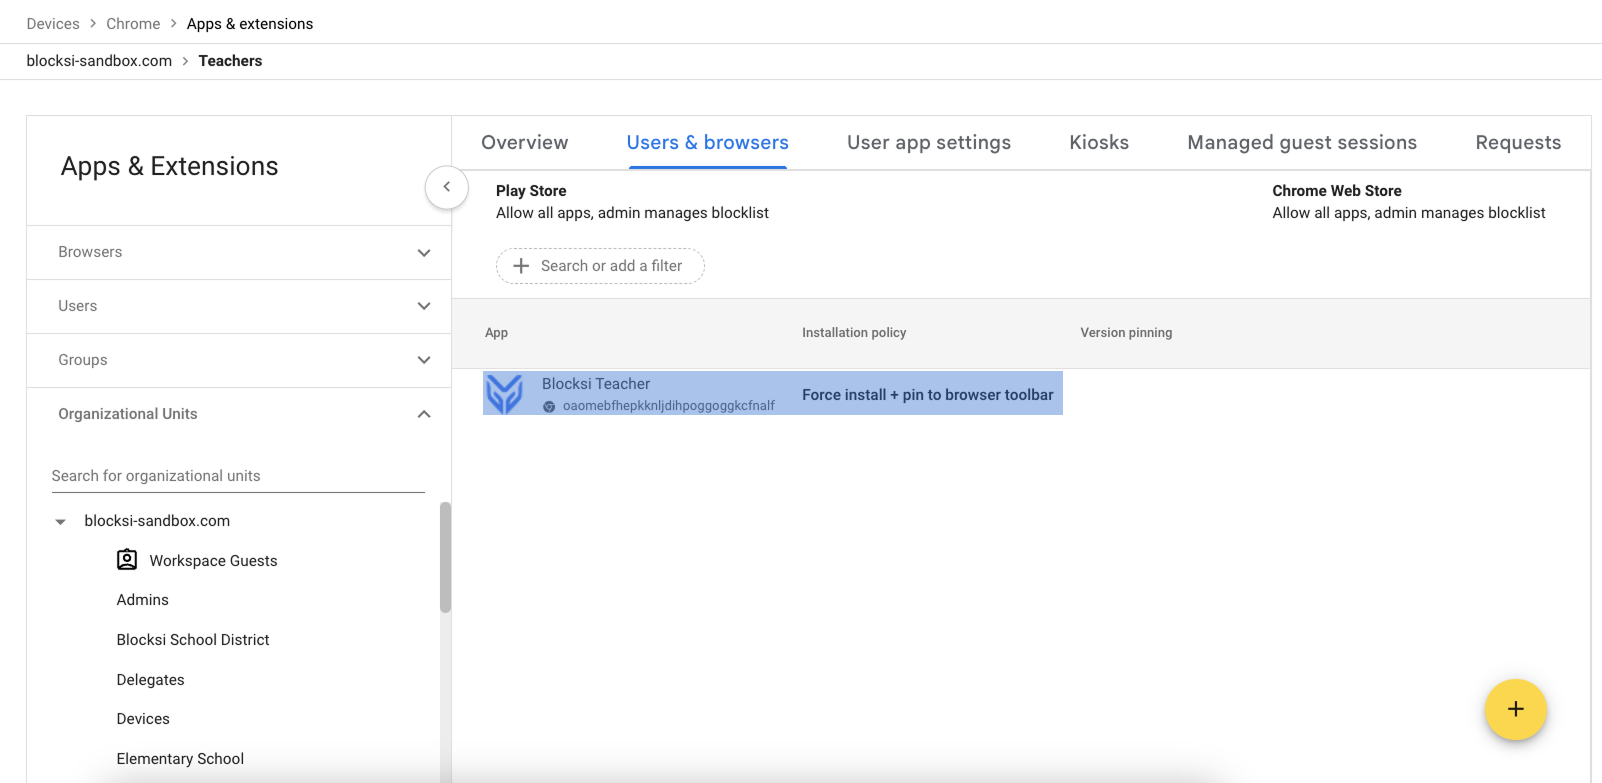
oaomebfhepkknljdihpoggoggkcfnalfClick Save. The Google Admin console now displays the Blocksi Teacher extension. By default, the extension is set to Allow install under its Installation policy settings.
Set the Installation policy to Force install + pin to browser toolbar so the extension installs automatically on teacher devices is pinned to their browser, then click Save.
Important
To ensure the extension is deployed to teachers, the Chrome Management for Signed-in Users setting must be configured for the relevant organizational unit.
Navigate to Google Admin > Devices > Chrome > Settings, then click the Users & browsers tab.
Search for the Chrome management for signed-in users setting in the + Search or add a filter field.
Click on the setting and set it to Apply all user policies when users sign into Chrome, and provide a managed Chrome experience.
Sign in to the Google Admin Console using your Google Admin credentials.
Navigate to Devices > Chrome > Settings from the Main Menu to the left.
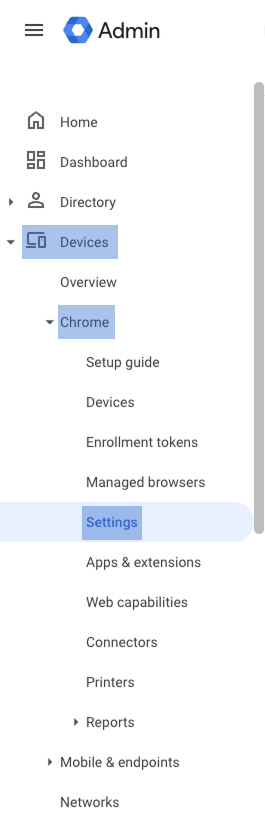
Click the Users & browsers tab.
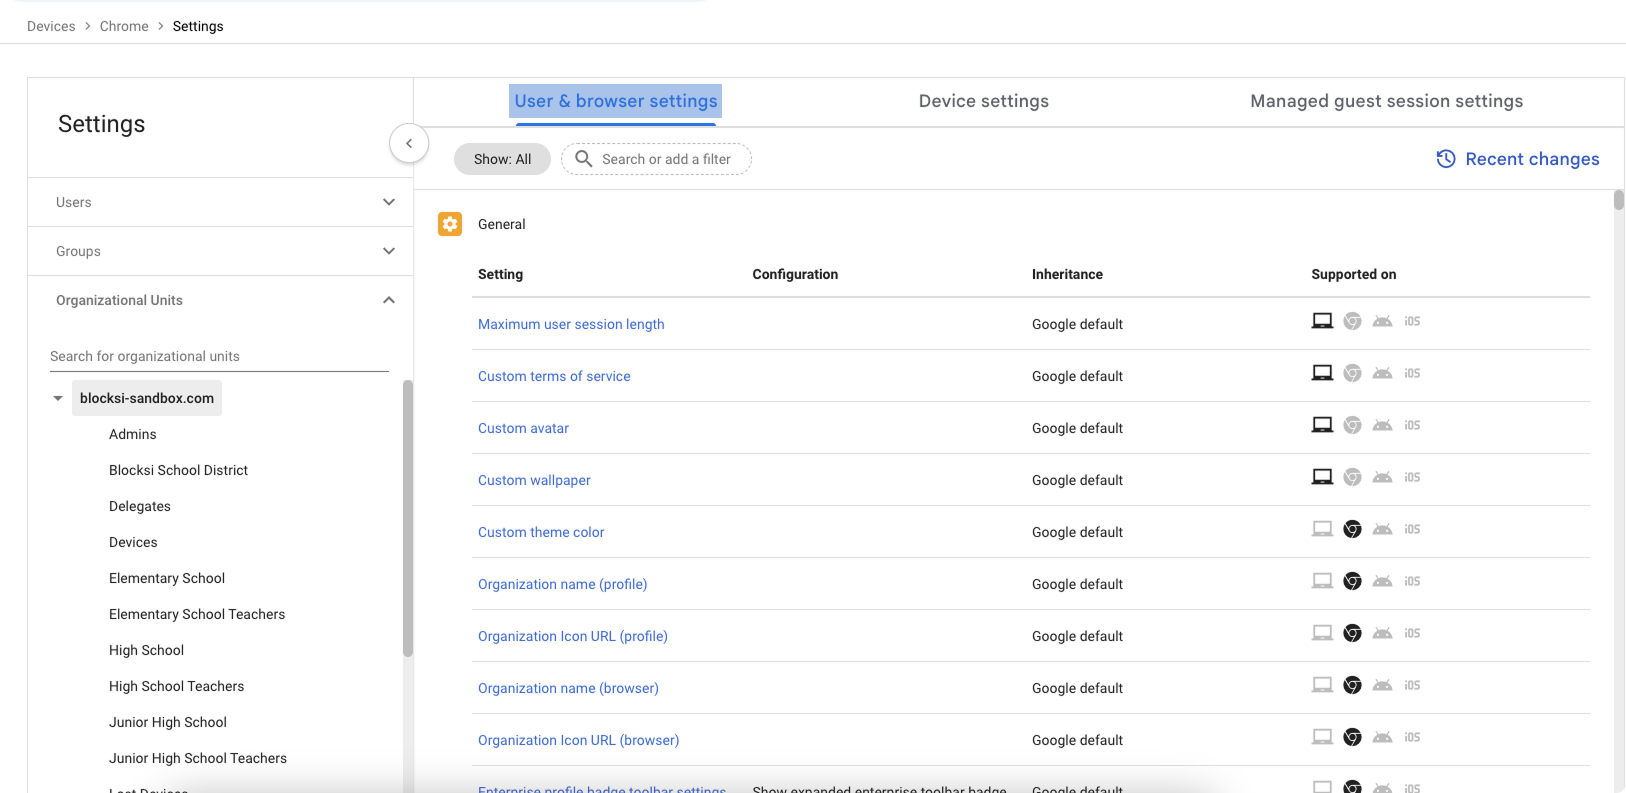
On the left, select the Teacher Organizational Unit (OU) you want to apply the setting to.
Type audio input allowed URLs in the + Search or add a filter field and press Enter.
Click on the Audio input allowed URLs option and enter
chrome-extension://oaomebfhepkknljdihpoggoggkcfnalfunder URL patterns to allow, then click Save.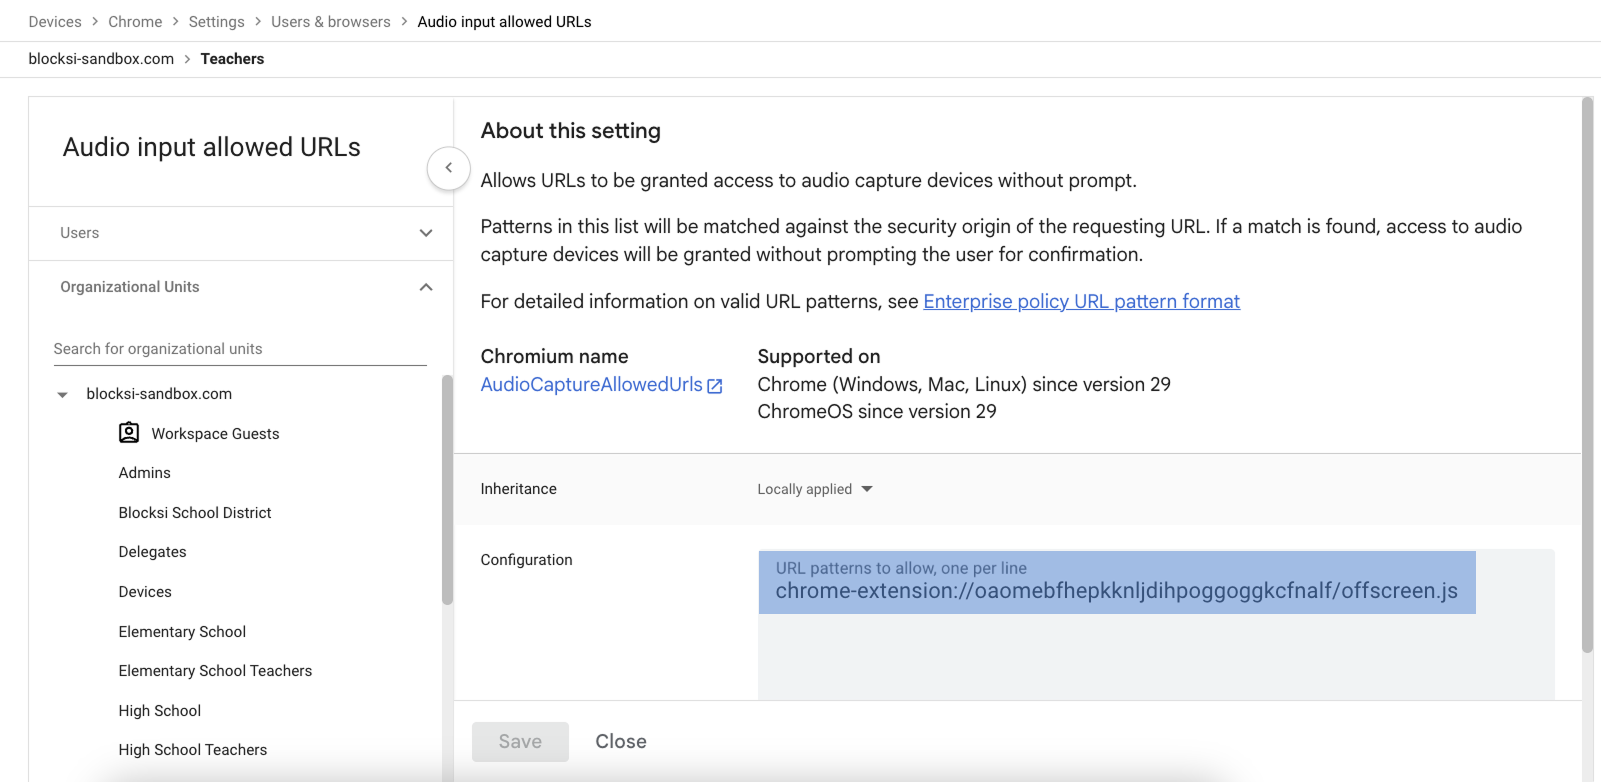
Note
This setting grants the Blocksi Teacher extension permission to capture audio.
Click Dashboard Settings from the Main Menu, then click Teacher Dashboard from its sub-menu. The Teacher Accounts screen appears.
Scroll down on the Teacher Dashboard screen to view General Settings.
Click the
button next to the Learning Hub Marketplace setting. The tab is opened by default.To add Class Notes, click the
 icon from the left-hand side under Marketplace AI Tools, and select the Add button. Class Notes should now be displayed on the right-hand side under Displayed AI Tools.
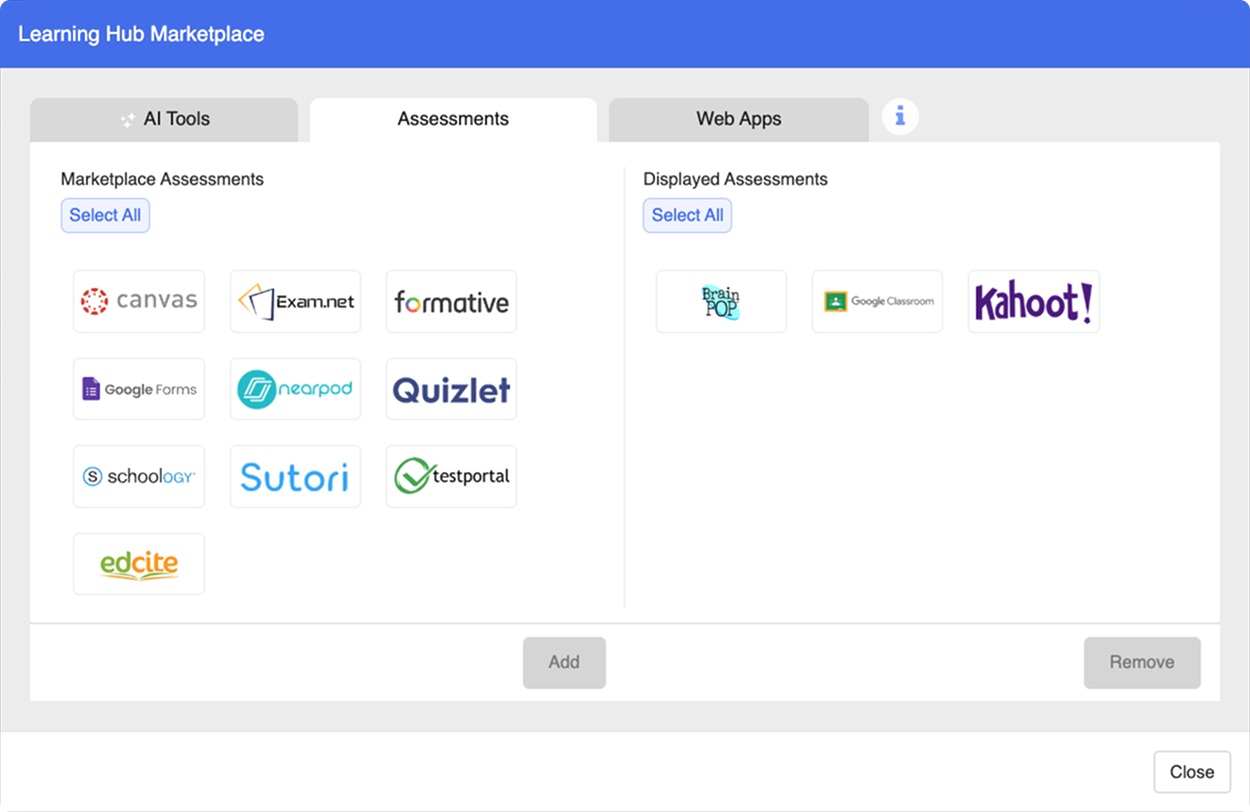
Administrators can simplify the Assessment setup process by adding presets for popular platforms (such as Kahoot!, Canvas, and Google Forms). Once added, these presets become available to teachers within the Assessment feature on their dashboard. Refer to Assessments on Teacher Dashboard to learn more about using “Assessment” in class sessions.
Click Dashboard Settings from the Main Menu, then click Teacher Dashboard from its sub-menu. The Teacher Accounts screen appears.
Scroll down on the Teacher Dashboard screen to view General Settings.
Click the
button next to the Learning Hub Marketplace setting. Select the Assessments tab.To add an Assessment preset, click its icon from the left-hand side under Marketplace Assessments, and select the Add button. Added Assessments are displayed on the right-hand side under Displayed Assessments.
To remove a preset, select it from the Displayed Assessments list and click the Remove button.
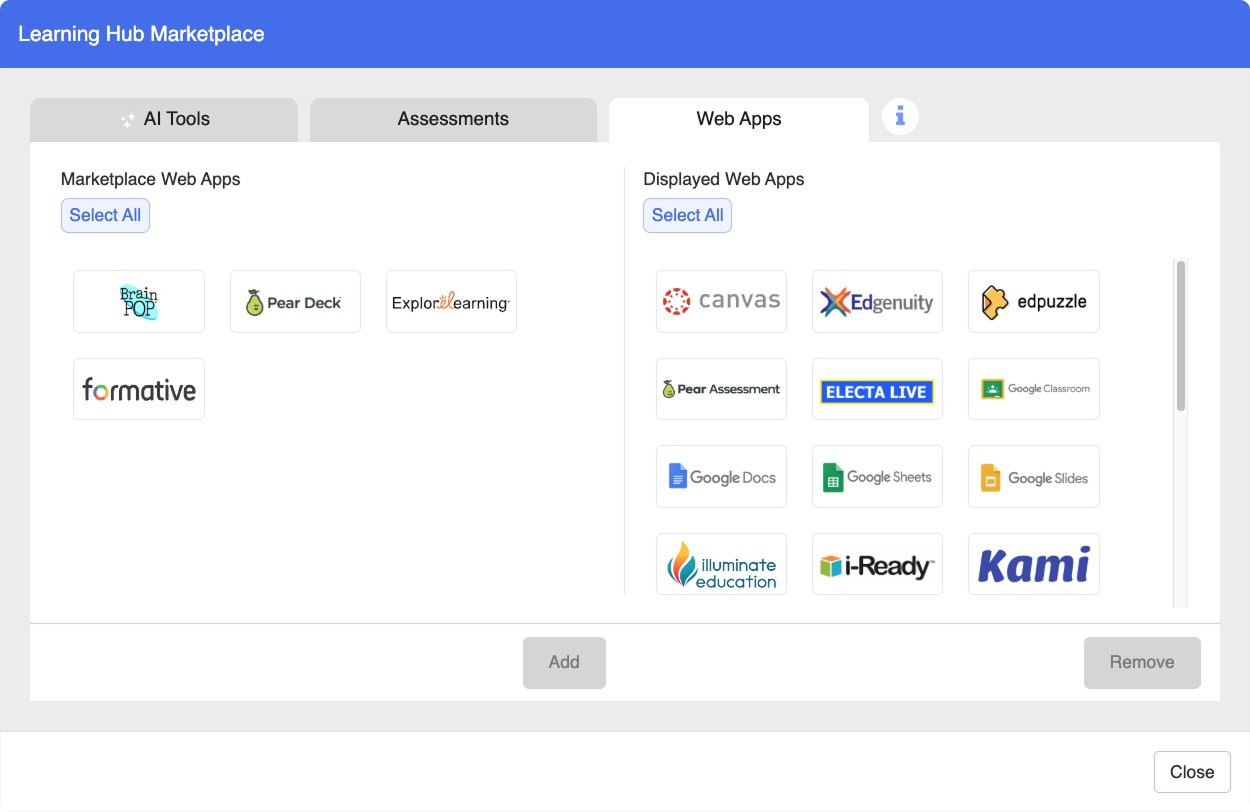
Administrators can streamline the Assessment classroom experience by adding presets for popular Web Apps (such as Edgenuity, Edpuzzle, and i-Ready). These presets become accessible to teachers within the Assessment feature once enabled. Refer to Assessments on Teacher Dashboard to learn more about using “Assessment” in class sessions.
Click Dashboard Settings from the Main Menu, then click Teacher Dashboard from its sub-menu. The Teacher Accounts screen appears.
Scroll down on the Teacher Dashboard screen to view General Settings.
Click the
button next to the Learning Hub Marketplace setting. Select the Web Apps tab.To add a Web App preset, click its icon from the left-hand side under Marketplace Web Apps, and select the Add button. Added Web Apps are displayed on the right-hand side under Displayed Web Apps.
To remove a preset, select it from the Displayed Web Apps list and click the Remove button.