Web Filter
Web Filters are the foundation of Blocksi content filtering. A Web Filter controls which websites students can visit by assigning one of three actions to each website category:  Allow,
 Block, or
 Warning. Use Web Filters to enforce acceptable use policies, protect students from inappropriate content, and apply consistent filtering rules across your organization.
Blocksi organizes websites into 85 predefined categories, grouped into six category types. Websites that have not been categorized yet fall under Unrated. Refer to the Web Filter Categories section to learn about each category.
Web Filters work at the domain level. Each domain is categorized by its primary purpose. For example, a news website with a gambling section is still categorized as News and Media. Subdomains inherit the category of their parent domain.
Add a specific URL or subdomain to a Custom Category or an Exception List to allow or block it without changing its category state. A Custom Category can also group websites that no predefined category covers, and appears under the Custom category type. Allowing a category does not override your other filters, which can still block websites in it.
Note
If a website is assigned to the wrong category, you can request a recategorization using the Website Rating Tool in the Action Bar.
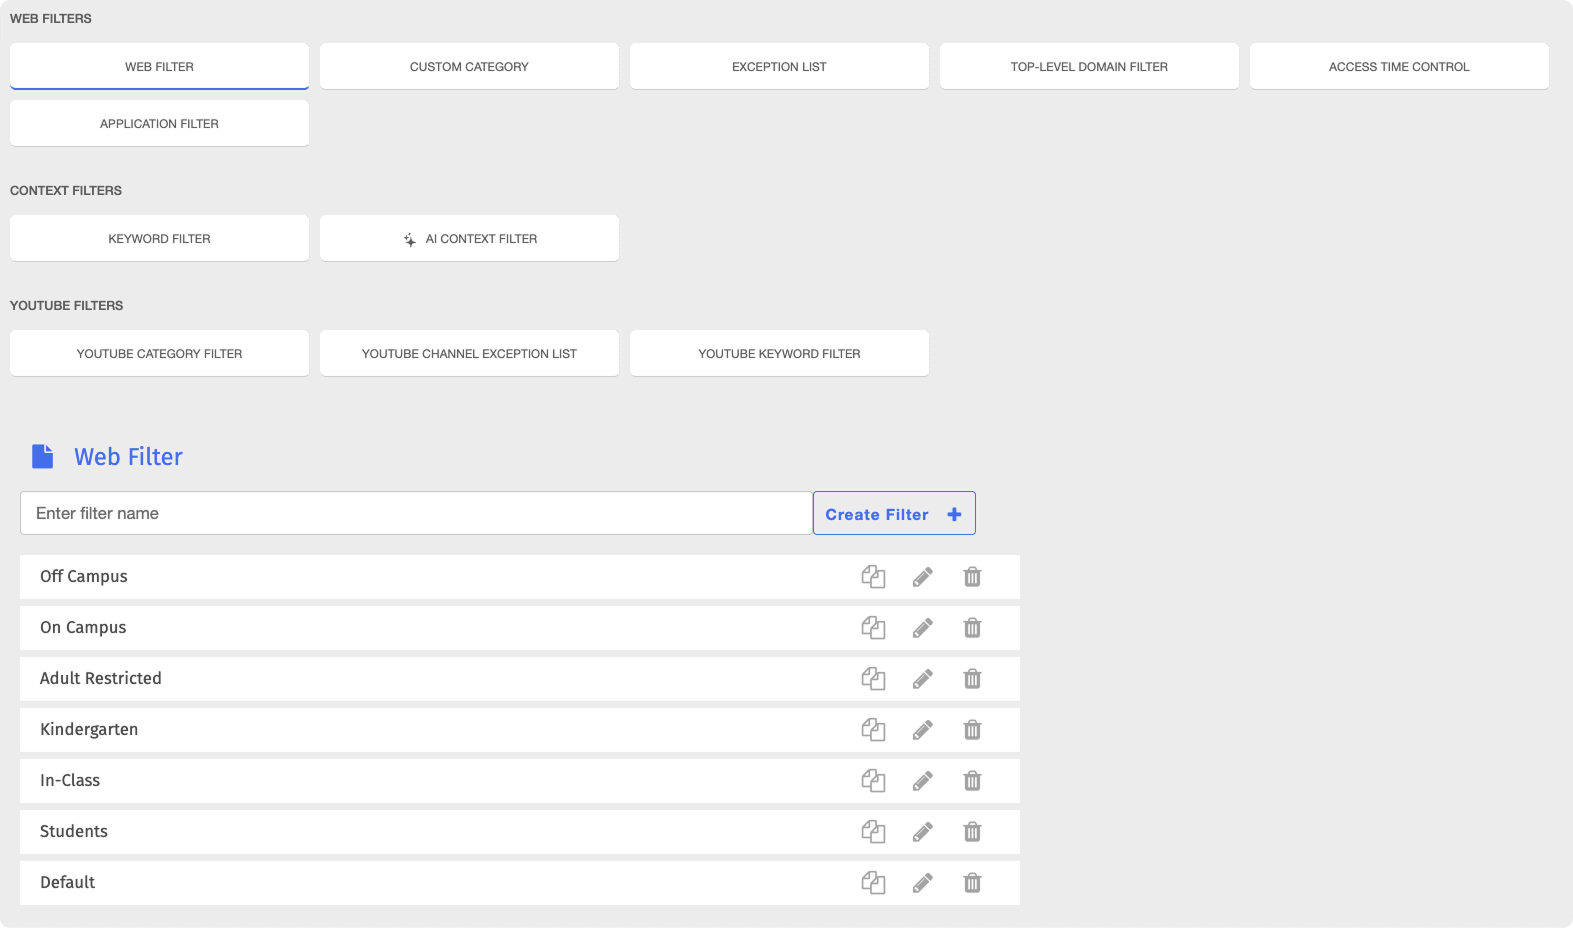
To access the Web Filter page, click Content Filtering from the Main Menu, then click Filters from its sub-menu. The Web Filter page opens by default.
Important
After making any changes to your content filtering or policies, click the  button in the Action Bar at the top of the page to apply the changes.
To set up a Web Filter, create the filter, then configure its categories.
Type a name for the filter in the Enter filter name text box, then click the
 button. The Edit Web Filter page opens.
Note
Smart proxy detection is turned on by default and blocks web proxies that are not categorized as Proxy Avoidance. You can turn it off with the toggle at the top of the page.

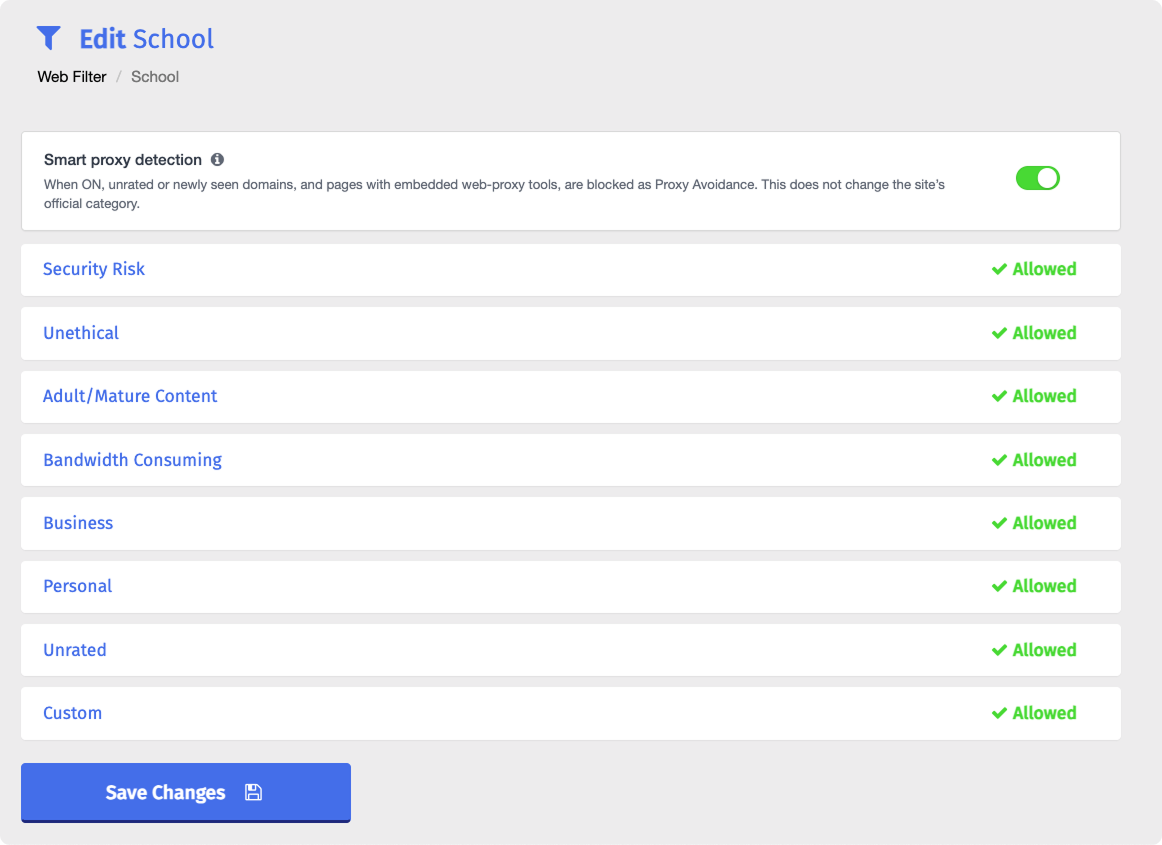
Click a category type to expand it and display its categories.
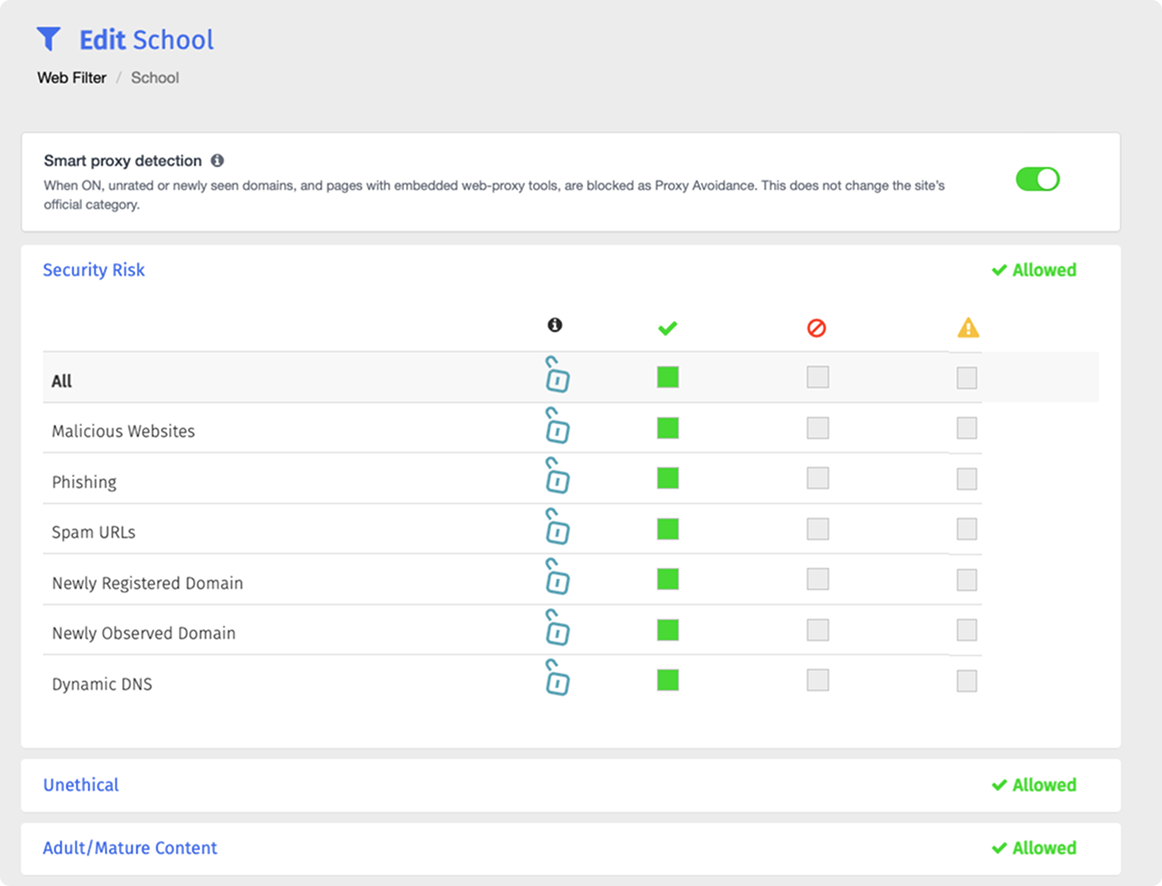
Select one of the following states for each category you want to change:
- Allow - Students can access websites in the category.
- Block - Students cannot access websites in the category.
- Warning - Students can access websites in the category and are shown a warning.
Important
All categories are set to Allow by default upon creating a Web Filter. A new Web Filter blocks nothing until you change the state of at least one category.
Click the
 button next to any category you want to lock, or the one on the All row to lock every category in the category type.
Note
Locking a category prevents teachers, delegates, and parents from overriding it by adding any of its URLs to their Exception Lists or Block/Allow Lists. Administrators can still add URLs from locked categories.
Repeat steps 2–4 for any other category types you want to configure.
Click the
 button.
You can manage your Web Filters by editing, renaming, duplicating, or deleting them. All of these actions can be performed directly on the Web Filter page.
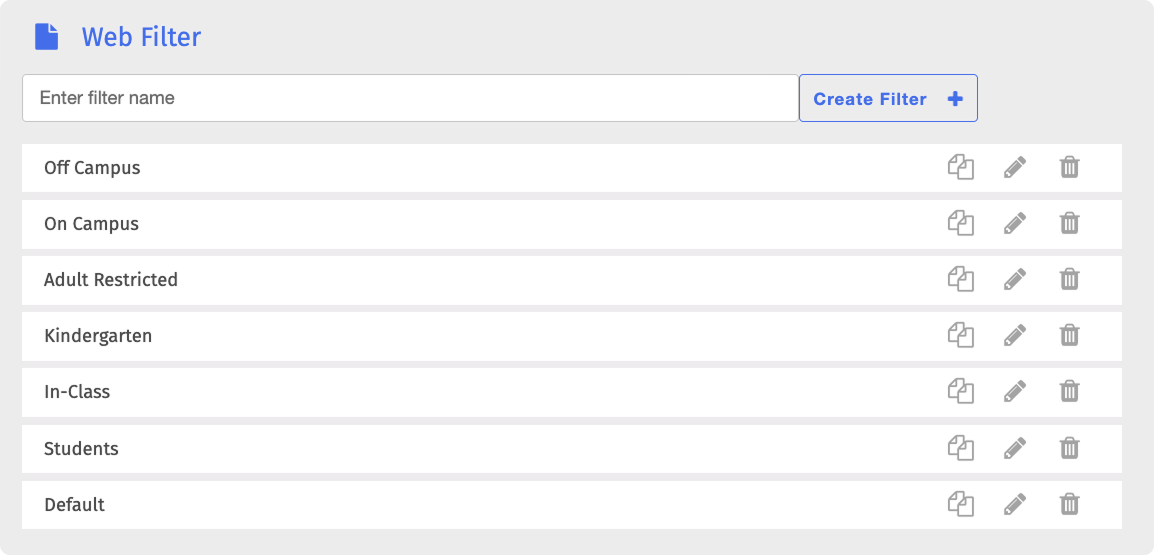
On the Web Filter page, locate the filter and click the  button to open the Edit Web Filter page. Make your changes, then click the button.
On the Web Filter page, locate the filter to rename and click its name. The filter name opens in an editable text box.

Make your changes, then click the Save button.
On the Web Filter page, locate the filter to duplicate and click the
 button. The Duplicate Filter window opens.
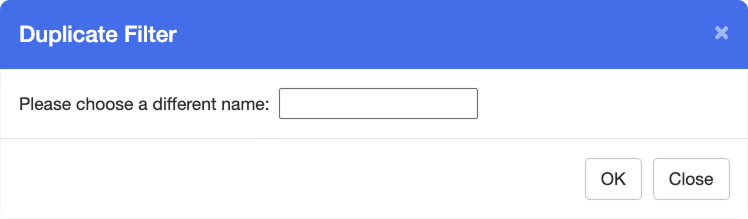
Enter a name for the new filter in the text box, then click OK. The new filter appears on the Web Filter page.
Note
The duplicate is an exact copy of the original, including the state and lock status of every category and the Smart proxy detection setting. The original Web Filter is not removed upon duplicating.
Warning
Deleting a Web Filter is a permanent action. Deleted filters cannot be recovered.
On the Web Filter page, locate the filter to delete and click the
 button to the right of it.
Click OK in the confirmation window. The Web Filter is permanently removed from the list.