Custom Category
Custom Categories let you group websites into your own categories when the predefined Web Filter categories do not cover them, or when the websites you want to manage belong to several different categories. A Custom Category appears under the Custom category type, and you can set it to  Allow,
 Block, or
 Warning in your Web Filters. Its state takes precedence over the predefined Web Filter categories.
Each Custom Category can contain domains, specific pages, IP addresses, and IP ranges, and wildcards let a single entry match multiple URLs.
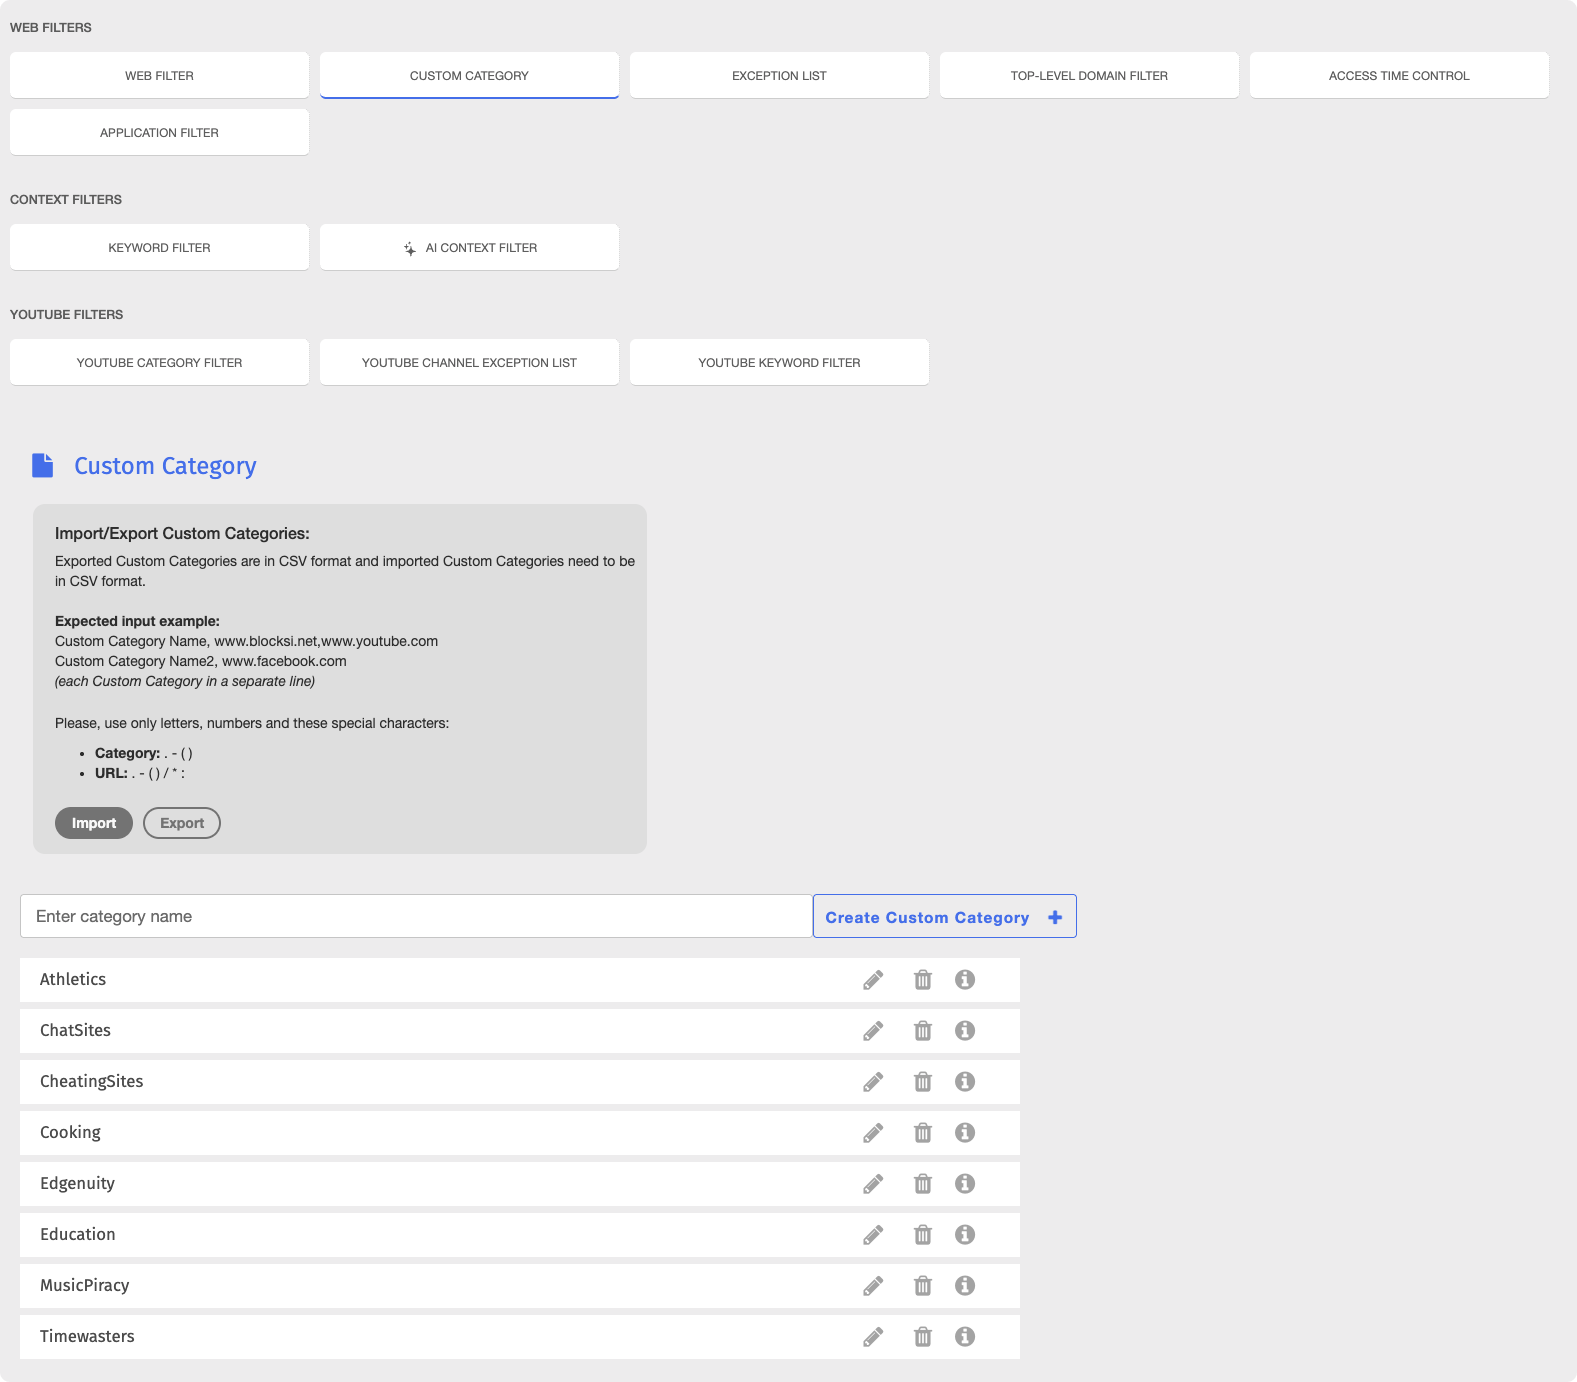
To access the Custom Category page, click Content Filtering from the Main Menu, then click Filters from its sub-menu. On the Filters page, click Custom Category listed under Web Filters.
Important
After making any changes to your content filtering or policies, click the  button in the Action Bar at the top of the page to apply the changes.
To set up a Custom Category, create the category, add the entries you want it to cover, then set its state in your Web Filters. Each entry must use one of the supported entry formats.
Type a name for the category in the Enter category name text box, then click the
 button. The Edit Custom Category page opens.

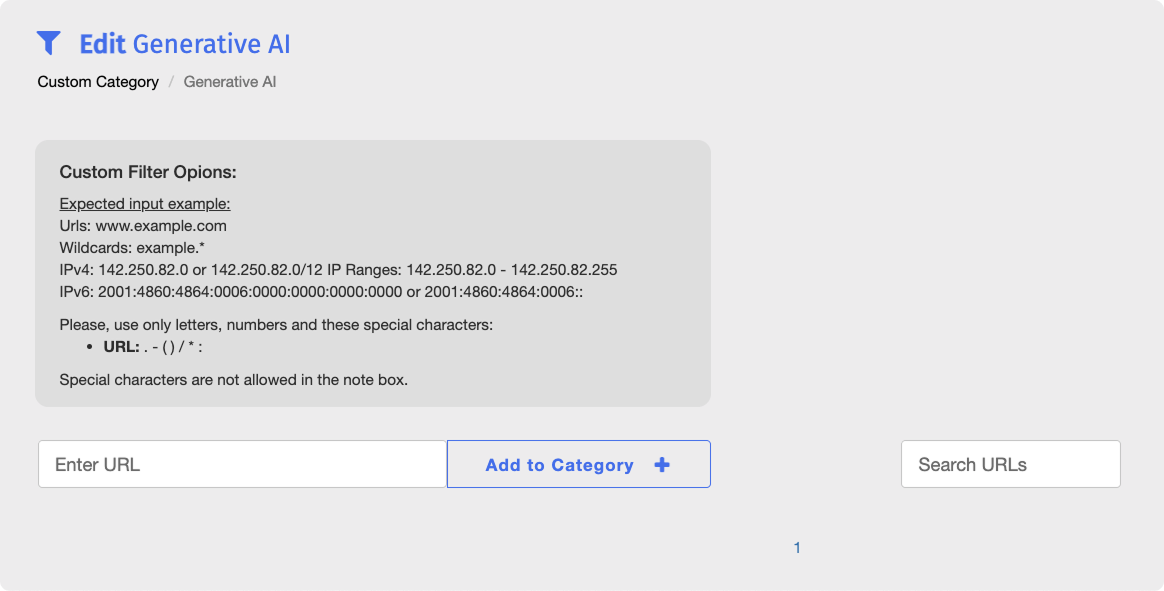
Type an entry in the Enter URL text box, then click the
 button. The entry is added to the category.
Tip
You can add a note to any new Custom Category entry. Notes appear below the entry. Special characters are not allowed in notes.
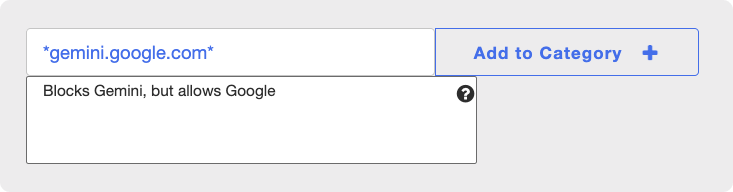
Repeat step 2 for each entry you want to add.
Custom Categories are applied from the Web Filter page. To access it, click Web Filter at the top of the Filters page.
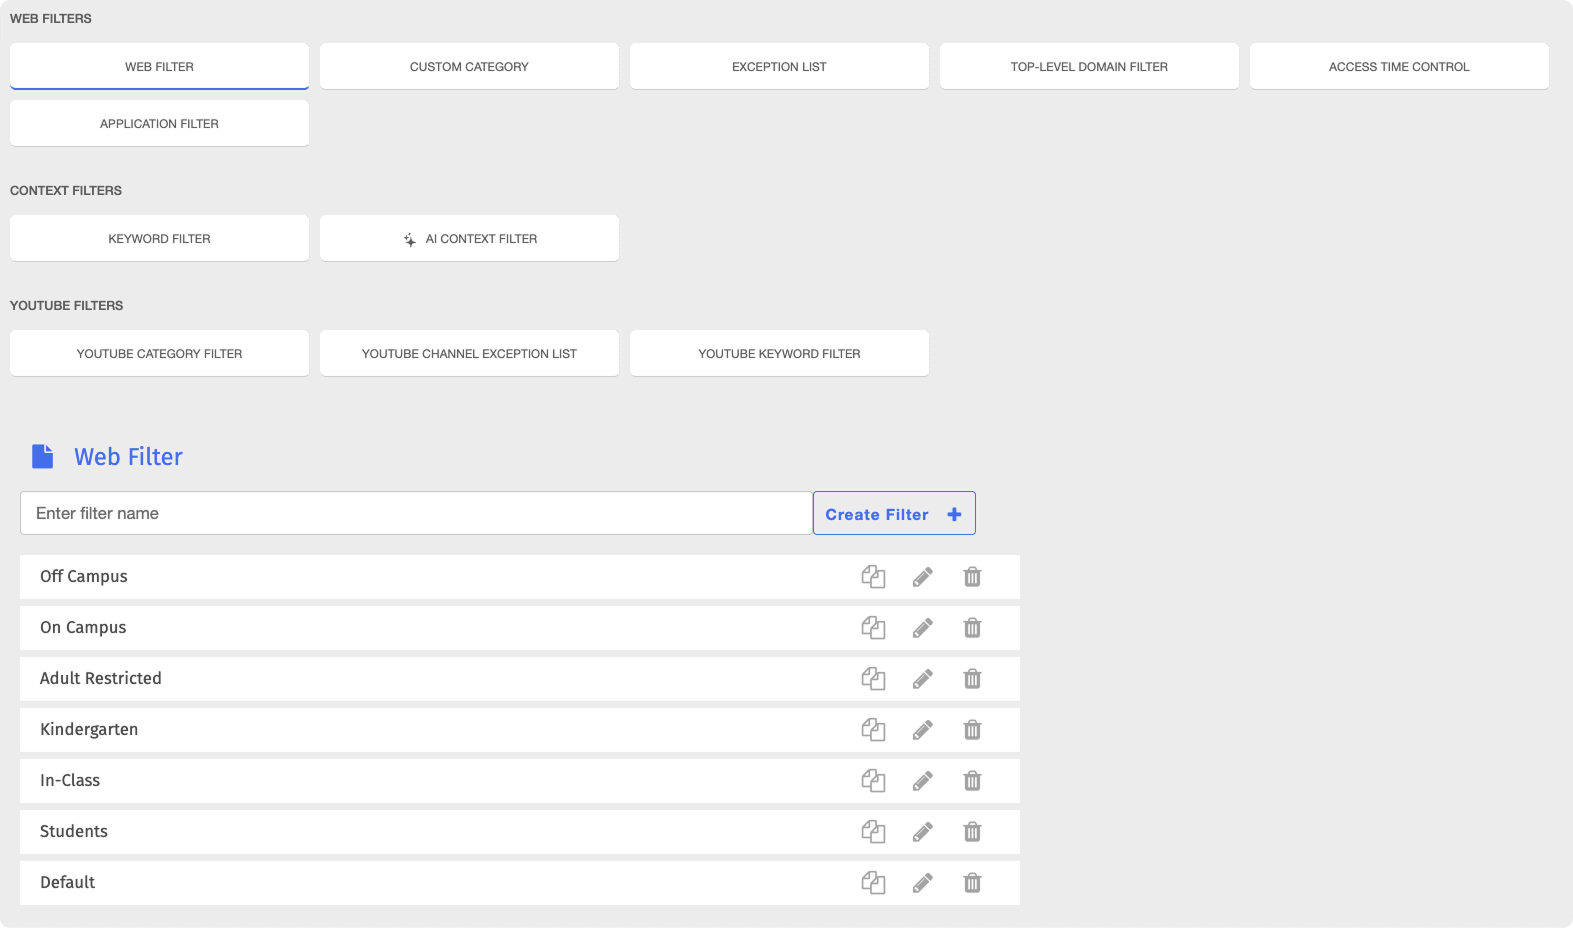
On the Web Filter page, locate the Web Filter you want to apply the category to and click its
 button. The Edit Web Filter page opens.
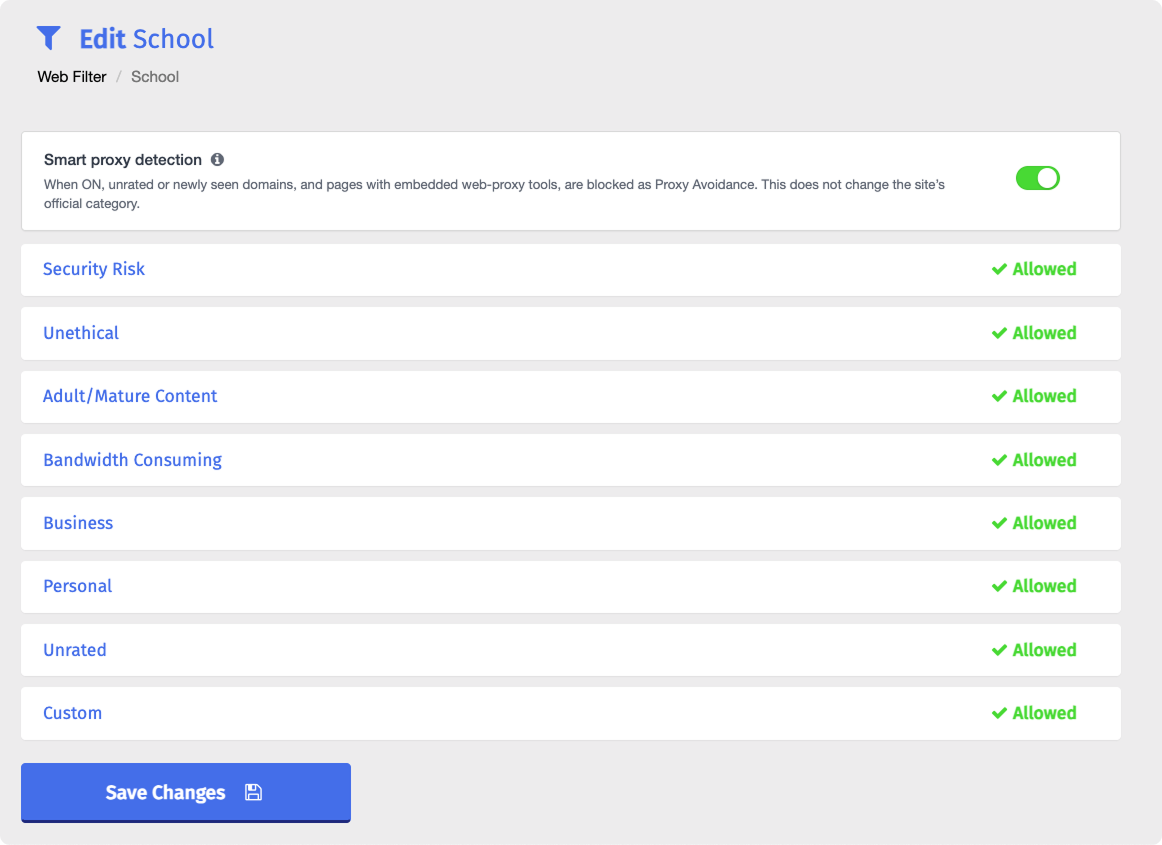
Click the Custom category type to expand it and display your Custom Categories.
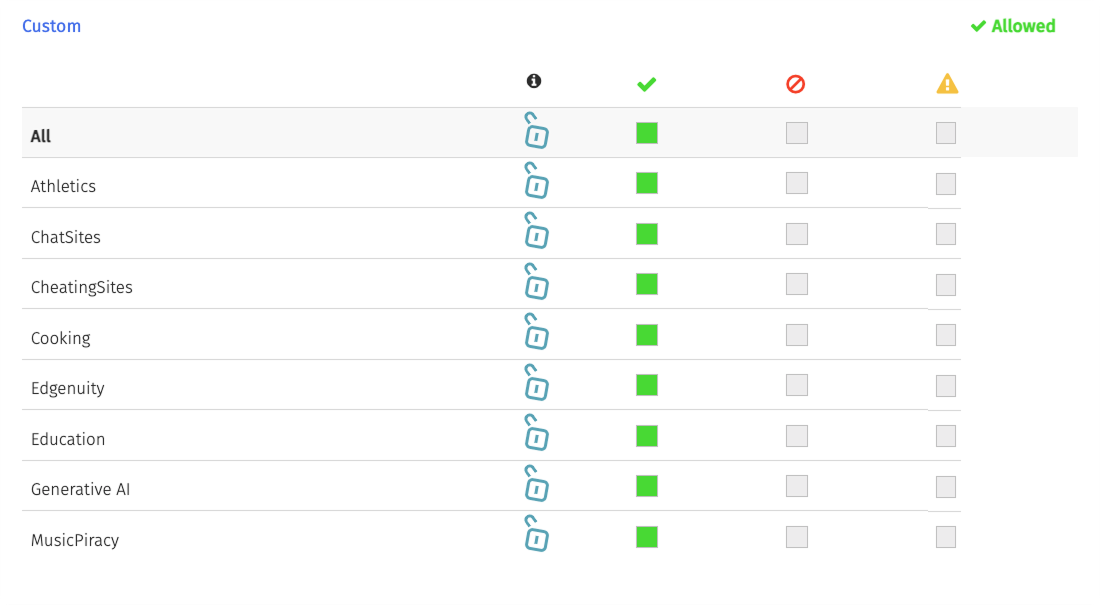
Select one of the following states for your Custom Category:
- Allow - Students can access websites in the category.
- Block - Students cannot access websites in the category.
- Warning - Students can access websites in the category and are shown a warning.
Important
New Custom Categories are set to Allow by default. A new Custom Category blocks nothing until you change its state.
Click the
 button.
Repeat steps 1–4 for any other Web Filters you want to apply the category to.
Each entry in a Custom Category can use one of the following formats:
Domain - Applies to every page on the domain, for example
www.example.com.Specific page - Applies to that page and its subpages, for example
merriam-webster.com/video.IPv4 address - Applies to that address, for example
142.250.82.0. CIDR notation is also supported, for example142.250.82.0/12.IP range - Applies to every address in the range, for example
142.250.82.0 - 142.250.82.255.IPv6 address - Applies to that address, for example
2001:4860:4864:0006:0000:0000:0000:0000or its shortened form2001:4860:4864:0006::.
Important
Entries can contain only letters, numbers, and the following special characters: . - ( ) / * :
For example, students use Merriam-Webster for class, but you want to keep them off its word games. Add merriam-webster.com/games to a Custom Category and set the category to Block in your Web Filter:
merriam-webster.com/gamesand every page under it are blocked.merriam-webster.comand its dictionary entries are not blocked by this entry.
Note
Wildcards in Custom Categories work the same way as in Exception Lists. Refer to the Using Wildcards section in Exception List to learn where to place a wildcard and which URLs it matches.
You can manage your Custom Categories by adding entries to an existing category, deleting entries, or deleting a whole category.
Click the button next to a category on the Custom Category page to open the Edit Custom Category page. Deleting a whole category is performed directly on the Custom Category page.
Tip
To find a specific entry in a long list, type in the Search URLs box on the Edit Custom Category page. Any matching entries appear as you type.
On the Edit Custom Category page, type an entry in the Enter URL text box, then click the button. The entry is added to the category.
On the Edit Custom Category page, locate the entry to delete and click the
 button to the right of it.
Click OK in the confirmation window. The entry is permanently removed from the category.
Important
Deleting the last entry in a Custom Category also deletes the category.
Warning
Deleting a Custom Category is a permanent action. Deleted categories, along with their entries, cannot be recovered.
On the Custom Category page, locate the category to delete and click the
button to the right of it.Click OK in the confirmation window. The Custom Category is permanently removed from the list.
You can import entire Custom Categories, including their names and all entries, or export all of your Custom Categories at once.
All imports and exports use CSV files.
You can import one or more Custom Categories at once from a single CSV file. The imported categories appear at the bottom of the list on the Custom Category page.
Prerequisites
The CSV file name must contain only letters and numbers, with no spaces or special characters.
Each Custom Category and all of its entries must be written in a single line, separated by commas, in the following format: custom category name,entry,entry, ...
Category names can contain only letters, numbers, and the following special characters: . - ( )
Entries can contain only letters, numbers, and the following special characters: . - ( ) / * :
For example, the following imports two Custom Categories, Educational Games and Timewasters, each containing three entries.
Educational Games,coolmathgames.com,kids.nationalgeographic.com,funbrain.com
Timewasters,reddit.com,x.com,tiktok.com

On the Custom Category page, click the
 button in the Import/Export Custom Categories section. A file browser window opens.
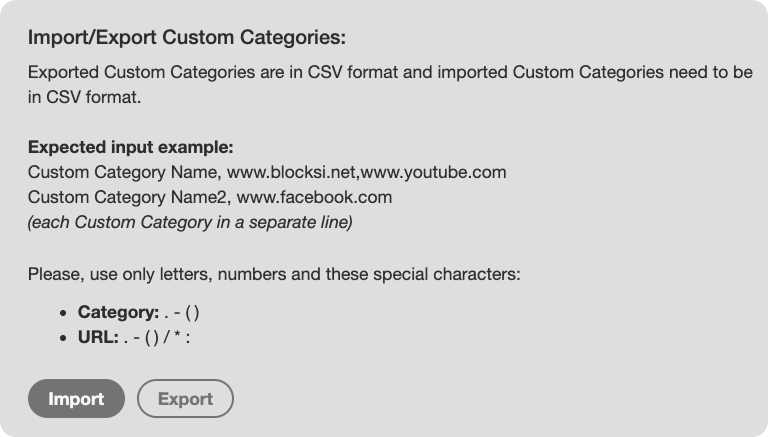
Select a CSV file on your device, then click Open. The imported Custom Categories appear on the Custom Category page.
You can export every Custom Category on your Admin Dashboard to a single CSV file. The exported file uses the same format as the one used for importing, with each category in its own line: custom category name,entry,entry, ...

Click the  button in the Import/Export Custom Categories section on the Custom Category page. All your Custom Categories are exported to a single CSV file, which is downloaded to your device.