Keyword Filter
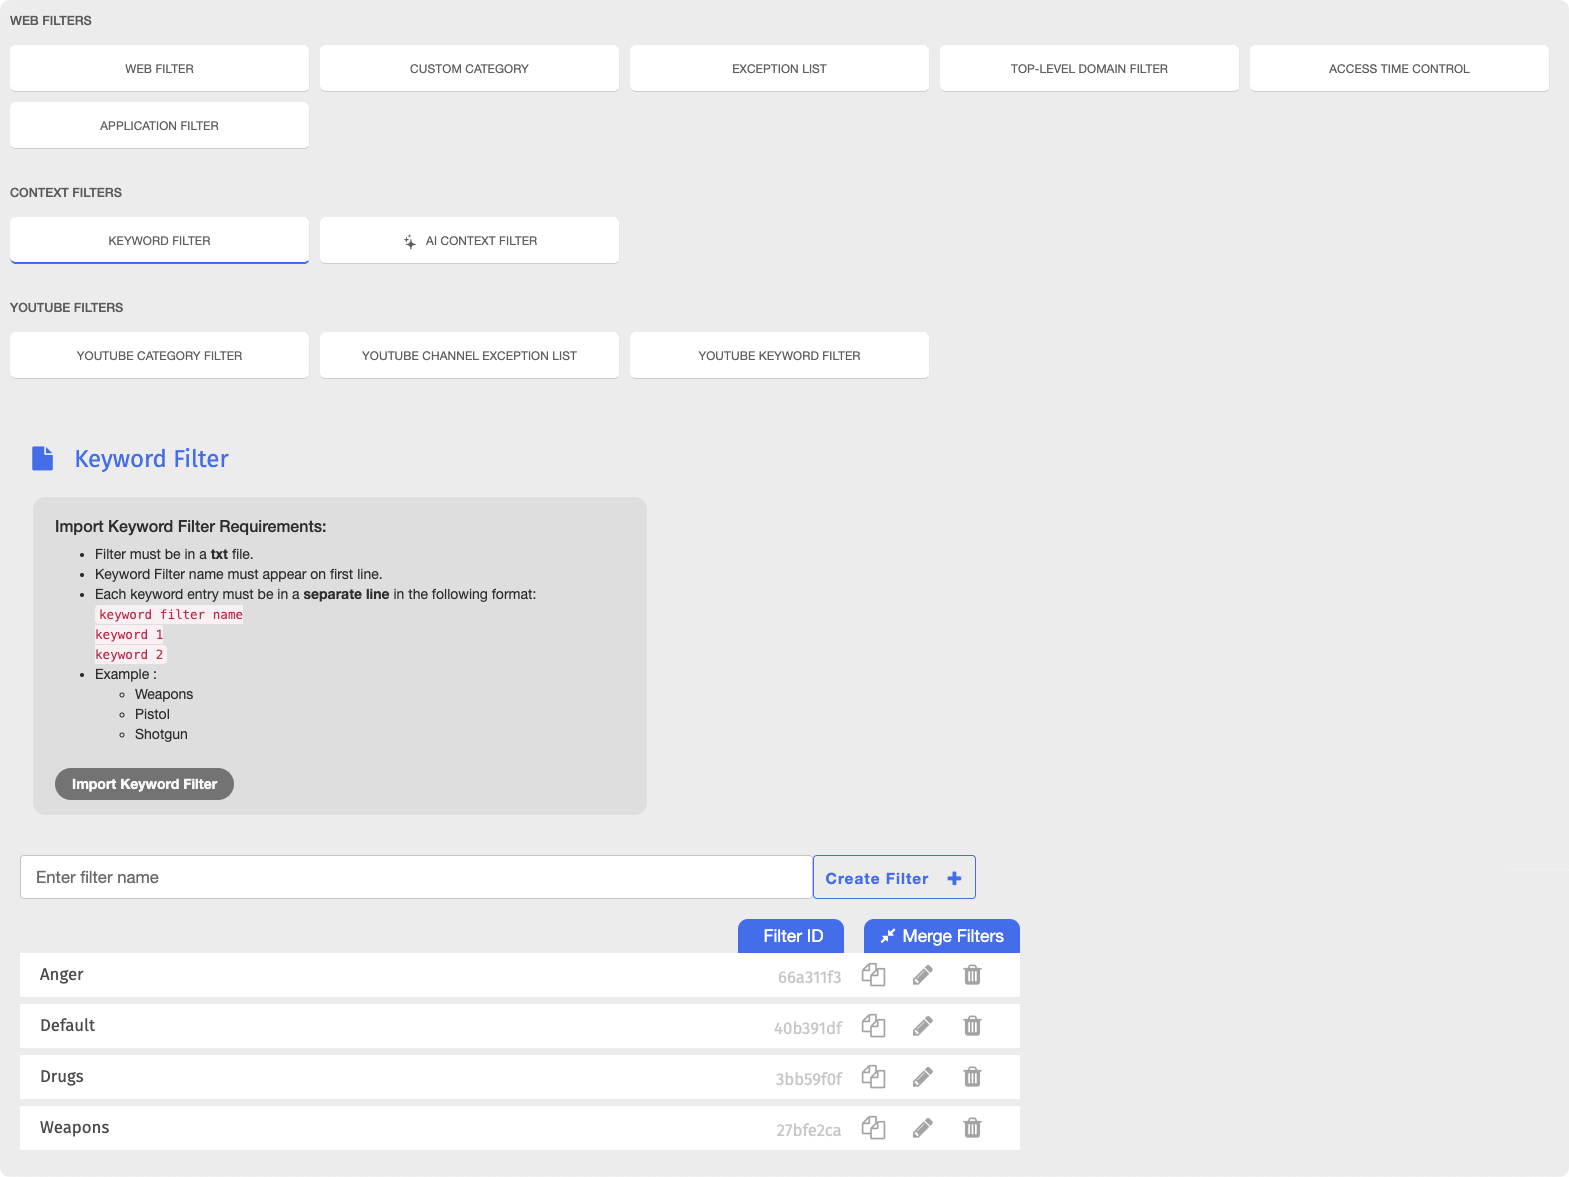
The Keyword Filter blocks web pages based on the words they contain. Add the words you want to restrict to a Keyword Filter, and students cannot reach pages that include them. Because the filter matches words rather than specific web addresses, it restricts inappropriate or irrelevant content wherever those words appear.
Note
Keywords match whole words only. For example, the keyword rap blocks pages containing the word rap, but not pages containing photography.
Each Keyword Filter has its own behavior setting that controls what content is scanned. Choose one of the following options when configuring a Keyword Filter:
Scan whole page content on all pages - The page is blocked if a keyword appears anywhere in its content, including search queries and search result snippets. This is the default option.
Match search queries only - The search results page is blocked only if a keyword appears in the search query. Other pages and search results are not scanned, which reduces false positives.
Important
A Custom Category or an Exception List can override the Keyword Filter. If a keyword blocks a website, you can allow that website by adding it to a Custom Category or an Exception List as an allowed entry.
To access the Keyword Filter page, click Content Filtering from the Main Menu, then click Filters from its sub-menu. On the Filters page, click Keyword Filter listed under Context Filters.
Important
After making any changes to your content filtering or policies, click the  button in the Action Bar at the top of the page to apply the changes.
Identifying the Keyword That Caused a Block
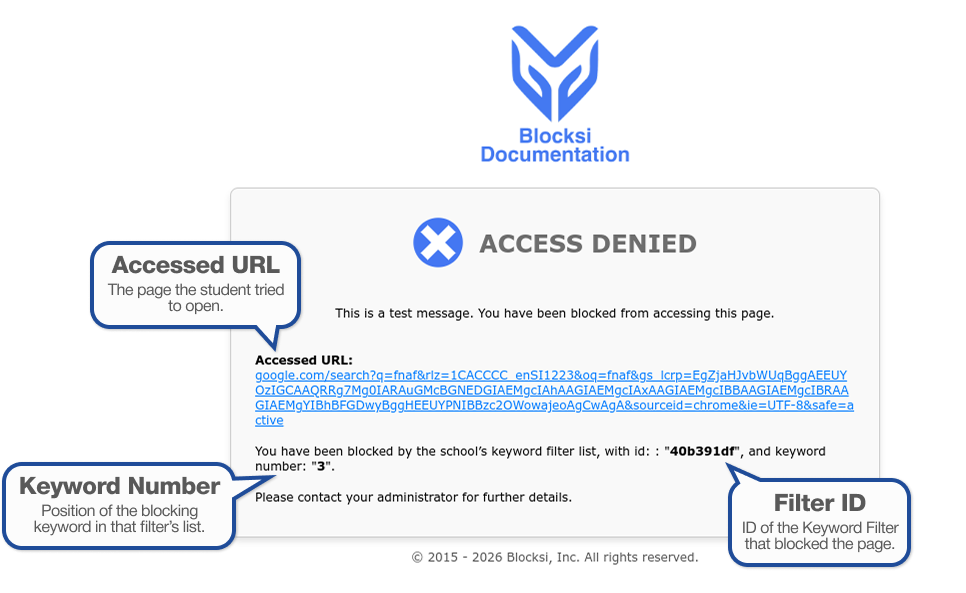
When a keyword blocks a page, the Access Denied page shows the keyword's position number and the ID of the Keyword Filter it belongs to. For example, #3 is the keyword's position and 40b391df is the filter ID.
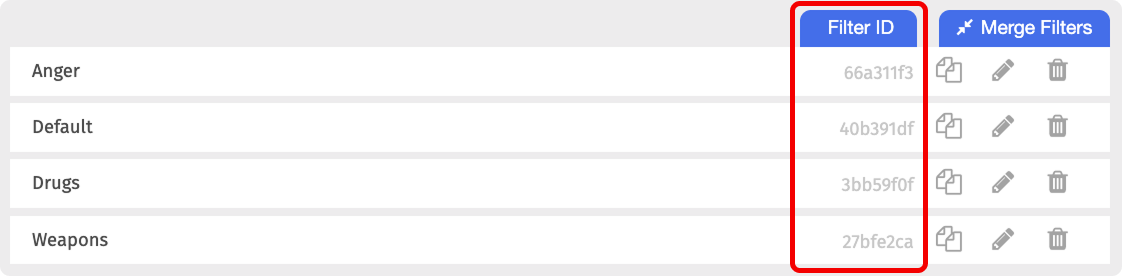
On the Keyword Filter page, locate the filter with the matching ID in the Filter ID column and click its  button. In the keyword list, find the keyword with the matching position number, shown to the left of each keyword.
To set up a Keyword Filter, create the filter, set its behavior, then add the keywords you want to block.
Type a name for the filter in the Enter filter name text box, then click the
 button. The new filter appears on the Keyword Filter page.

Click the
button in the same row as the new filter. The Edit Keyword Filter page opens.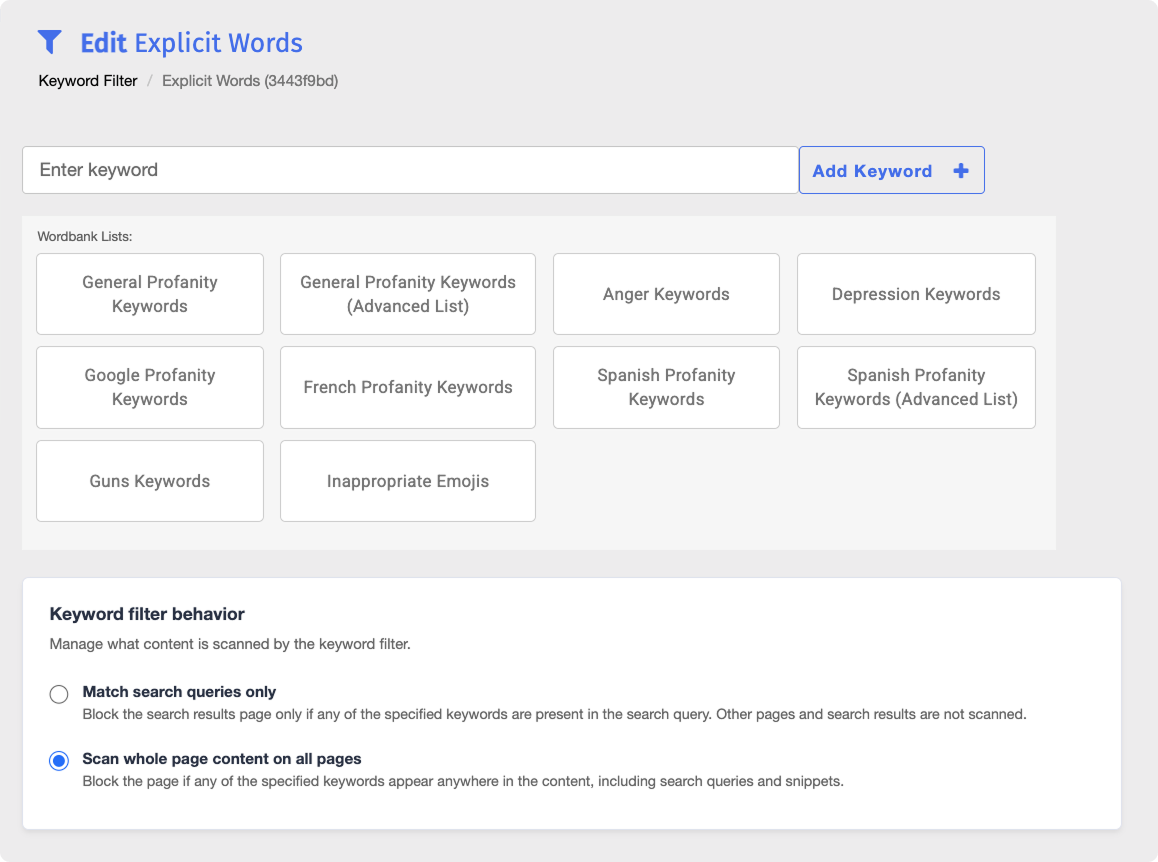
In the Keyword filter behavior section, select one of the following options:
Scan whole page content on all pages - The page is blocked if a keyword appears anywhere in its content, including search queries and search result snippets. This is the default option.
Match search queries only - The search results page is blocked only if a keyword appears in the search query. Other pages and search results are not scanned, which reduces false positives.
Add keywords to the filter in one of the following ways:
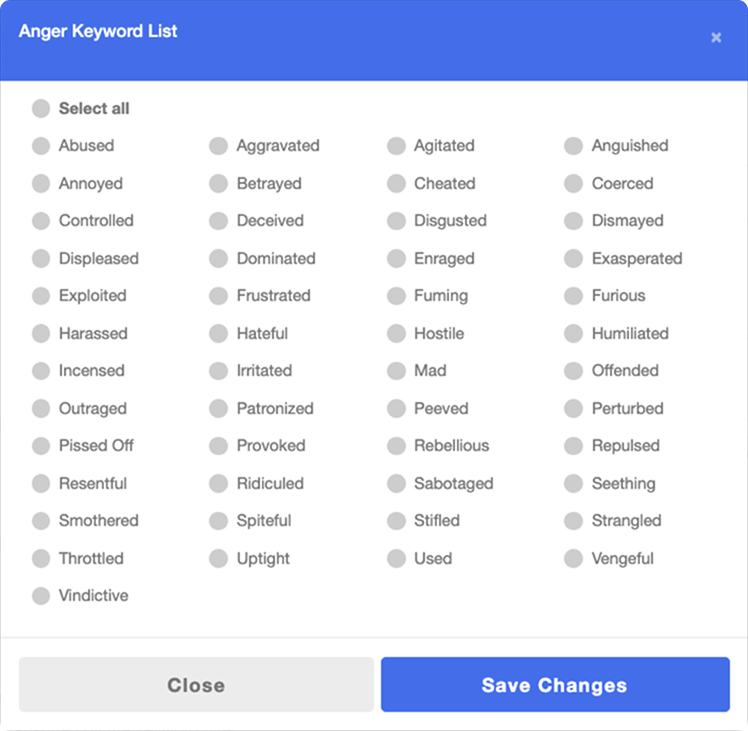
Under Wordbank Lists, click the list you want to use. In the window that opens, select the keywords you want to add, or select the Select all option, then click the
 button.
Type a keyword in the Enter keyword text box, then click the
 button.

New keywords appear at the end of the keyword list. Refer to the Adding Keywords From a Wordbank List to an Existing Filter section to see the available Wordbank Lists.
Repeat step 4 for each keyword or Wordbank List you want to add.
You can manage the keywords in a Keyword Filter by adding keywords from a Wordbank List, adding your own keywords, or deleting them.
Click the button next to a filter on the Keyword Filter page to open the Edit Keyword Filter page.
Blocksi provides preconfigured Wordbank Lists that you can add to a Keyword Filter. The following Wordbank Lists are available:
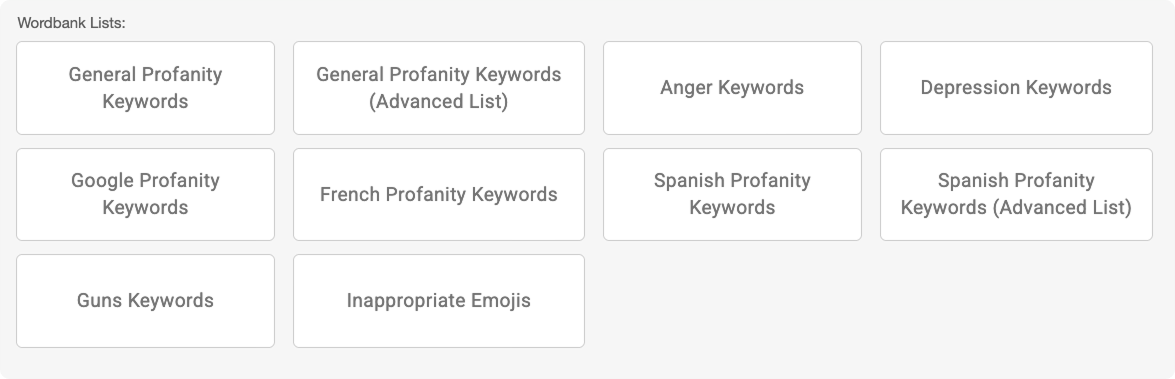
On the Edit Keyword Filter page, click the list you want to use under Wordbank Lists. A window opens with the keywords in that list.
Select the keywords you want to add, or select the Select all option to add the entire list.
Click the
button. The selected keywords appear at the end of the keyword list.
On the Edit Keyword Filter page, type a keyword in the Enter keyword text box, then click the button. The keyword appears at the end of the keyword list.
On the Edit Keyword Filter page, locate the keyword to delete and click the
 button to the right of it.
Click OK in the confirmation window. The keyword is permanently removed from the filter.
You can manage your Keyword Filters by renaming, duplicating, merging, or deleting them. All of these actions can be performed directly on the Keyword Filter page.
On the Keyword Filter page, locate the filter to rename and click its name. The filter name opens in an editable text box.

Make your changes, then click the Save button.
On the Keyword Filter page, locate the filter to duplicate and click the
 button. The Duplicate Filter window opens.
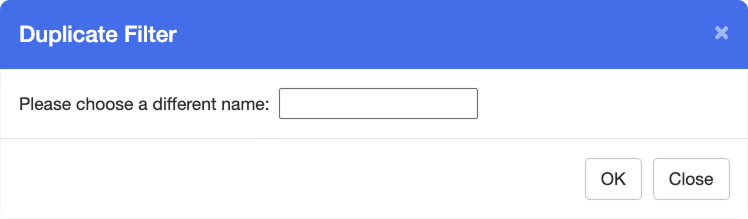
Enter a name for the new filter in the text box, then click OK. The new filter appears on the Keyword Filter page.
Note
The duplicate is a copy of the original, including all of its keywords and their order. The keyword filter behavior setting is not copied, so check it on the new filter’s Edit Keyword Filter page. The original Keyword Filter is not removed upon duplicating.
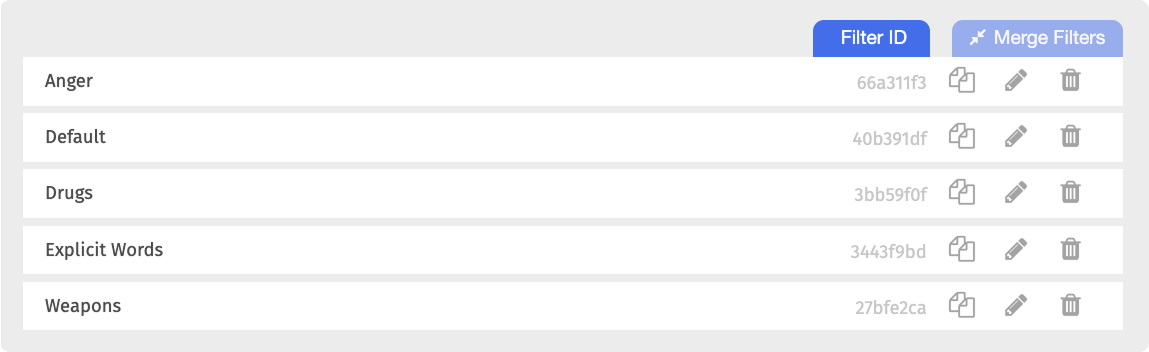
On the Keyword Filter page, click the row of each filter you want to include in the merged filter. Selected filters are highlighted in blue.
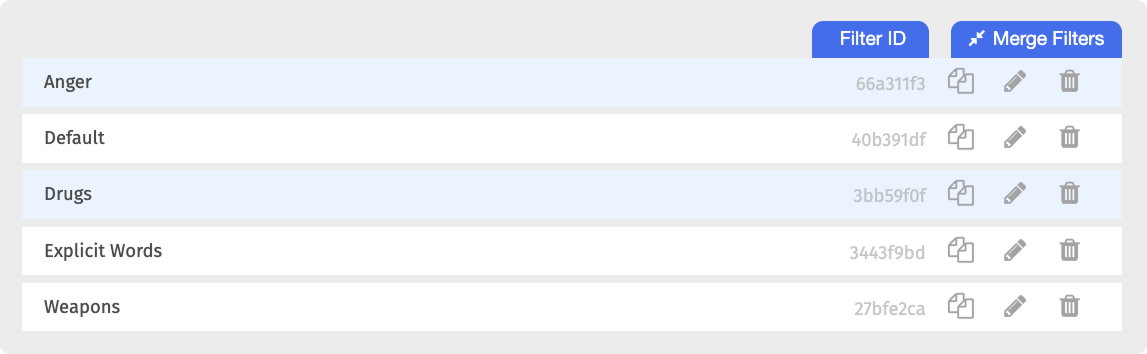
Click the
 button above the list of filters. The New Merged Filter window opens.
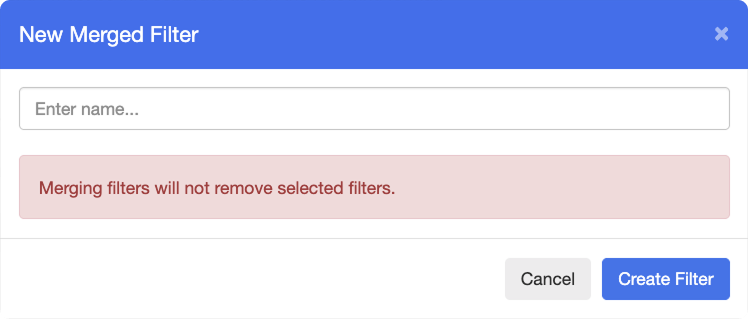
Enter a name for the merged filter in the Enter name... text box, then click the
 button. The merged filter appears on the Keyword Filter page.
Note
The merged filter contains all keywords from the original filters. The original Keyword Filters are not removed upon merging.
Warning
Deleting a Keyword Filter is a permanent action. Deleted filters, along with their keywords, cannot be recovered.
On the Keyword Filter page, locate the filter to delete and click the
button to the right of it.Click OK in the confirmation window. The Keyword Filter is permanently removed from the list.
You can import an entire Keyword Filter, including its name and all of its keywords. The imported filter appears on the Keyword Filter page alongside your manually created filters.
Prerequisites
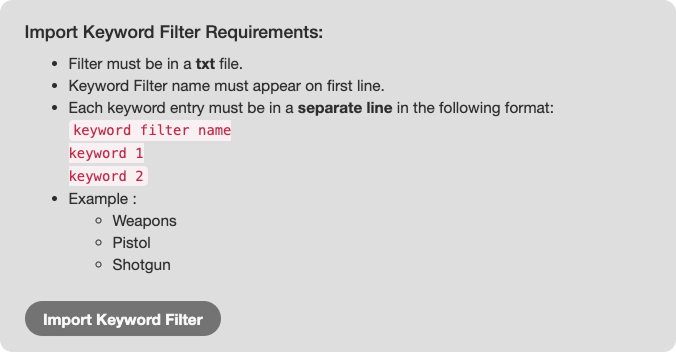
The file must be a TXT file.
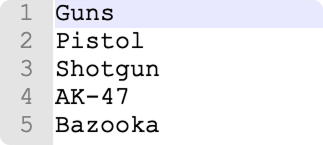
The name of the Keyword Filter must be on the first line of the file, and each keyword must be on its own line below it.
For example, the following creates a Keyword Filter named Guns containing four keywords.
Guns
Pistol
Shotgun
AK-47
Bazooka
On the Keyword Filter page, click the
 button in the section above the list of filters. A file browser window opens.
Select a TXT file on your device, then click Open. The imported filter appears on the Keyword Filter page.