Setting Class Policies
The Blocksi Content Filter utilizes policies to manage and monitor student web activity through a series of configurable filters. These policies offer control over blocking or allowing entire categories of web content (e.g., Games), and can be tailored to a district's specific needs using an Exception List, which permits or restricts individual URLs regardless of their category. Blocksi also includes comprehensive YouTube filtering.
Policies are highly flexible and can be applied to an entire class or targeted specifically at small groups and individual students.
Important
The policy applied to students on school grounds outside of active class sessions is determined by the administrator. During active class sessions, the classroom policy takes precedence and overrides any previously applied policy.
Teachers can select the active classroom policy directly from their Teacher Dashboard. The range of policies available for selection can be limited and managed by administrators to ensure that only approved policies are used in the classroom.
Note
The policies available in the drop-down list are those shared with you by your administrator. If you need additional policies, contact your administrator to have them shared with you. If the Advanced Filtering Tools feature has been enabled for you on the Admin Dashboard, you can also create your own policies. For help creating policies, refer to the Policies section.
Click the Edit button in the class header at the top of the class view. The class settings can now be modified.
Tip
The class header can be found at the top of the individual class view on the Teacher Dashboard. It displays the class name, class length, active policy, and other class details.

Click the class policy drop-down list and select a policy for the class.

Note
The drop-down list displays the name of the currently active policy. In the example shown above, the active policy is Science Lab.
Click the Save button to apply the new class policy.
Note
The policies available in the drop-down list are those shared with you by your administrator. If you need additional policies, contact your administrator to have them shared with you. If the Advanced Filtering Tools feature has been enabled for you on the Admin Dashboard, you can also create your own policies. For help creating policies, refer to the Policies section.
Ensure the class session is currently active.
Click the Edit button in the class header at the top of the class view. The class settings can now be modified.
Tip
The class header can be found at the top of the individual class view on the Teacher Dashboard. It displays the class name, class length, active policy, and other class details.
Click the Policies for Groups link. The Apply Policy to Group window opens.

Select the desired group from the Apply to Group drop-down list, then select the policy to apply to the group from the Select a Policy drop-down list.
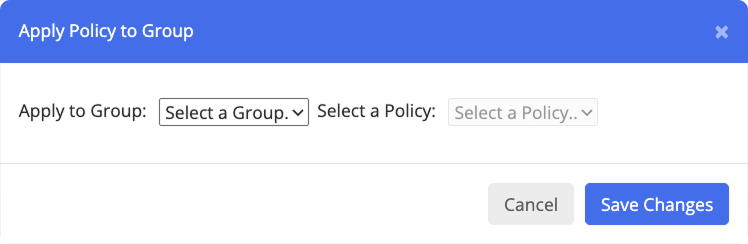
Click the Save Changes button. The selected policy is now applied to the student group.
Note
The policies available in the drop-down list are those shared with you by your administrator. If you need additional policies, contact your administrator to have them shared with you. If the Advanced Filtering Tools feature has been enabled for you on the Admin Dashboard, you can also create your own policies. For help creating policies, refer to the Policies section.
Ensure the class session is currently active.
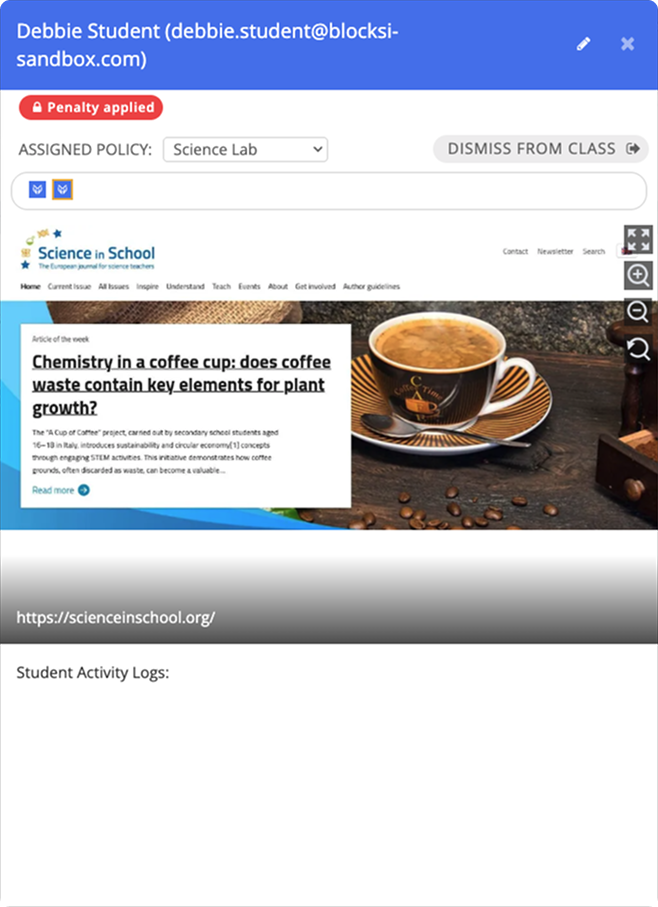
Locate the student you want to apply a policy to and click their tile to expand the additional student tile options, as shown in the image below.
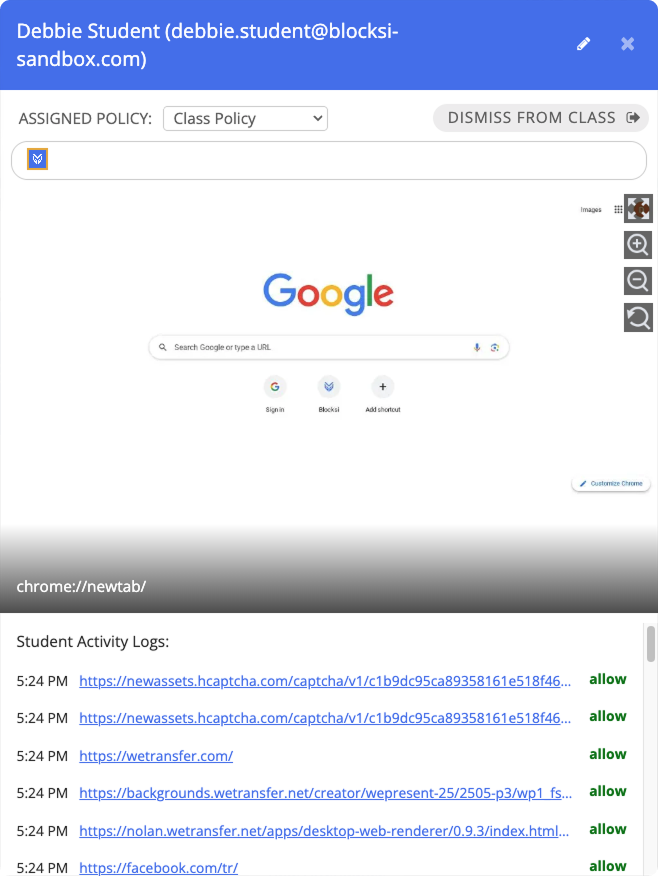
Select the policy to apply to the student from the Assigned Policy drop-down list. The selected policy is immediately applied to that student.
Warning
Note: Teachers may only modify the policy of a student in a Penalty Box if it has been unlocked by an administrator. When locked, the Penalty Box policy is mandatory and cannot be changed or overridden. If the student is in a Penalty Box, their tile will expand into the window shown below.