Adding, Excluding, and Dismissing Students
This section shows you how to add students to a class and how to exclude or dismiss them from a class.
Warning
Students cannot be added to a class while a class is in session.
Ensure the class session is not currently active.
Click the Students button. The Classroom Students window opens.
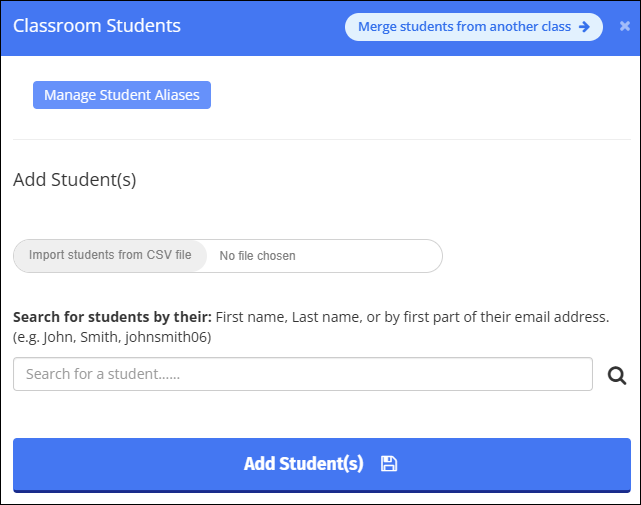
Enter the student's first name, last name, or the first part of their email address in the Search for a Student text box.
Click the
 icon. The matching students appear below the search box, as shown below.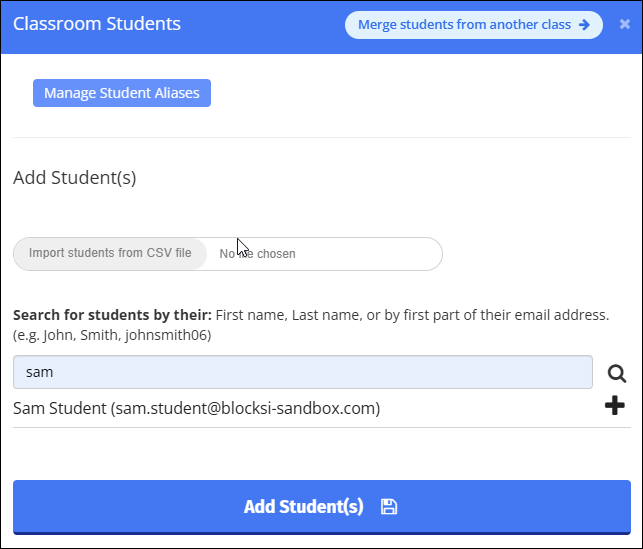
Important
Students who are not part of an organizational unit assigned to you cannot be added to the class when the Student OU Restriction setting is enabled in the Teacher Dashboard Settings on the Admin Dashboard.
Click the plus icon to the right of the student you want to add.
Click Add Student(s). The student tiles appear in the class, confirming that the students have been successfully added.
Ensure the class session is not currently active.
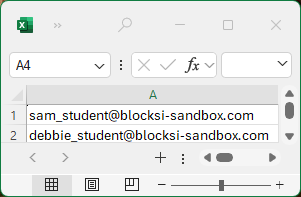
Click Import Students from CSV File.
Navigate to the appropriate folder, select the CSV file, and click Open. The filename appears to the right.
Click Add Students. The student tiles appear in the class, confirming that the students have been successfully added.
Students can join classes using a class code provided by their teacher. Share the following procedure with the student for entering the class code.
Navigate to blocksi.net.
Hover over Sign In button and click Student from the drop-down menu.
Enter your credentials and sign in. The class code entry screen appears.
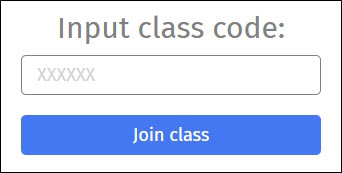
Enter the class code in the Input Class Code field and click Join Class.
Note
This only needs to be done once per school year.
Excluding a student is a temporary measure, unlike dismissing a student which permanently removes them from the class. While a student is excluded, any actions performed in the class do not affect them and their screen cannot be viewed. The student remains in the class and can be included again at any time.
Ensure the class session is currently active.
Click the
 button in the top right corner of the student's tile to exclude the student. The button turns gray.
Note
The
button defaults to included and appears in orange when the student is active in the class.To include the student again, click the
button once more. The button returns to orange.
Dismissing a student permanently removes them from the class. Dismissed students can always be re-added by following the procedure in the Adding Students to a Class section.
Click the tile of the student you want to dismiss to expand the additional student tile options.
Click the Dismiss from Class button in the top right corner of the expanded student tile view. A confirmation prompt appears.
Click Yes. The student is immediately removed from the class.