Creating and Rostering Classes
This section describes creating and rostering classes.
Click CREATE NEW CLASS. The Create a Class window opens.
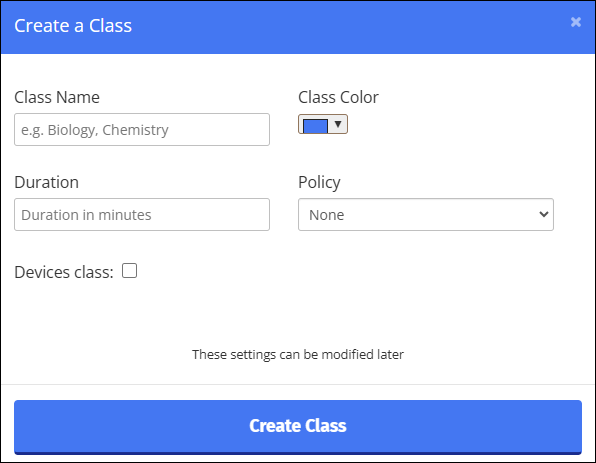
Type the name of the class in the Class Name text box.
Select a color for the class from the Class Color drop-down list, if necessary. The color you select appears as the border around the class block on the dashboard.
Type the duration of the class, in minutes, in the Duration text box.
Select the policy to apply to the class from the Policy drop-down list.
Select the Devices class checkbox to create classes consisting of Windows devices.
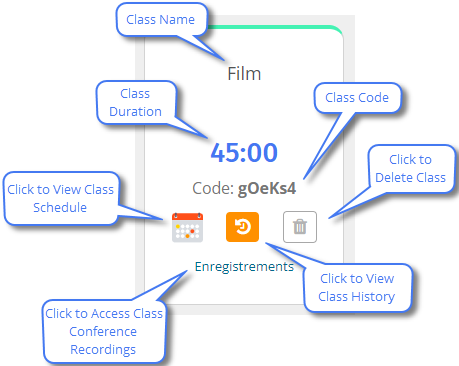
Click Create Class. The class appears as a tile on the dashboard, as shown below.
Note
If you created a Windows class, then a Windows icon appears in the upper right-hand corner of the tile.
See Adding Students to a Class.
Roster classes in the following ways:
Import students from Google Classroom, Clever, or ClassLink.
Import students from the SIS (OneRoster) or Wonde.
Create a class in Blocksi and add students to the class.
Click the import classes button for the desired classroom. The Import Classes window opens.
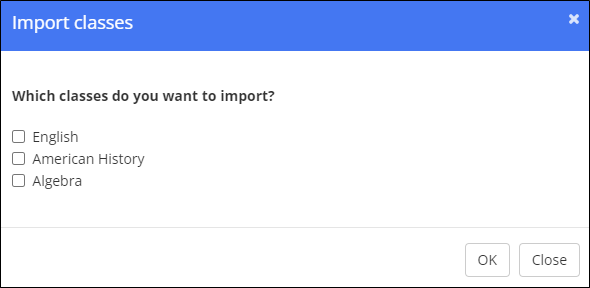
Select the checkboxes to the left of the classes to import.
Click OK. The classes are imported to your dashboard.
Prerequisites
Before proceeding, ensure the following prerequisites have been met:
The district administrator must have configured and saved the OneRoster SIS connection settings.
The teacher account must be linked to OneRoster and imported from the SIS (OneRoster).
Sign in to the Blocksi Teacher Dashboard using a teacher account that was imported from the SIS (OneRoster).
Click the Import from the SIS button on your Teacher Dashboard.
The Import Classes modal window opens, displaying a table of all classes assigned to you in the SIS (OneRoster). The table includes the following columns:
Class - The subject name (e.g., Mathematics, English).
Grade - The grade level associated with the class.
Terms - The academic term(s) in which the class exists (e.g., Fall 2025, Spring 2026).
Student Count - The number of students enrolled in the class.
Click a class row to expand it and view the enrolled students. Each student entry shows the student's name, email address, and grade.
By default, all students in a class are selected. If needed, deselect any individual students you do not want to import.
Select the classes you want to import by clicking the checkbox next to each class. To select all classes, click the Select All checkbox at the top of the table.
Click Import. After the import completes, a success message confirms how many new classes have been imported into Blocksi. The imported classes then appear on your Teacher Dashboard.
Tip
Re-importing classes that have already been imported refreshes the existing classes with updated data and student rosters from the SIS (OneRoster). This serves as a manual sync for your classes.
Note
Once classes have been imported, Blocksi can automatically keep class rosters in sync with the SIS on a daily basis. The SIS (OneRoster) Class Sync must be enabled by your Blocksi administrator.
Prerequisites
Before proceeding, ensure the following prerequisites have been met:
The district administrator must have configured and saved the Wonde connection settings.
The teacher account must be linked to and imported from Wonde.
Sign in to the Blocksi Teacher Dashboard using a teacher account that is connected to Wonde.
Click the
 button on the dashboard.
The Import Classes modal window opens, displaying a table of all classes available for import from Wonde.
Tip
Click a class row to expand it and view the students enrolled in that class. Each entry shows the student's first name, last name, and email address.
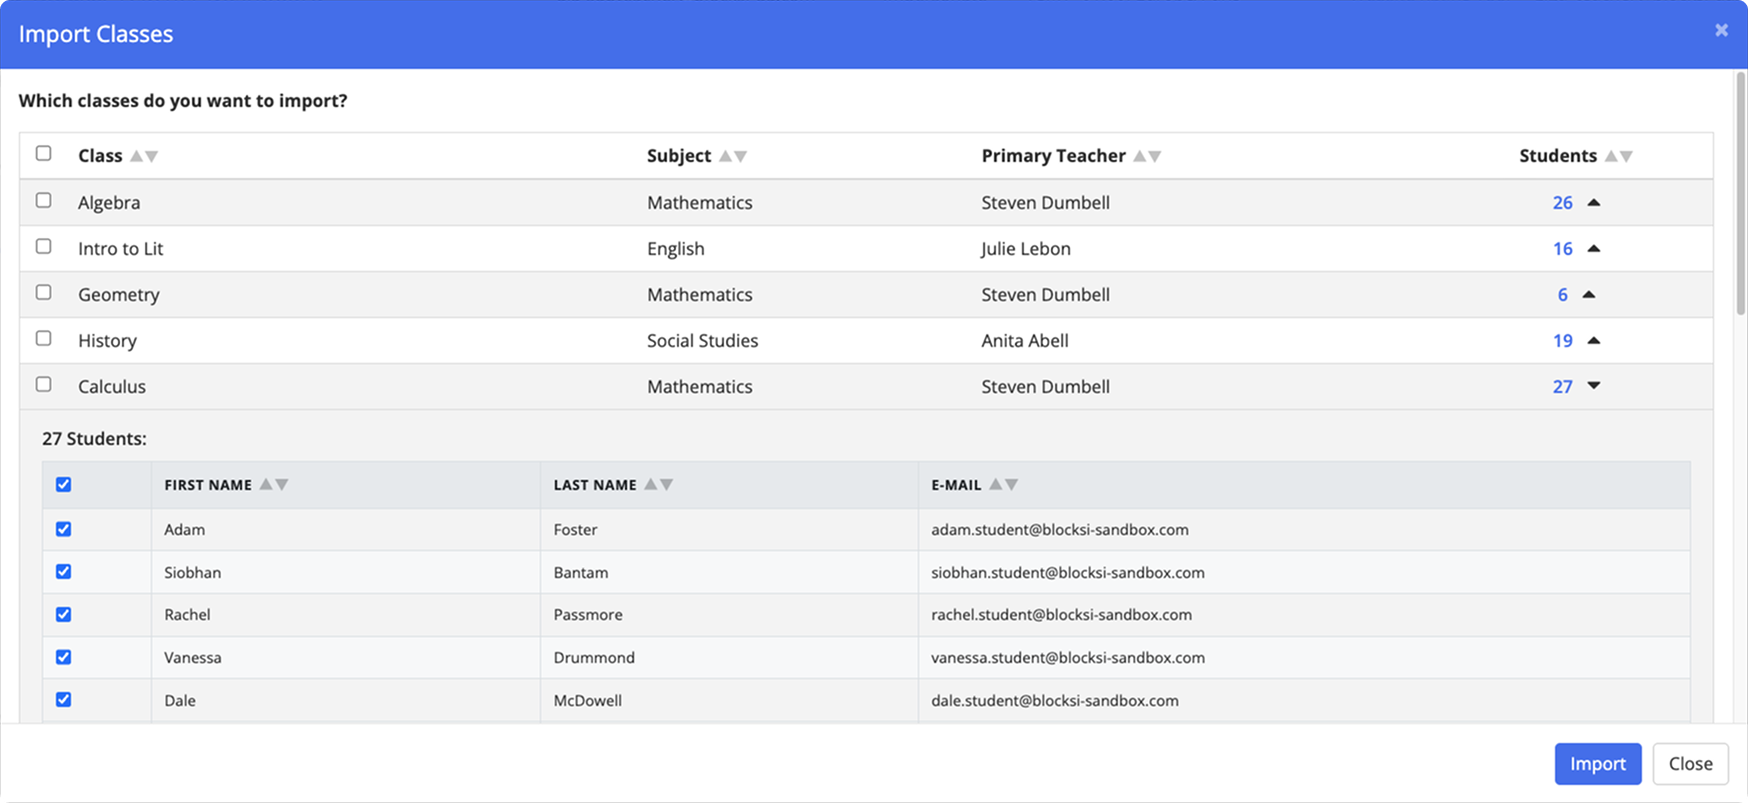
Select the classes you want to import by clicking the checkbox next to each class. To select all classes, click the Select All checkbox at the top of the table.
Click the Import button. After the import completes, a success message confirms how many classes have been imported into Blocksi. The imported classes then appear on your Teacher Dashboard.
Tip
To manually sync your Wonde classes, click the Sync with Wonde button within the class.

Note
Once classes have been imported, Blocksi can automatically keep class rosters in sync with Wonde on a daily basis. The Wonde Class Sync must be enabled by your Blocksi administrator.