Scheduling and Merging Classes
This section describes working with classes.
Blocksi's Class Scheduler uses the A/B Block Schedule.
The A/B Block Schedule consists of the Weekly Scheduler, Week A, Week B, and Custom Week tabs.
Weekly Scheduler Tab
On this tab you select the start and end weeks for the school year and set up the Week A, Week B, and Custom Week templates.
Week A and Week B Tabs
On these two tabs you set up the schedule for the corresponding template by adding classes to each template and specifying their starting times for each day of that week.
Custom Week Tab
On this tab you set up weeks that may differ from Weeks A and B. For example, use this template as a skip week template or as a third template.
Regular Class Schedules
If your school does not use block schedules, Blocksi recommends that you use Week A to set up your class schedule for the year. Use the custom week to allow for holidays and breaks during which there are no classes.
Note
Use the ON/OFF toggle to stop your classes from starting when you need to prevent pulling students into classes. This is helpful when you may be sick and unable to hold class, or for periods during which to suspend classes, like spring break or holidays.
Easily create a schedule of your classes on your dashboard. This allows you to set up all your classes for the entire upcoming school year.
Use the Class Scheduler to turn on automatic class start so classes can start and end automatically without intervention from you. For example, if you set your Chemistry class duration for 90 minutes and set it to start at 8:00 AM Monday through Friday, then the Chemistry class will automatically start at 8:00 AM and end at 9:30 AM on each of those days.
As with manual class creation, students are released from the class after the class duration has elapsed.
Click SHOW/HIDE SCHEDULE.
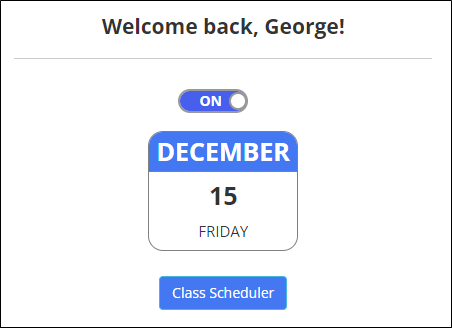 The screen expands to include the following:
A welcome back message
An option to start classes automatically
The current date
The Class Scheduler button
Any upcoming classes
Setting Up the Weekly School Year
Setting Up the Week A and Week B Schedules
Setting Up the Custom Week Schedule
Click the Class Scheduler button. The Class Scheduler window opens.
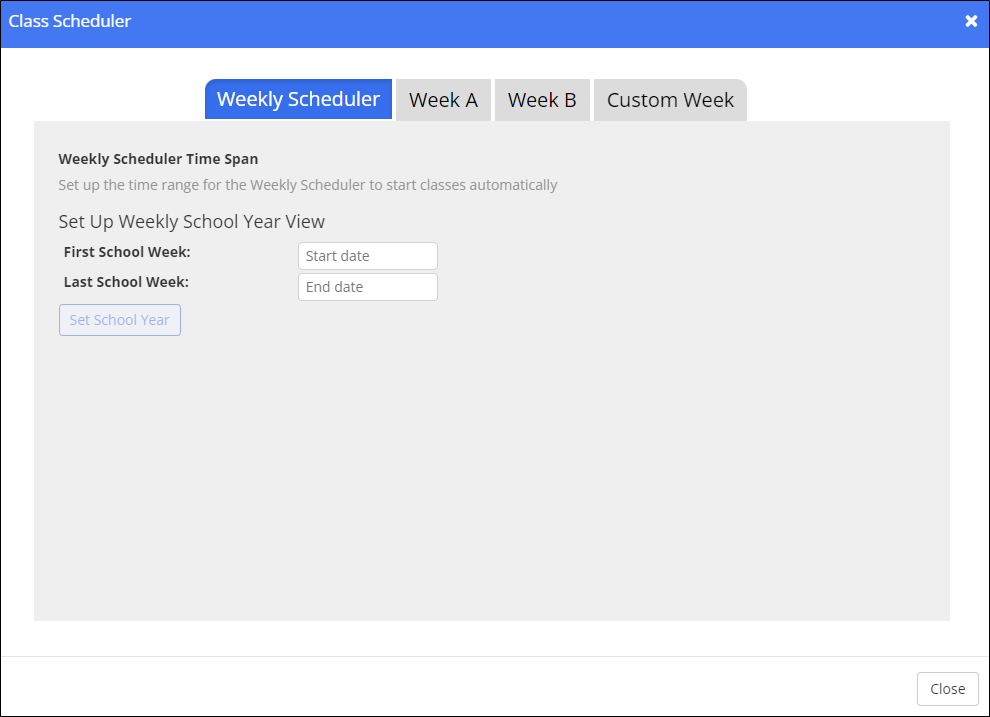
Select the school year start date from the First School Week drop-down list.
Select the school year end date from the Last School Week drop-down list.
Click Set School Year. The window expands to include the weekly schedule templates.
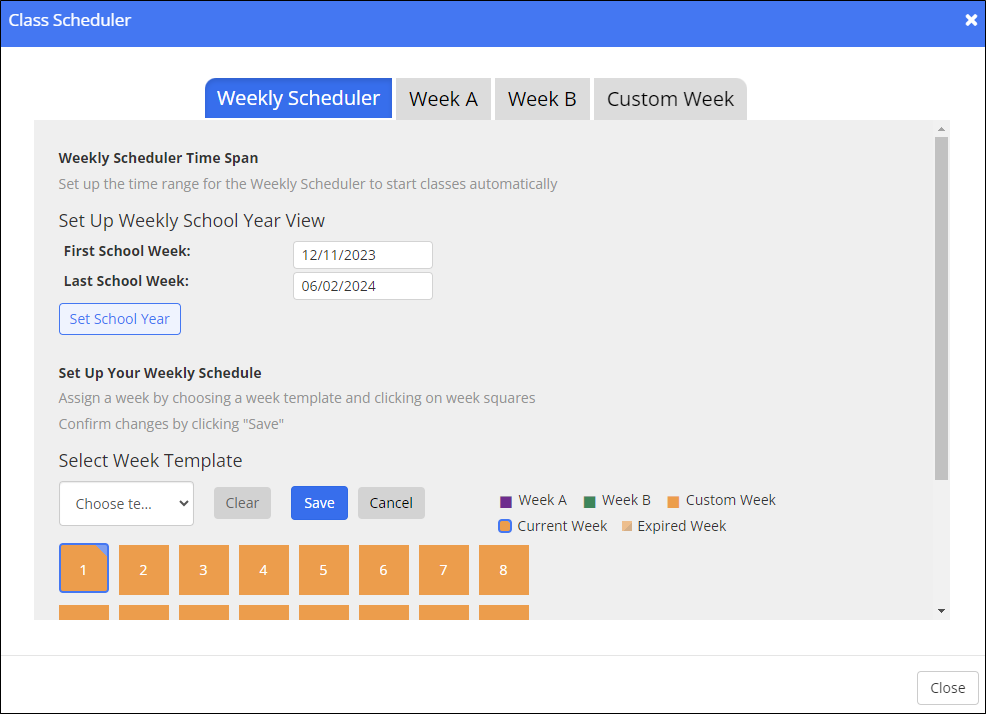
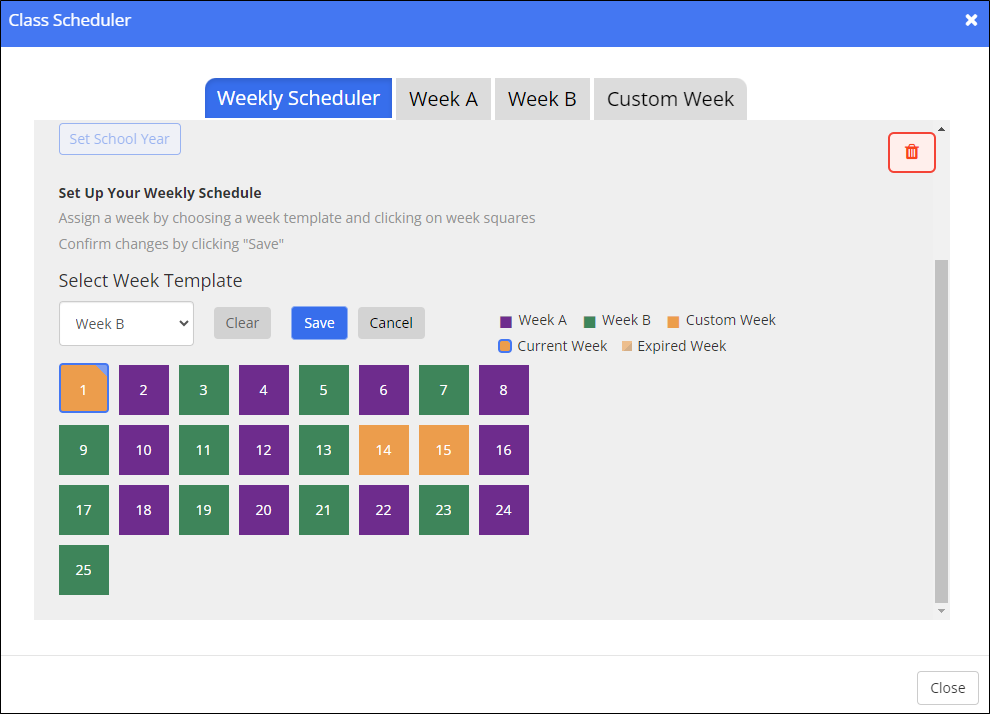
By default, weeks are set up with the Custom Template and appear as orange squares.
Select the desired week template from the Select Week Template drop-down list.
Note
Hovering your mouse cursor over a numbered week block displays the From and To dates along withe the week number.
Click the desired week. The color of that week changes to the color of the corresponding template, as shown below. Select more than one week at a time; just click each week after you select the desired template.
Note
You cannot edit the current week or any past weeks.
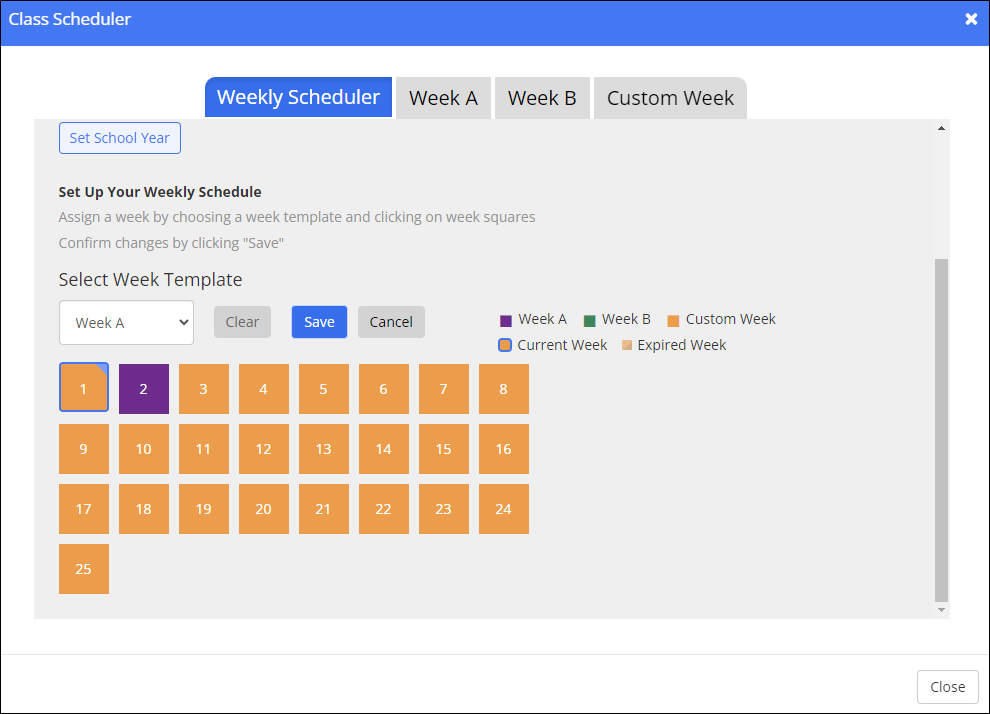
Click the Save button. A confirmation prompt appears.
Click OK.
Repeat Steps 5 through 8 for each week you need to set up.
Note
Remember, if you are not using the block schedule, use Week A to set up your class schedule for the year. Use the custom week to allow for holidays and breaks during which there are no classes.
Click the Week A or Week B tab. The window changes to the corresponding schedule. Both schedules are set up the same way.
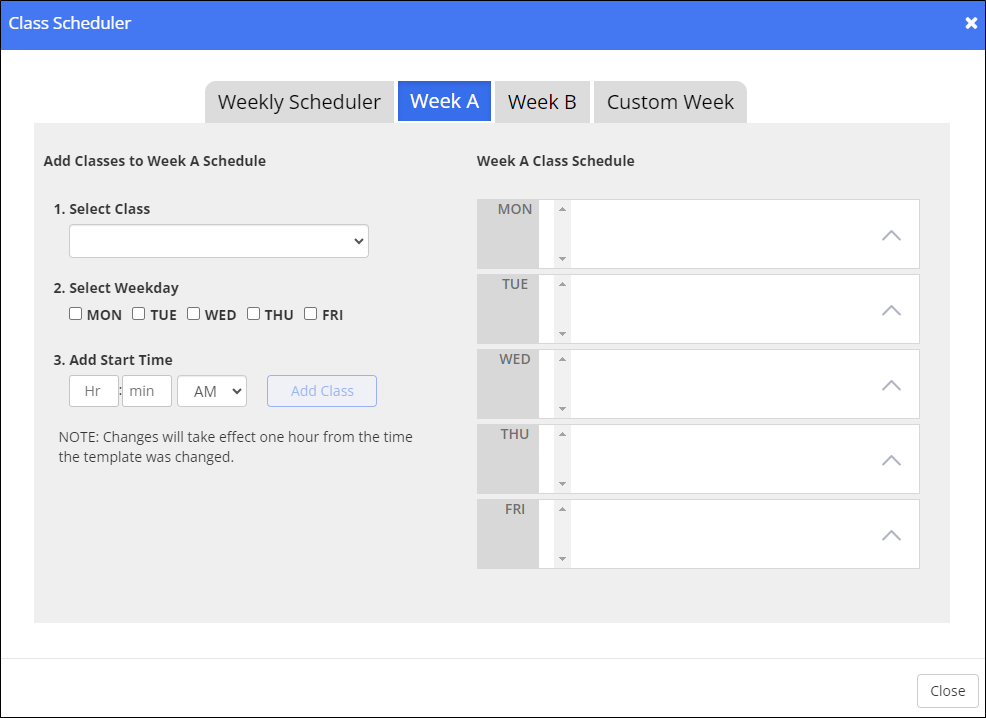
Select the class to schedule from the Select Class drop-down list.
Select the checkboxes for the day or days of the week on which to schedule this class.
Add the start time of the class in the Add Start Time fields.
Click Add Class. The class or classes are added to the schedule and appear in the corresponding day to the right, as shown below.
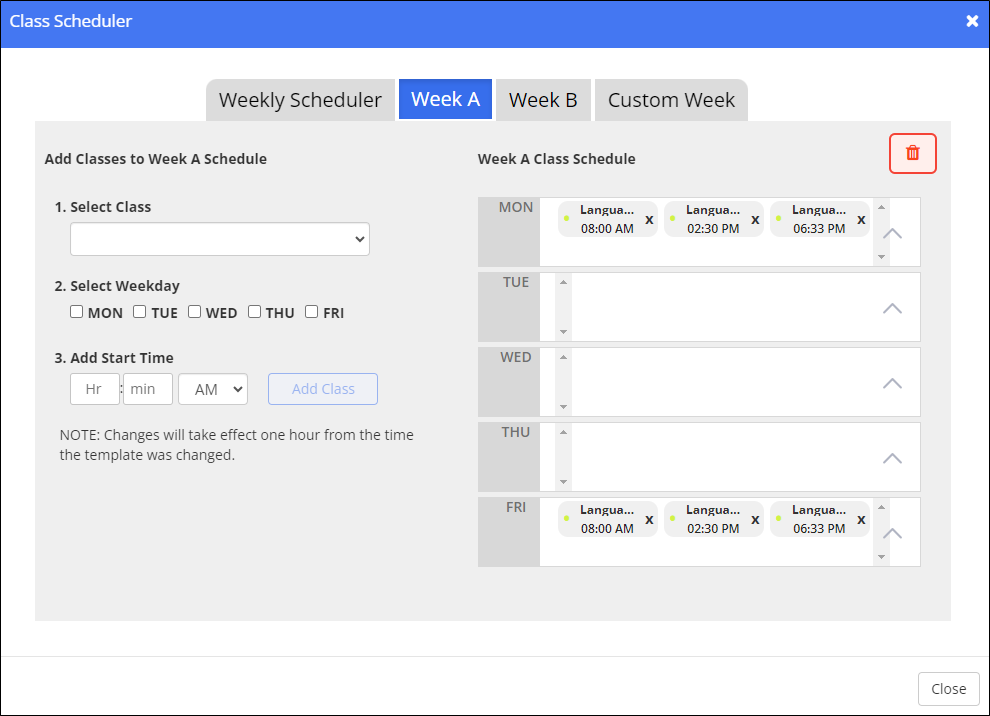
Repeat steps 4 and 5 if this class is held more than once on any day.
Repeat Steps 2 through 5 for each class you class to add.
Note
At any time, click the up arrow to the right of a day and select the checkboxes for the day or days to copy.
Click the Close button when you are finished adding classes.
Click the Custom Week tab. The window changes to the corresponding schedule.
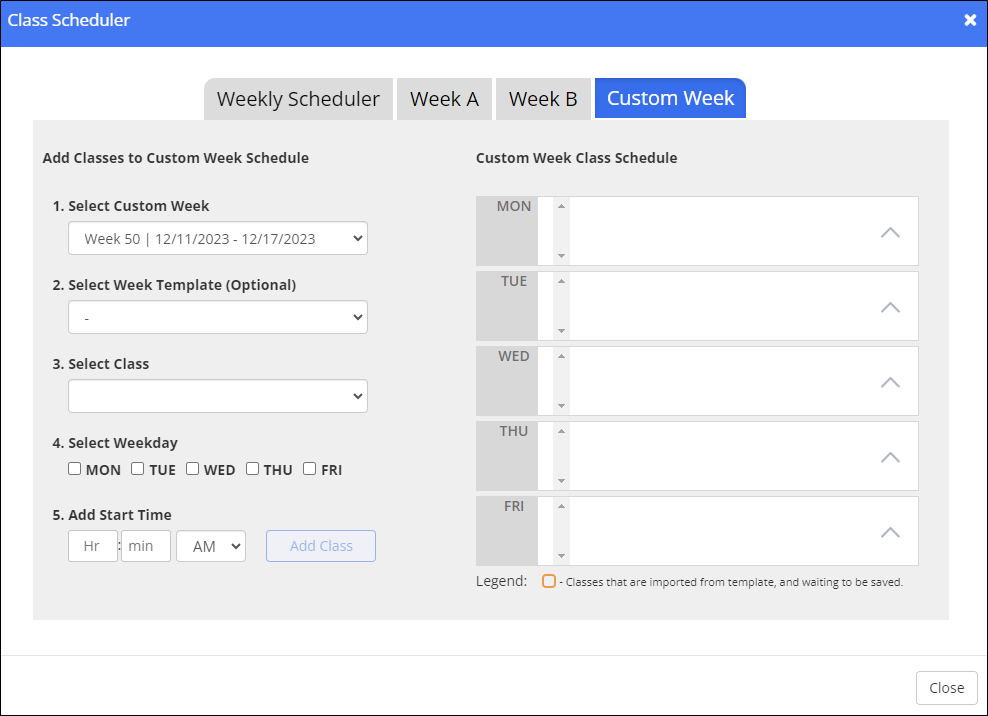
Select the custom week from the Select Custom Week drop-down list.
Note
Weeks are numbered sequentially from the start of the calendar year, not the school year that you set up in Part 1.
Select the week template to use from the Select Week Template drop-down list to use the class schedule from one of the templates. Selecting a template adds that template's classes to the custom week schedule. This step is optional.
Select the class to schedule from the Select Class drop-down list.
Select the checkboxes for the day or days of the week on which to schedule this class.
Add the start time of the class in the Add Start Time fields.
Click Add Class. The class is added to the schedule and appears in the corresponding day to the right.
Repeat steps 6 and 7 if this class is held more than once on any day.
Repeat Steps 4 through 7 for each class you class to add.
Note
At any time, click the up arrow to the right of a day and select the checkboxes for the day or days to copy.
Click the Close button when you are finished adding classes.
Click the Class Scheduler button. The Class Scheduler window opens.
Navigate to the the Shared Templates tab. The left side of the window displays a list of templates provided by your administrator. Each entry shows the following:
The date range the template is active for.
The specific days of the week the template applies to.
Click a template name to expand it. A vertical timeline representing a single school day appears, with different colored time blocks displayed alongside it.
Configure your schedule by dragging and dropping your classes into the desired time slots:
Locate your classes in the Overview of Your Current Classes list on the right.
Click and hold a class from the list, then drag and drop it into the desired time slot on the template timeline.
Tip
Check the Template Explainer box in the bottom right corner for a written summary of the configured schedule and additional information about the template.
The following is a sample school year schedule implementing the A/B Block Schedule. Note that Blocksi has included custom weeks, which contain no classes, for the two-week holiday break and two-week spring break.
Note
Use the ON/OFF toggle to stop your classes from starting when you need to prevent pulling students into classes. This is helpful when you may be sick and unable to hold class, or for periods during which to suspend classes, like spring break or holidays.
Click the Students button. The Classroom Students window opens.
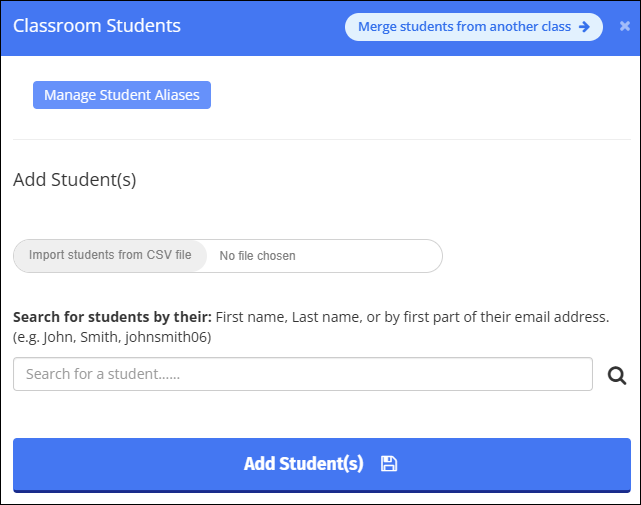
Click Merge students from another class. The Merge classes window opens.
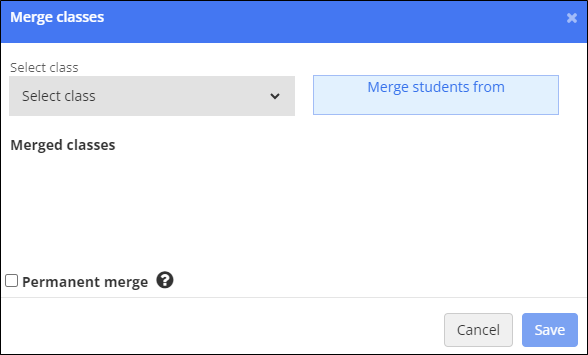
Select the class to merge from the Select class drop-down list. The class appears to the right.
Click the class name in the box to the right. The class to merge from appears below in the Merged classes section.
Select the Permanent Merge checkbox to make this class merge permanent. Making the merge permanent does not sync daily with the respected user directory.
Click Save. That class is merged into your current class.