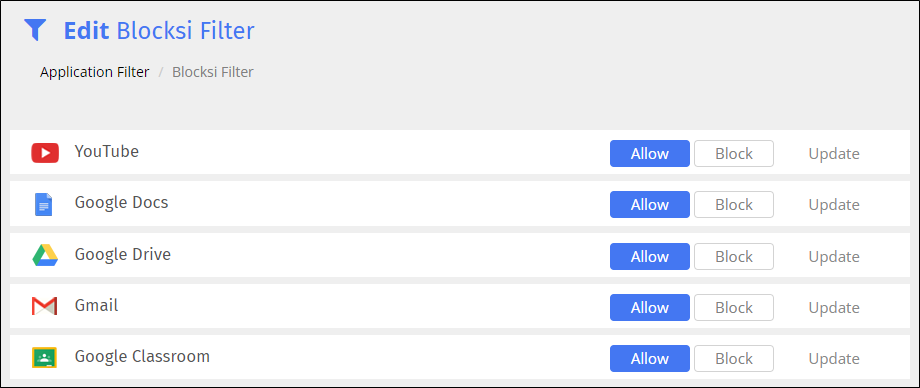
The application filter contains a list of popular applications like Gmail, YouTube, Google Docs, etc. Use this filter to control access to those applications, among others.
Use application filters to control a student’s access to YouTube, Google Docs, Google Drive, Gmail, and Google Classroom. Create as many application filters as you need.
To create an application filter
Click Filters from the Main Menu and then click Application Filter from its sub-menu. The Application Filter screen appears.

Type the name of the filter in the Enter filter name text field.
Click Create Filter + to add the filter. The new filter appears at the bottom of the list.
Click the
 icon to the right of the filter name to open the new filter. The Edit screen appears. See Blocking and Allowing Applications for information on blocking and allowing apps.
To block and allow applications
Click Filters from the Main Menu and then click Application Filter from its sub-menu. The Application Filter screen appears.

Locate the filter for which to block and allow applications, and click the
 icon to the right of the filter name. The Edit screen appears.
Click the Allow or Block button for the desired application.
Click Update for each application you allow or block. You must click the Update button for each application change. If you do not, the system saves only the ones for which you do.
Rename an application filter as needed.
To rename an application filter
Click Filters from the Main Menu and then click Application Filter from its sub-menu. The Application Filter screen appears.

Locate the filter to rename, and click the filter name. A box opens to allow you to rename the filter. Note that Blocksi added Save and Cancel buttons to the right of the name, as shown below.

Rename the filter, and click the Save button.
Modify an application filter as needed.
To modify an application filter
Click Filters from the Main Menu and then click Application Filter from its sub-menu. The Application Filter screen appears.

Locate the name of the filter to modify, and click the
 icon to the right of the filter name. The Edit screen appears.
Make the necessary changes to the filter.
Use an existing application filter to create a new one.
To duplicate an application filter
Click Filters from the Main Menu and then click Application Filter from its sub-menu. The Application Filter screen appears.

Locate the filter to duplicate, and click the
 icon. The Duplicate Filter window opens.
Type the name of the new filter in the text box.
Click OK. The duplicated filter appears at the bottom of the list. It contains the same application settings as the original filter.
Make any desired changes to the new filter and save it.
Delete application filters when you no longer need them.
To delete an application filter
Click Filters from the Main Menu and then click Application Filter from its sub-menu. The Application Filter screen appears.

Locate the filter to delete, and click the
 icon to the right of the filter. A confirmation prompt appears.
Click OK to delete the filter.