Conferencing
The Teacher Dashboard includes a conferencing feature that allows teachers to connect with students in real time. Teachers can conduct and record conferences, and review the recordings at a later time. One-on-one meetings, small group sessions in breakout rooms, and whole-class sessions with different layouts are all supported. Teachers can also start a Zoom meeting directly from their class session.
Important
A conference license must be assigned to your account before you can use the conferencing feature. Contact your administrator to have a license assigned to you.
Ensure the class session is currently active.
Click the
 button from the quick actions section of the Teacher Dashboard. A modal window opens.
Note
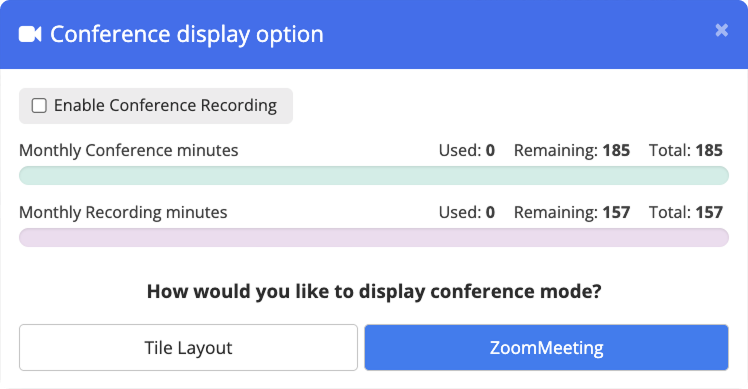
The window also displays the number of monthly conference minutes and monthly recording minutes used and available, as well as the total number of minutes for each.
Choose one of the following options:
Tile Layout - The Tile Layout conference window opens on both your dashboard and the student screen.
Zoom Meeting — Use Zoom to start a Zoom meeting for your classroom conference.
To record a conference:
When you start a conference, select the Enable conference recording checkbox at the top of the Conference display option window.
To retrieve conferences:
Go to the main Teacher Dashboard page and click the CONFERENCE RECORDINGS button. The All Conference Room Recordings window opens. This is a listing of all the conference recordings you have made for all your classes.
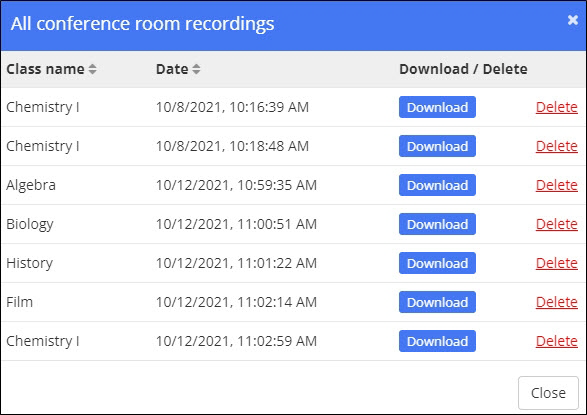
From this window, download or delete your conference room recordings.
Choose to hold a private conference with one student. To do so, create a student group with only that student in it.
While a class is in session, click the
 button. The Student Groups window opens.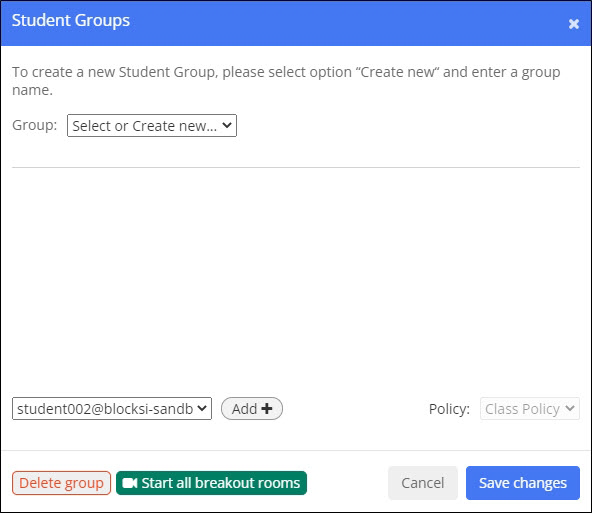
Select the group that contains the student from the Group drop-down list.
Click the Start Conference for Group button. The breakout room window appears in the lower right-hand corner of the screen, as shown below.
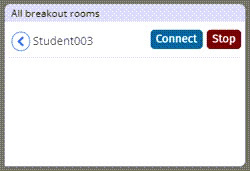
Click the Connect button. You are now in a conference with that student.
While in a conference, you can start and stop your microphone and camera, as well as mute your student’s microphone.
Note
Your student has to enable their camera. You do not have control over the student’s camera.
Tip
To end the conference, click Disconnect From Group in the lower right-hand corner of the screen. Then click Stop in the lower right-hand corner of your dashboard.
For issues with conferencing, please refer to the Conference Troubleshooting article.
Start video conferencing for one or more groups. These instances are referred to as breakout rooms.
While a class is in session, click the
button. The Student Groups window opens.Select the group of students from the Group drop-down list.
Click the Start Conference for Group button. The breakout room window appears in the lower right-hand corner of the screen, as shown below.
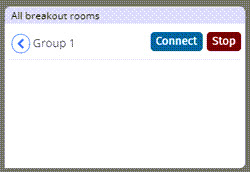
Click the Connect button. You are now in a conference with that group of students.
While in a conference, you can start and stop your microphone and camera, as well as mute your students' microphones.
Note
Your students have to enable their cameras. You do not have control over the students' cameras.
Tip
Click Stop in the lower right-hand corner of the screen. Then click Disconnect From GroupTo end the conference, click
While a class is in session, click the
button. The Student Groups window opens.Click the Start Conference for Group button. The breakout room window appears in the lower right-hand corner of the screen, as shown below.
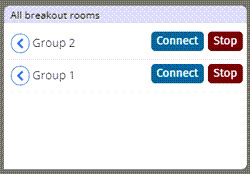
Click the Connect button for each group. You are now in a conference with all groups.
While in a conference, you can start and stop your microphone and camera, as well as mute your students' microphones.
Note
Your students have to enable their cameras. You do not have control over the students' cameras.
Tip
To end the conferences, click Disconnect From Group in the lower right-hand corner of the scree. Then click Stop in the lower right-hand corner of your dashboard.
Select Tile Layout. The Tile Layout conference window opens on both your dashboard and the student screen, as shown below.
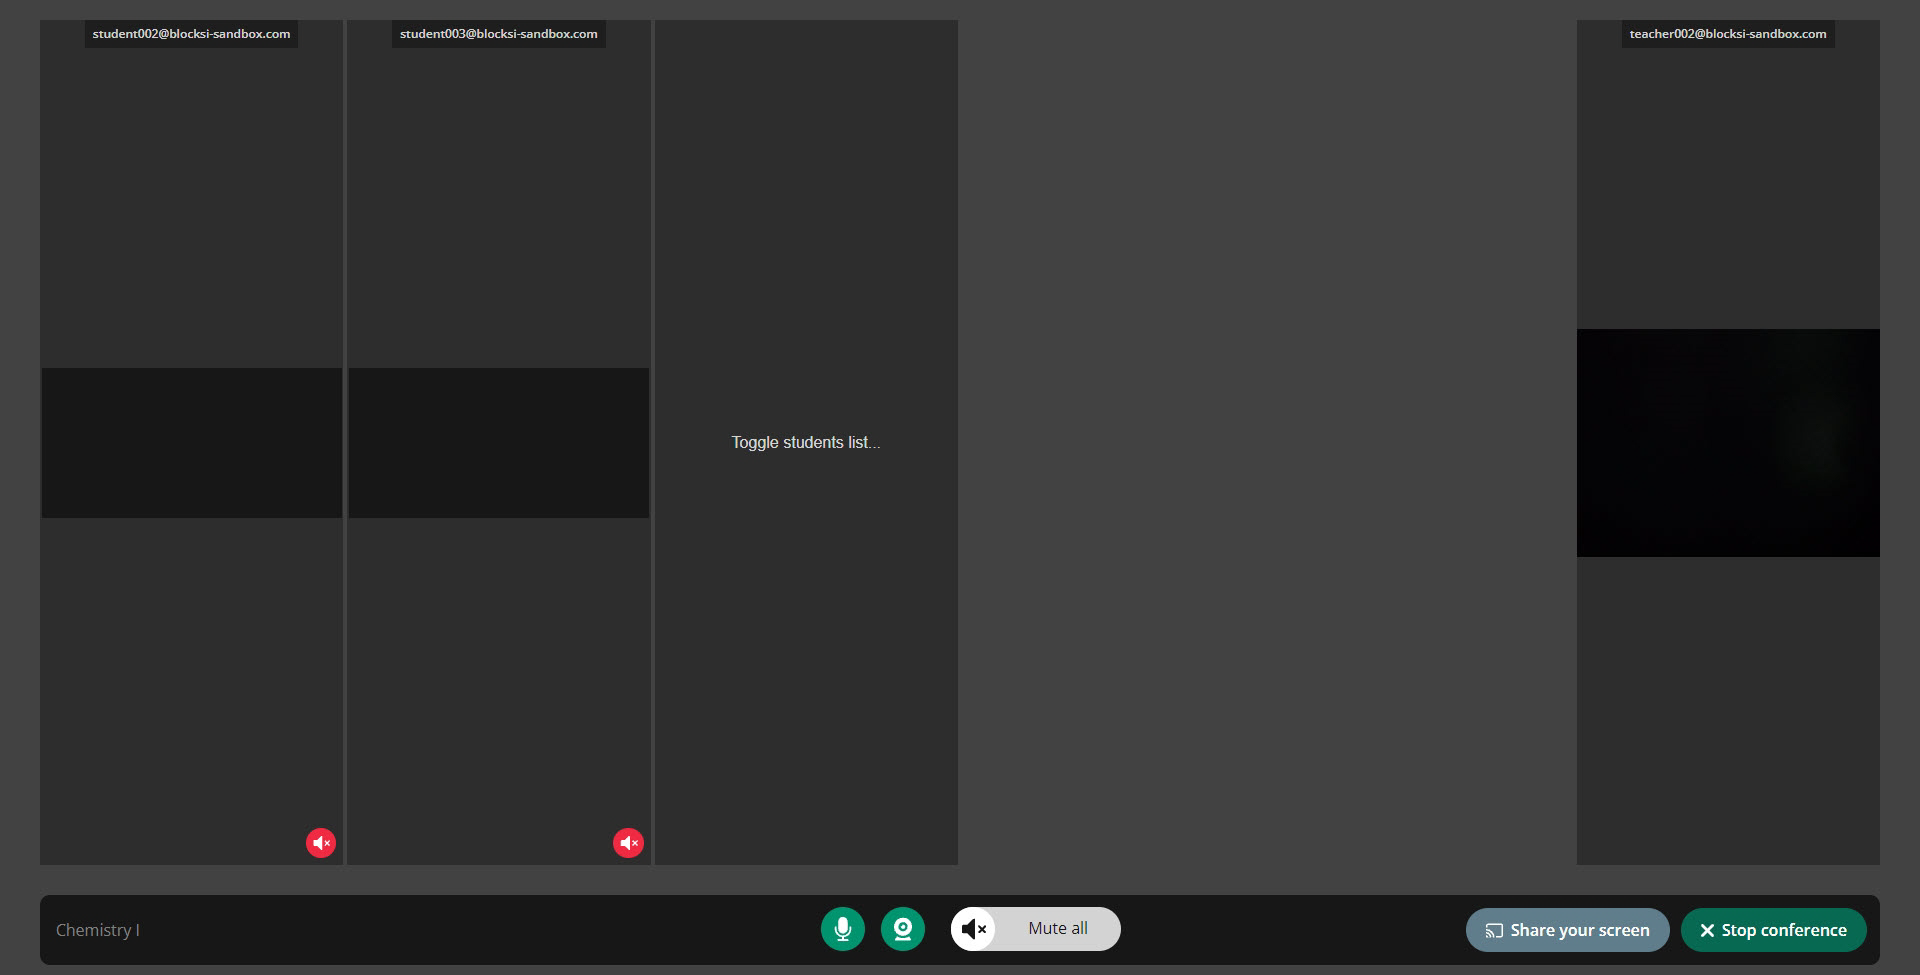
All the students in the class appear on your screen. Click Toggle students list... to see a list of the students in the class. The list appears at the far right of the screen. From this list, turn on or off each student’s video tile that appears to the left, as shown below. Note that student001’s video tile is turned off. Click that student’s tile to hide the student list to the right; click it again to restore the list.
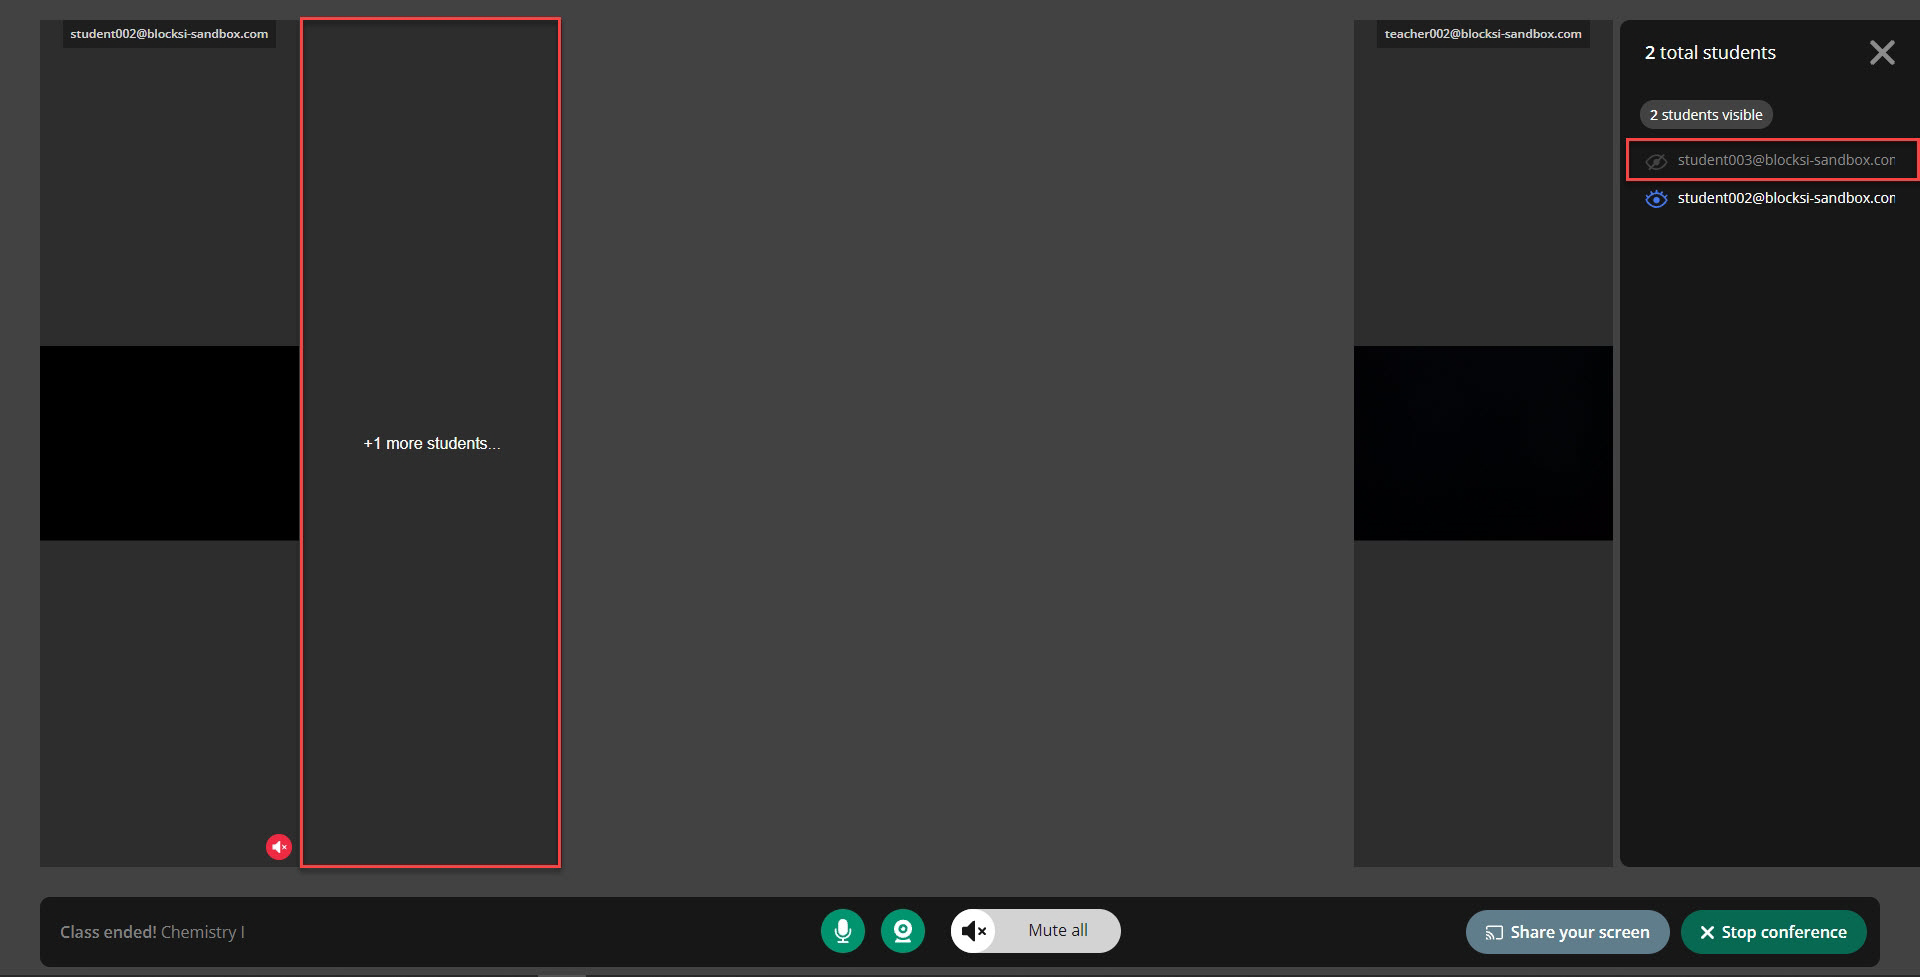
You can mute and unmute all the students with the Mute all/All muted button. You can also mute each student individually with the audio button in the lower left-hand corner of each student’s tile.
While the conference is running, you can physically see each student as well as monitor what each student is doing. You can also use the commands offered on your dashboard (i.e., push out assessments, share/enforce content, share screen, close tabs, etc.) For ease of use, you can share their screen right from the conference window.
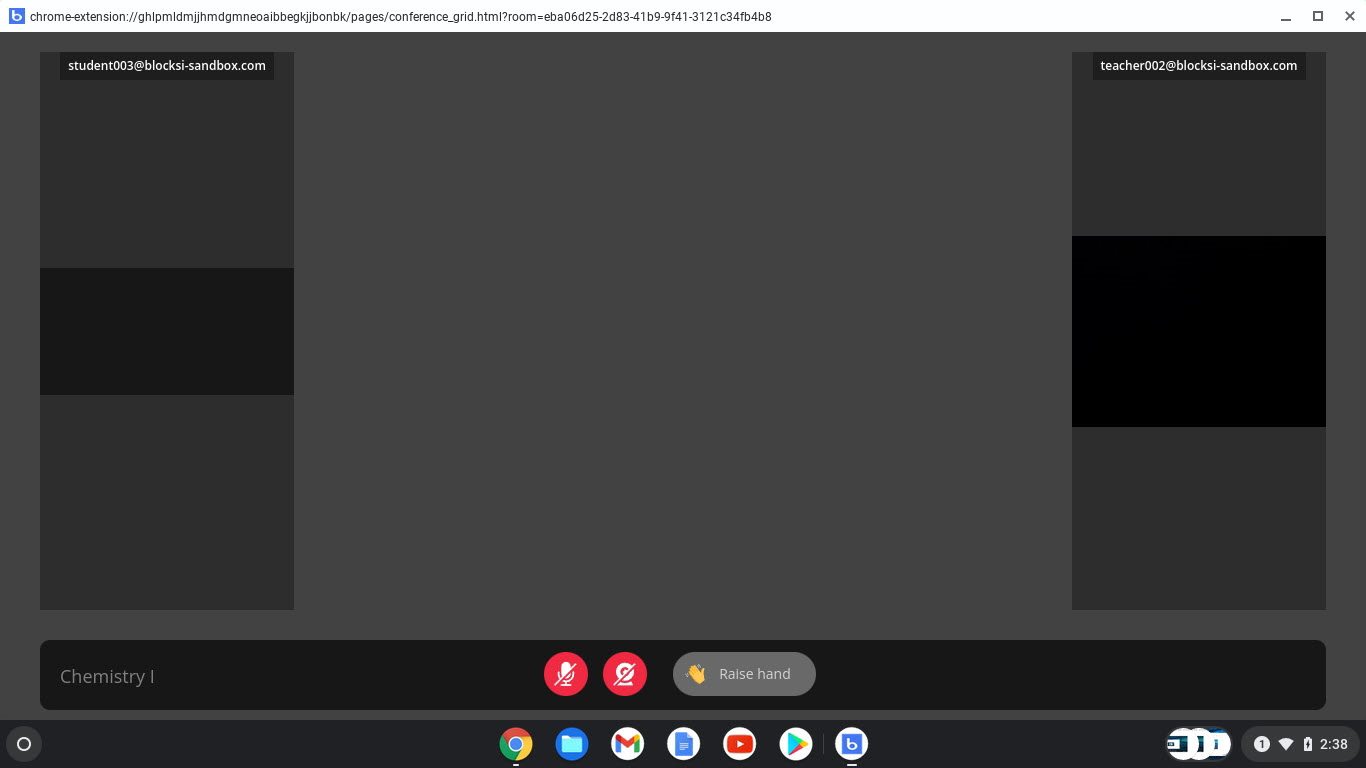
In Tile Layout, the students are able to see and hear you as well as the other students in the class. From this conference window, the students can click the red audio button and the red webcam button to turn on their audio and video. The students also have the option to raise hand, which shows on your dashboard letting you know the student has a question or is requesting to speak (if muted).
Note
To record conference sessions, select the Enable Conference Recording checkbox when starting the conference.
Use Zoom for classroom conferences. To use Zoom for classroom conferences, you must install the Blocksi Class Meetings app on your teacher account.
Note
To change the Zoom account associated with your Blocksi account, uninstall the Blocksi Class Meetings app from your personal Zoom account and reinstall it on your teacher Zoom account. Refer to the Uninstalling the Blocksi Class Meetings App section for instructions on how to uninstall the app.
From the Zoom App Marketplace
From inside a running Blocksi class
Sign in to the Zoom App Marketplace at marketplace.zoom.us and search for the Blocksi Class Meetings app.
Click Install. You are taken to the Blocksi teacher sign-in page or directly to your class, depending on whether you are already signed in.
Select a class from your dashboard and start the class session.
Click the
button from the quick actions section of the Teacher Dashboard. The Conference Display Option window opens.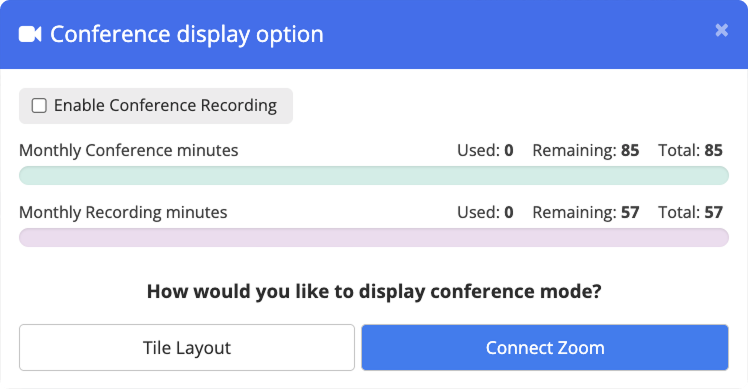
Click Connect Zoom to begin the installation process. You are taken to the Zoom sign-in page on the Zoom App Marketplace website.
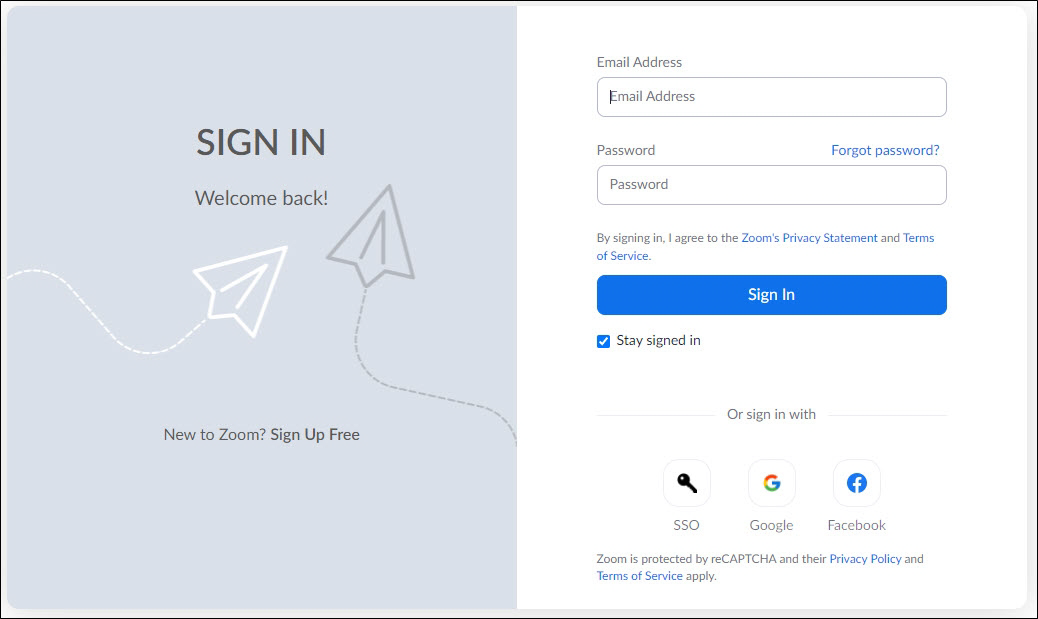
Enter your email address and password in the appropriate fields and click Sign In. You are taken to the Install Blocksi Class Meetings App page.
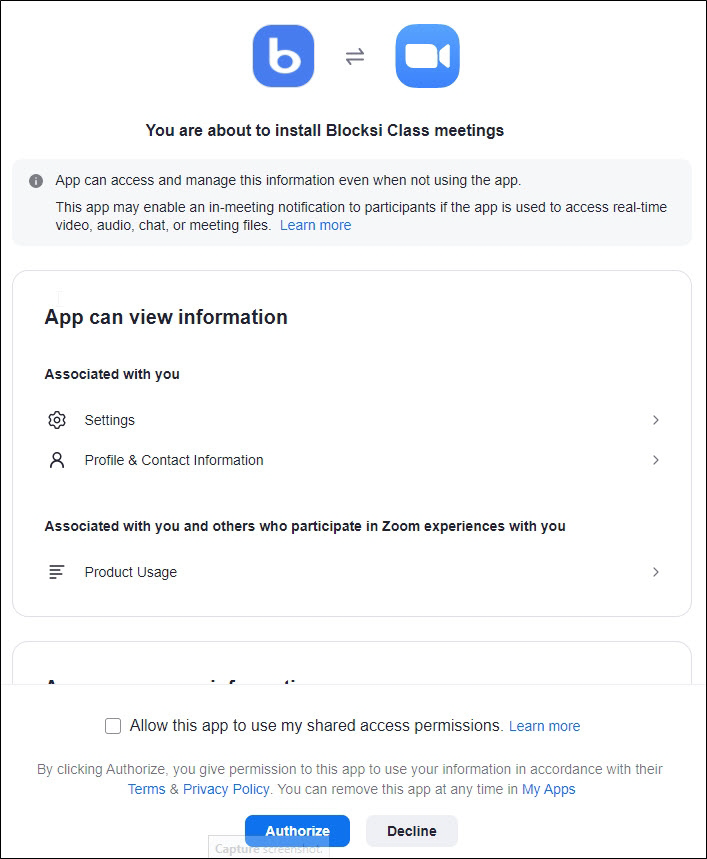
Click Authorize. You are returned to your dashboard. The Connect Zoom button in the Conference Display Option window has now changed to Zoom Meeting, confirming that the installation was successful.
Note
The Connect Zoom button in the Conference Display Option window has now changed to Zoom Meeting, confirming that the installation was successful.
Inside a running Blocksi class, you can start a Zoom conference directly from your Teacher Dashboard.
Select a class from your dashboard and start the class session.
Click the
button from the quick actions section of the Teacher Dashboard. The Conference Display Option window opens.Click Zoom Meeting. A Zoom meeting is created using the credentials associated with your account. A Zoom window opens on the screens of all students in the class.
Note
Students must have an internet browser window open on their Chromebook to receive the Zoom meeting prompt. If Zoom does not open automatically, the student must contact their administrator for access to Zoom.
Student Status | Experience |
|---|---|
Zoom installed and logged in | The student is prompted to open their Zoom app and join the meeting. |
Zoom installed but not logged in | The student can enter any name or sign in with their Zoom account to join the meeting. |
Zoom not installed | The student clicks Launch Meeting. A Zoom installation prompt appears. The student clicks Cancel, then clicks Launch Meeting a second time and is prompted to join the meeting from their browser. |
Late-Arriving Students
When a student arrives late and a Zoom meeting is already in progress, you will need to share the Zoom meeting URL with them via message. To retrieve and share the meeting URL:
Click the Meeting Information icon (green shield with checkmark) in the upper left corner of the Zoom meeting window.
Click Copy Link below the Invite Link to copy the URL to your clipboard.
Return to the class and send a message to the late student, including the copied URL.
The student clicks the URL link in the message. You will receive a prompt to admit the student to the meeting.
Click Admit.
You may need to uninstall the Blocksi Class Meetings app from your account if you want to change the Zoom account associated with your Blocksi account.
Important
Uninstalling the app removes it from your account only - it does not uninstall the app itself.
Sign in to the Zoom App Marketplace at marketplace.zoom.us.
Click Manage > Installed Apps or search for the Blocksi Class Meetings app.
Locate the Blocksi Class Meetings app and click Uninstall to the right. A confirmation prompt appears.
Select the reason for uninstalling and click Uninstall.