Hall Pass
The Blocksi Hall Pass is a digital hall pass management system designed to enhance student safety, reduce classroom disruptions, and provide accountability by tracking student movements within school facilities.
Teachers can enable the Hall Pass feature for a class, create Hall Passes for students, manage incoming requests, and monitor active Hall Passes.
Navigate to the class in which you want to enable Hall Pass by clicking the class tile.
Click the Student Options button. The Enable Student Options window opens.
Check the Enable Hall Pass Feature
 option, then click Confirm to save your changes.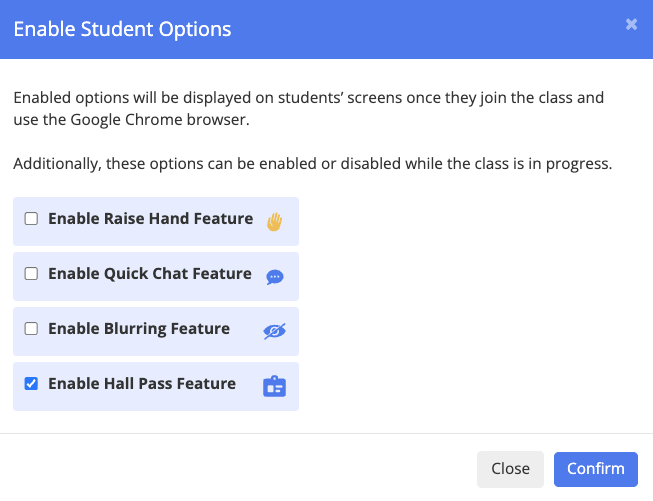
A Hall Pass can be issued for one of six available locations:
Bathroom |
|
Water break |
|
Nurse |
|
Counselor |
|
Office |
|
Library |
|


Hall Passes can be created in one of four ways: by a student, by a teacher, by an administrator, or by a delegate.
Students can create a Hall Pass request from their device. The request button is added to the student's screen when the Hall Pass feature is enabled by the teacher and when the class is running.
Click the
 button on the student's screen. By default, the floating button is located in the bottom right. A menu appears once the button is clicked.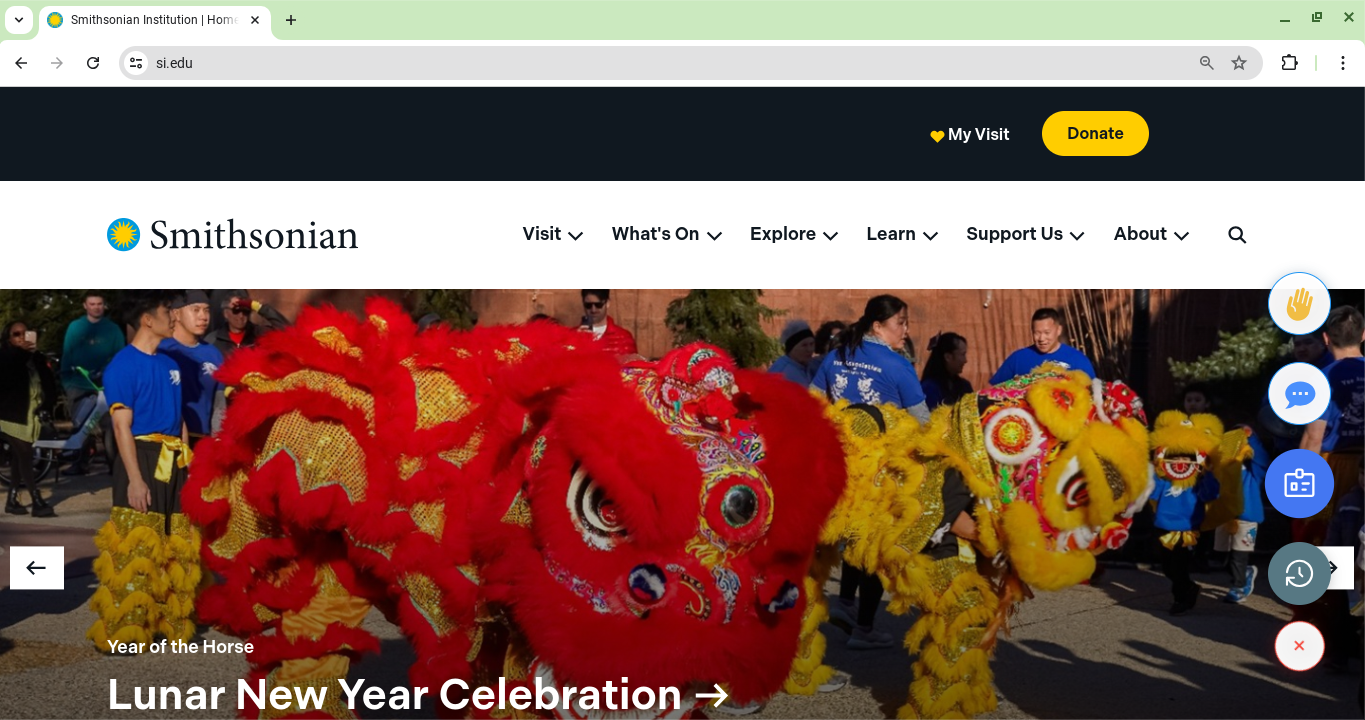
Note
The student must be on a page that is not the default Chrome page in order for the plus button to be visible.
In the menu, click the
 button to create a Hall Pass request. The Hall Pass Request window opens.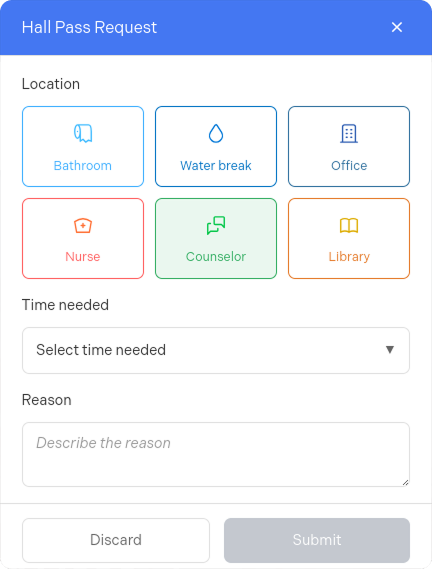
Select the Location from the given options.
Select the Time needed from the drop-down menu. While the default and maximum durations are set by your administrator, students can also manually input a specific time.
Students can also describe the Reason why they require a Hall Pass.
Click Submit to send the request. Once submitted, the Hall Pass has to be approved by either a teacher, an administrator, or a delegate.
Note
A submitted request can be viewed by clicking the
button. From there, it can also be deleted or edited as needed.
Teachers can create a Hall Pass for every student in the current class.
Important
Administrators and delegates can create rules that limit or disable creating and approving Hall Passes for certain students. In this case, reach out to your administrator for assistance.
Click the
 button at the top of your Teacher Dashboard. The Create Hall Pass window opens.
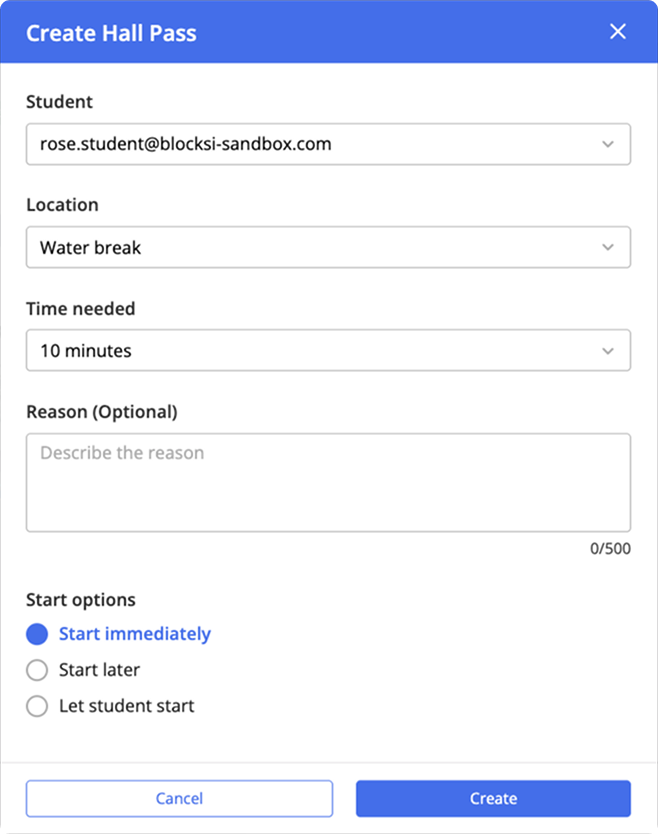
Select the Student you want to create a Hall Pass for.
Choose the Hall Pass Location from the drop-down menu.
Select the Time needed.
Note
A Hall Pass can be ended prematurely either by a student, a teacher, an administrator, or a delegate.
Describe why a Hall Pass is required in the Reason field.
Choose from the given Start options:
Start immediately - The Hall Pass starts instantly.
Start later - Schedule a time for the Hall Pass to start (in 1:00 minute, 3:00 minutes, or 5:00 minutes).
Let student start - Lets the student decide when to start the Hall Pass; you will be prompted to select an auto-start time.
Click Create.
Teachers can manage Hall Pass requests using the Hall Pass Heads-up Display in their class on the Teacher Dashboard.
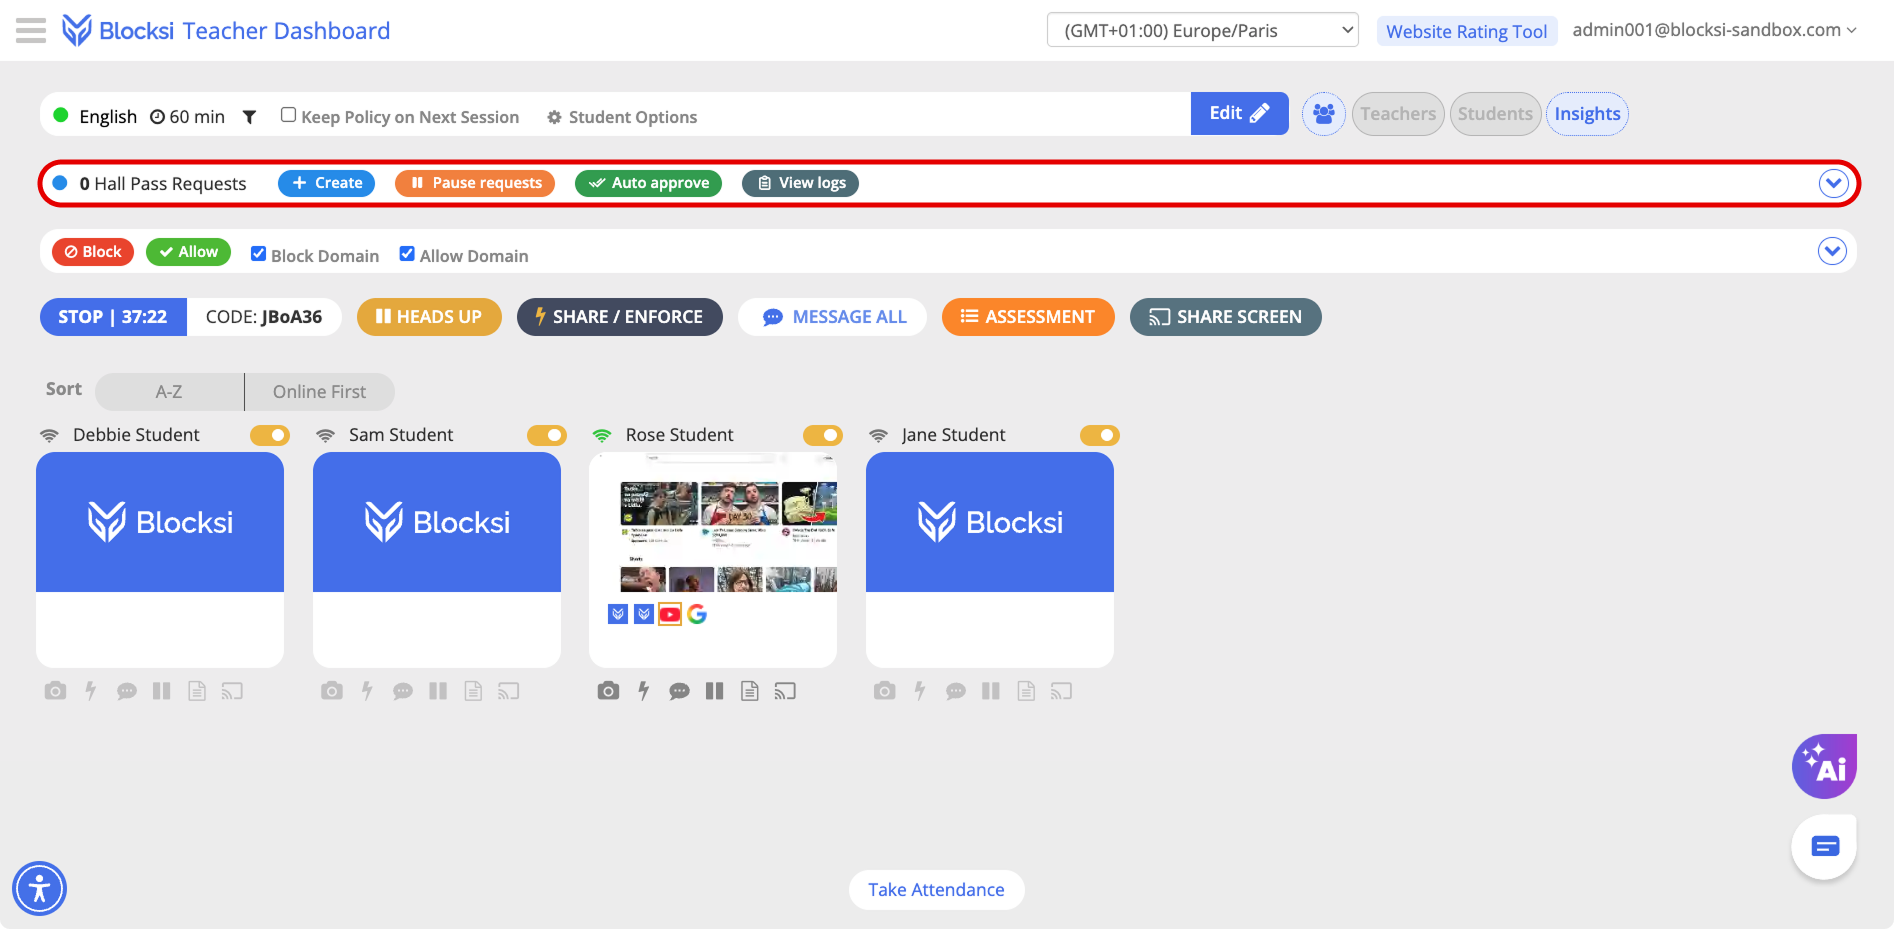
The Hall Pass Heads-up Display contains the following buttons:
| Create | Creates a Hall Pass for a student in the current class. Refer to Creating a Hall Pass From the Teacher Dashboard to learn how. |
| Pause Requests | Temporarily stops students from submitting new requests. Especially useful during assignments. While requests are paused, the button changes to Resume Requests |
| Auto Approve | Automatically approves all Hall Pass requests. While auto-approval is active, the button changes to Manually Approve |
| View Logs | Opens the Hall Pass logs for the current class. |
| Hall Pass Actions | Expands the request management table. |




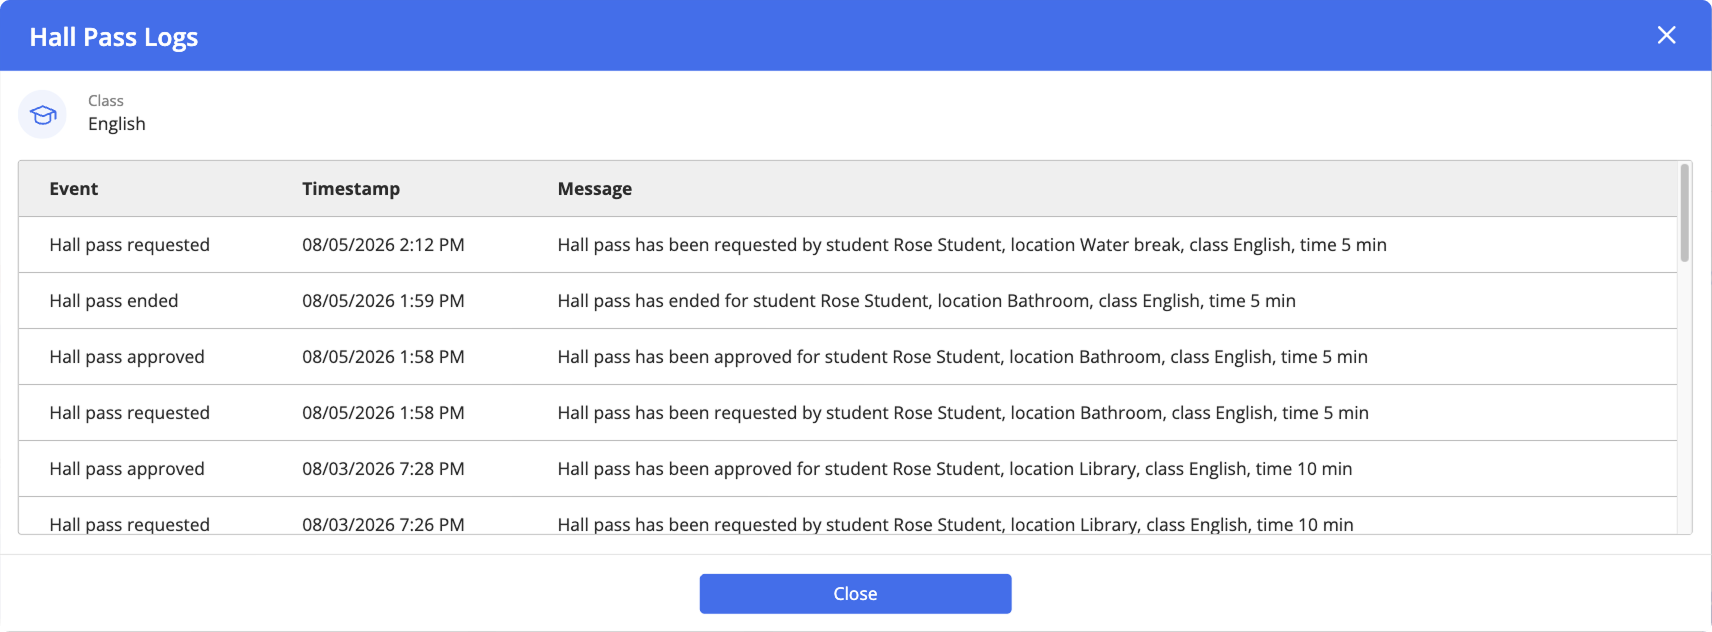
Teachers can view Hall Pass logs by clicking the  button in the Hall Pass Heads-up Display.
The logs section includes all Hall Pass logs created in the current class. Logs include information about the following:
Event
Timestamp
Message with Hall Pass details
You can expand the request management table by clicking the  at the far right.
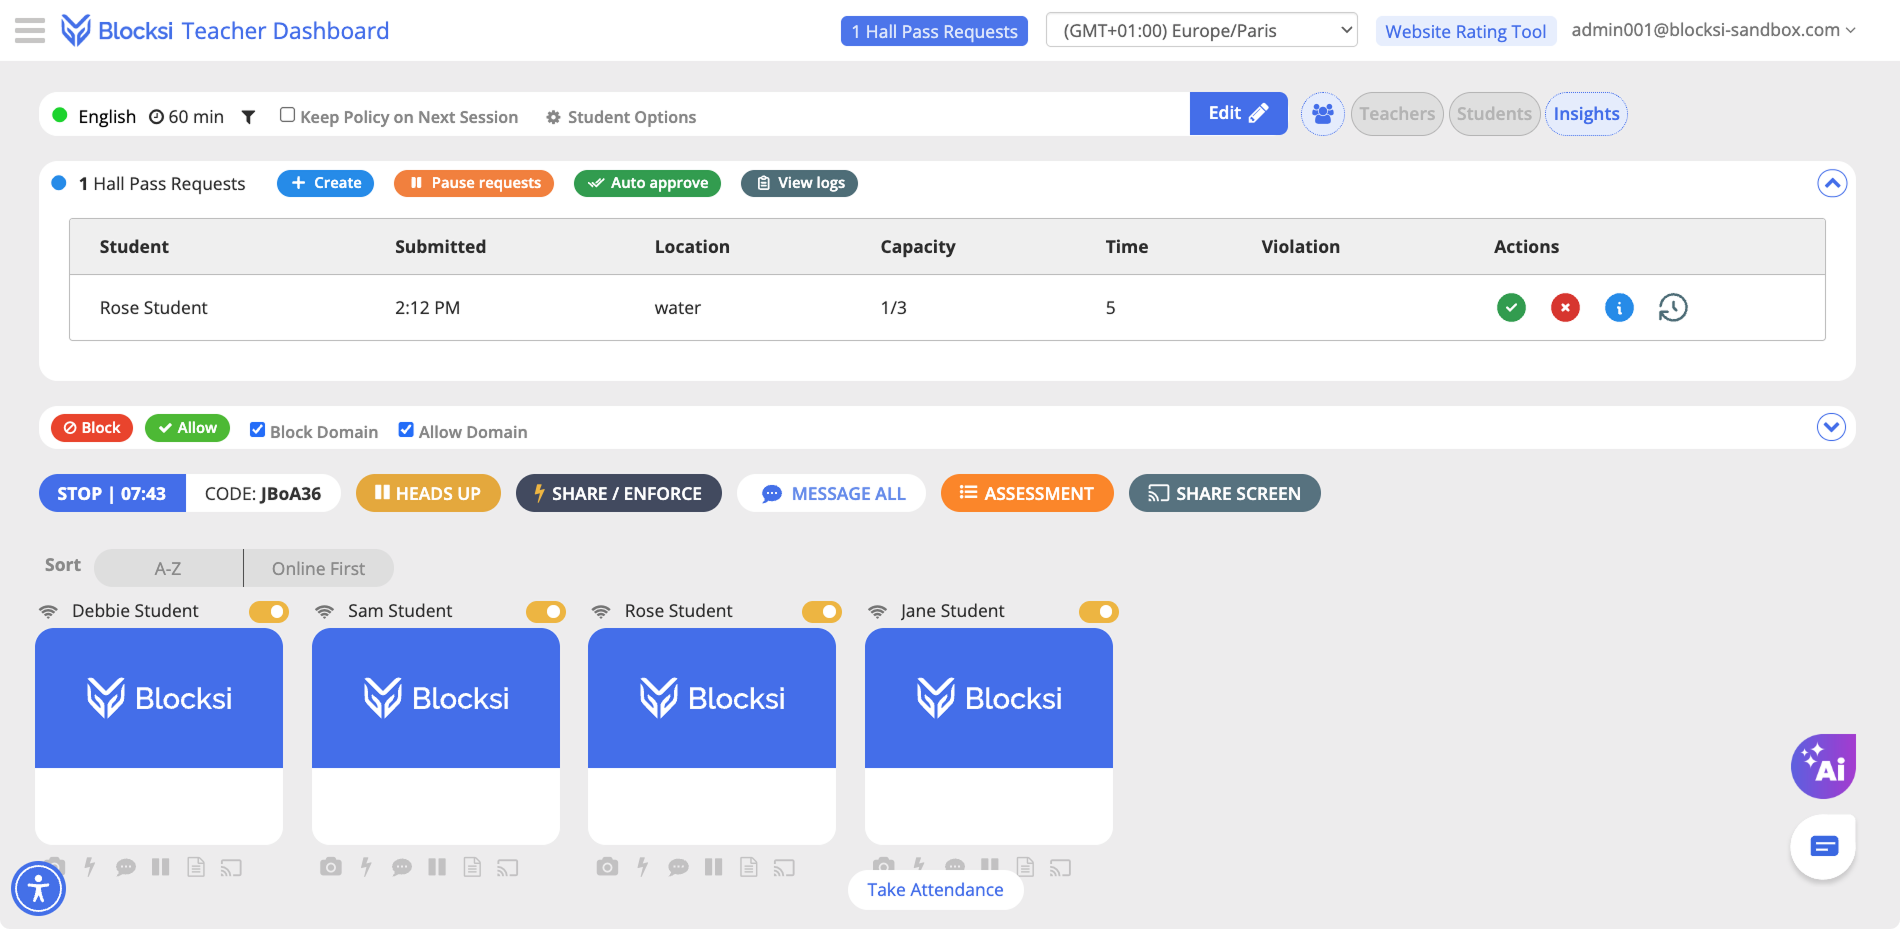
Student - The student who submitted the request.
Submitted - The exact time the Hall Pass was requested.
Location - The requested destination of the Hall Pass.
Capacity - The number of free spots remaining at the requested destination.
Time - The duration requested by the student.
Violation - Shows whether the request violates a rule set by an administrator or a delegate. Depending on the rule settings, a request with a violation tag may be rejected automatically.
Actions - Gives teachers the ability to quickly manage Hall Pass requests.

Approve
Approve student's Hall Pass request.

Deny
Deny student's Hall Pass request.

Info
See information about a Hall Pass request. The following information is shown: Student, Location, Submitted, Requested time, and Reason.
Teachers can approve or deny requests from the details window, as well as adjust the start time and add a comment.

History
Opens a history window that shows a table of all requested Hall Passes for the selected student in the current class.
Note
When a teacher receives a Hall Pass request, a notification is shown in the Teacher Dashboard header. This notification displays the number of currently pending requests. When a notification is clicked, the request management table expands and the notification disappears.
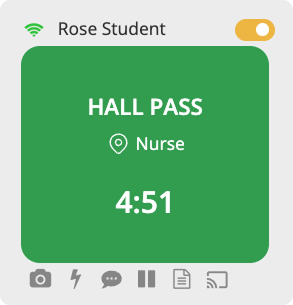
When a Hall Pass is active, the student's tile turns green and displays a live countdown along with the Hall Pass location.
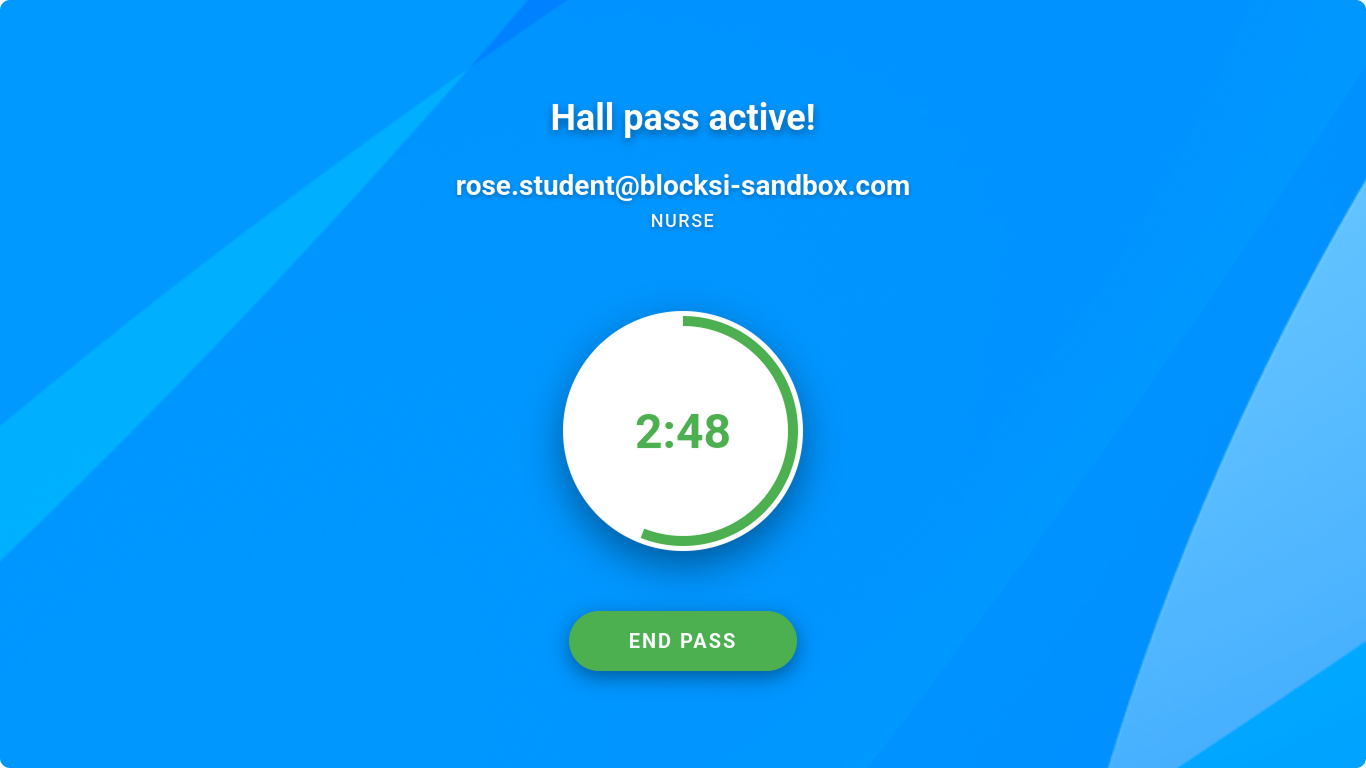
The student's screen locks and displays an overlay while the Hall Pass is active.
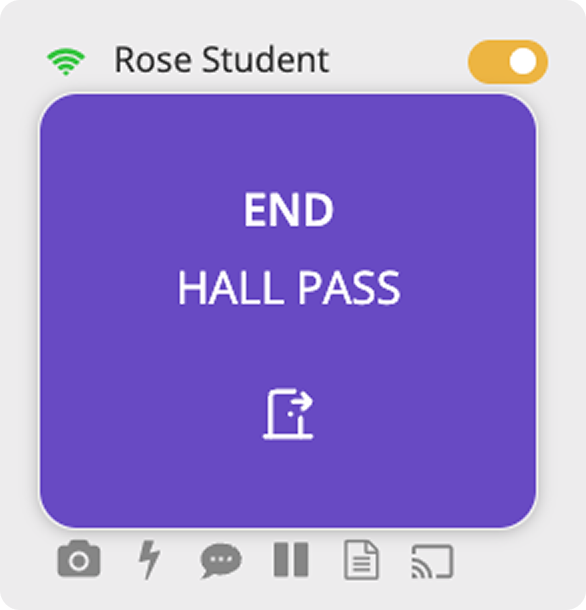
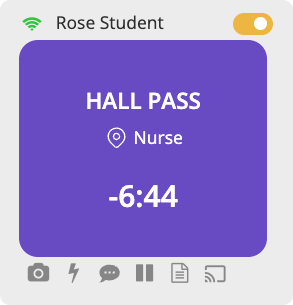
If the student exceeds the Hall Pass duration, the tile turns purple and the countdown continues, now counting the exceeded time.
A Hall Pass can be ended prematurely by a student, a teacher, an administrator, or a delegate. To end it yourself, hover over the tile of a student with an active Hall Pass and click End Hall Pass.