Delegates set up teacher accounts here.
Add as many teacher accounts as you need.
To add a teacher account
Click Settings from the Main Menu and then click Teacher Accounts from its sub-menu. The Teacher Accounts screen appears.
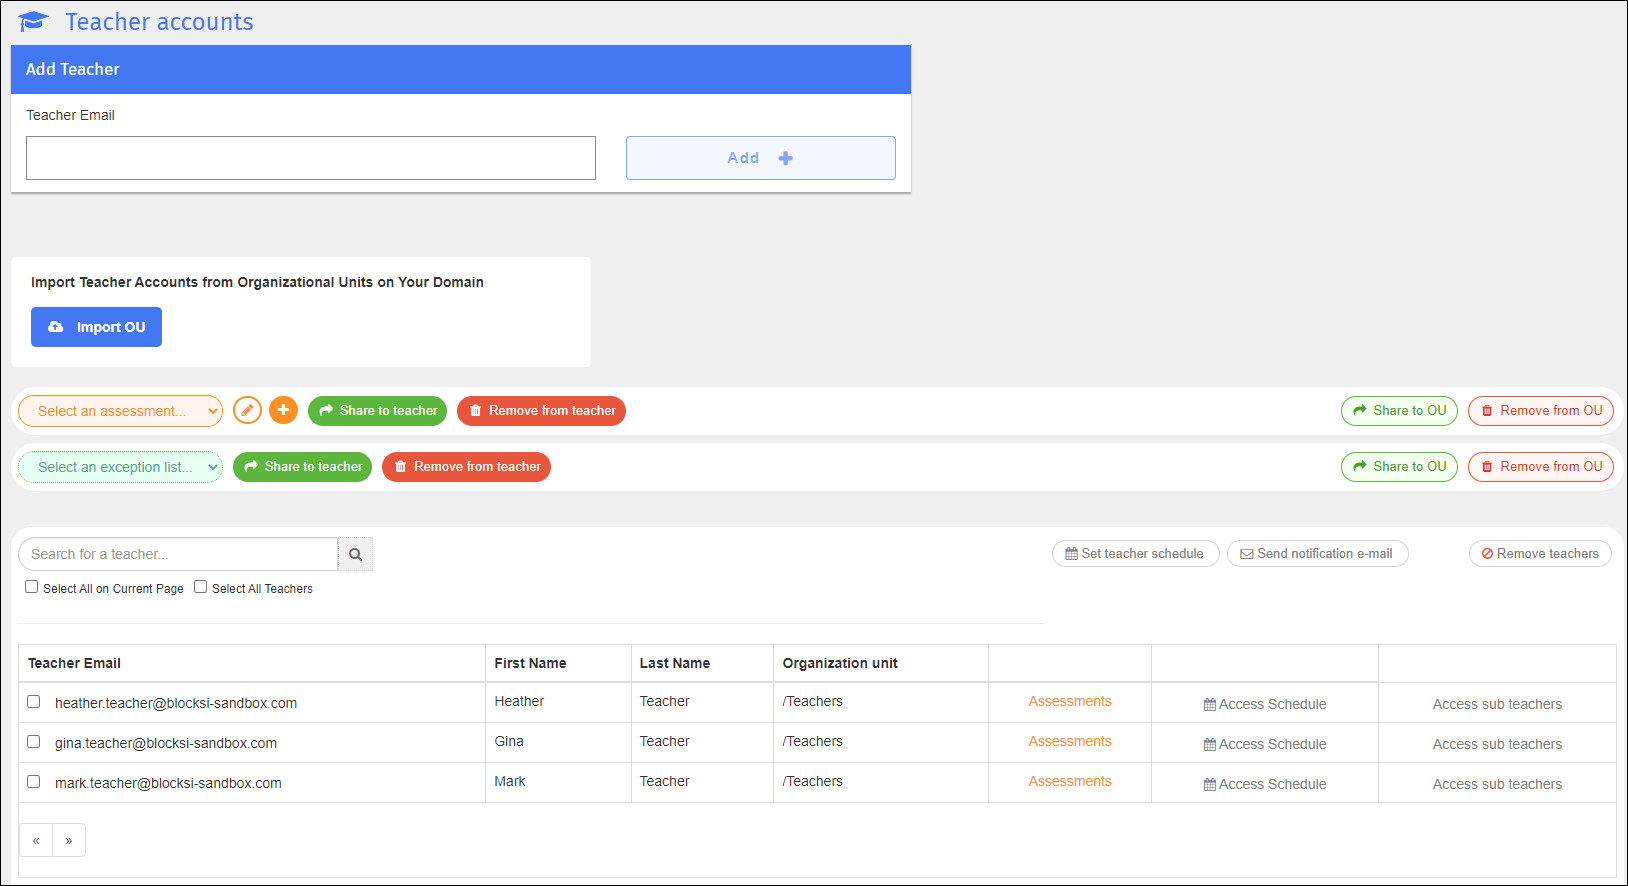
Type the email address of the teacher account to add in the Teacher Email text box in the Add Teacher section.
Click Add + to add the teacher account. The new teacher account appears in the list.
Import teacher accounts from an organizational unit (OU).
To import teacher accounts
Click Settings from the Main Menu and then click Teacher Accounts from its sub-menu. The Teacher Accounts screen appears.
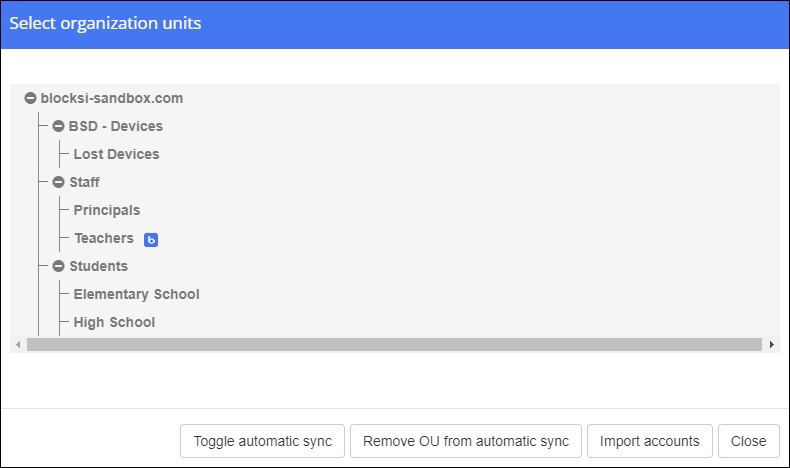
Click the Import OU button. The Select organizational units dialog appears.
Note
When importing teachers from Clever, follow the prompts in the Clever portal, and click the Clever sync button again in Blocksi to add the teachers.
Navigate to the desired OU and click Import accounts. The teacher accounts from the selected OU are imported into the listing.
Create new assessments and share them with teachers or OUs.
Add as many new assessments for your teachers as you need. This provides teachers with easy access to any assessments you have created and shared with them on their Teacher Dashboards.
To create a new assessment
Click Settings from the Main Menu and then click Teacher Accounts from its sub-menu. The Teacher Accounts screen appears.

Click the
 icon. An edit window opens.
Type the name of the new assessment in the Enter name... text box.
Click Create Assessment. The new assessment name appears in the Select an assessment... drop-down list.
Select the new assessment and click the
 icon. The assessment edit window opens.
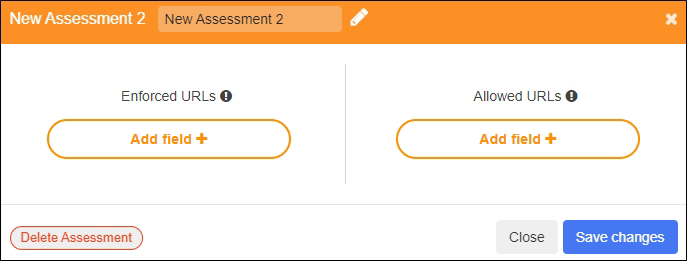
Click the edit icon to the right of the assessment name to change it, if desired.
Click the Add field + button in the Enforced URLs section, and type the URL in the text box that appears. Click the Add field + button again to add more URLs.
Note
Enforced URLs determine which sites are pushed out to the students’ screens.
Click the Add field + button in the Allowed URLs section, and type the URL in the text box that appears. Click the Add field + button again to add more URLs.
Note
Allowed URLs determine which websites the students are allowed to access; however, they not pushed out to the students.
Tip
The URL that you type in the Allowed URLs section must contain wildcards to allow access to the entire domain of the URL you type in the Enforced URLs section. For example, if you type www.purple.com in the Enforced URLs section, then you must type *purple.com* in the Allowed URLs section.
When you have finished adding all the URLs, click Save Changes.
Add modify assessments as needed.
To modify an assessment
Click Settings from the Main Menu and then click Teacher Accounts from its sub-menu. The Teacher Accounts screen appears.

Select the name of the assessment to modify in the Select an assessment... drop-down list.
Click the
 icon. The assessment edit window opens.
Make the necessary changes to the assessment.
When you have finished making your changes, click Save Changes.
Share an assessment to a teacher account.
To share an assessment to a teacher account
Click Settings from the Main Menu and then click Teacher Accounts from its sub-menu. The Teacher Accounts screen appears.

Select the desired assessment from the Select an assessment ... drop-down list.
Select the checkboxes to the right of the teachers to whom to share the assessment .
Click the Share to Teacher button to the right. The selected assessment is shared to the teacher(s).
Remove an assessment from a teacher account at any time.
To remove an assessment from a teacher account
Click Settings from the Main Menu and then click Teacher Accounts from its sub-menu. The Teacher Accounts screen appears.

Select the desired assessment from the Select an assessment... drop-down list.
Select the checkboxes to the right of the teachers from whom to remove the assessment.
Click the Remove from Teacher button to the right. The selected assessment is removed from the teacher(s).
Tip
Click the Assessments link to the right of the teacher email to remove the assessment from only one teacher. Click the down arrow to the right of the drop-down list and select the assessment to remove. Click Remove to the right. The selected assessment is removed from that teacher.
Share an assessment to an organizational unit (OU).
To share an assessment to an OU
Click Settings from the Main Menu and then click Teacher Accounts from its sub-menu. The Teacher Accounts screen appears.

Select the desired assessment from the Select an assessment... drop-down list.
Click the Share to OU button to the right. The Select Organizational Units window opens.
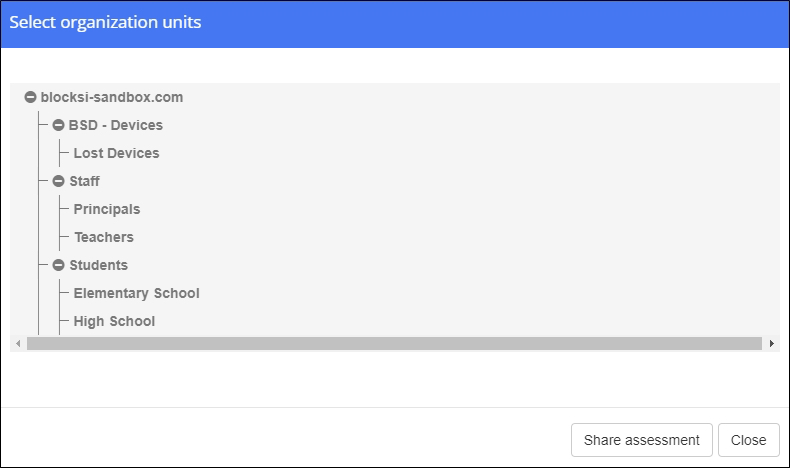
Navigate to the OU to which to share the assessment and click Share Assessment . The selected assessment is shared to the OU.
Remove an assessment from an organizational unit (OU) at any time.
To remove an assessment from an OU
Click Settings from the Main Menu and then click Teacher Accounts from its sub-menu. The Teacher Accounts screen appears.

Select the desired assessment from the Select an assessment ... drop-down list.
Click the Remove from OU button to the right. The Select Organizational Units window opens.
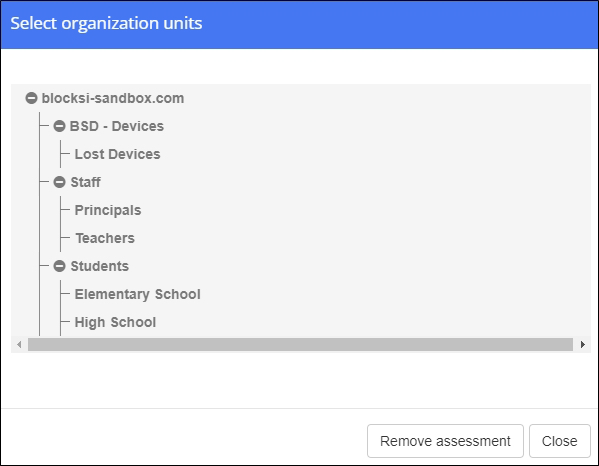
Navigate to the OU from which to remove the assessment and click Remove Assessment . The selected assessment is removed from the OU.
Administrators, delegates, and teachers can add substitute teachers. Substitute teachers are assigned to teachers and each teacher is limited to three substitutes.
Substitutes have access only to what their teachers allow.
Note
Substitute teachers cannot be added to a class while a class is in session.
Add up to three substitute teachers for each teacher.
To add a substitute teacher
Click Settings from the Main Menu and then click Teacher Accounts from its sub-menu. The Teacher Accounts screen appears.
Locate the teacher for which to add a substitute teacher.
Click the Access Sub Teachers link to the far right of the teacher's username. The teacher's sub teachers list window opens.
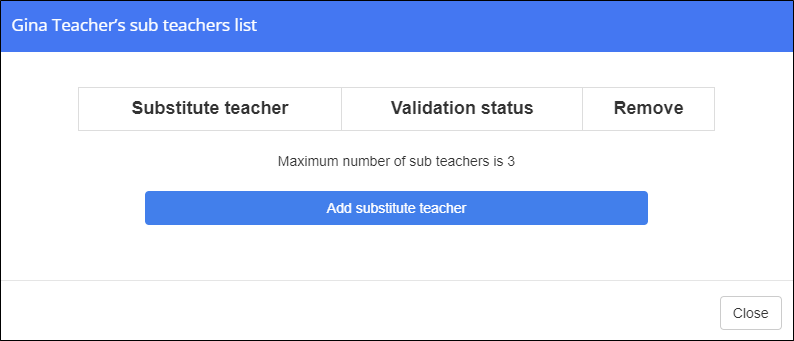
Click the Add Substitute Teacher button. The following window opens.
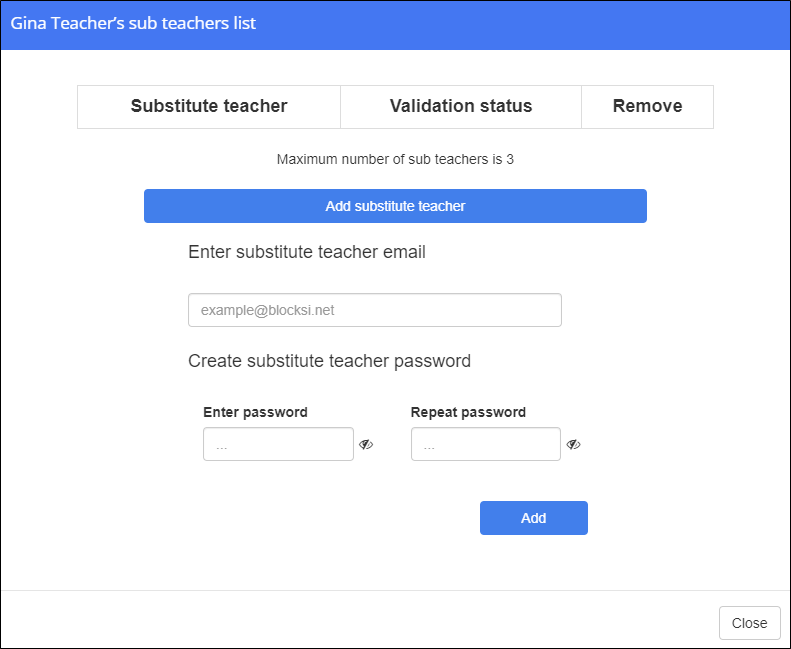
Type the substitute teacher's email address in the text box.
Type a password that the substitute will use to sign in to the dashboard and repeat it in the text box to the right.
Click Add to add the substitute teacher. A validation prompt appears at the top of the window.
Click the red AWAITING VALIDATION status. It changes to a green VALIDATED status. The substitute teacher can now sign in to the Teacher Dashboard.
Before substitute teachers can sign in to the Teacher Dashboard, they must be validated by either the Admin or Delegate.
To validate a substitute teacher
Click Settings from the Main Menu and then click Teacher Accounts from its sub-menu. The Teacher Accounts screen appears.
Locate the teacher with the substitute to validate.
Click the Access Sub Teachers link to the far right of the teacher's username. The teacher's sub teachers list window opens.
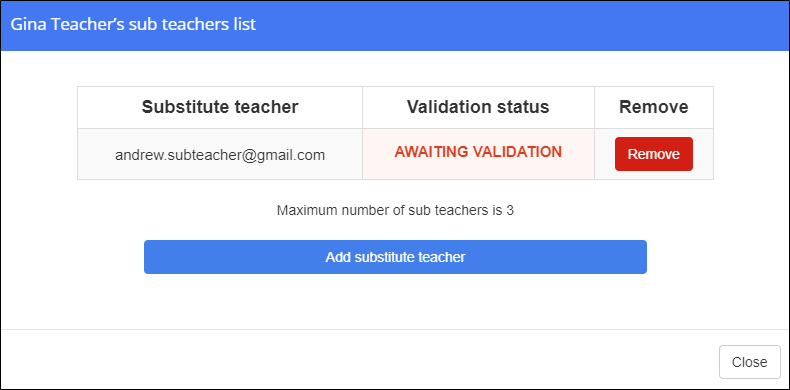
Click the red AWAITING VALIDATION status. It changes to a green VALIDATED status. The substitute teacher can now sign in to the Teacher Dashboard.
After you add and validate a substitute teacher, you need to provide them with the following instructions for accessing the Teacher Dashboard.
To sign in as a substitute teacher
Go to blocksi.net and click Sign in as Teacher. The following sign in page appears.
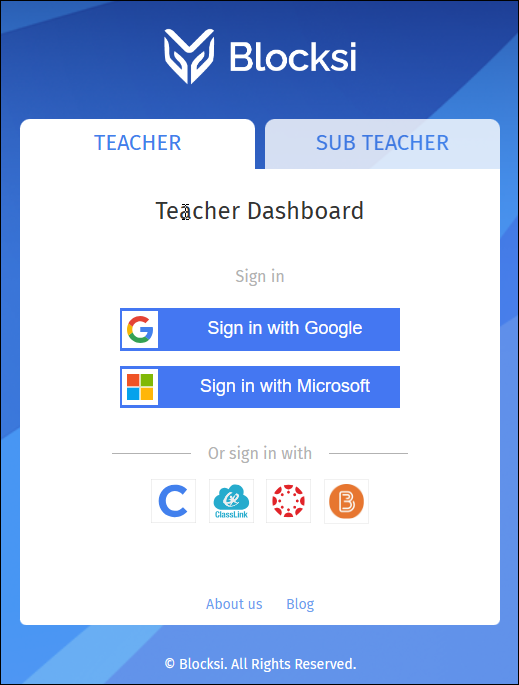
Click the SUB TEACHER tab. The Substitute Teacher sign in page appears.
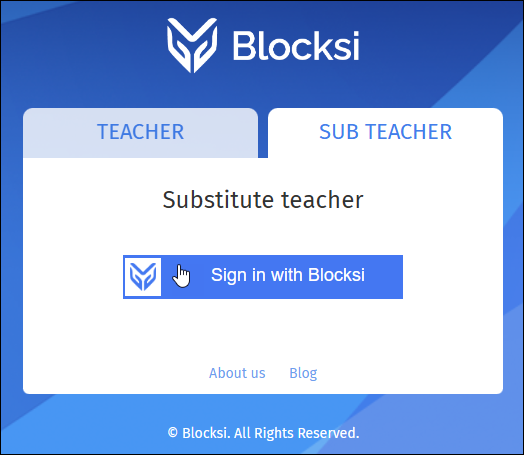
Click Sign in with Blocksi. The SUBSTITUTE TEACHER LOGIN page appears.
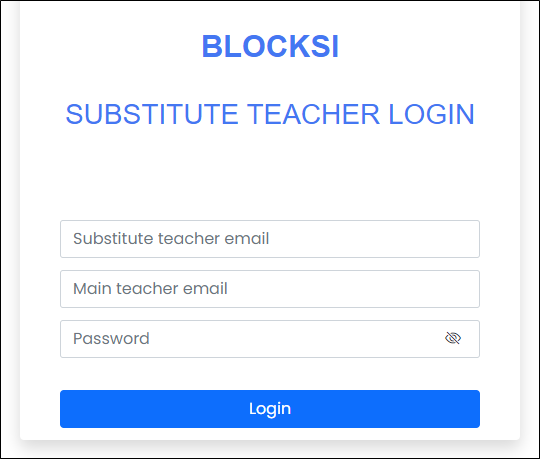
Type your email address in the Substitute teacher email text box.
Type your main teacher's email address in the Main teacher email text box.
Type your password in the Password text box.
Click Login. You are taken to the Teacher Dashboard.
Share an exception list to a teacher account.
To share an exception list to a teacher account
Click Settings from the Main Menu and then click Teacher Accounts from its sub-menu. The Teacher Accounts screen appears.

Select the desired policy from the Select an exception list... drop-down list.
Select the checkboxes to the right of the teachers to whom to share the exception list.
Click the Share to Teacher button to the right. The selected exception list is shared to the teacher(s).
Remove an exception list from a teacher account at any time.
To remove an exception list from a teacher account
Click Settings from the Main Menu and then click Teacher Accounts from its sub-menu. The Teacher Accounts screen appears.

Select the desired exception list from the Select an exception list... drop-down list.
Select the checkboxes to the right of the teachers from whom to remove the exception list.
Click the Remove from Teacher button to the right. The selected exception list is removed from the teacher(s).
Tip
Click the Exception Lists link to the right of the teacher email to remove the exception list from only one teacher. Click the down arrow to the right of the drop-down list and select the exception list to remove. Click Remove to the right. The selected exception list is removed from that teacher.
Share an exception list to an organizational unit (OU).
To share an exception list to an OU
Click Settings from the Main Menu and then click Teacher Accounts from its sub-menu. The Teacher Accounts screen appears.

Select the desired exception list from the Select an exception list... drop-down list.
Click the Share to OU button to the right. The Select Organizational Units window opens.
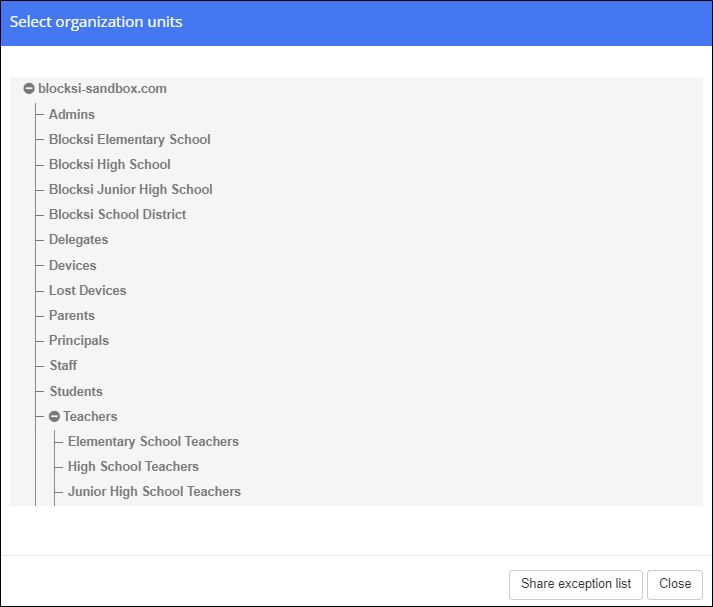
Navigate to the OU to which to share the exception list and click Share Exception List. The selected exception list is shared to the OU.
Remove an exception list from an organizational unit (OU) at any time.
To remove an exception list from an OU
Click Settings from the Main Menu and then click Teacher Accounts from its sub-menu. The Teacher Accounts screen appears.

Select the desired exception list from the Select an exception list... drop-down list.
Click the Remove from OU button to the right. The Select Organizational Units window opens.
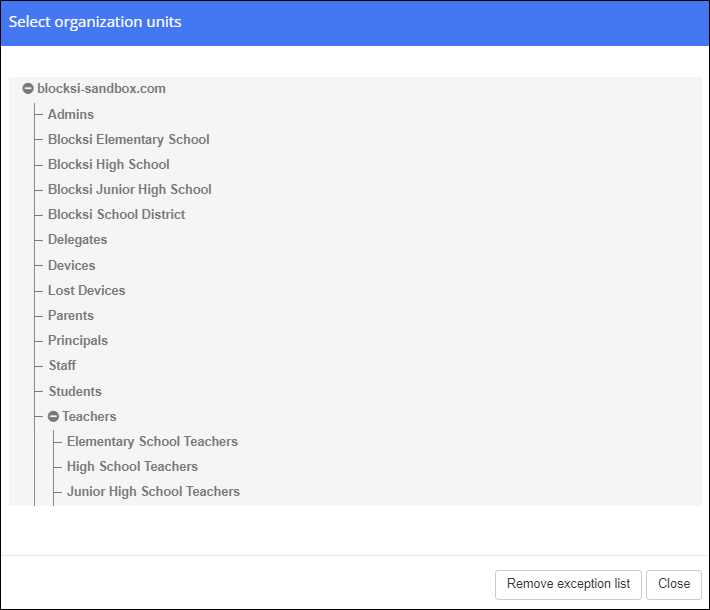
Navigate to the OU from which to remove the exception list and click Remove Exception List. The selected exception list is removed from the OU.
Send a notification email to a teacher account to inform them that they now have access to the Teacher Dashboard.
To send a notification email
Click Settings from the Main Menu and then click Teacher Accounts from its sub-menu. The Teacher Accounts screen appears.

Select the checkbox to the left of the teacher account to which to send the notification email.
Click the Send Notification Email button to send the notification. A notification email is sent to the selected teacher account.
Set the time during which teachers can access their dashboards to see student screens.
To set teacher schedules
Click Settings from the Main Menu and then click Teacher Accounts from its sub-menu. The Teacher Accounts screen appears.

Click the Set Teacher Schedule button. The Teacher schedule window opens.
Select the Turn on Schedule checkbox to enable this feature.
Select the day on which to allow teachers to access their classes from the Day drop-down list.
Click in the From field. A time selector window opens. The time selector uses military time.
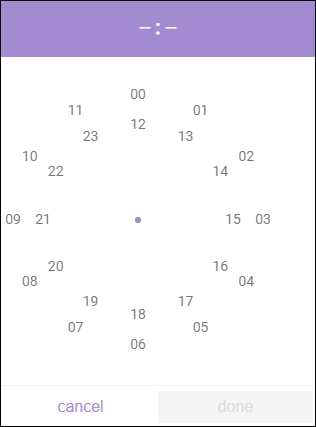
Select the time from which teachers can access their classes, and click Done when you have finished. The start time you selected appears in the From field.
Note
You must select the hour and minute individually.
Click in the To field. The time selector window opens once again.
Select the time up until which teachers can access their classes, and click Done when you have finished.
Click Save to save the schedule. Teachers are now able to access their classes on the day you selected during the hours you selected.
Click Close to close the window.
To search for a teacher account
Click Settings from the Main Menu and then click Teacher Accounts from its sub-menu. The Teacher Accounts screen appears.

Type the email for the teacher account you are searching for in the Search for a teacher... text box.
Click the
 icon. The teacher appears in the list below.
Remove a teacher account when you no longer need it.
To remove a teacher account
Click Settings from the Main Menu and then click Teacher Accounts from its sub-menu. The Teacher Accounts screen appears.

Select the checkbox to the left of the teacher account to remove and click the Remove Teachers button. A confirmation prompt appears.
Click OK to remove the account.