Create daily, weekly, and monthly Web Activity reports for your child. These reports include the following information:
Filters used to generate the report.
Report date and time.
Allowed, blocked, and sites that required a warning for each organizational unit.
Breakdown of each category, including most visited URLs.
Most active users and the number of hits for each.
Most blocked users and the number of hits for each.
Reports that you create are saved in the system and include the following information:
Date and time range that the report covers.
The web activity for each organizational unit the report covers.
A category breakdown of all websites visited or attempted.
The most visited URLs in each category
The most active users during the report date range.
The most blocked users during the report date range.
Create as many reports as you need.
To create a report
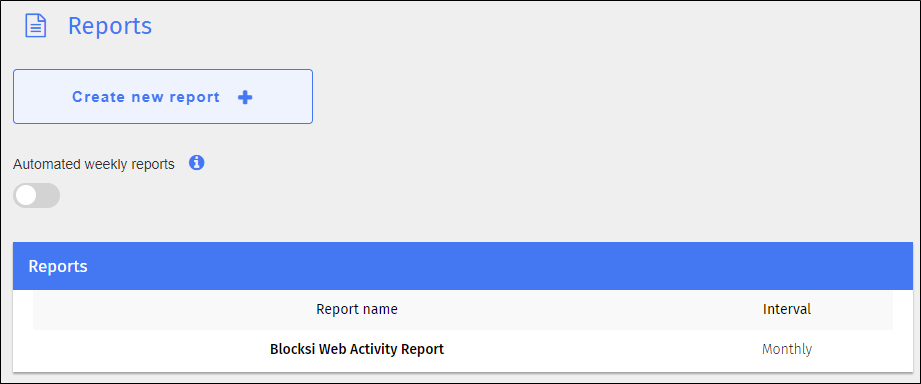
Click Reports from the Main Menu. The Reports screen appears.

Create your own reports or have Blocksi create weekly reports for you automatically. Toggle Automated weekly reports and Blocksi creates weekly reports for you automatically. Note that the report appears immediately in the report list with the name default.
Note
You cannot rename the default report. You also cannot create another automated weekly report unless you first delete this one.
Click Create New Report + to create your own report. The New Report window opens.
Type the name of the report in the Report Name text box.
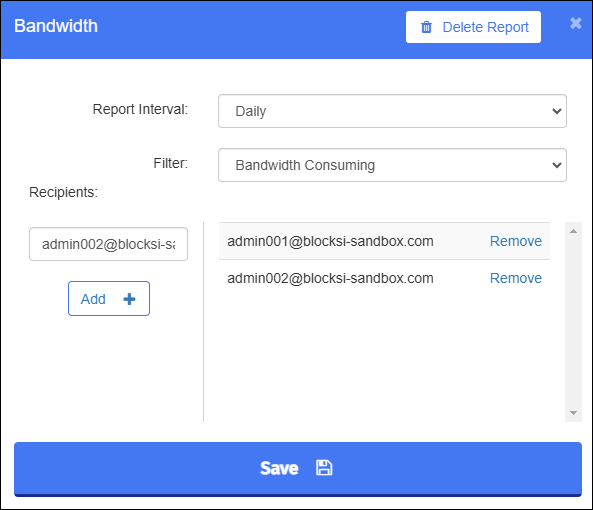
Select how often the report should run from the Report Interval drop-down list. The options are Daily, Weekly, and Monthly.
Type an individual’s email address to which to send a copy of the report in the Enter email address text box.
Click Add +. The email address appears to the right.
Click Save. The new report appears in the list along with the interval in the New Report window.
Add as many recipients to a report as you need. The reports are sent daily, weekly, or monthly to the email addresses of the recipients you enter here.
To add a recipient to a report
Click Reports from the Main Menu. The Reports screen appears.

Click the name of the report to which to add a recipient. The edit window opens.

Type an individual’s email address to which to send a copy of the report in the Enter email address text box.
Click Add +. The email address appears to the right.
Click Save.
You remove recipients from a report when they no longer need to receive a copy.
To remove a recipient from a report
Click Reports from the Main Menu. The Reports screen appears.

Click the name of the report from which to remove a recipient. The edit report window opens.

Locate the recipient to remove and click the Remove link to the right. There is no confirmation prompt; the recipient is immediately removed from the list.
Note
You cannot remove the last recipient from the report. Each report must have at least one recipient.
Click Save.
To review a saved report
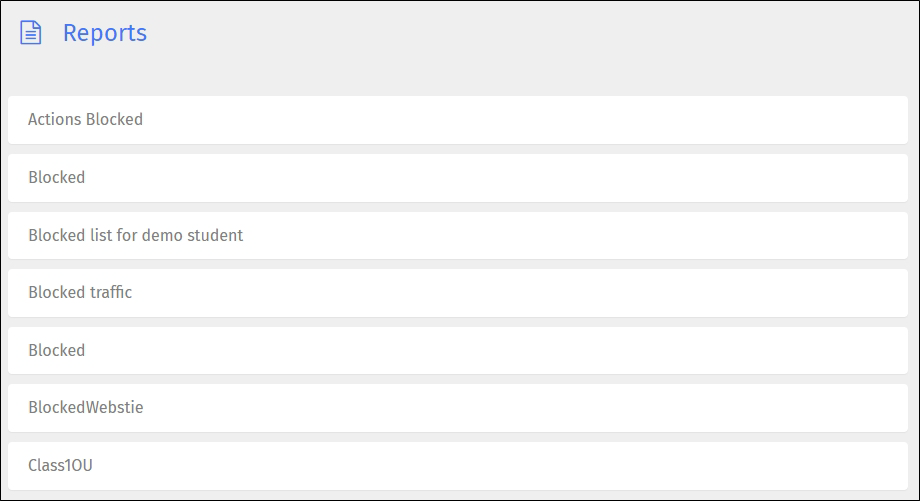
Click Saved Reports from the Main Menu. The Reports screen appears. All the reports the system has generated and sent out appear here.

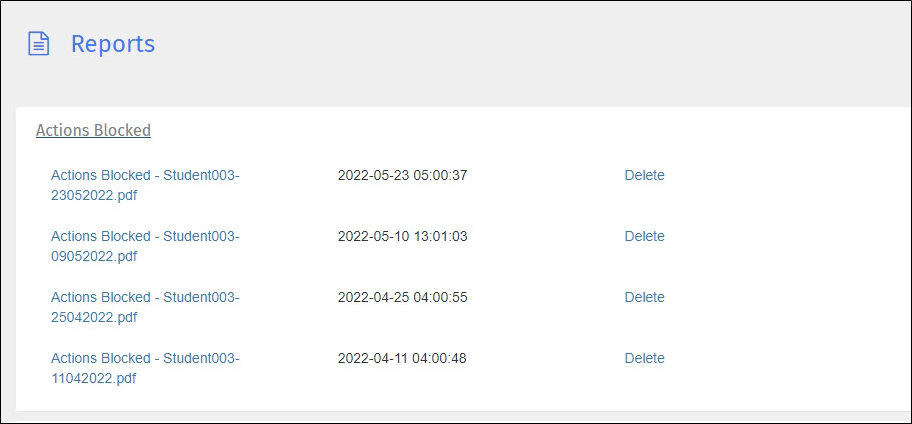
Click the report name to view details about the report. Details include the date and time the report was run. A Delete link appears as well.

Click the report name to view the PDF. The PDF opens in a separate window.
Delete a saved report when you no longer need it.
To delete a saved report
Click Saved Reports from the Main Menu. The Reports screen appears. All the reports the system has generated and sent out appear here.

Click the report name to view details about the report. Details include the date and time the report was run. A Delete link appears as well.

Locate the report to delete and click the Delete link to the right of the report name. A confirmation prompt appears.
Click OK to delete the report.
Delete reports when you no longer need them.
To delete a report
Click Reports from the Main Menu. The Reports screen appears.

Click the name of the report to delete. The edit report window opens.

Click Delete Report in the top right corner of the window. A confirmation prompt appears.
Click OK to delete the report.