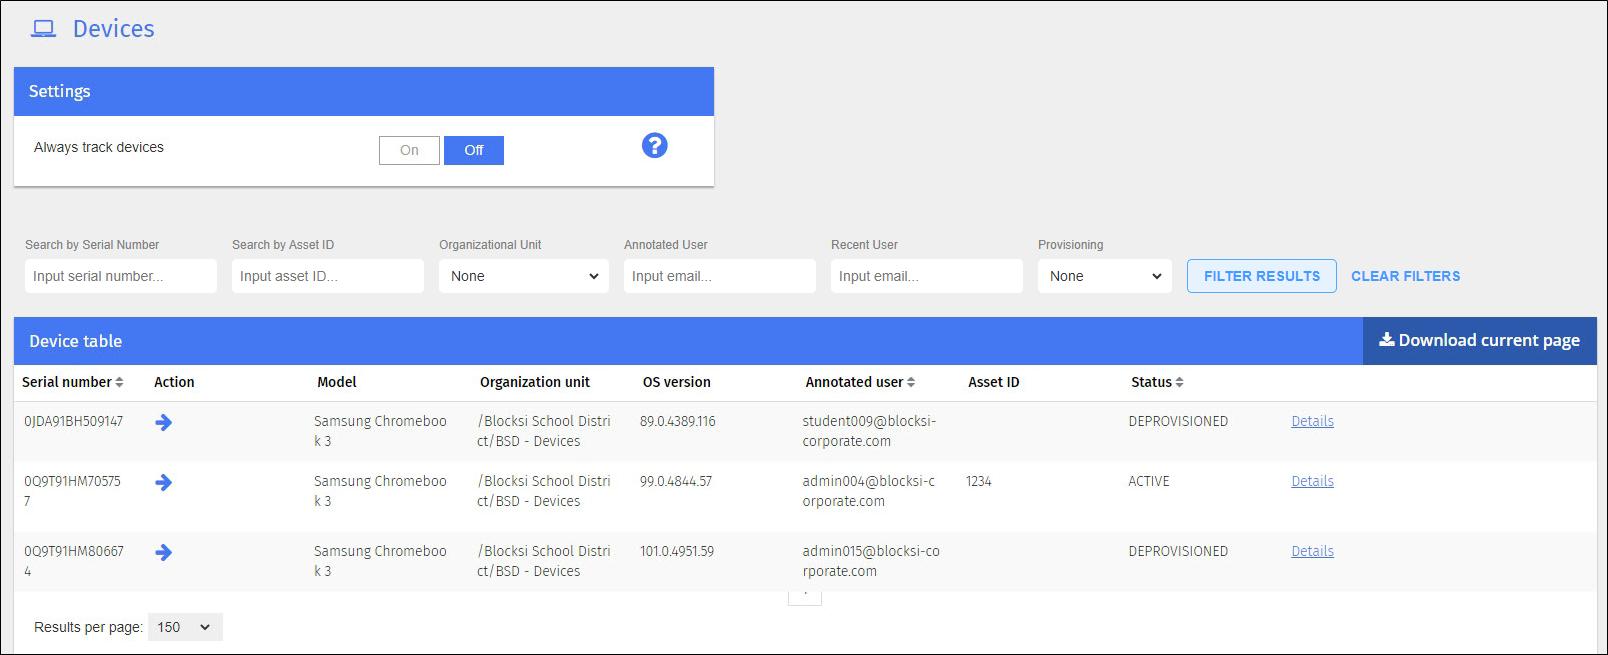
Manage Chromebook device inventory from the Blocksi Admin Dashboard. Chromebook Inventory synchronizes from Google Admin Console to the Blocksi Admin Dashboard to facilitate ease of management for your district assets. Blocksi's Device Management feature provides inventory details including Serial Number, Model, current Organizational Unit, OS Version, User, Asset ID, and Device Status. Take actions on selected devices to change OU, lock down a stolen device, disable, re-enable, and deprovision a device.
There may be times when Blocksi cannot locate devices recently added to the Google Admin Console. To ensure that Blocksi can see all devices, you must sync the devices with the admin console. Device Inventory regularly synchronizes with Google Admin Console.
To manually sync devices
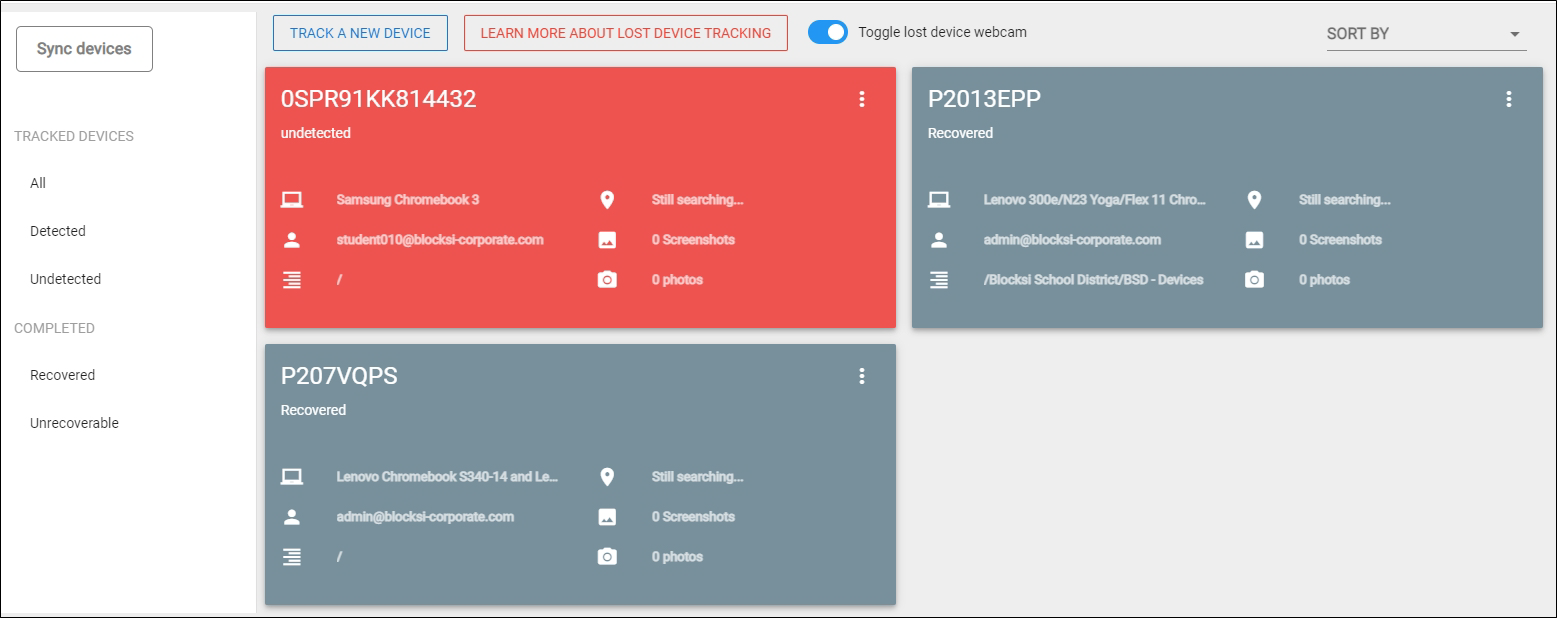
Click Device Management from the Main Menu and then click Lost Devices from its sub-menu. The following screen appears.

Click Sync Devices to sync the devices.
Search for a device in the device table.
To search for a device
Click Device Management from the Main Menu and then click Inventory from its sub-menu. The Devices screen appears.

Search for a device using one or more of the following criteria:
Serial number
Asset ID
Organizational unit
User email
Provisioning
Click the FILTER RESULTS button to search. Click CLEAR FILTERS to start your search over.
Download the device table to a CSV file to keep for your records.
To download the device table
Click Device Management from the Main Menu and then click Inventory from its sub-menu. The Devices screen appears.

Click the Download Current Page button to the right to download the file. The file appears in the lower left-hand corner of your screen in your spreadsheet program. Click it to open and save it.
Use device management to move devices between organizational units (OU)s.
To move a device to another OU
Click Device Management from the Main Menu and then click Inventory from its sub-menu. The Devices screen appears.

Click the
 icon to the left of the device to move. The Select Organizational Unit window opens.
Select the OU to which to move the device, and click the OK button to move the device. The device now appears in the selected OU in the Device Table.
Disable a device for any reason.
To disable a device
Click Device Management from the Main Menu and then click Inventory from its sub-menu. The Devices screen appears.

Click the ON button in the Settings section at the top of the screen. The location of all devices is reported every ten minutes and appears in the Device Table.
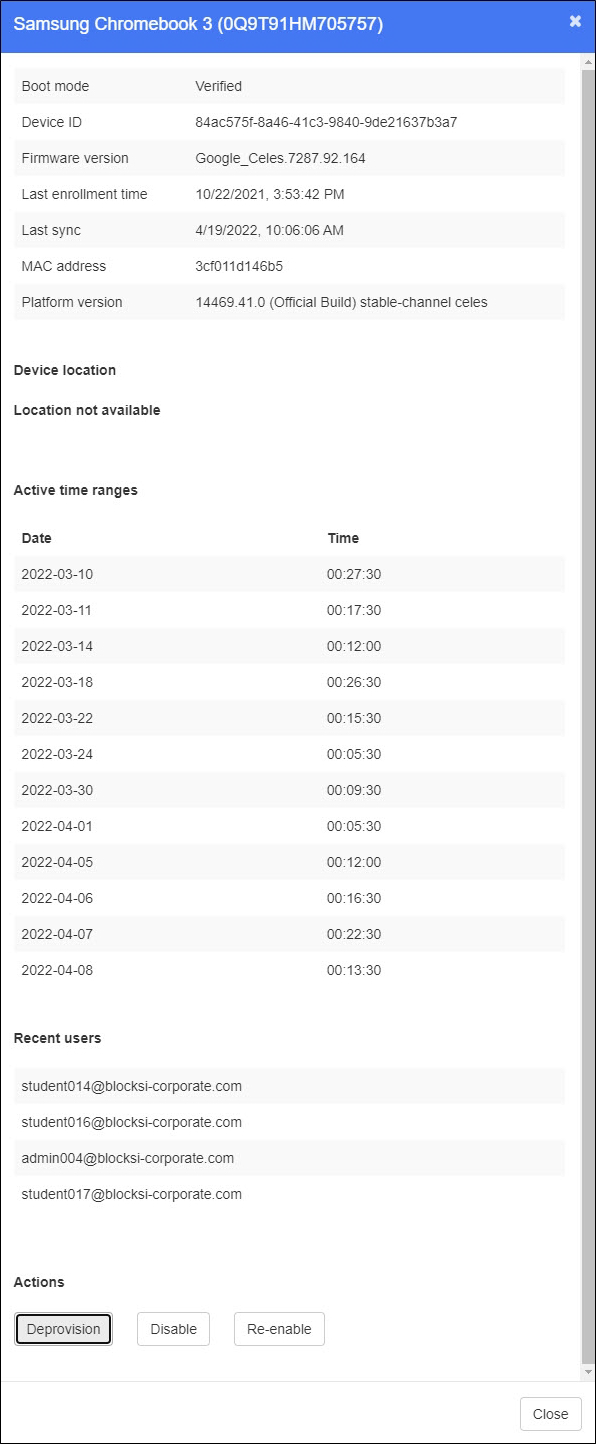
Click the Details link to the right of the device to disable and the device details window opens. This window contains information about the selected device, including the device ID, the last enrollment time, the last sync time, the MAC address, and the location of the device.

Scroll to the bottom of the window.
Click the Disable button. A confirmation prompt appears.
Click Yes to disable the device. The Status column now indicates that the device is DISABLED.
Re-enable a disabled device at any time.
To re-enable a device
Click Device Management from the Main Menu and then click Inventory from its sub-menu. The Devices screen appears.

Click the ON button in the Settings section at the top of the screen. The location of all devices is reported every ten minutes and appears in the Device Table.
Click the Details link to the right of the device to re-enable and the device details window opens. This window contains information about the selected device, including the device ID, the last enrollment time, the last sync time, the MAC address, and the location of the device.

Scroll to the bottom of the window.
Click the Re-enable button. A confirmation prompt appears.
Click Yes to re-enable the device. The Status column now indicates that the device is ENABLED.
Deprovision a device when you no longer need it.
To deprovision a device
Click Device Management from the Main Menu and then click Inventory from its sub-menu. The Devices screen appears.

Click the ON button in the Settings section at the top of the screen. The location of all devices is reported every ten minutes and appears in the Device Table.
Click the Details link to the right of the device to deprovision and the device details window opens. This window contains information about the selected device, including the device ID, the last enrollment time, the last sync time, the MAC address, and the location of the device.

Scroll to the bottom of the window.
Click the Deprovision button. The following additional fields appear.

Select the checkbox to the left of the reason to deprovision the device.
Click Confirm. A confirmation prompt appears.
Click OK to deprovision the device. The device is deprovisioned. The Status column now indicates that the device is DEPROVISIONED.