Every video on YouTube is assigned a category that is typically selected when the video is uploaded to YouTube. Categories include Music, Sports, Film and Animation, and many more. When a user attempts to visit a blocked YouTube category, instead of a video, they see a message indicating that the video has been blocked.
Create as many YouTube category filters as you need.
To create a YouTube category filter
Click Content Filtering from the Main Menu and then click Filters from its sub-menu.
Click YOUTUBE CATEGORY FILTER at the top of the screen. The YouTube Category Filter screen appears.

Type the name of the filter in the Enter filter name text field.
Click Create Filter + to add the filter. The Edit page appears.
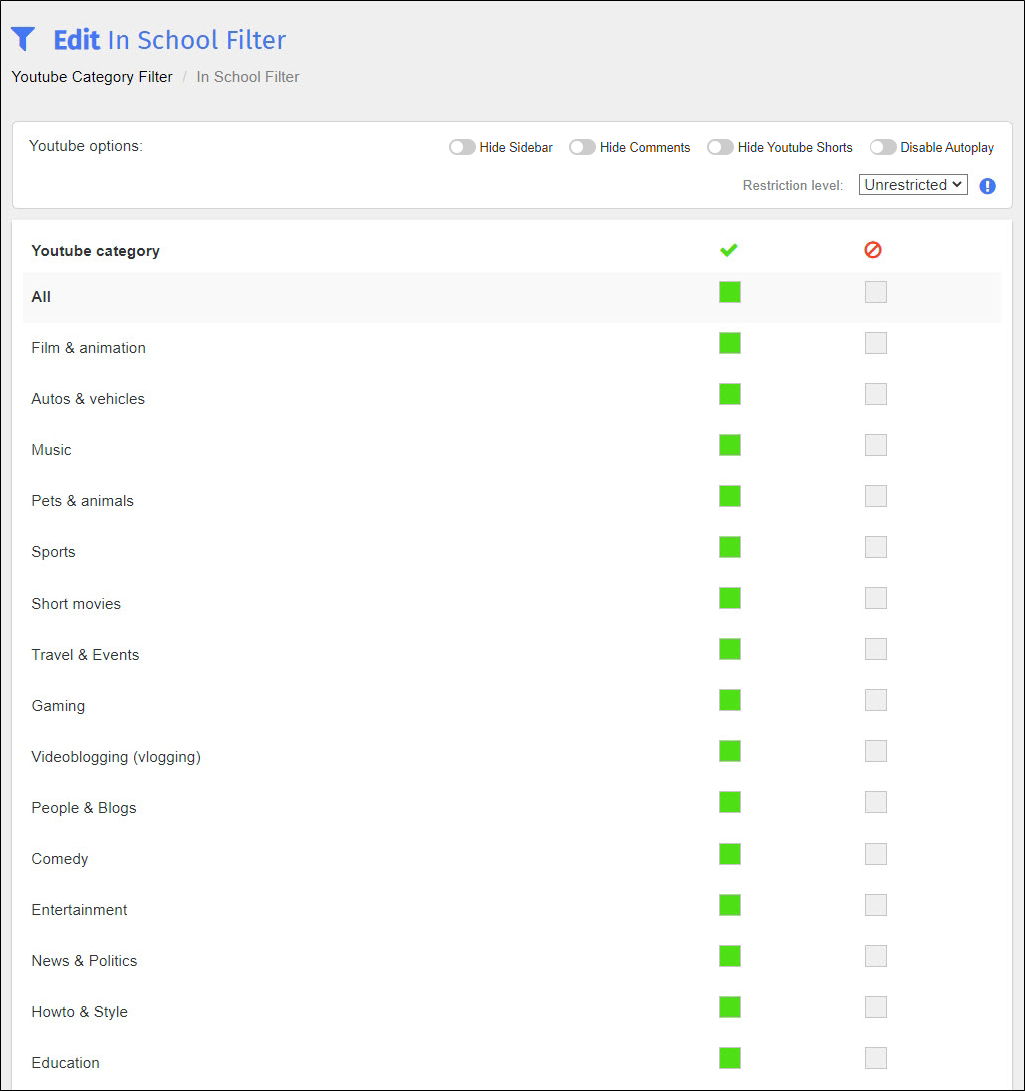
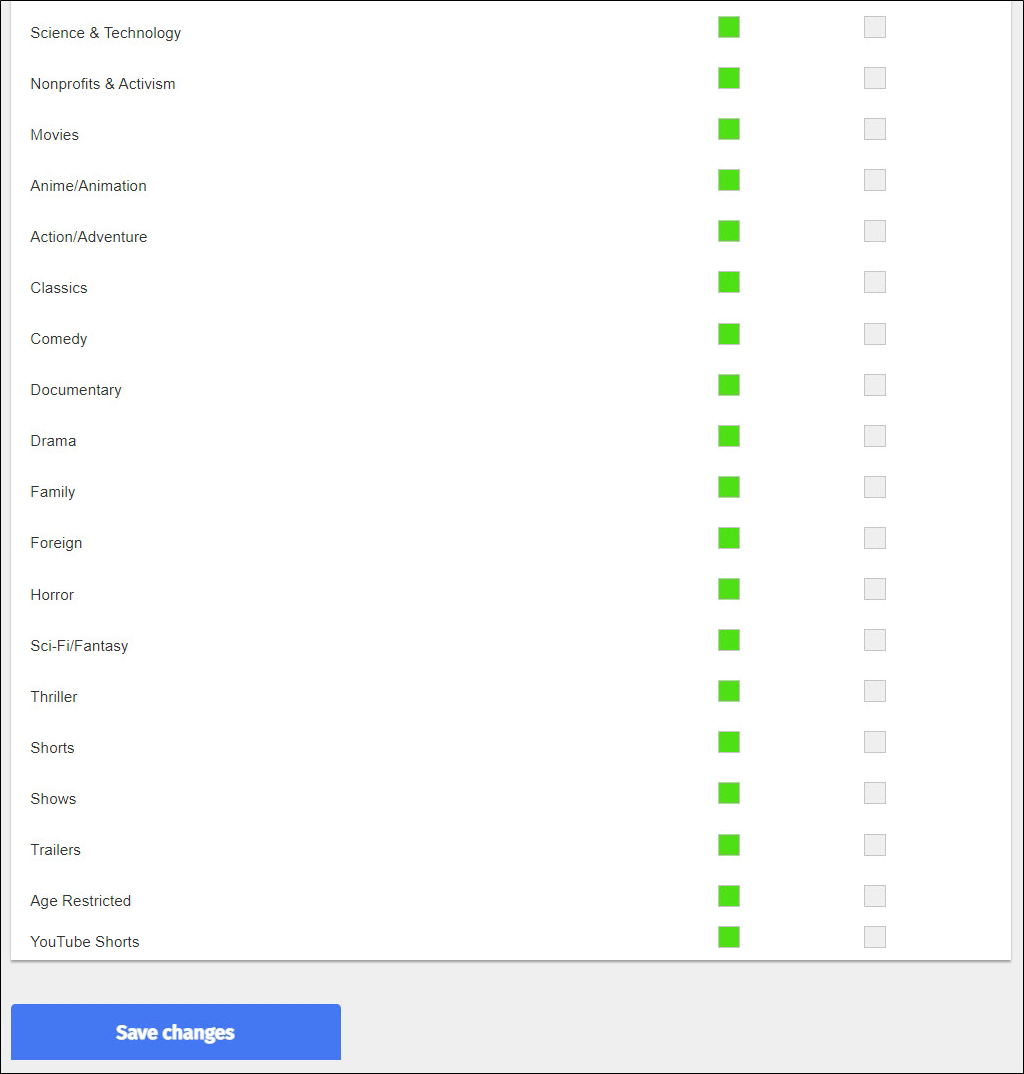
The following screen is shown in two parts to save space.


To block and allow YouTube categories
Select the checkboxes in the first column for each of the categories to allow students to access.
Select the checkboxes in the second column for each of the categories to block students from accessing.
Enable the Hide Sidebar option to hide the suggested videos that appear on the right-hand side of YouTube.
Enable the Hide Comments option to hide all comments for YouTube videos.
Enable the Hide YouTube Shorts option to hide all YouTube Shorts videos.
Enable the Disable Autoplay option to prevent the next video from automatically playing upon the completion of the previous video.
Select how much restriction to place on the categories from the Restriction level: drop-down list. Restriction levels are set by Google and include the following:
Unrestricted - Select this option to turn the two restricted modes (Strict and Moderate) off. Users have unrestricted access to YouTube.
Moderate - Select this setting to allow a larger collection of videos than allowed with Strict mode.
Strict - Select this option to filter out most videos, while still allowing access to some videos.
Click Save Changes when you have finished selecting categories.
Rename a YouTube category filter as needed.
To rename a YouTube category filter
Click Content Filtering from the Main Menu and then click Filters from its sub-menu.
Click YOUTUBE CATEGORY FILTER at the top of the screen. The YouTube Category Filter screen appears.

Locate the filter to rename, and click the filter name. A box opens to allow you to rename the filter. Note that Blocksi added Save and Cancel buttons to the right of the name, as shown below.

Rename the filter, and click the Save button.
Modify YouTube category filters at any time.
To modify a YouTube category filter
Click Content Filtering from the Main Menu and then click Filters from its sub-menu.
Click YOUTUBE CATEGORY FILTER at the top of the screen. The YouTube Category Filter screen appears.

Locate the filter to modify, and click the
 icon to the right of the filter name. The Edit page appears. See Blocking and Allowing YouTube Categories.
Use an existing YouTube category filter to create a new one.
To duplicate a YouTube category filter
Click Content Filtering from the Main Menu and then click Filters from its sub-menu.
Click YOUTUBE CATEGORY FILTER at the top of the screen. The YouTube Category Filter screen appears.

Locate the filter to duplicate, and click the
 icon. The Duplicate Filter window opens.
Type the name of the new filter in the text box.
Click OK to add the filter and close the window. The duplicated filter appears at the bottom of the list. It contains the same categories as the original filter.
Make any desired changes to the new filter and save it.
Delete YouTube category filters when you no longer need them.
To delete a YouTube category filter
Click Content Filtering from the Main Menu and then click Filters from its sub-menu.
Click YOUTUBE CATEGORY FILTER at the top of the screen. The YouTube Category Filter screen appears.

Locate the filter to delete, and click the
 icon to the right of the filter. A confirmation prompt appears.
Click OK to delete the filter.