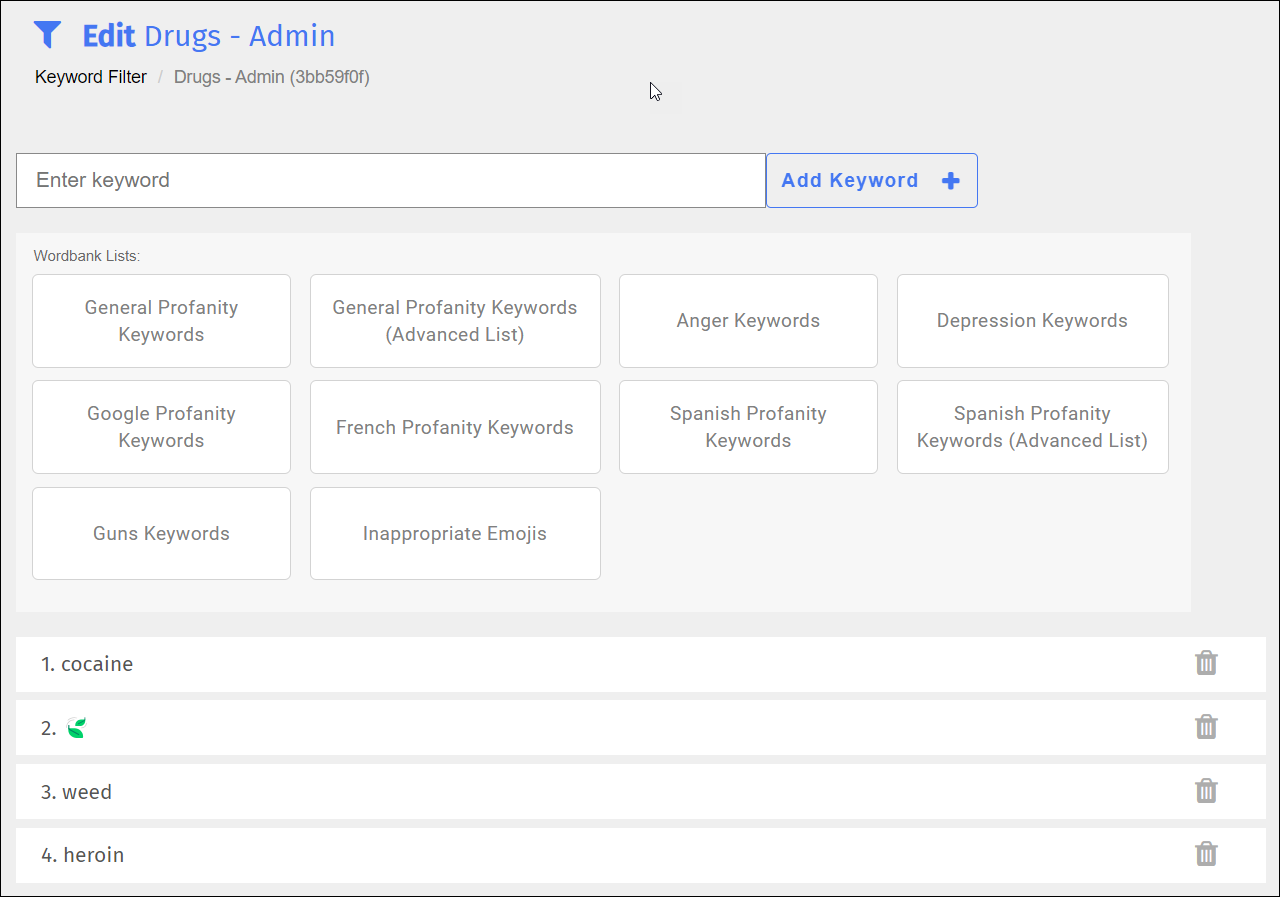
Block access to web pages that contain specific words to prevent access to pages with questionable material. Words are stored in keyword lists, which are identified by a unique ID number.
Create as many keyword filters as you need.
To create a keyword filter
Click Content Filtering from the Main Menu and then click Filters from its sub-menu.
Click KEYWORD FILTER at the top of the screen. The Keyword Filter screen appears.

Type the name of the filter in the Enter filter name text field.
Click Create Filter + to add the filter. The new filter appears at the bottom of the list.
Click the
 icon. The Edit screen appears. See Adding a Keyword to a Keyword Filter for details on adding keywords.
Note
The Filter ID and keyword number appear on the Access Denied page on the student's device and is used to identify the specific word that generated the denial.
Add as many keywords as you need to a keyword filter. Blocksi provides you with the following wordbank lists.
General Profanity Keywords
General Profanity Keywords (Advanced List)
Anger Keywords
Depression Keywords
Google Profanity Keywords
Guns Keywords
Inappropriate Emojis
Choose from the following foreign language wordbanks:
French Profanity Keywords
Spanish Profanity Keywords
Spanish Profanity Keywords (Advanced List)
To add keywords from the wordbank lists

Click the desired wordbank list button. The corresponding wordbank list window opens. The one shown below contains the keywords for depression.

Select the keyword or keywords from the list. Click the Select All option to include the entire list of words.
Click Save Changes. The word or words you selected appear at the end of the keyword list.
Note
Each word has a number to the left, which indicates its location in the list. These numbers are used for identifying which keywords are used for denying students access to certain sites. See Access Denied Due to Keyword.
Be careful how you enter your keyword. For example, if you add the word rap, only websites with an exact match (the word rap) in their titles and descriptions are blocked. Websites with titles and descriptions containing the term photograpwhy are not blocked, even though the word contains rap.
To add your own keyword

Type your keyword in the Enter keyword text box.
Click the Add Keyword + button to add the keyword. The keyword you entered appears at the end of the keyword list.
Note
Each word has a number to the left, which indicates its location in the list. These numbers are used for identifying which keywords are used for denying students access to certain sites.
Delete keywords when you no longer need them.
To delete a keyword from a keyword filter
Click Content Filtering from the Main Menu and then click Filters from its sub-menu.
Click KEYWORD FILTER at the top of the screen. The Keyword Filter screen appears.

Locate the filter from which to delete a keyword, and click the
 icon. The Edit screen appears.
Locate the keyword to delete and click the
 icon to the right. A confirmation prompt appears.
Click OK to delete the keyword and close the prompt.
Merge two or more keyword filters into one new keyword filter.
To merge keyword filters
Click Content Filtering from the Main Menu and then click Filters from its sub-menu.
Click KEYWORD FILTER at the top of the screen. The Keyword Filter screen appears.

Click each one of the filters to merge. The filters you select turn blue.
Click Merge Filters. The New Merged Filter window opens.

Type the name of the new filter in the Enter name text box.
Click Create Filter to save the new filter.
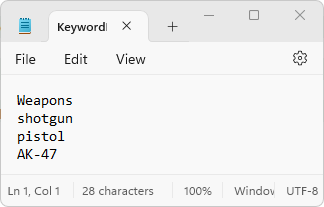
Import keyword filters from an Excel file or a CSV file.
To import keyword filters
Click Content Filtering from the Main Menu and then click Filters from its sub-menu.
Click KEYWORD FILTER at the top of the screen. The Keyword Filter screen appears.

Click the Import Filter button to import the list. The Open dialog opens.
Navigate to the desired folder, select the file, and click Open. The filter is imported and appears at the bottom of the keyword filters.
Example Keyword Filter Import File

Rename a keyword filter as needed.
To rename a keyword filter
Click Content Filtering from the Main Menu and then click Filters from its sub-menu.
Click KEYWORD FILTER at the top of the screen. The Keyword Filter screen appears.

Locate the filter to rename, and click the filter name. A box opens to allow you to rename the filter. Note that Blocksi added Save and Cancel buttons to the right of the name, as shown below.

Rename the filter, and click the Save button.
Modify a keyword filter as needed.
To modify a keyword filter
Click Content Filtering from the Main Menu and then click Filters from its sub-menu.
Click KEYWORD FILTER at the top of the screen. The Keyword Filter screen appears.

Locate the name of the filter to modify, and click the
 icon to the right of the filter name. The Edit screen appears.
Make the necessary changes to the filter.
Use an existing filter to create a new one.
To duplicate a keyword filter
Click Content Filtering from the Main Menu and then click Filters from its sub-menu.
Click KEYWORD FILTER at the top of the screen. The Keyword Filter screen appears.

Locate the filter to duplicate, and click the
 icon. The Duplicate Filter window opens.
Type the name of the new filter in the text box.
Click OK to add the filter and close the window. The duplicated filter appears at the bottom of the list. It contains the same keywords as the original filter.
Make any desired changes to the new filter and save it.
Delete keyword filters when you no longer need them.
To delete a keyword filter
Click Content Filtering from the Main Menu and then click Filters from its sub-menu.
Click KEYWORD FILTER at the top of the screen. The Keyword Filter screen appears.

Locate the filter to delete, and click the
 icon to the right of the filter. A confirmation prompt appears.
Click OK to delete the filter.