Troubleshooting
Here are some useful troubleshooting tips.
In the event you have a Green WiFi status indicator but a blue screen on a student's class tile, then you have an incorrect setting for the OU that is used to monitor students on the Teacher Dashboard.
To correct the setting
Sign in to the Google Admin console using your Google Admin credentials.
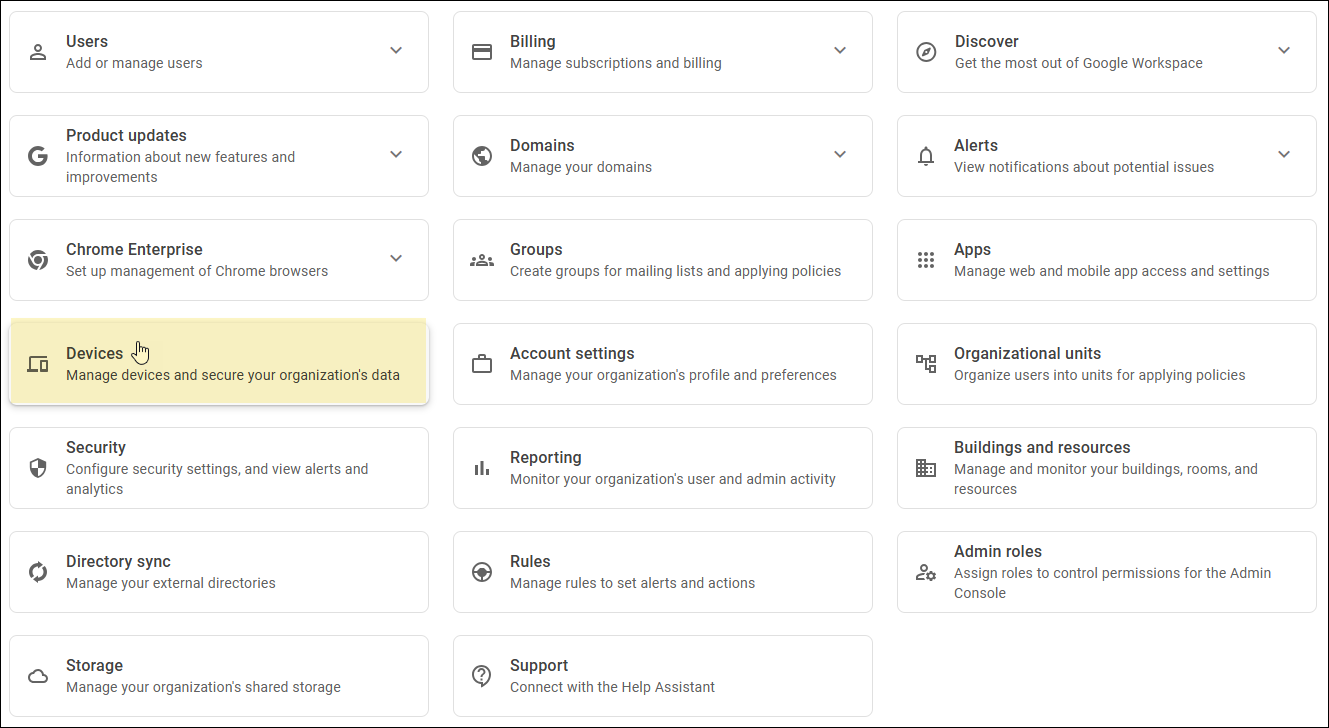
Click Devices.
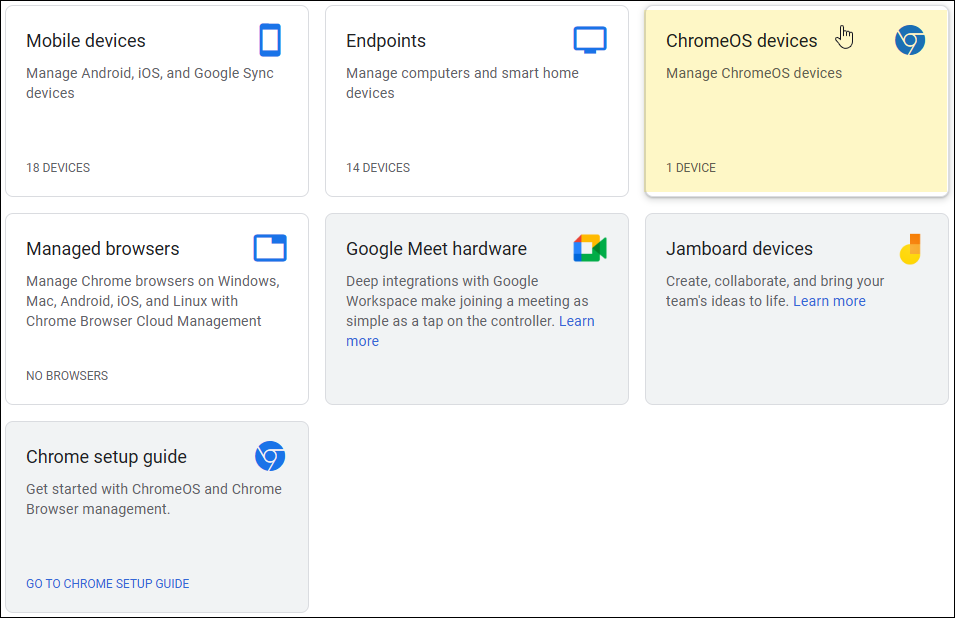
Click Chrome devices.

Click Settings.

Click User & browser settings. The User & browser settings tab opens.
Click the OU with which you plan to monitor students with the Teacher Dashboard. The selection shown here is for example only; yours may be different.
Type screenshot in the + Search or add a filter field and press Enter.
Click the down arrow to the right of the Screenshots option and change it to Allows users to take screenshots and video recordings.
Click SAVE in the upper right corner of the console to save the setting.
The Blocksi extension version must be verified with the most recent Blocksi version, particularly on the students’ Chromebooks.
You can check the Chromebook browser settings to verify this.
To verify the current version of the Blocksi extension
Click the three dots located in the upper right-hand corner of the browser.
Hover your mouse cursor over More tools and click Extensions. The Extensions screen appears.
Locate the Blocksi tile and verify the current version.
If the current version is showing an earlier version, you can reboot the Chromebook or click the Update button (if it is present on the Extensions screen) to update the extension. If the button is not present, click the Developer mode button in the upper right-hand corner of the Extensions screen.
You may be signed into their personal Zoom account when attempting to install the Blocksi class meetings app.
In this case, the app is installed to your personal Zoom account.
To remedy this, do the following
Uninstall the Blocksi class meetings app from your personal Zoom account.
Sign off of your personal Zoom account.
Install the Blocksi class meetings app to your teacher Zoom account. Because you signed out of your personal Zoom account, you are prompted to sign in to your Zoom teacher account when installing the Blocksi class meetings app.
Note
You may also be prompted for a Zoom sign in if you have not interacted with Zoom inside the browser you are using.
Create as many test users as you need.
Adding the User's Personal Information
Sign in to the Google Admin console using your Google Admin credentials.
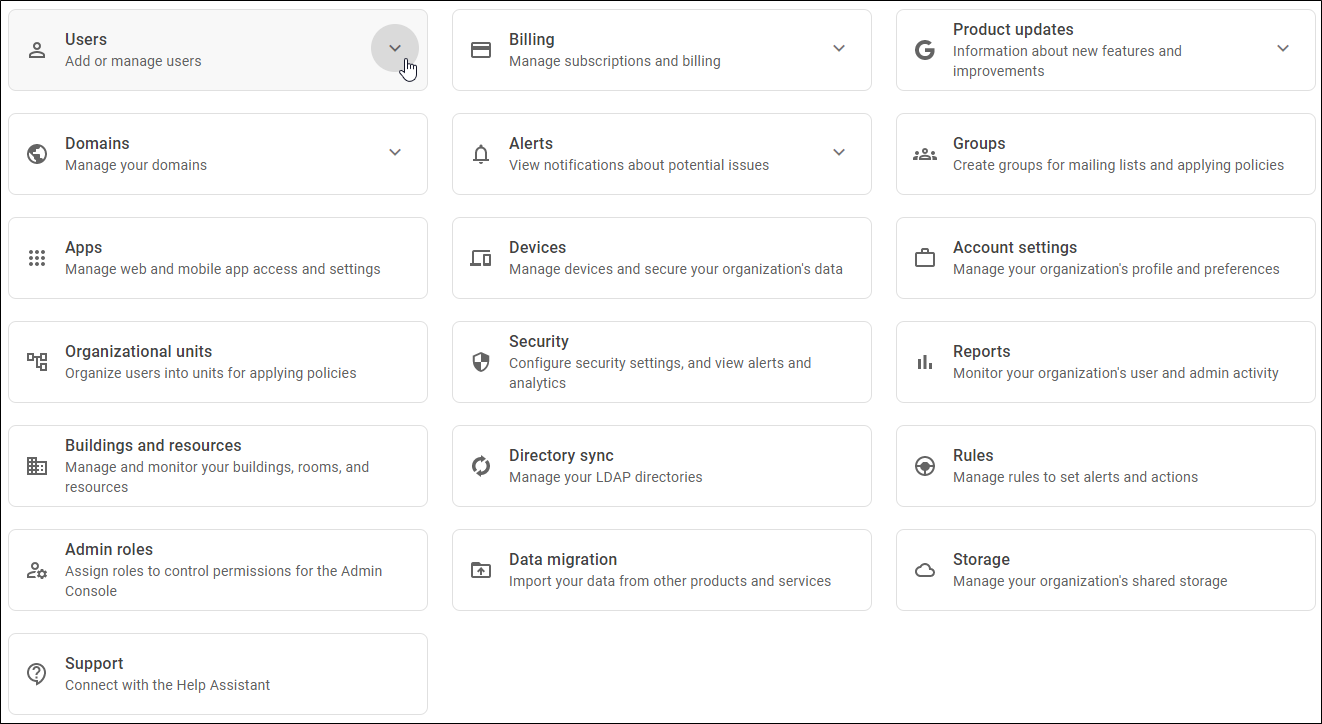
Click the down arrow in the Users section. The Users section expands.
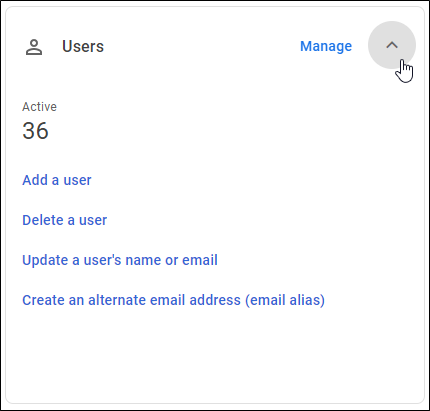
Click Add a User. The Add new user page appears.
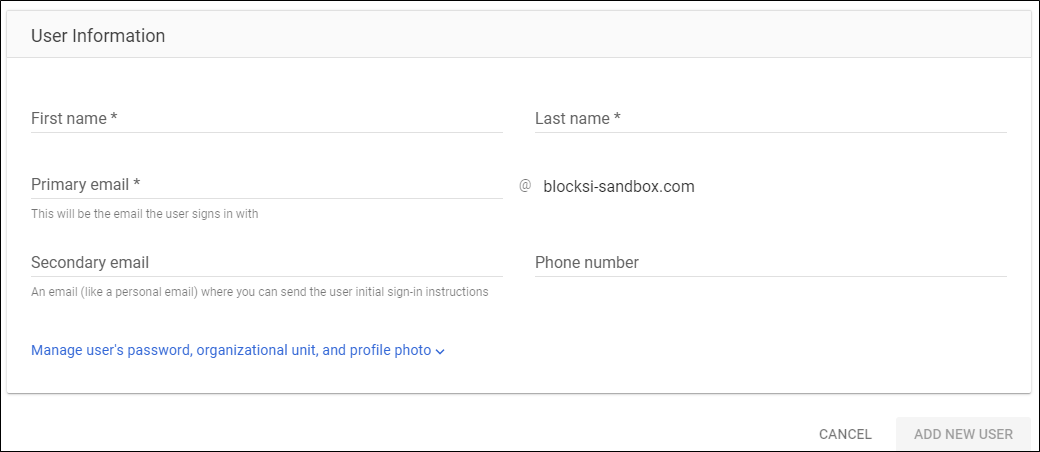
Type the user’s first name in the First name* text field.
Type the user’s last name in the Last name* text field.
Type the user’s primary email in the Primary email* text field.
Type the user's secondary email in the Secondary email text field, if necessary.
Type the user’s phone number in the Phone number field.
Selecting the OU and Assigning a Password
Click Manage user's password, organizational unit, and profile photo link to expand the User information page.
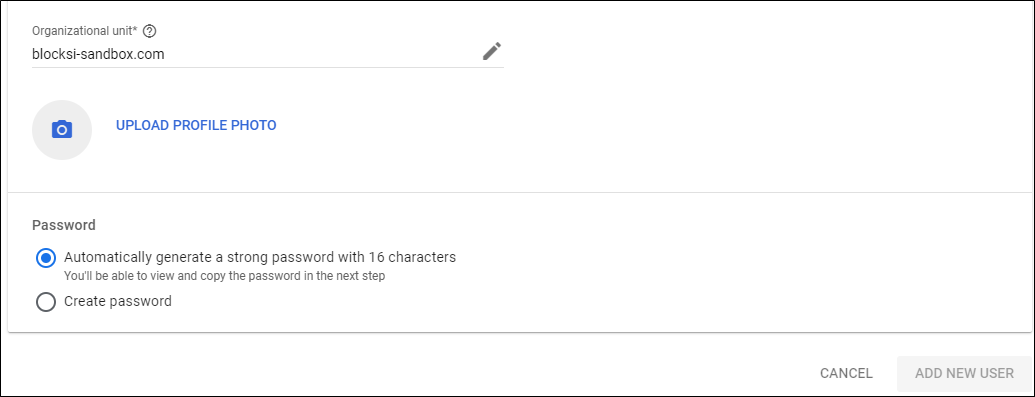
The OU that appears in the Organizational unit* field is the default OU for your district. The default OU shown here is for example only; yours will be different.
Click the
 icon to open the Select organizational unit window, as shown below. The OUs shown here are for example only; yours will be different.
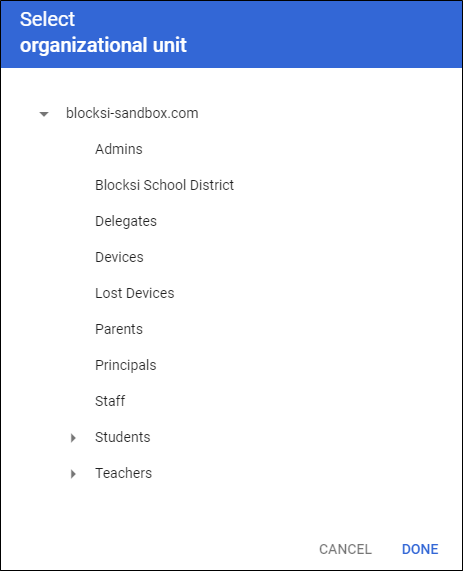
Select the student OU for district and click DONE.
Click UPLOAD PROFILE PHOTO to add a photo for this user. The Open dialog appears.
Navigate to the image file and click Open. The photo of the user appears to the left, along with the file name and a REMOVE link. Click the REMOVE link to remove the photo and select another.
Click the Create password option to create a password for this user. The Password field appears, as shown below.
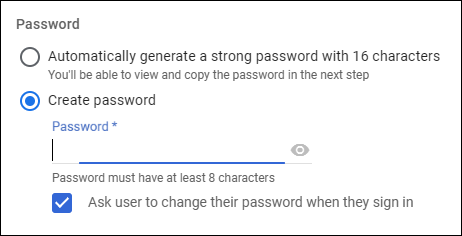
Type Appletwo in the Password field. This password will assist you with signing in for troubleshooting purposes.
Note
Click the
 icon to view the password as you type it.
Clear the Ask user to change their password when they sign in checkbox.
Click ADD NEW USER. The user is added to the OU you selected and an additional screen appears, from which to copy or print the password, or email sign-in instructions to the user. Click PREVIEW and SEND to preview the email and send it to the user. You also have the opportunity to send a copy of the email to yourself.
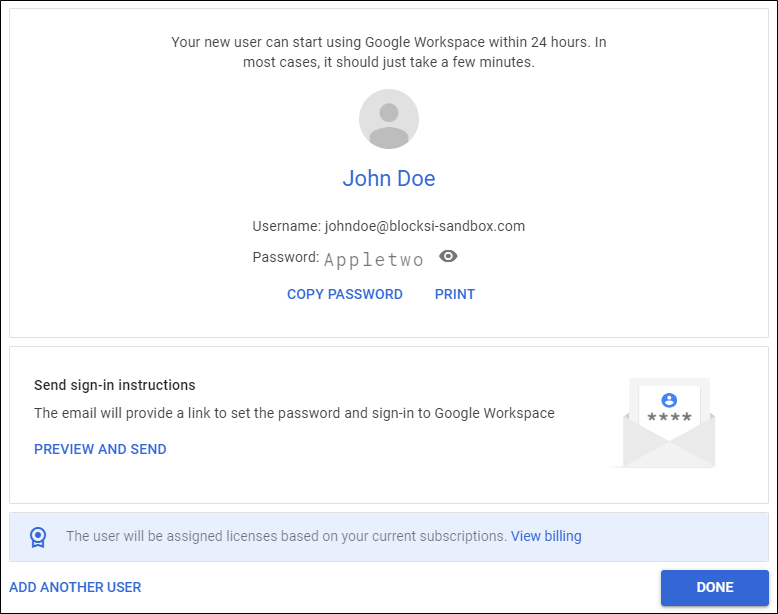
Click ADD ANOTHER USER to add more users or click DONE if you are not adding more users. If you choose to add more users, you are brought back to the Add new user page. If you are finished adding users, and you click DONE, you are brought to the Users page on the Google Admin Console.
Scroll down to locate the new user.